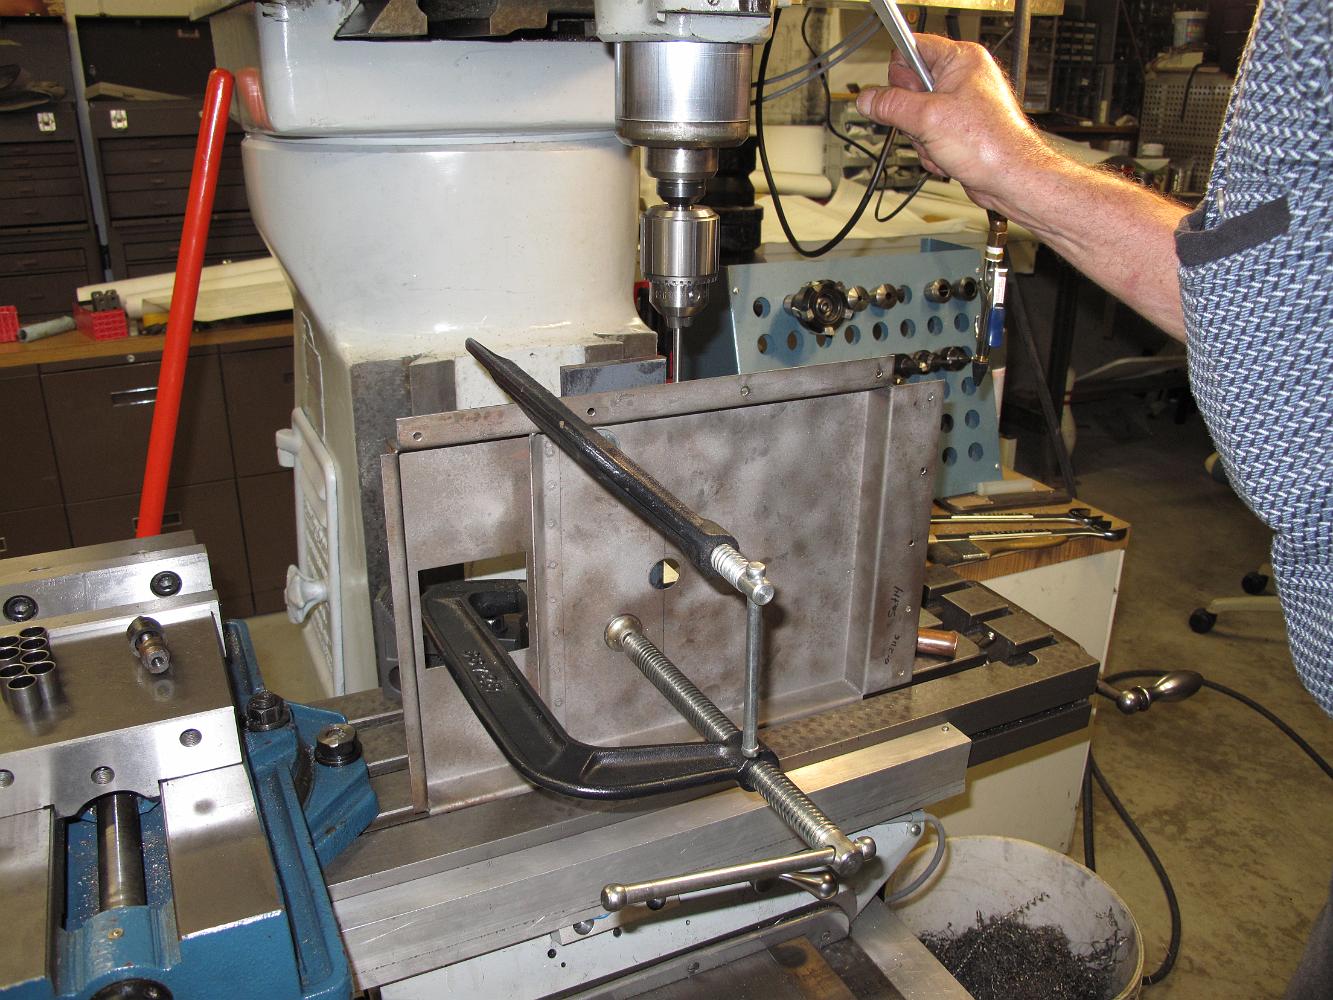
24-Mar-10 Once again I have to thank the generosity of others to have the right tool when needed. Here we are trimming the fire pan width to fit the actual…
21-April-10 We switched back from working on the Freight Elevator to the firepan because I acquired some wet refractory grout to line the pan with -- only the…
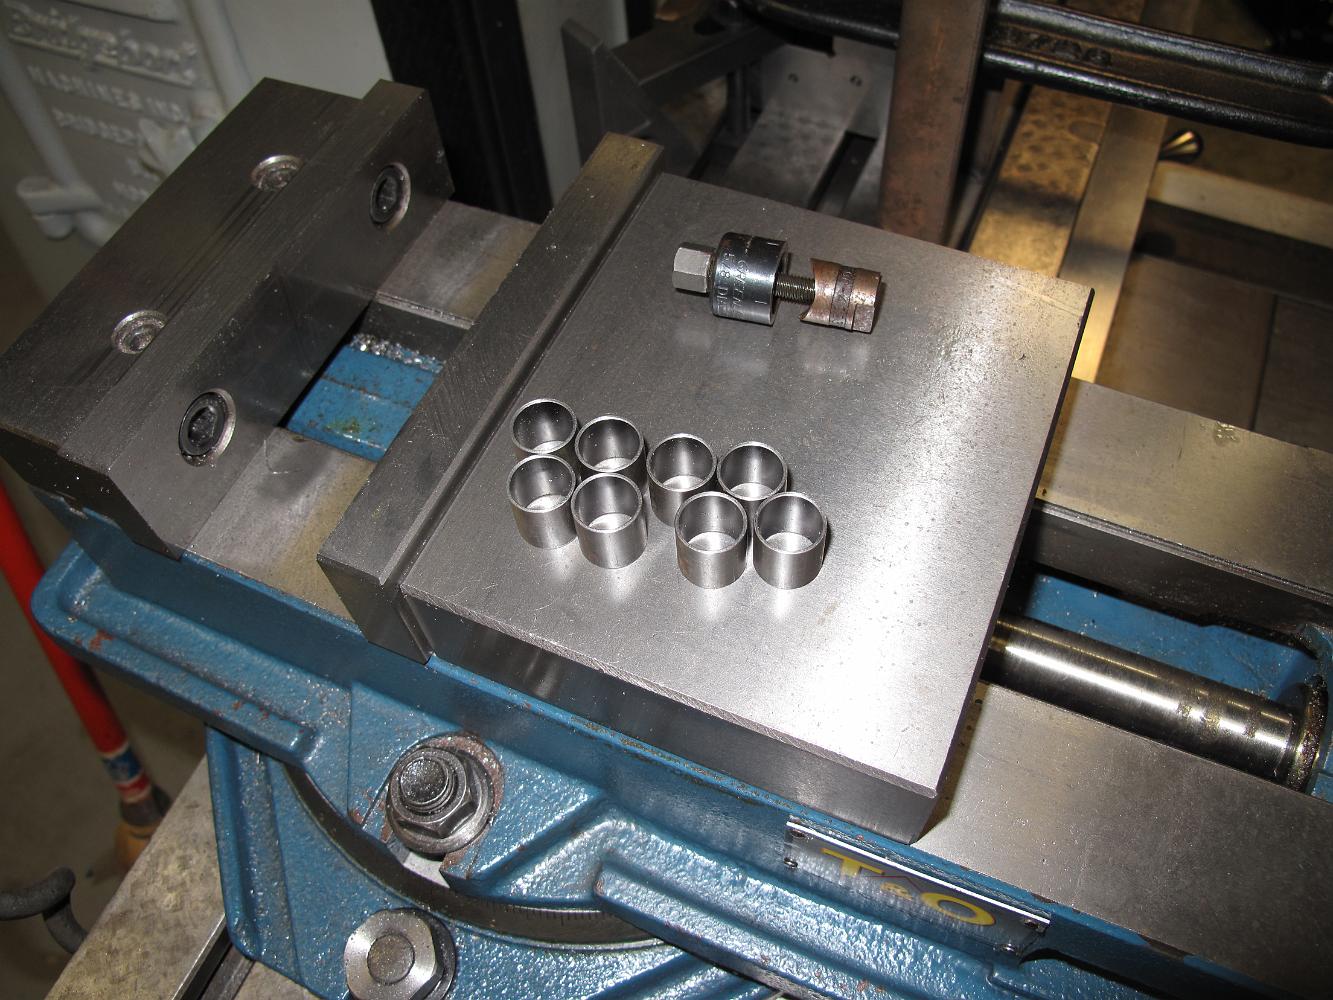
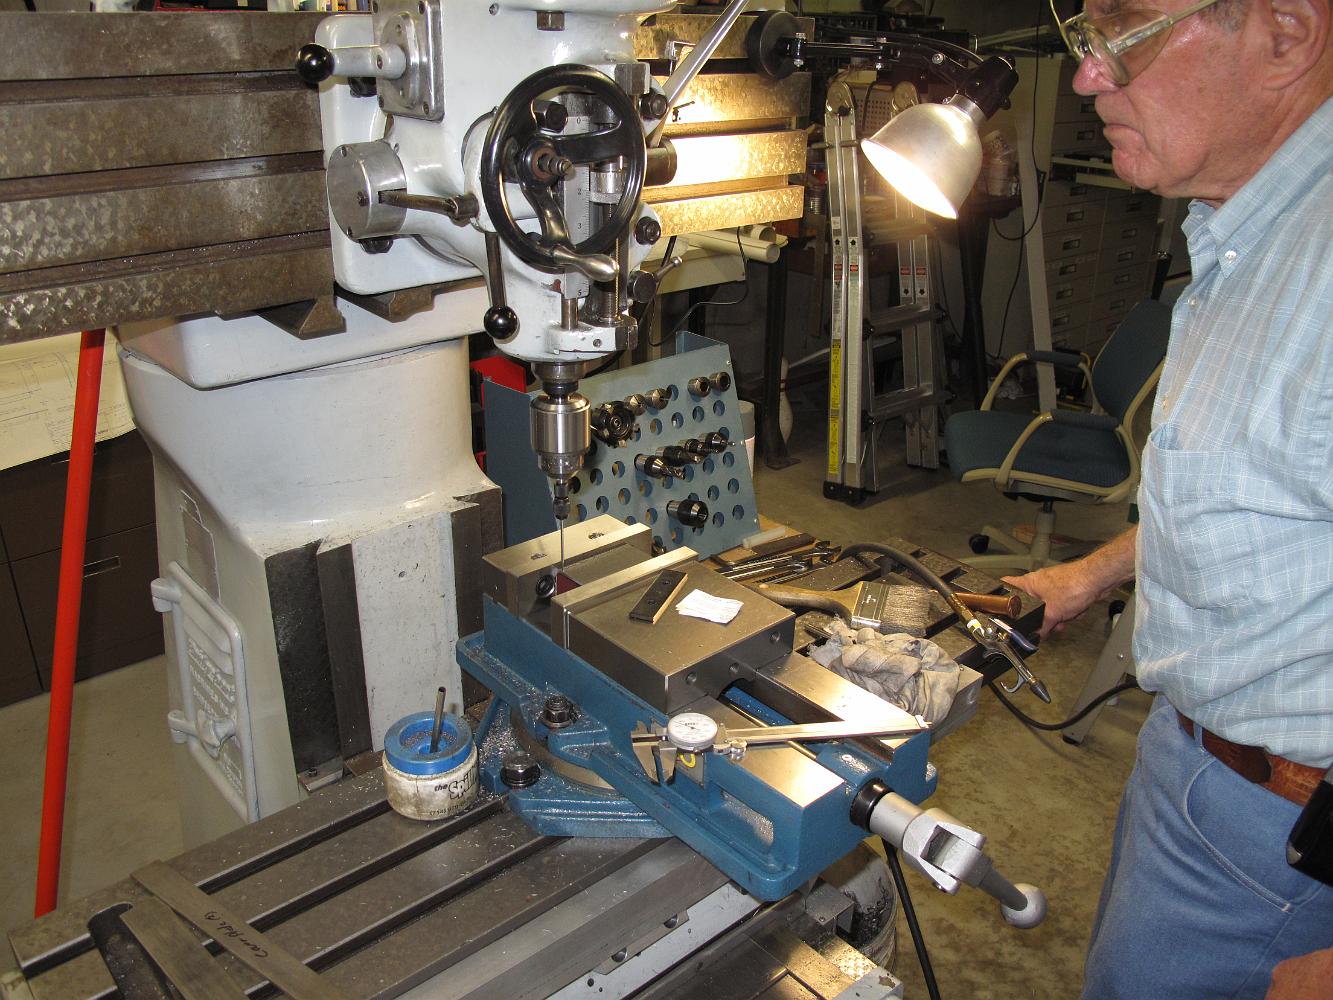
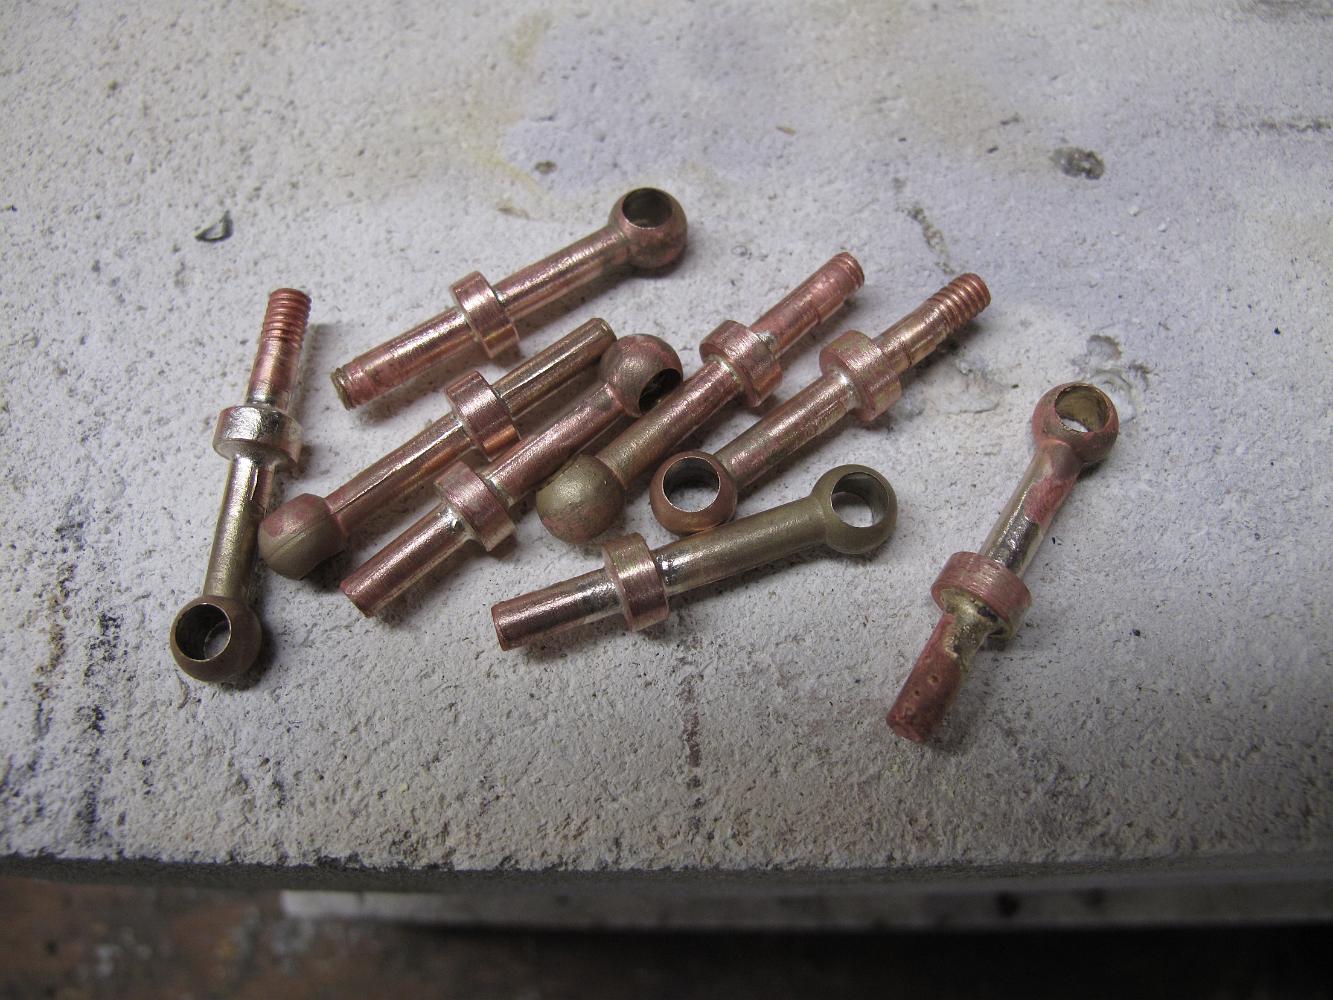
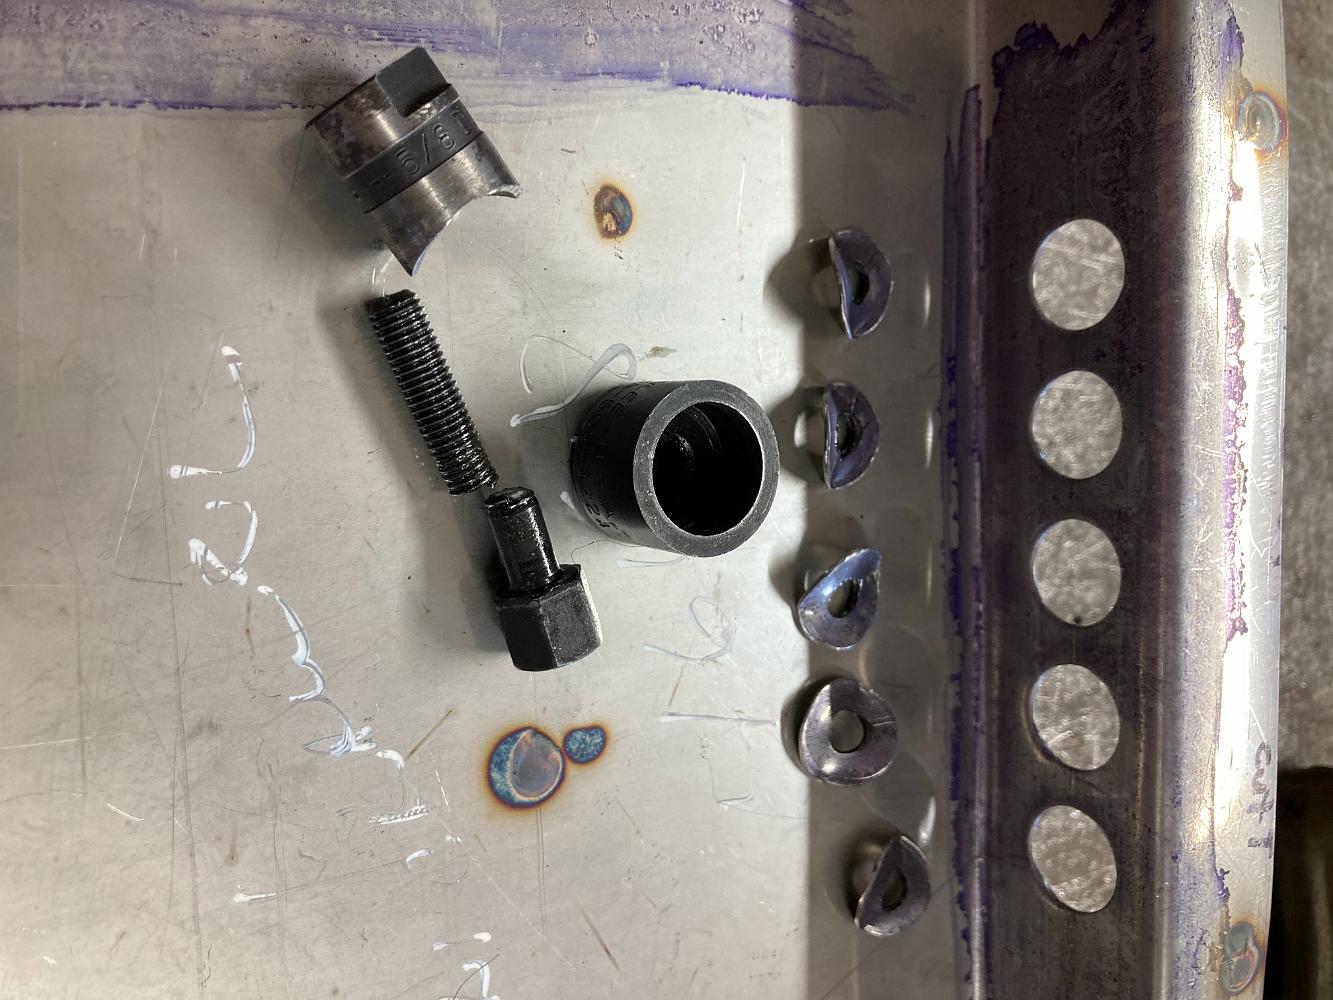
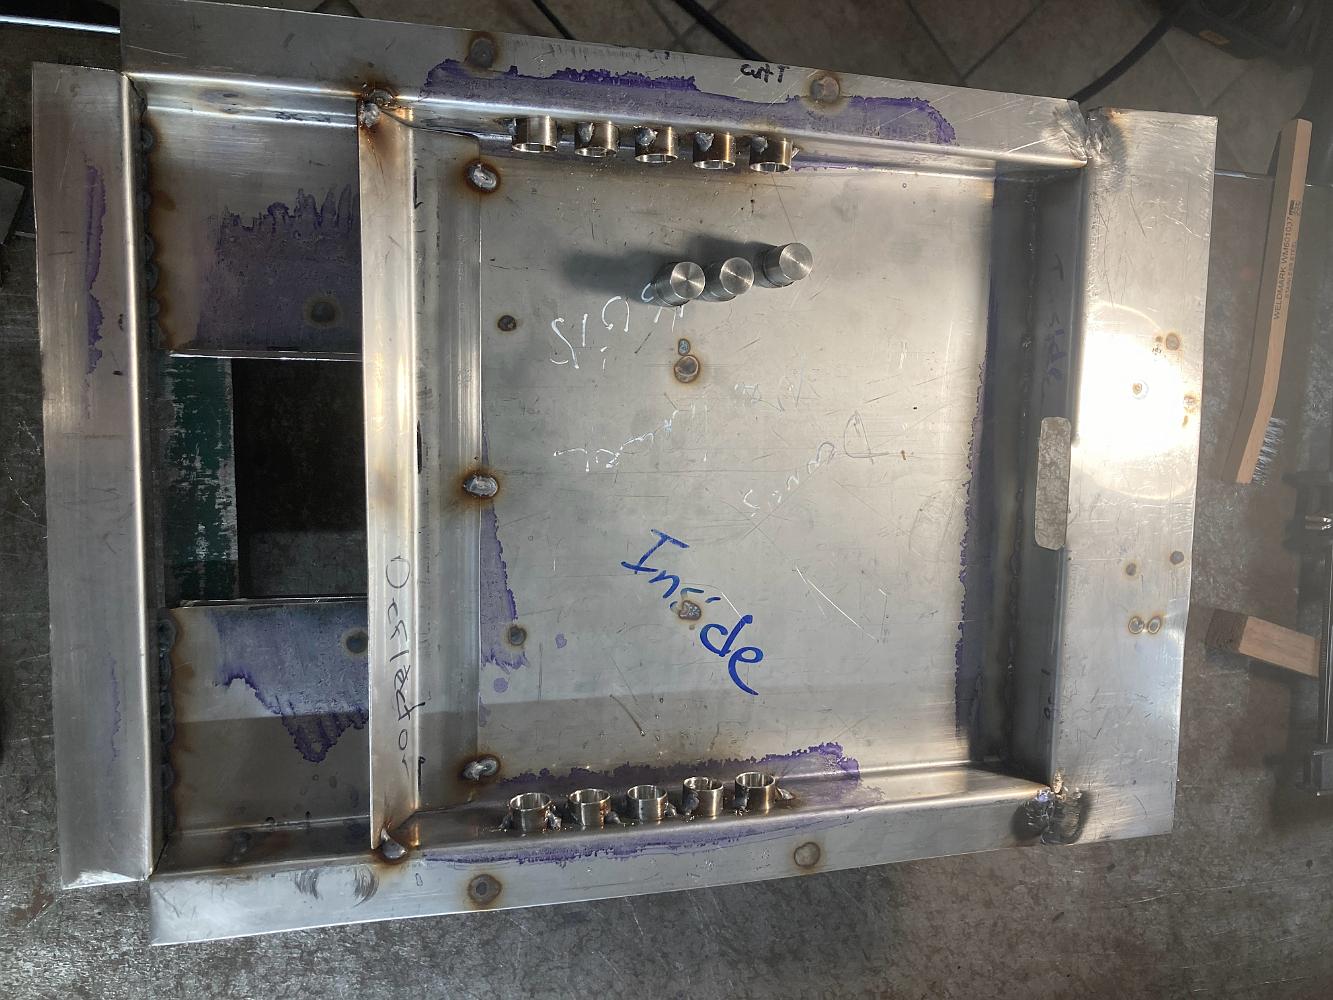
While Bill was putting the holes in the pan, I chucked a piece of 5/8" steel tube in the lathe and turned out eight air intake tubes. In the background you can…

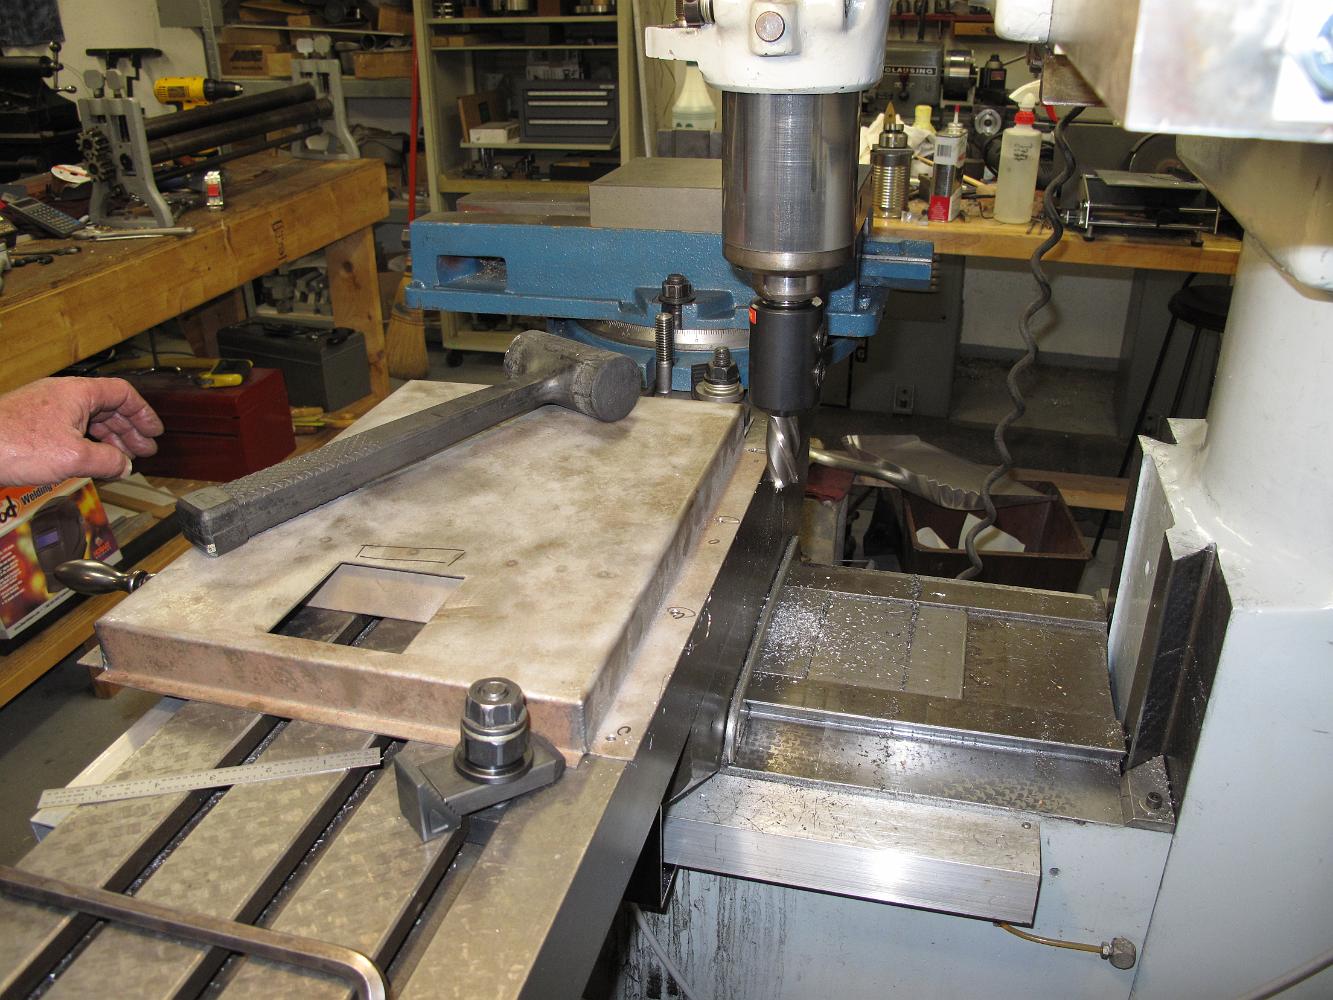
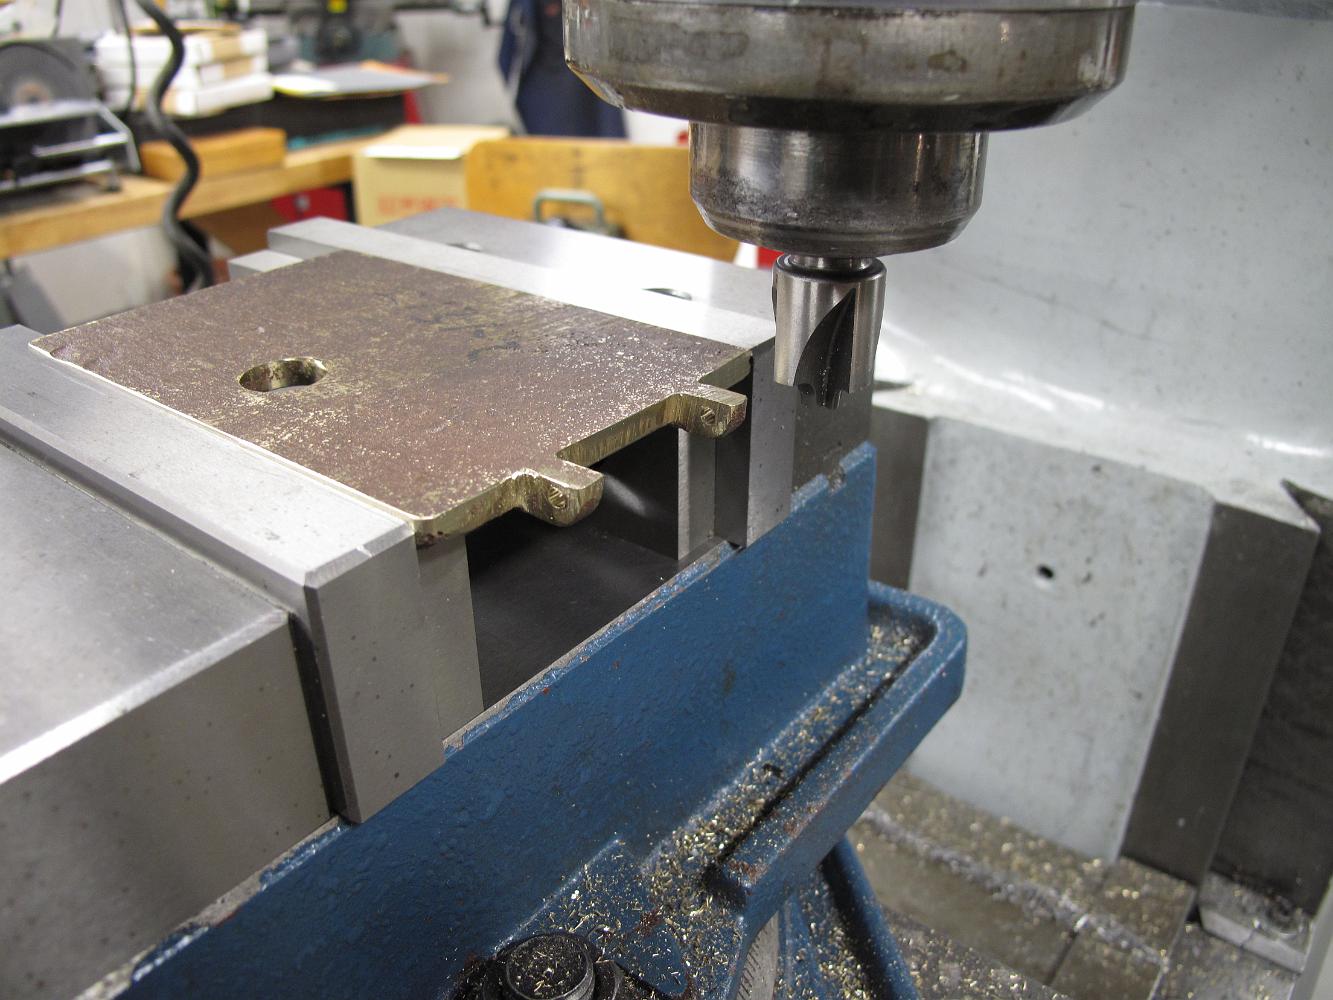
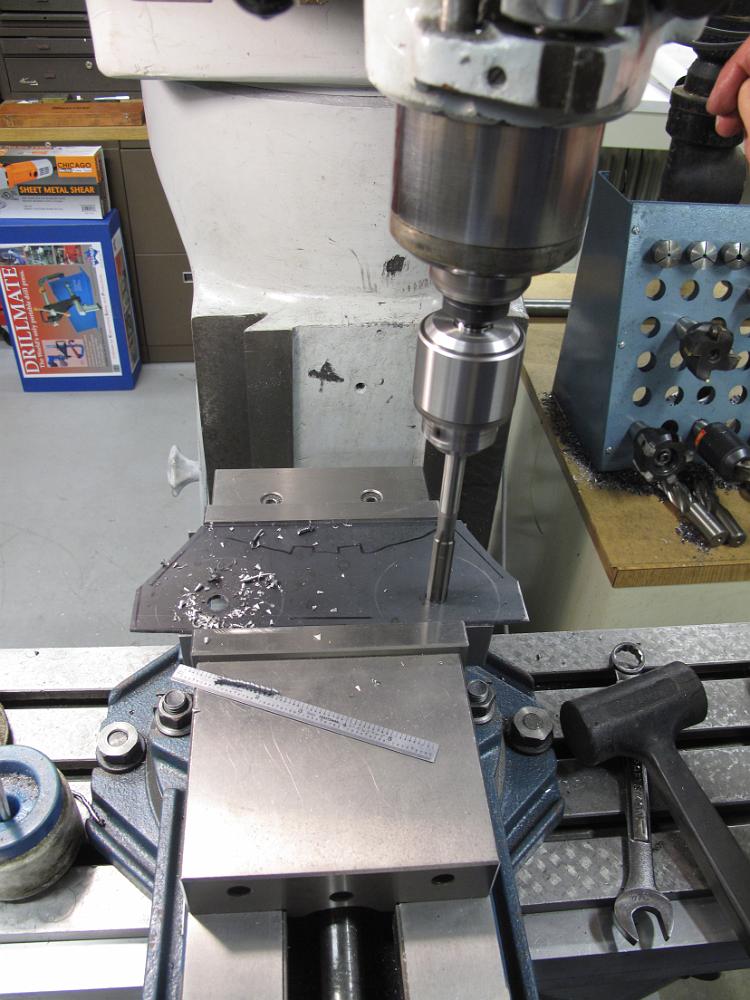
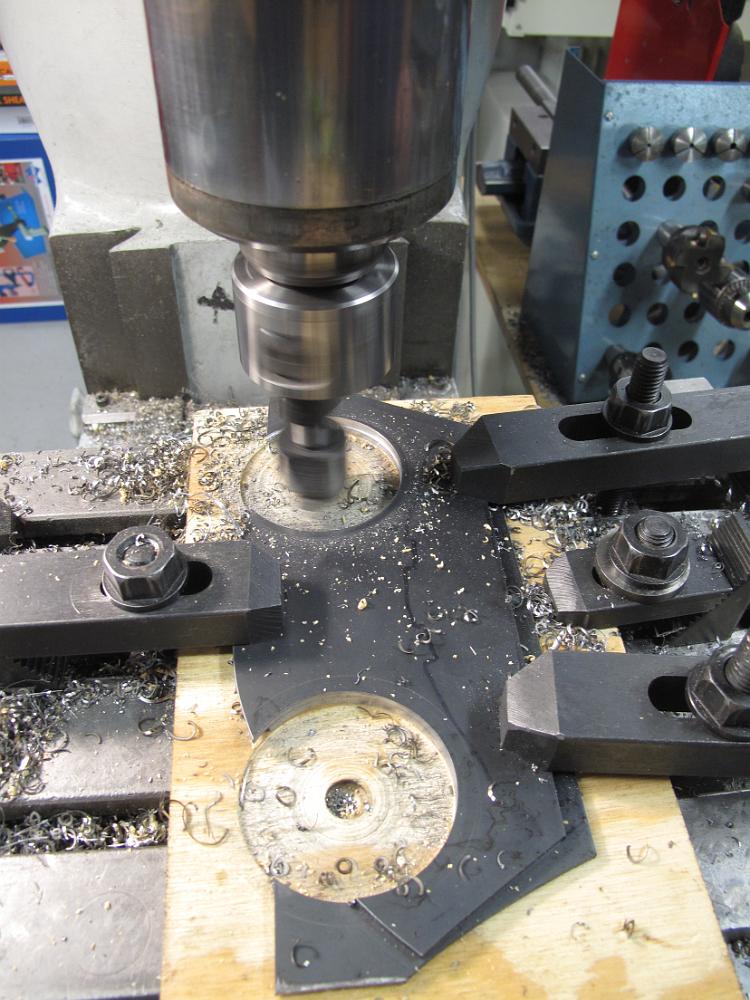
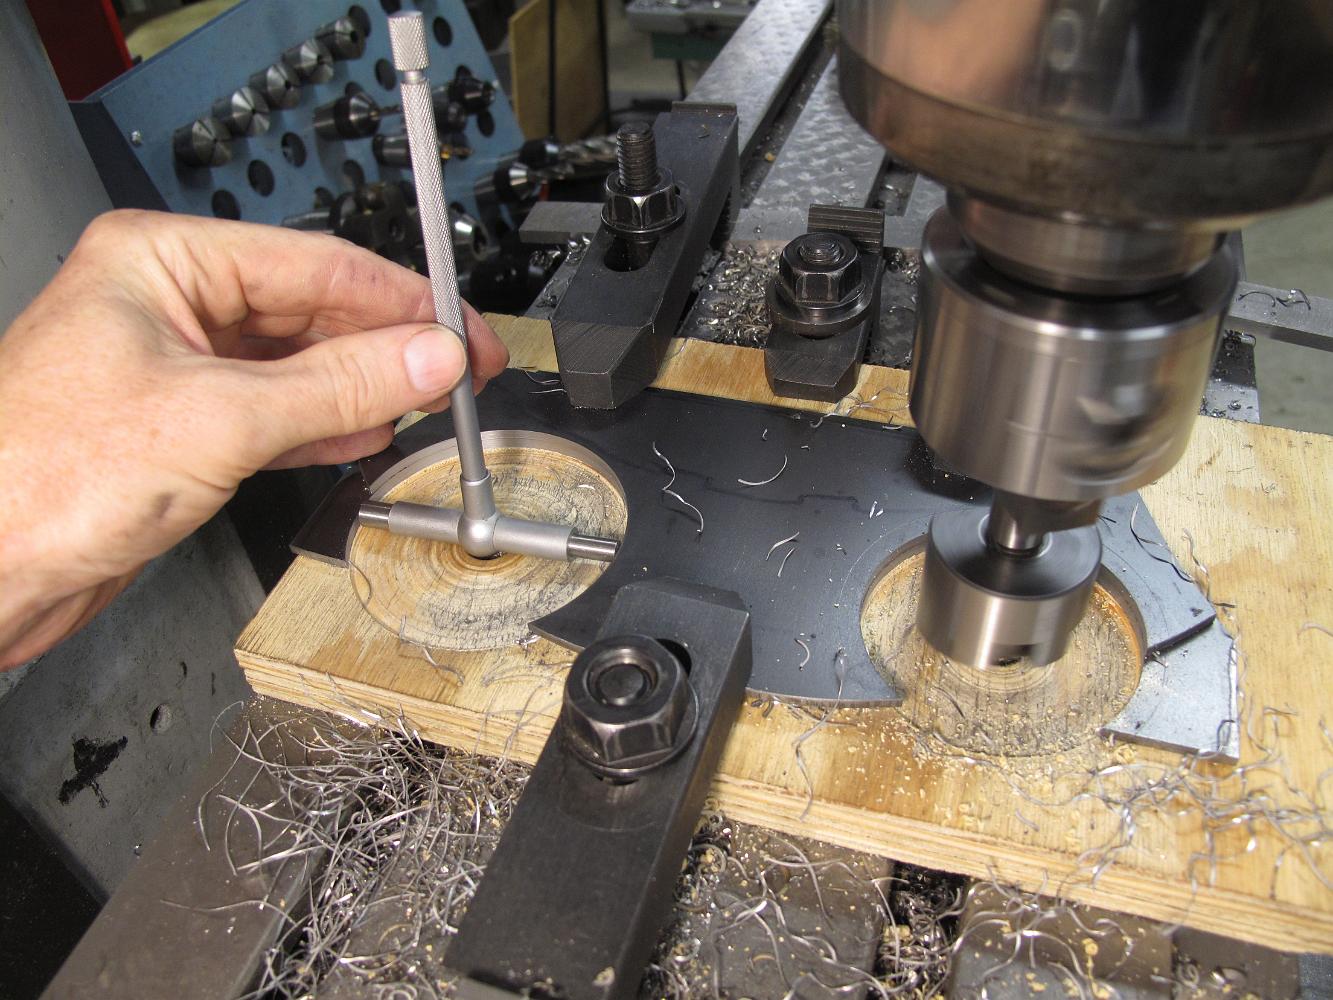
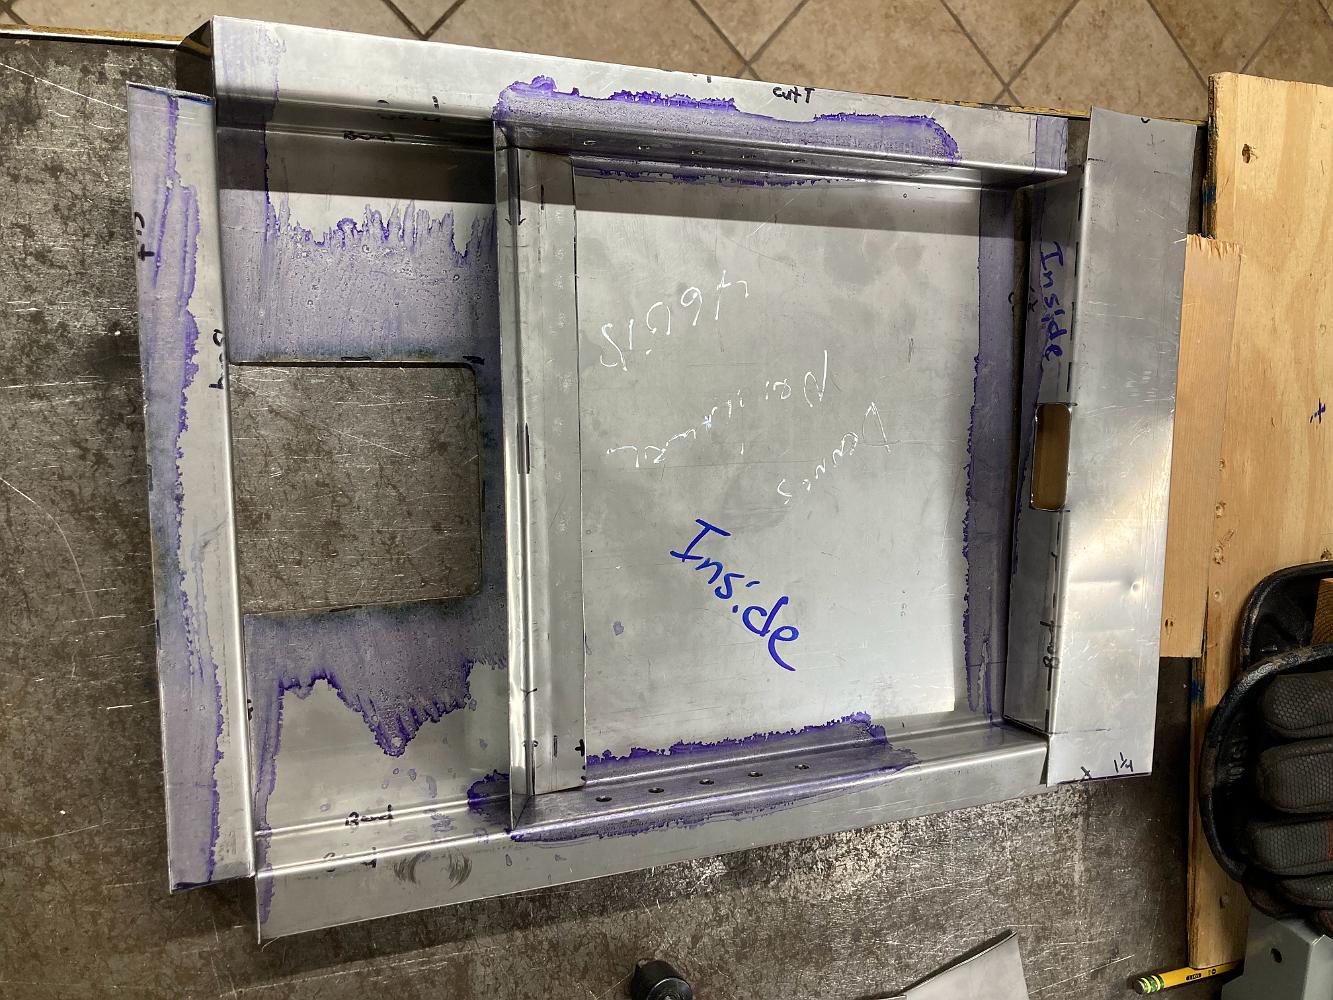
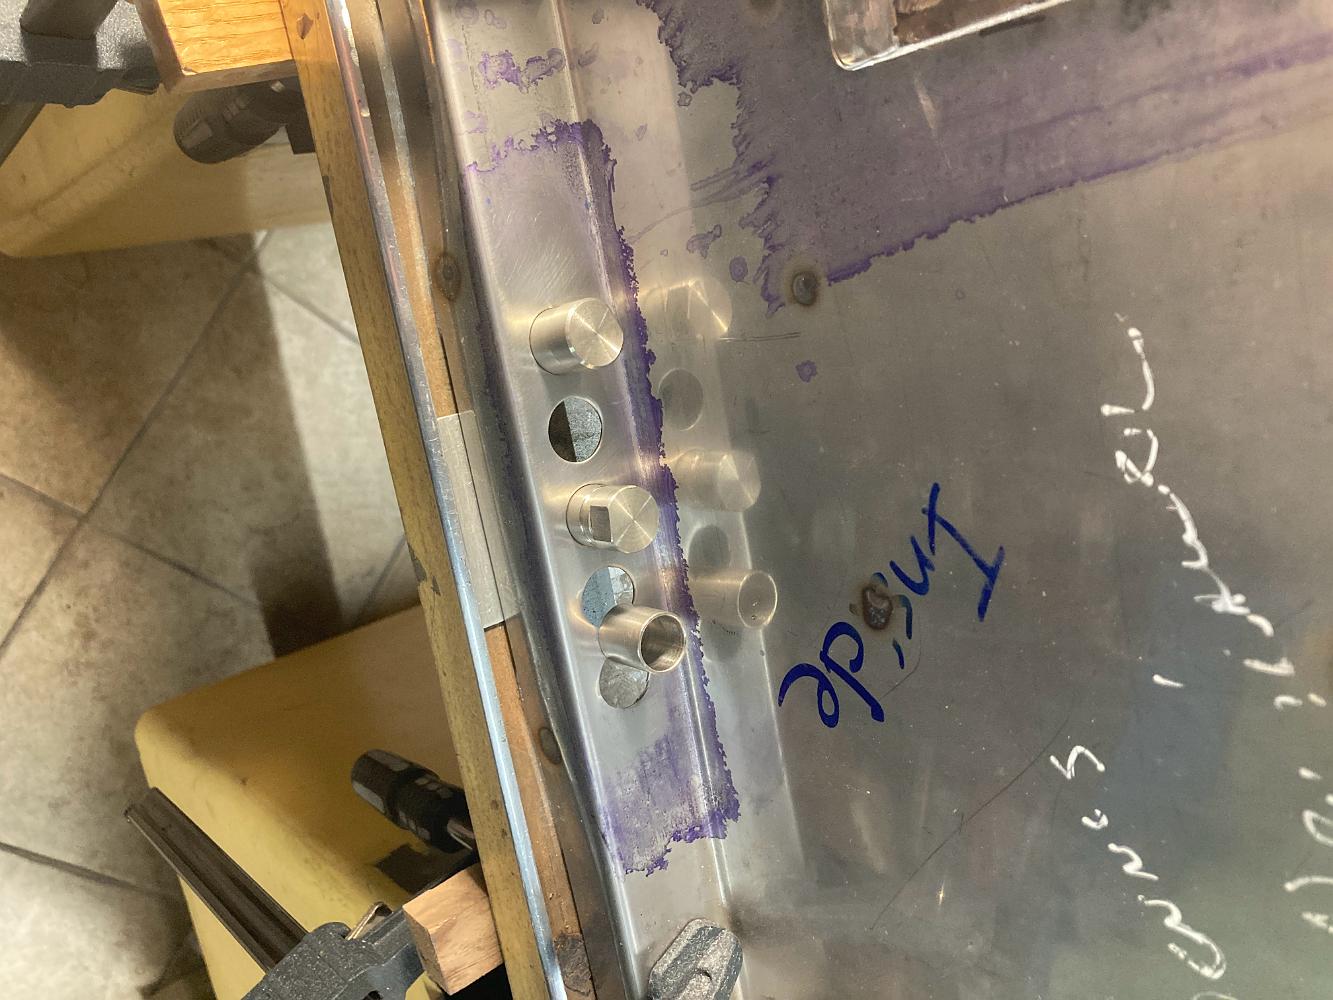
With the pan bolted to table to keep it in one place, we drill two holes for the burners in the end, and finish the holes with the knockout plug cutters.
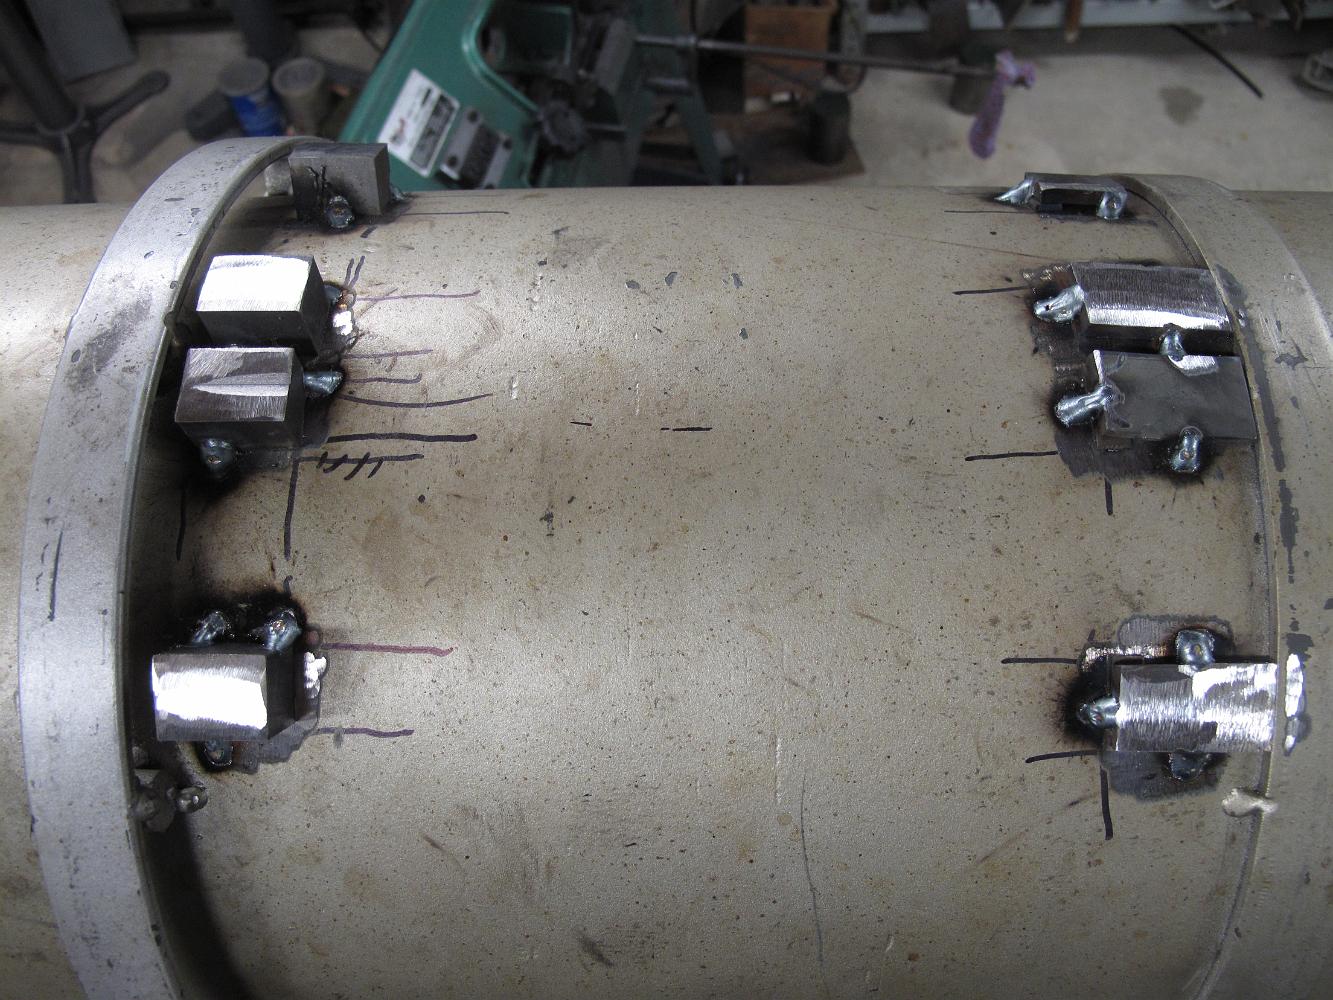
26-April-10 I decide I will weld 1/4" thick bars to the bottom of the boiler to anchor the firepan. I will drill and tap them to match the pan mounting holes…
Bill works on the burner mounting brackets while I weld on the fire pan.

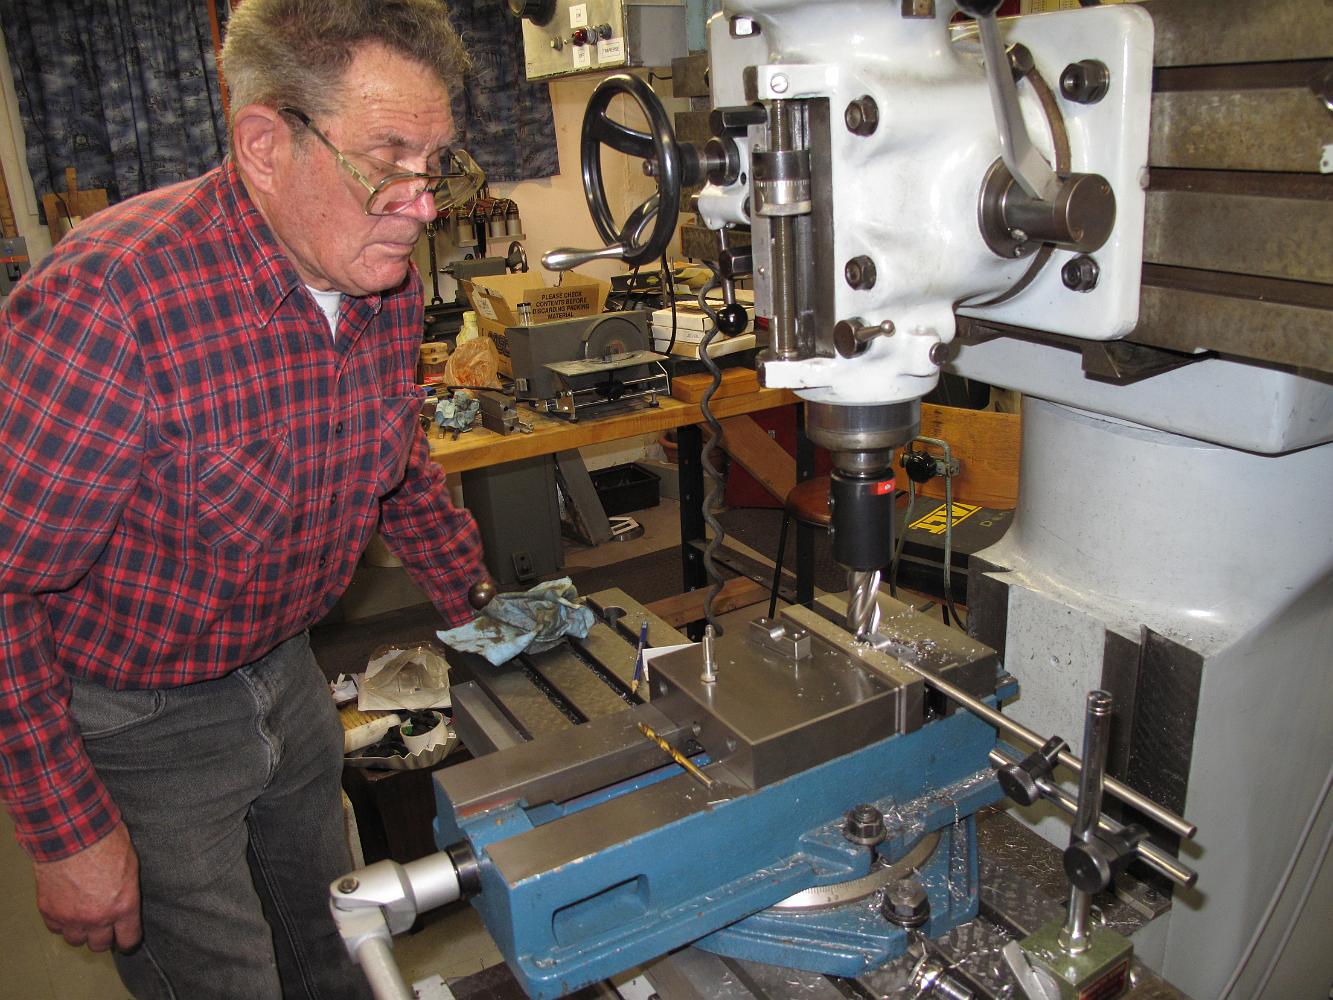
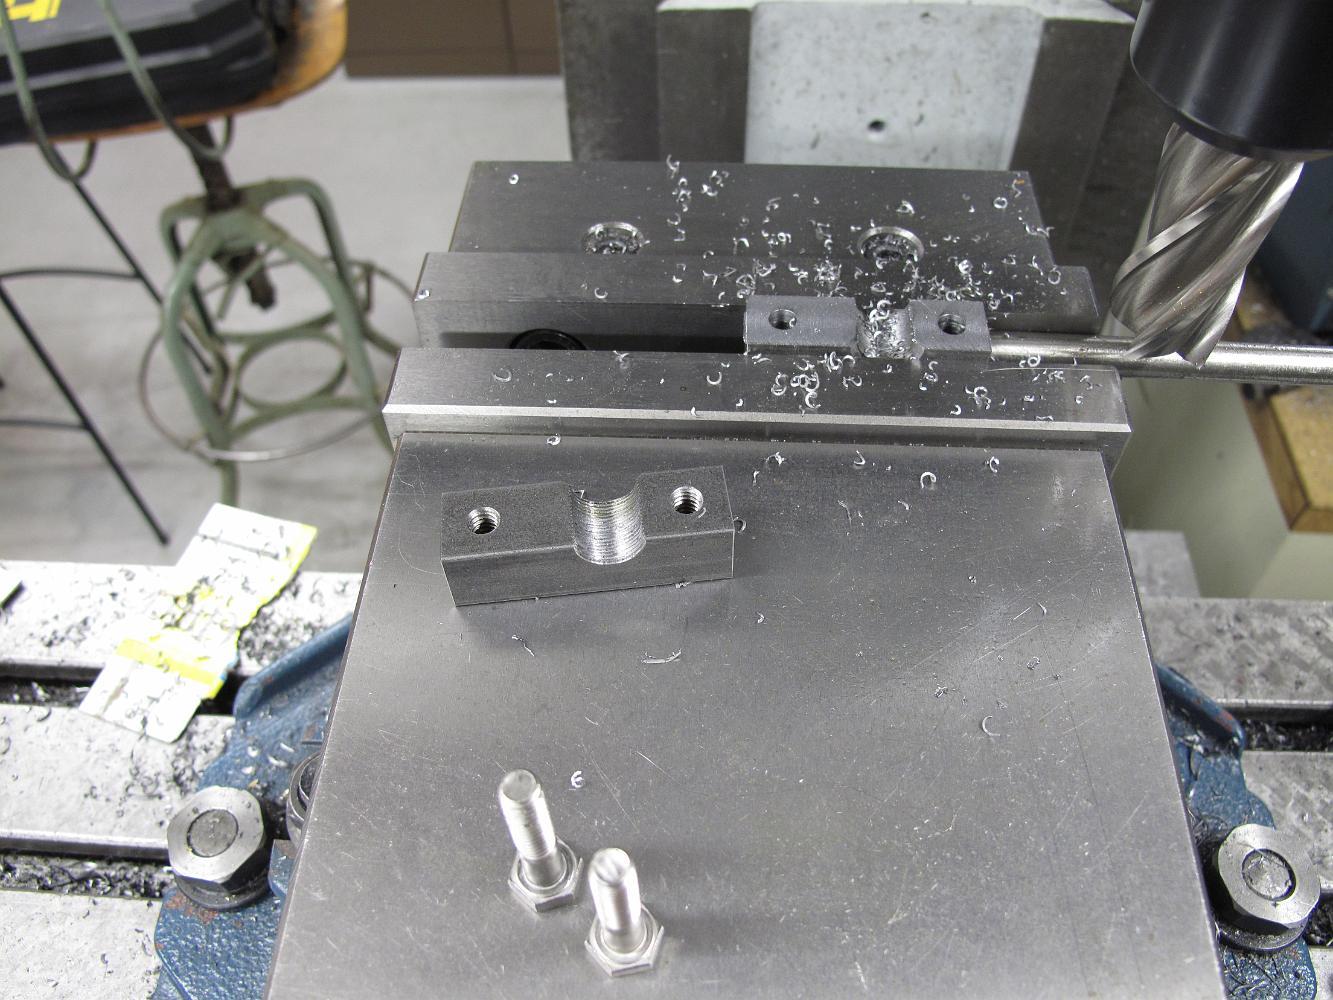
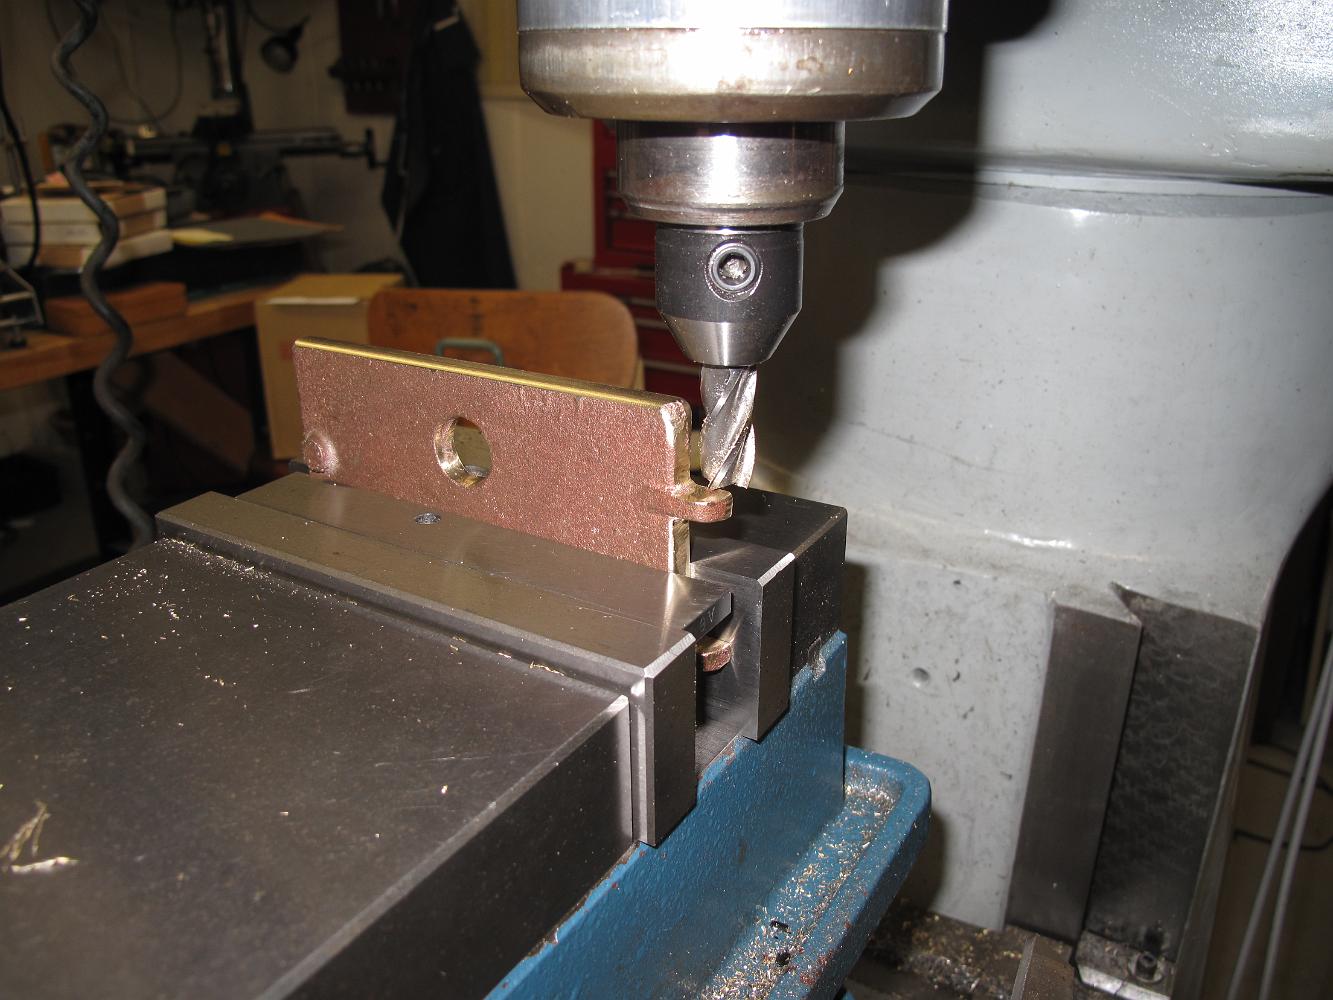
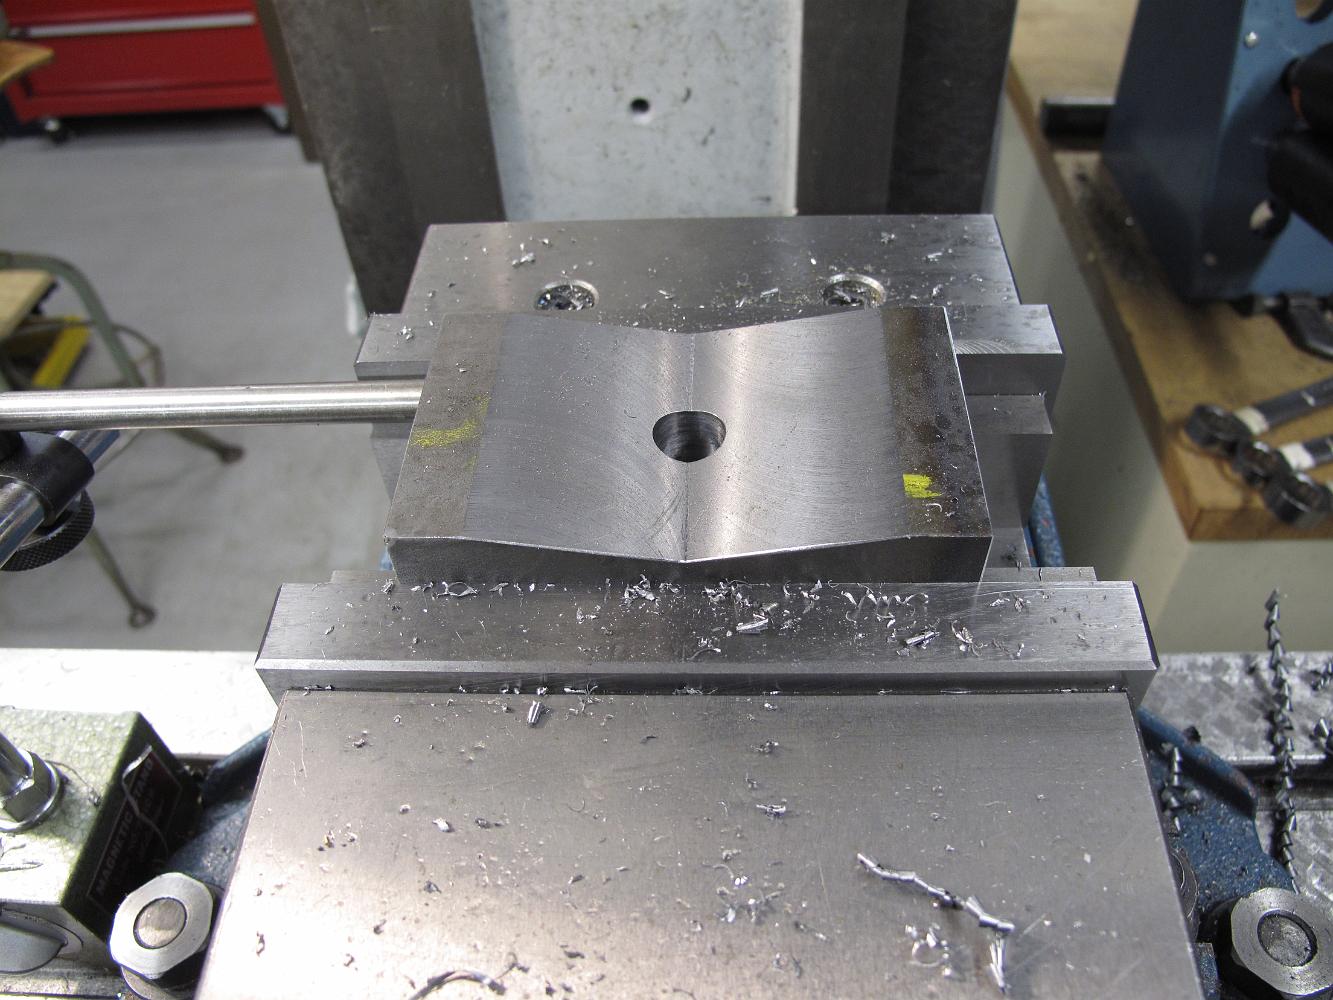
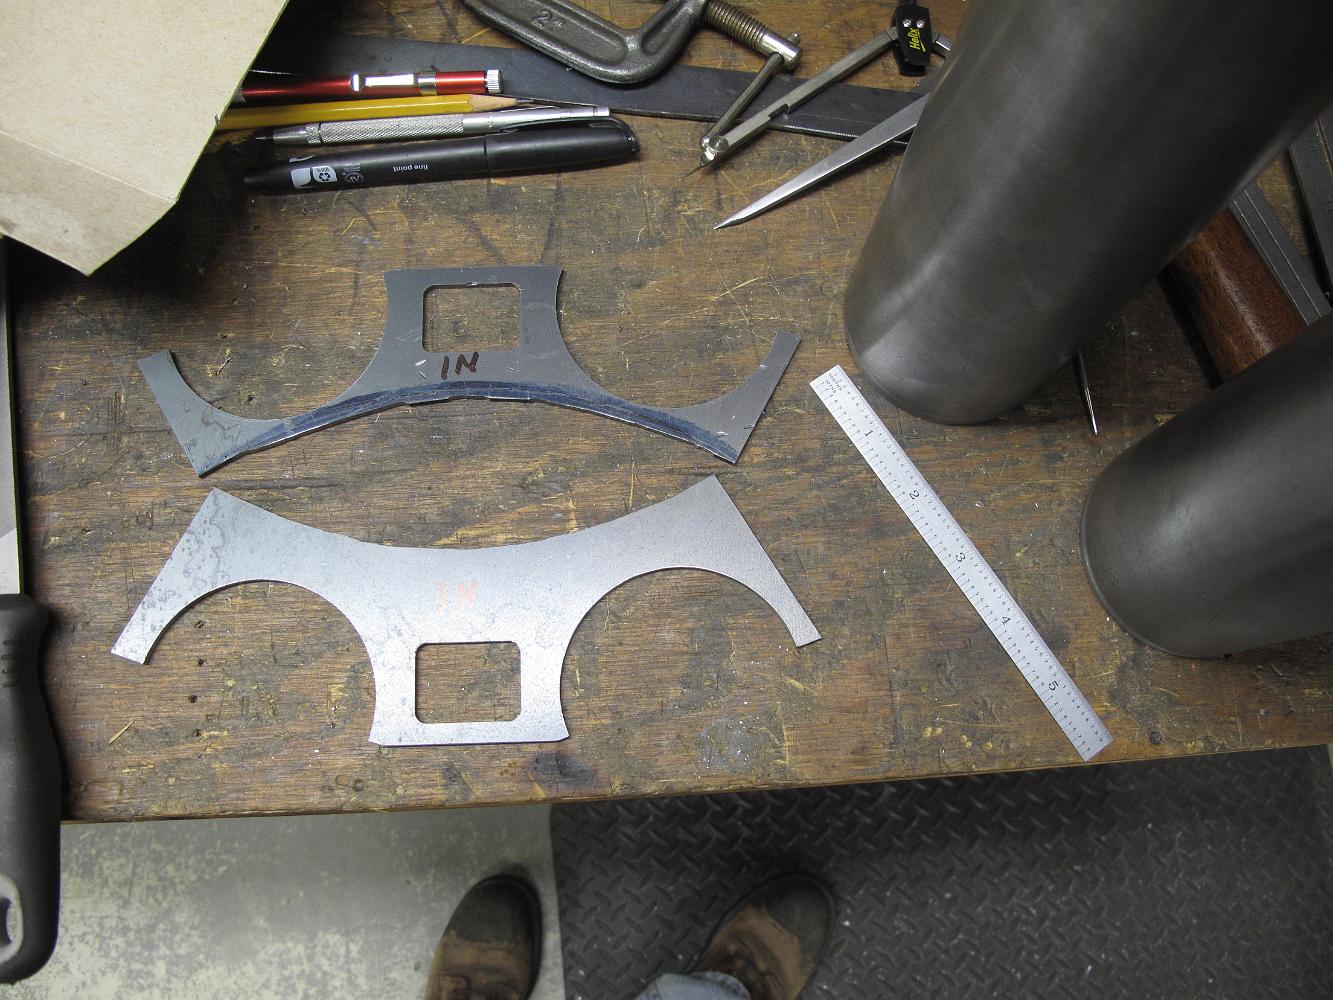
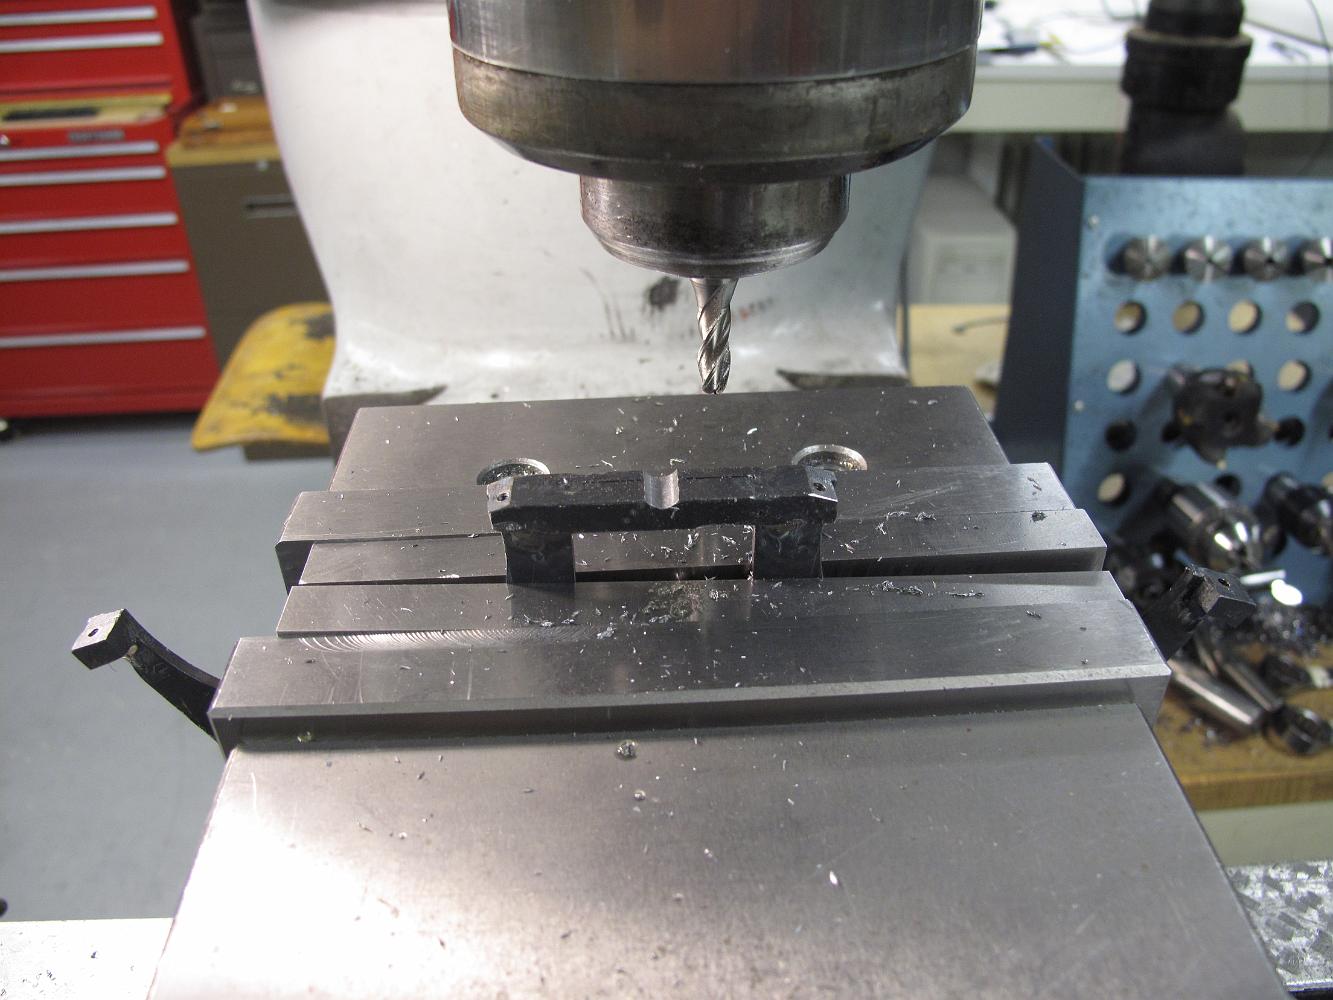
We decide to mill the damper guide bars from solid instead of a buildup as shown on the print.
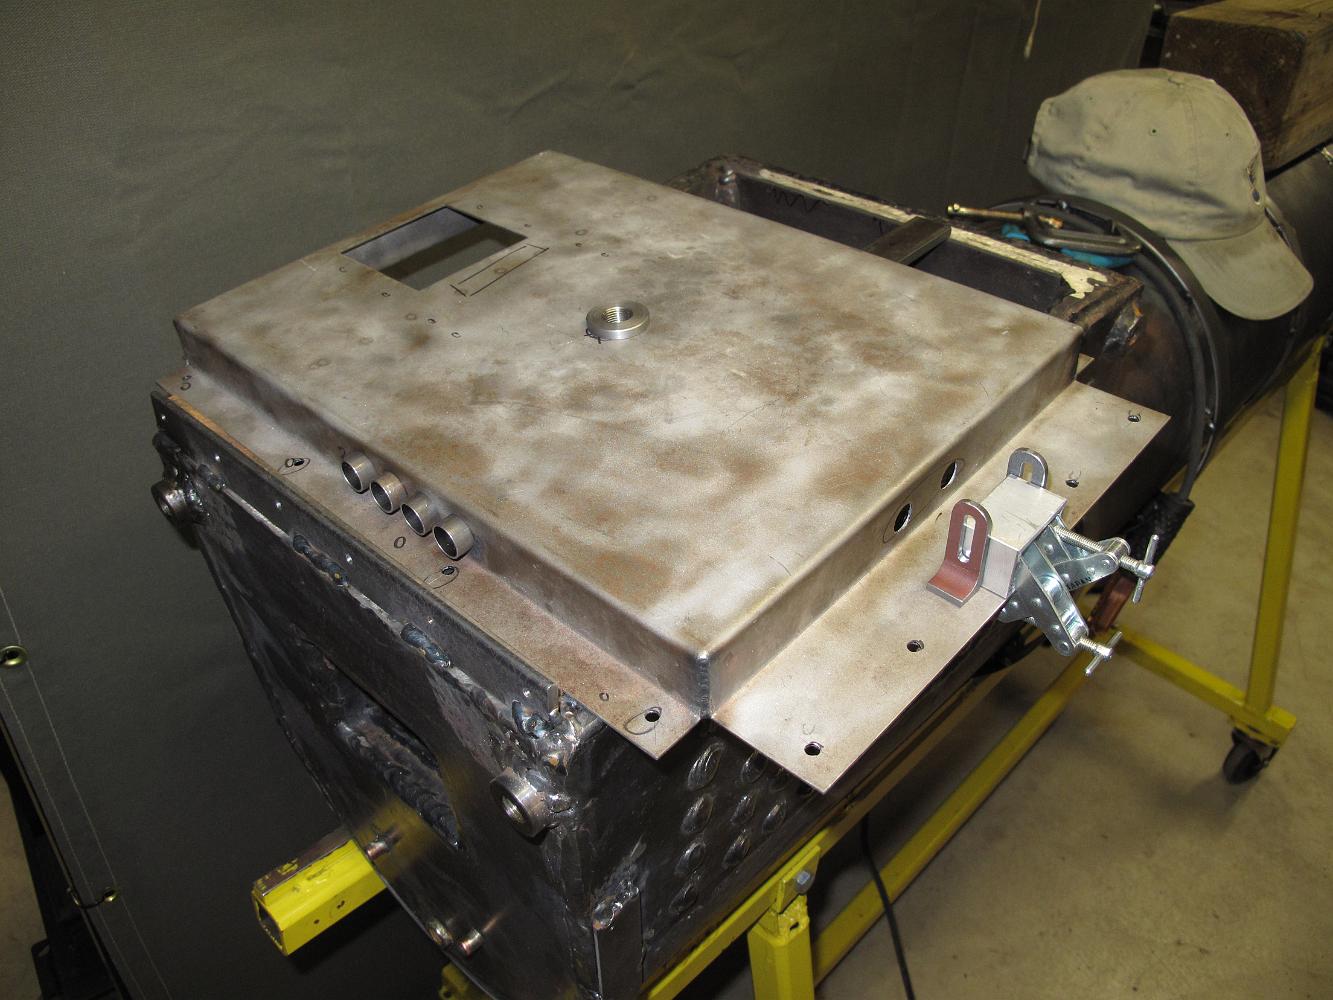
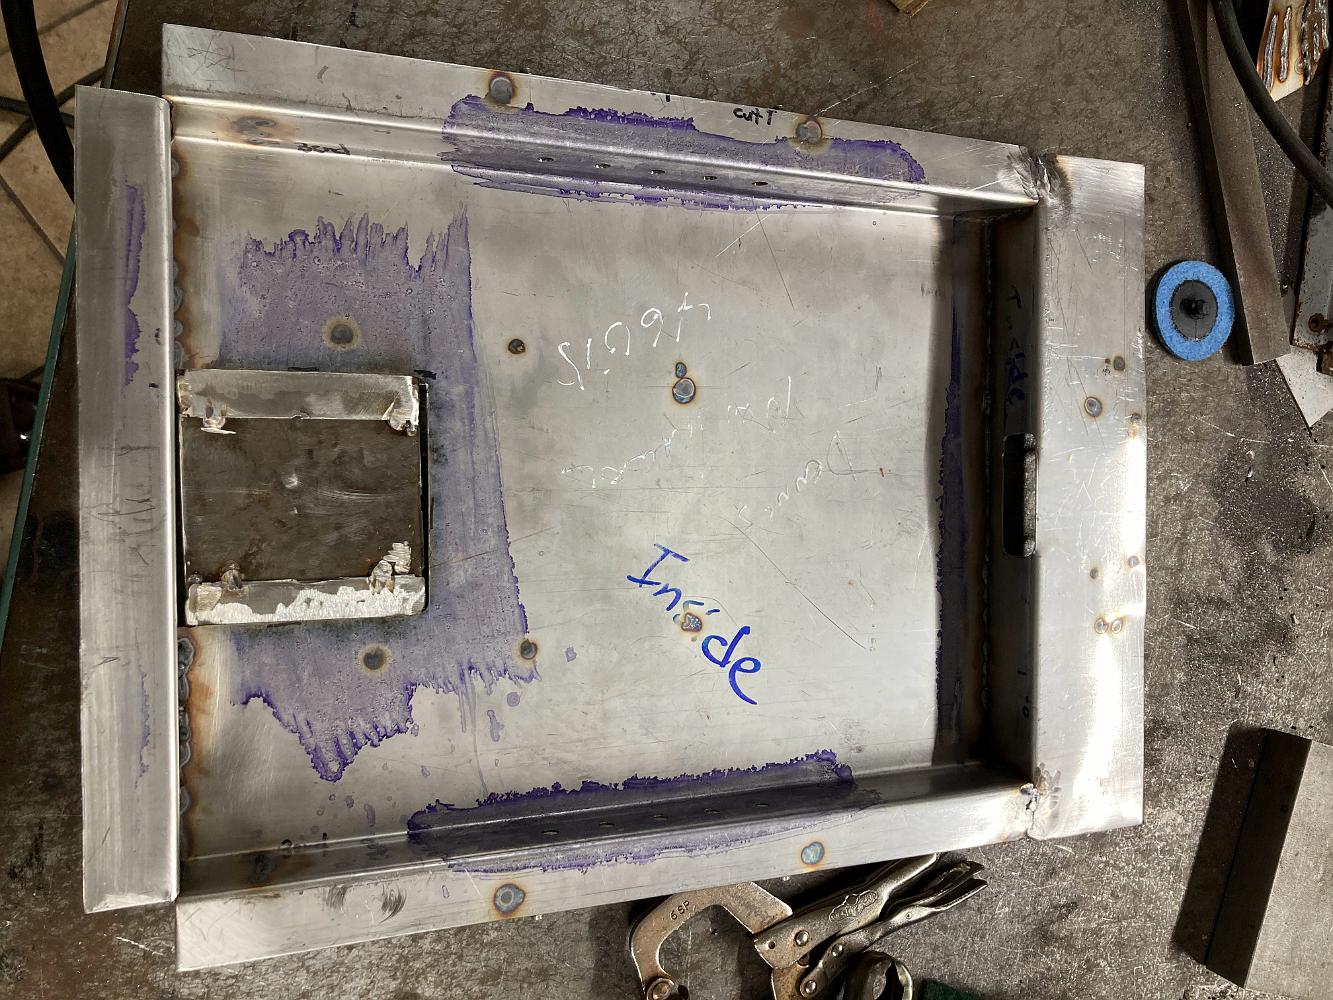
The air intake tubes are spot welded to the fire pan and the burner brackets are ready to be positioned and welded. We used a sizing block to make sure they…

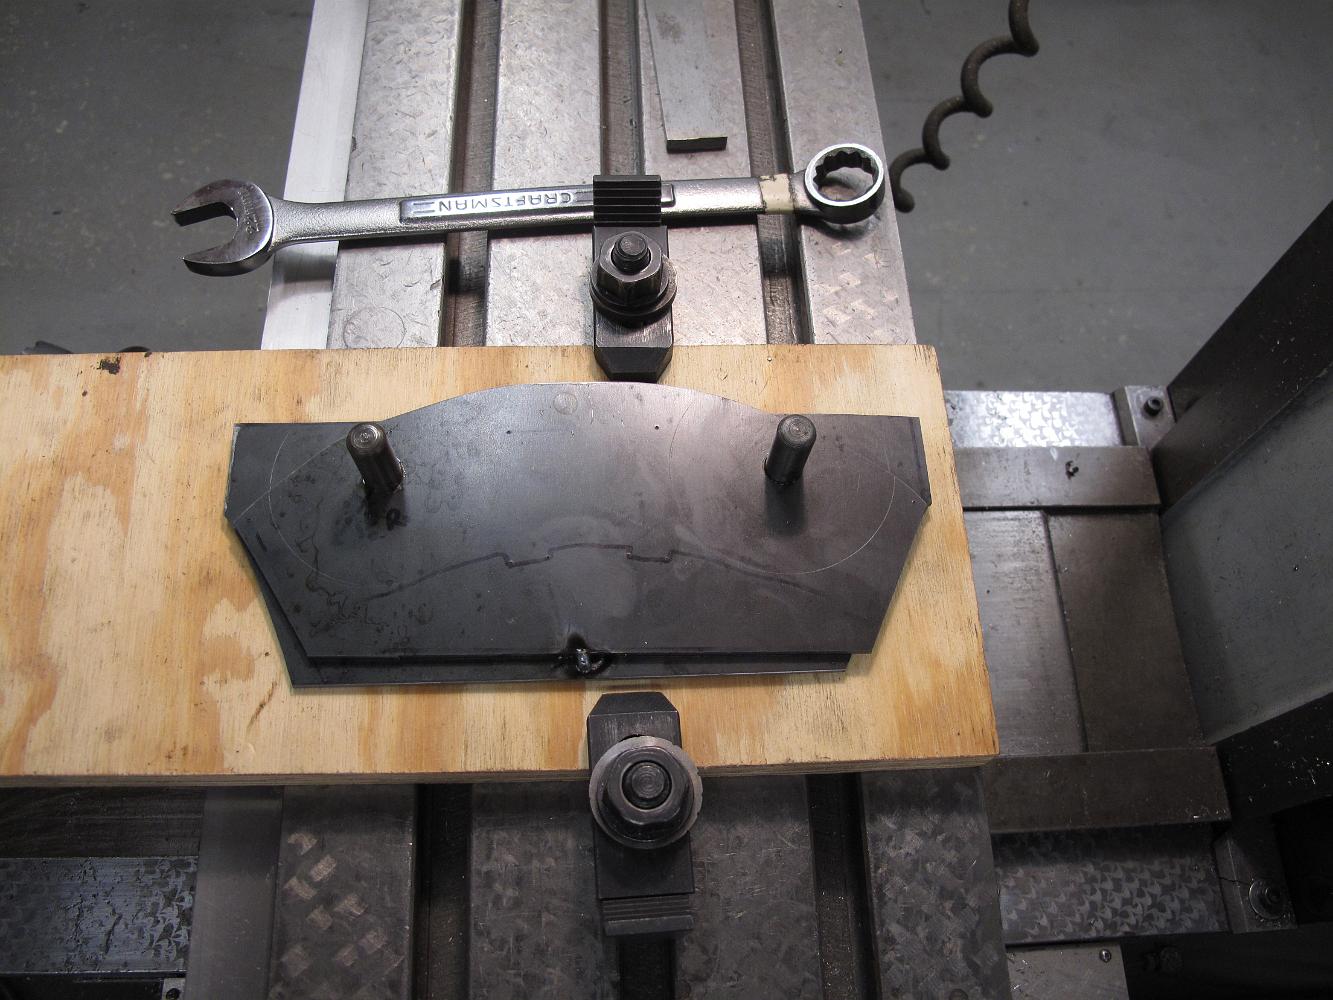
Laying out the guide bar position.
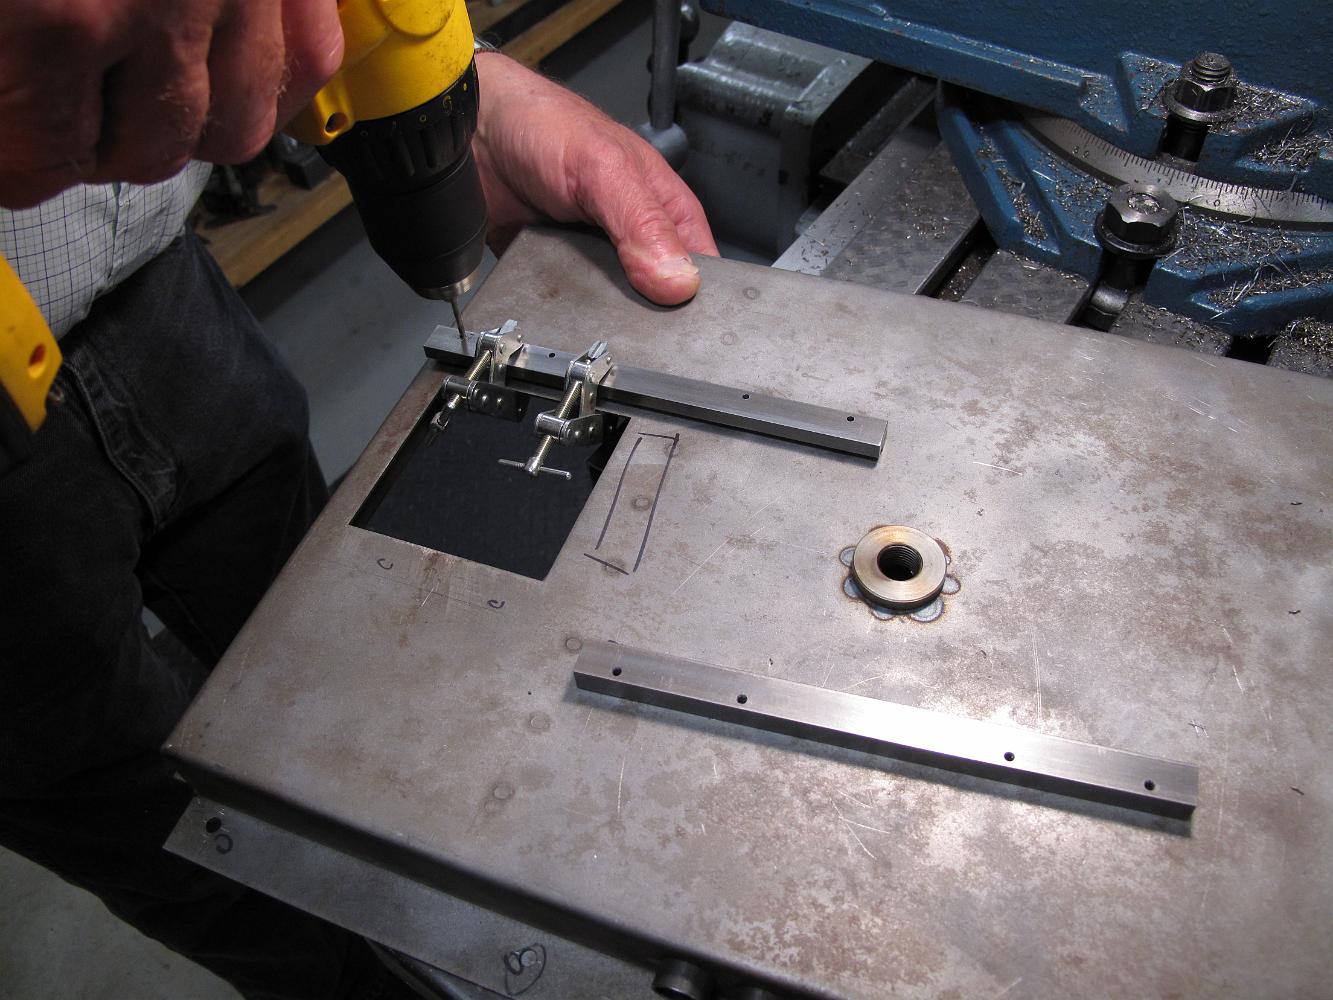
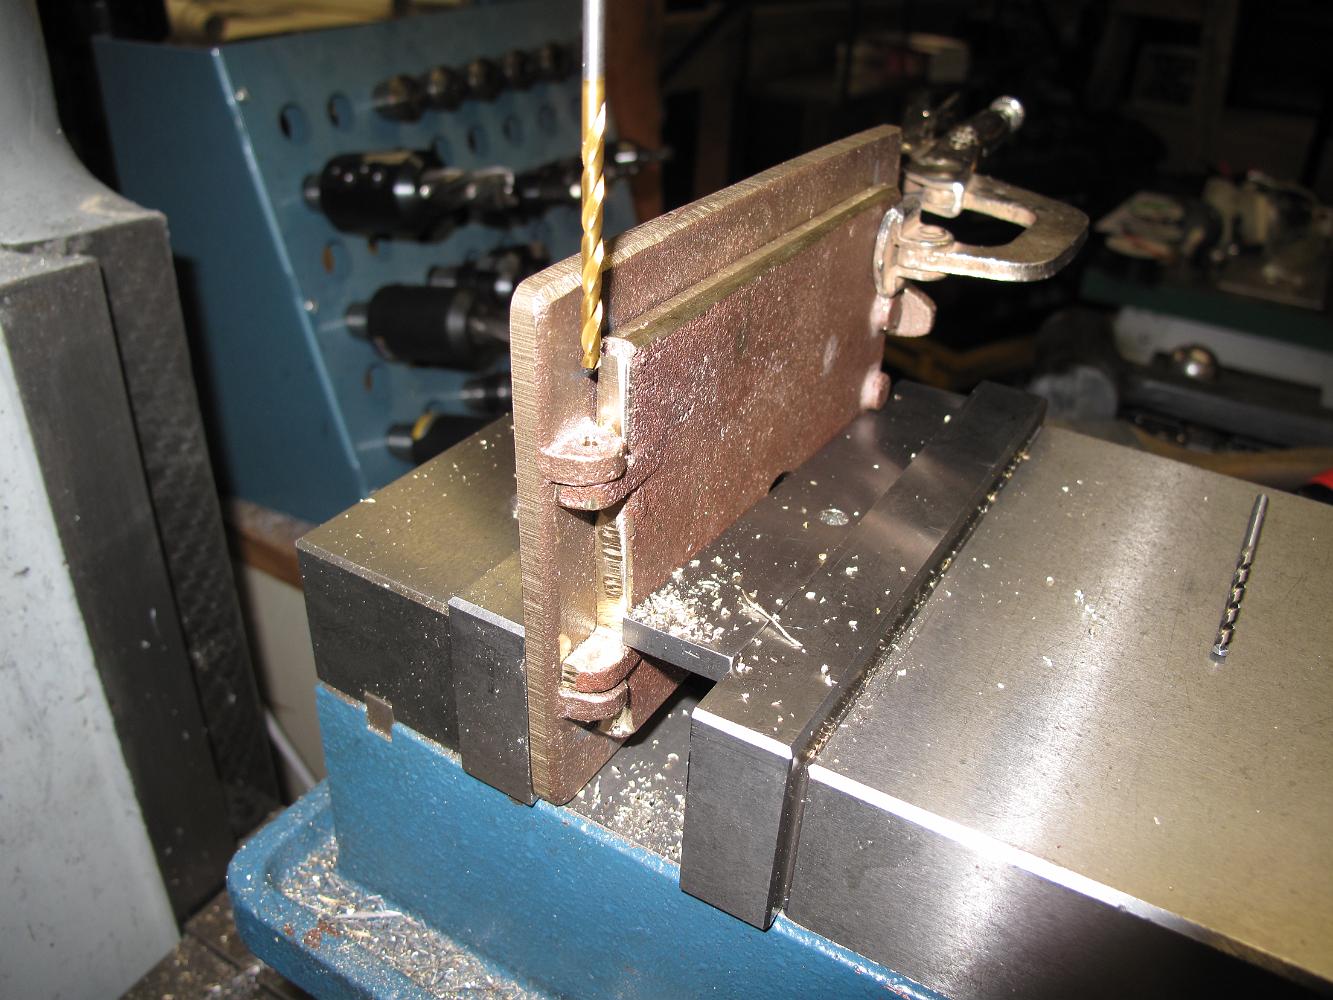
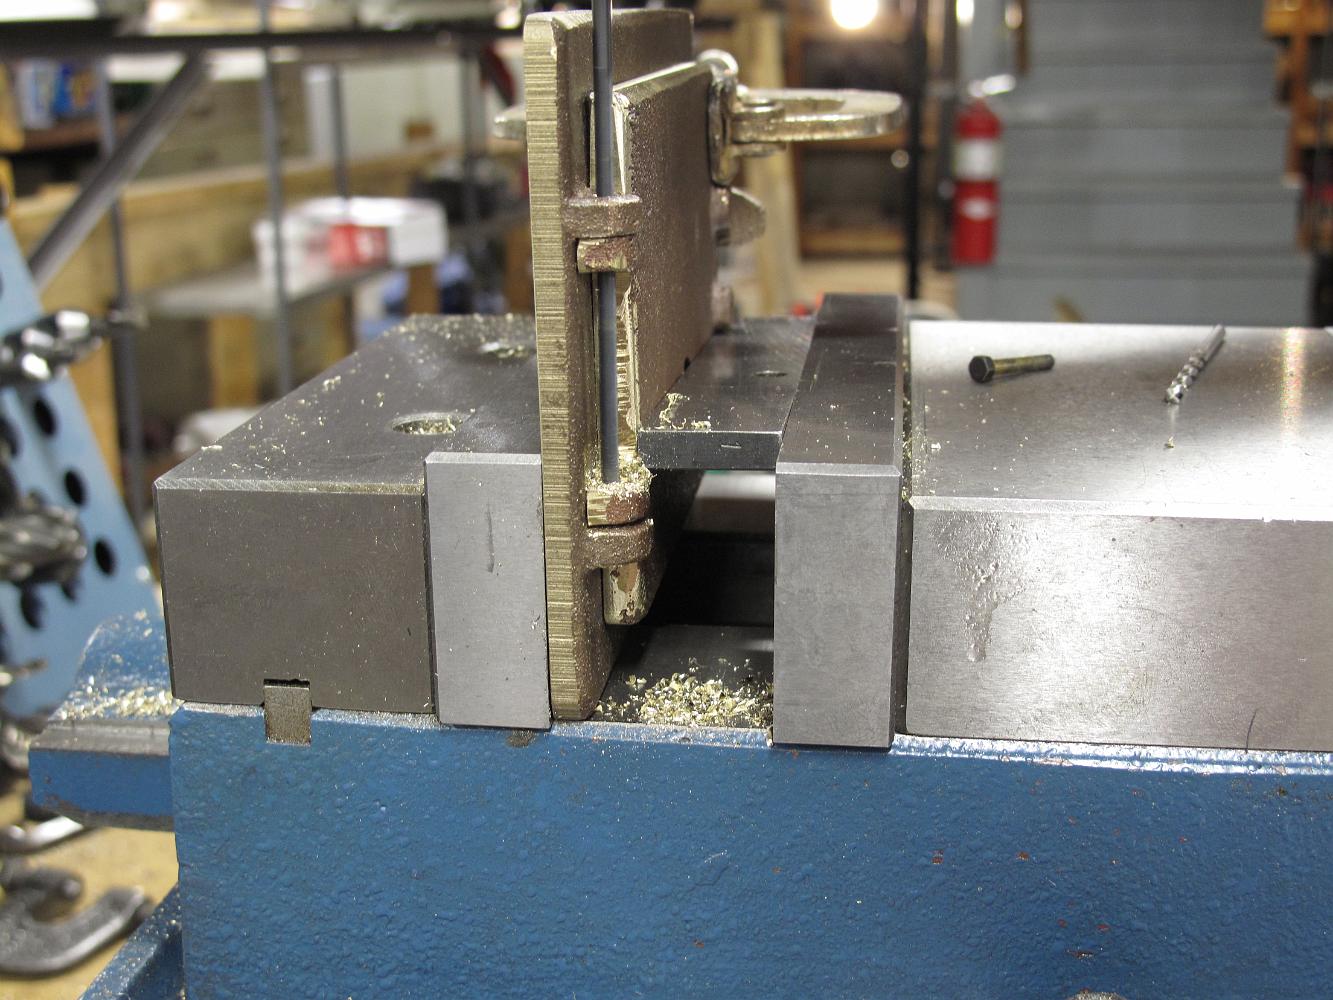
5-May-10 Match drilling the fire pan damper guide bars to the pan. We machined them from solid instead of the build up like the plans call for because this is…
Too much pressure! This is the broken end of my riveting buck which shattered while putting the damper guide bars on. Bill thought 120psi was a 'little too…

Tempering a new riveting buck after hardening it. This is O-2 oil-hardening steel. We used 40 psi for the riveting gun for the rest of the rivets.
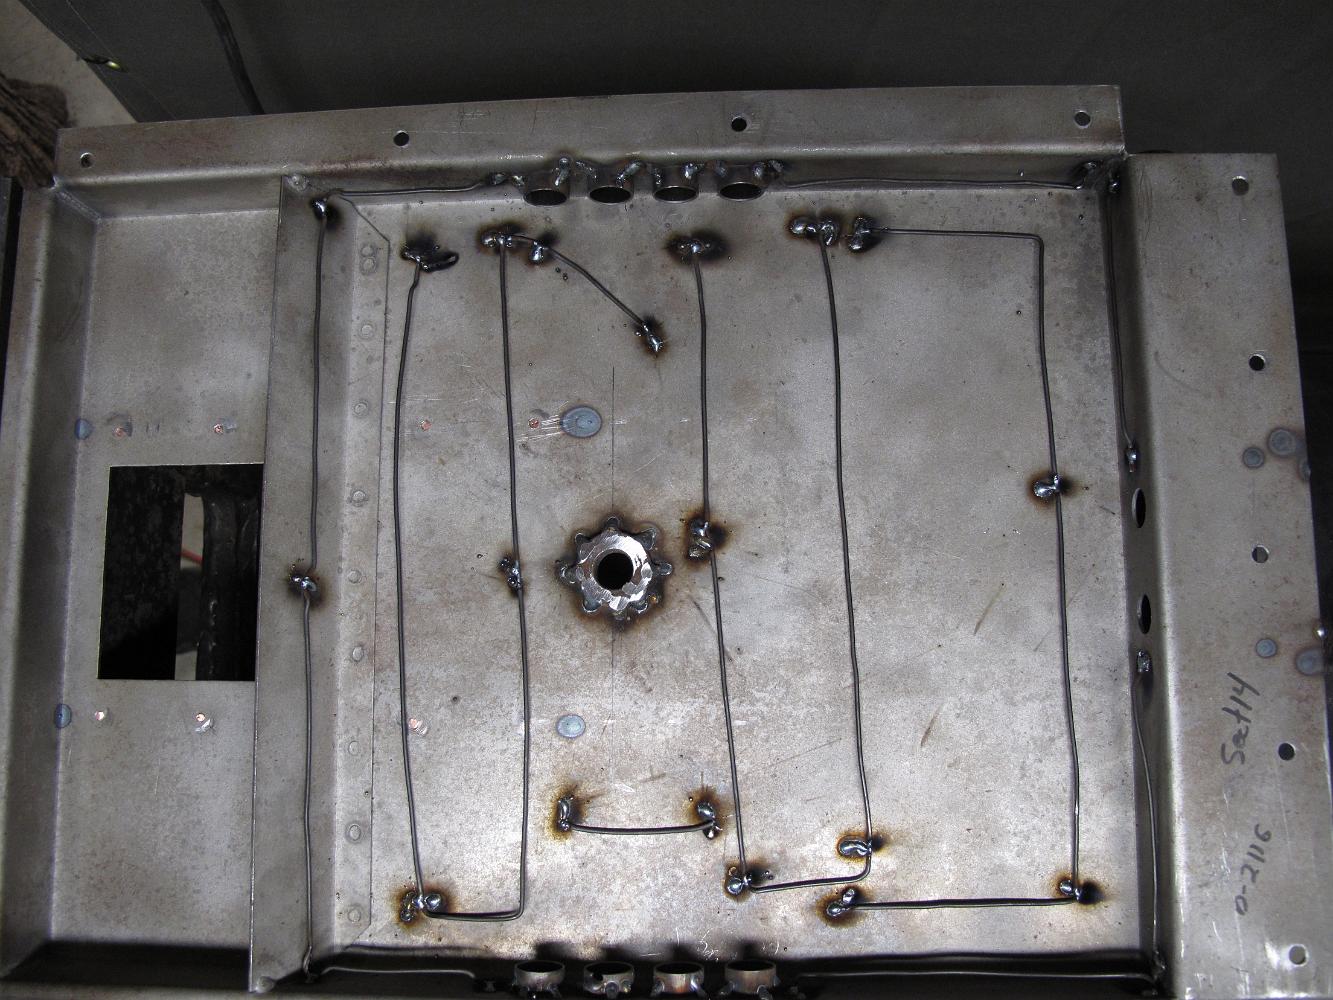
While Bill was making a new Riveting buck, I took some mild steel mending wire and did my best to spot weld it to the pan for the refractory cement would have…
7-May-10 Since the bottom of the boiler is very uneven, and I don't want to drill and tap blind holes into the mud ring, I tack welded 1/4" thick flat stock to…
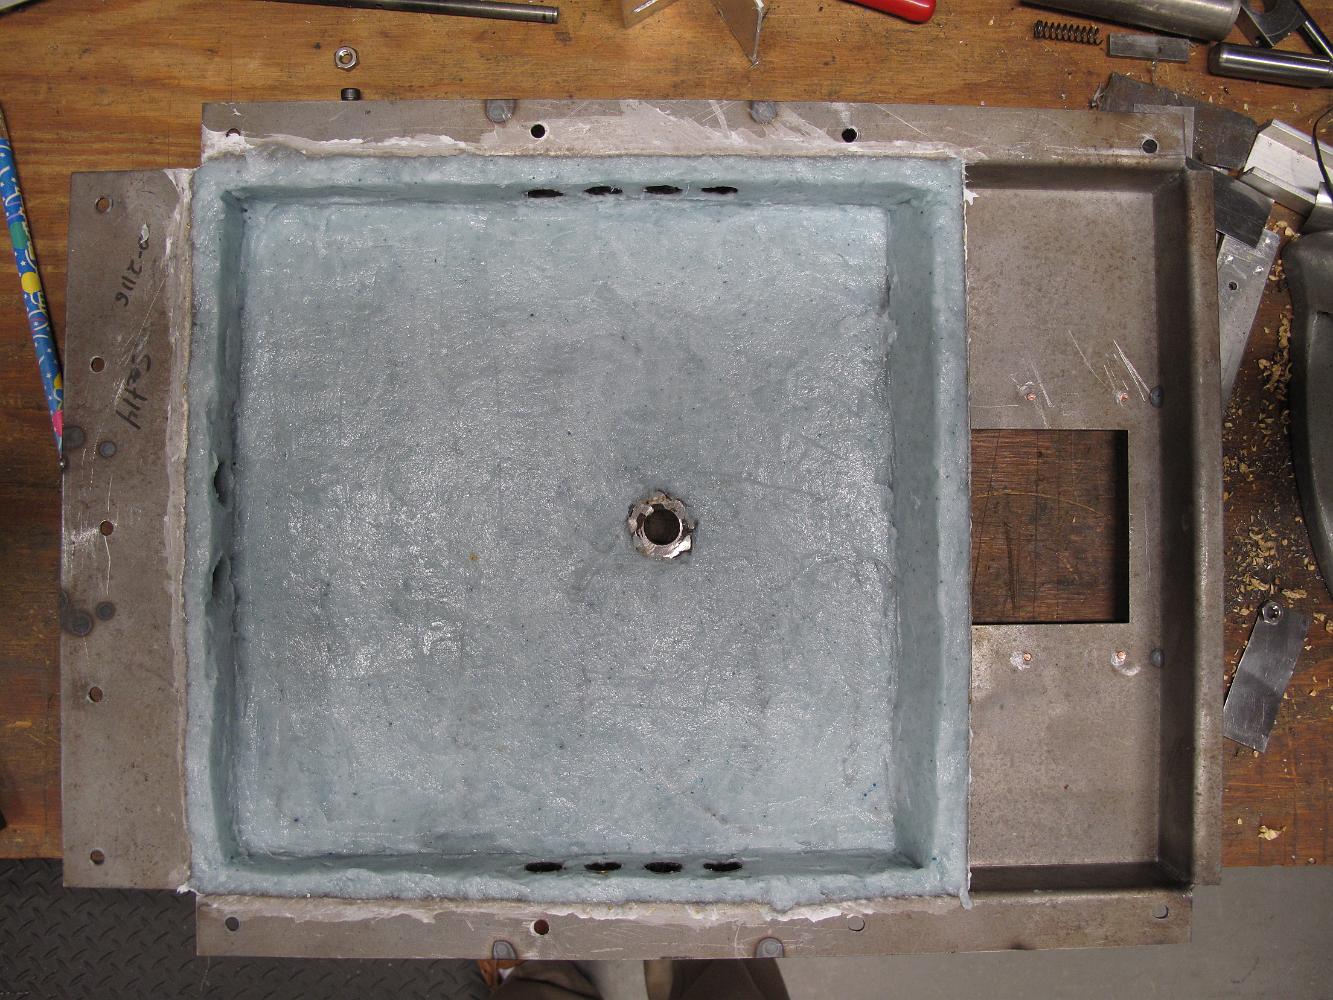
10-May-10 Oh Happy Day, I finally have the refractory cement in the fire pan! I have been hanging onto this wet, fiber reinforced cement for almost a month now…

I'm pretty happy with how it turned out seeing how this was my first time ever working with this cement. And it only took me an hour for this job. Yes, the…
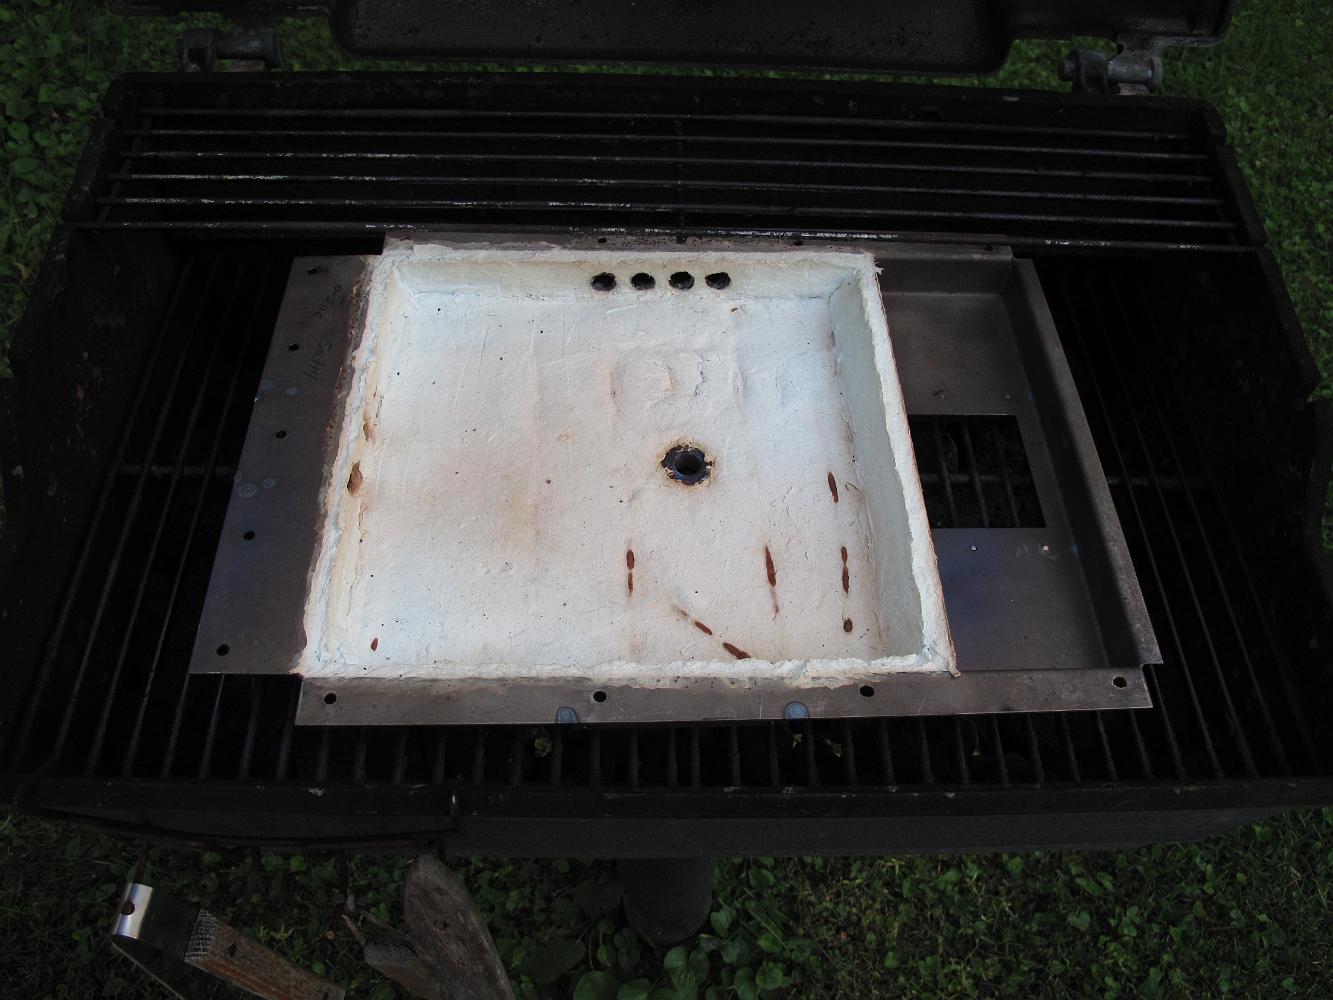
11-May-10 Here is the fire pan baking on the grill. I thought the fiber reinforced refractory cement would air dry, but this morning I found it uncured and…
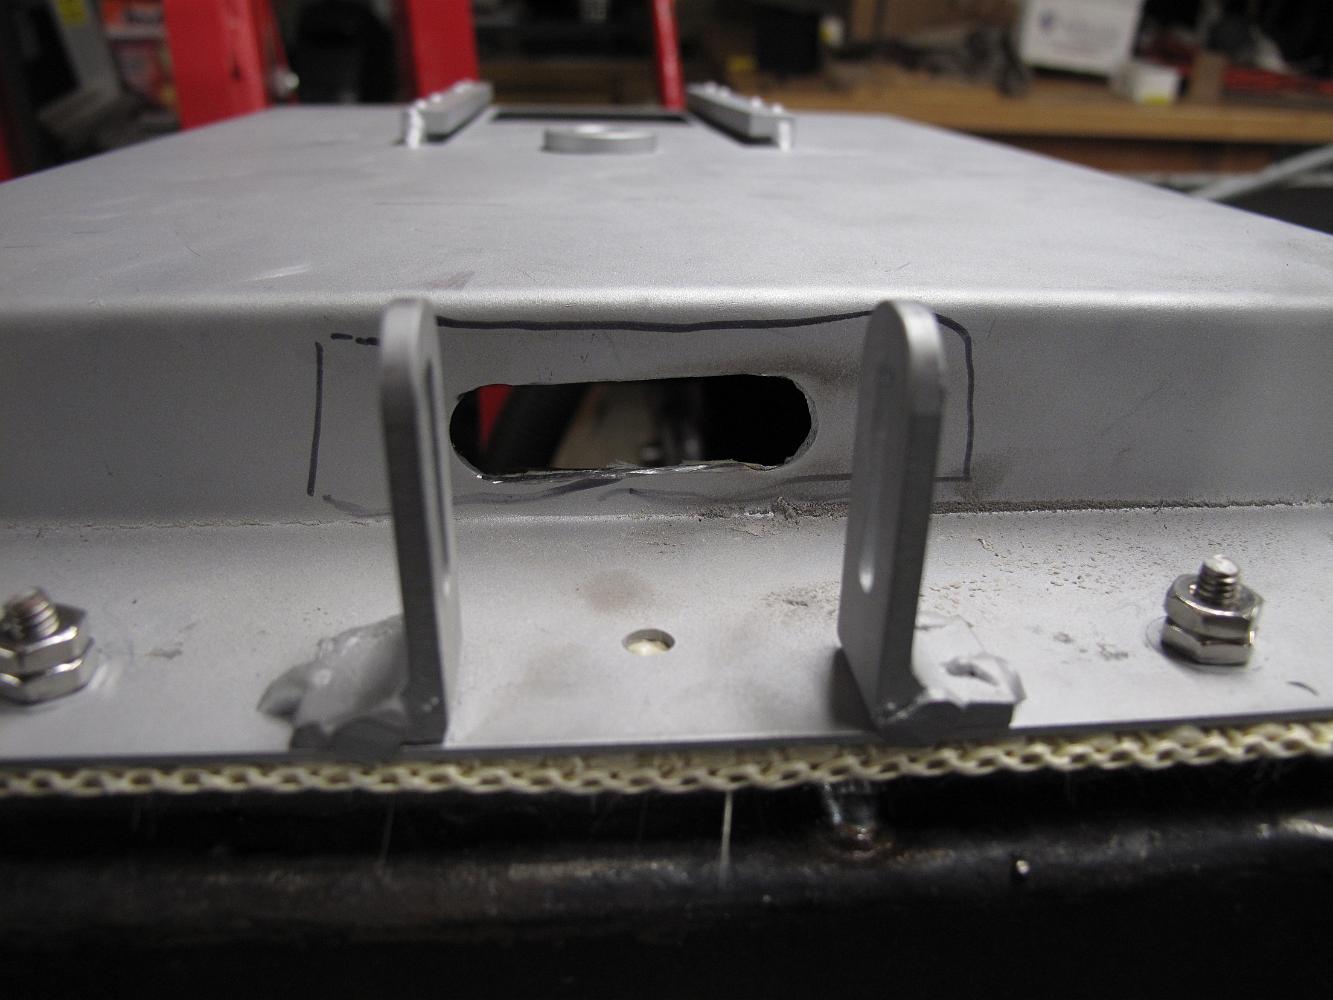
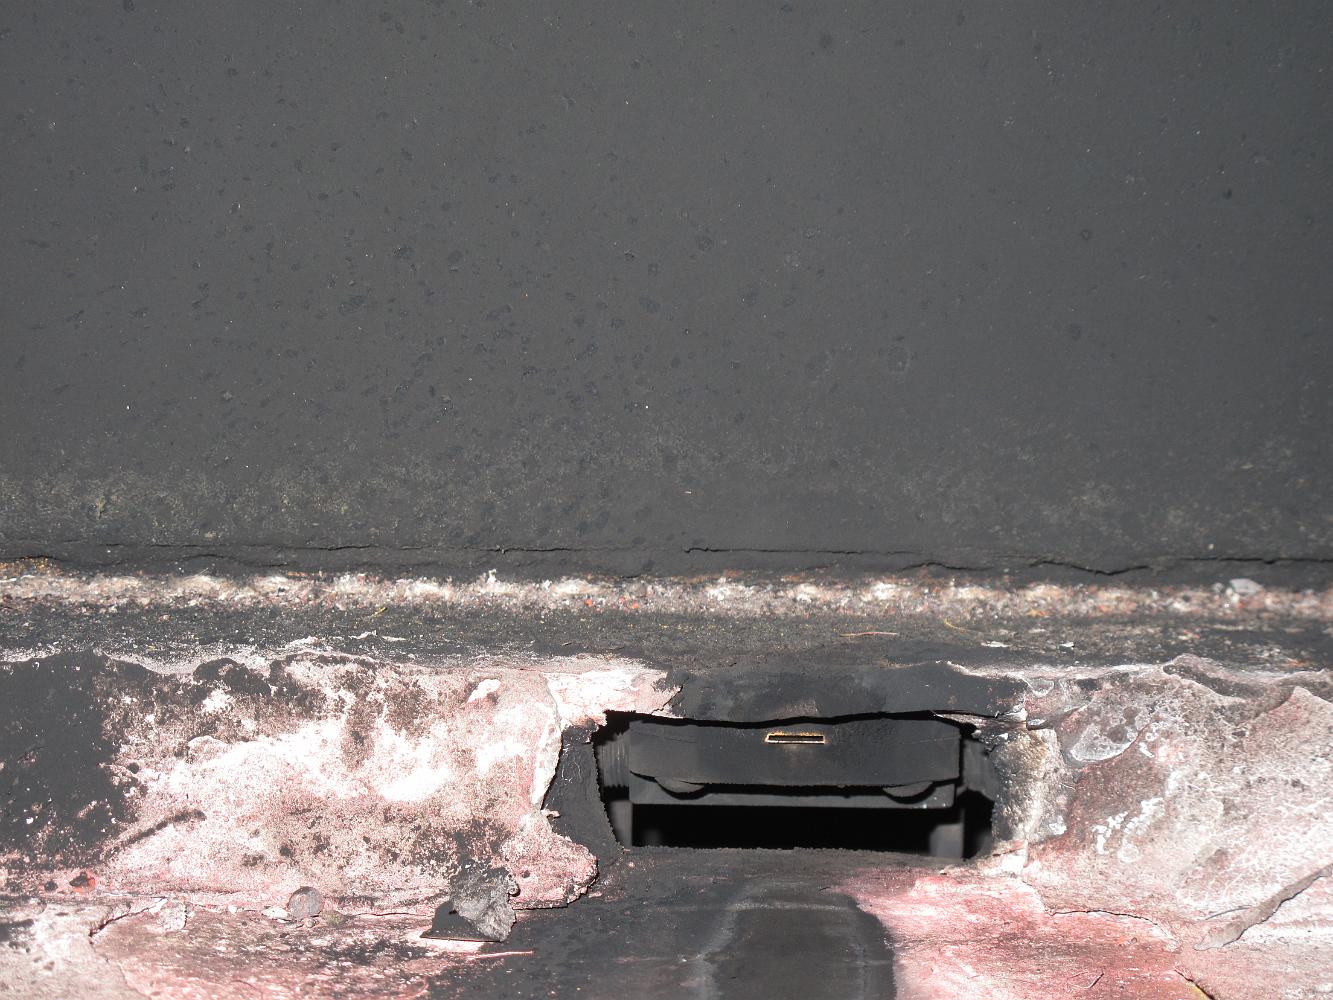
29-Oct-2010 Here's a closeup of the fire pan with the modifications to the burner opening. Bill and are were not satisfied with the close-fitting 1/2" holes the…
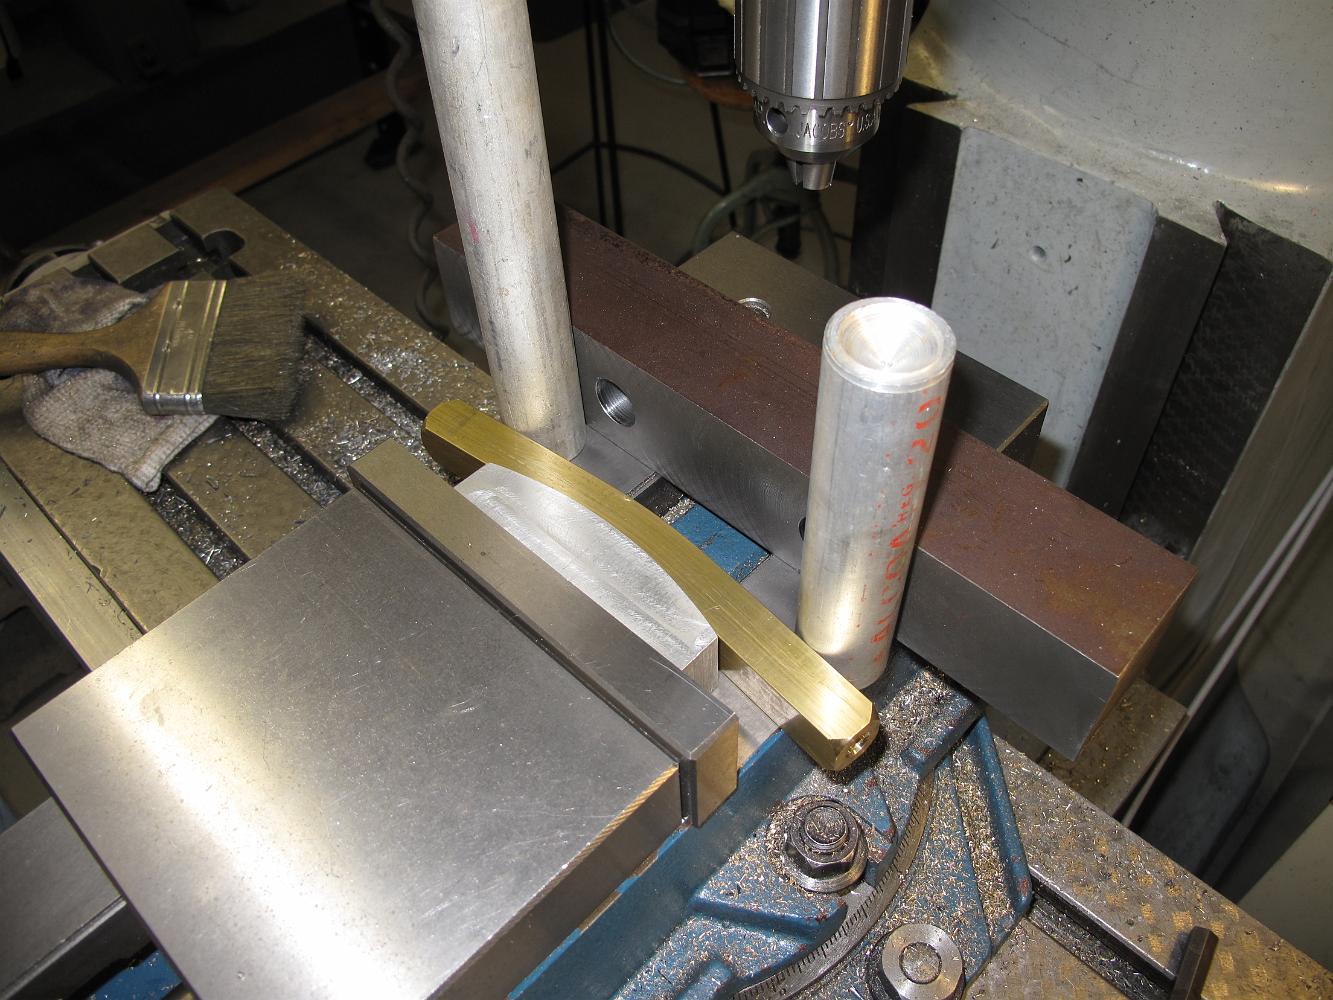
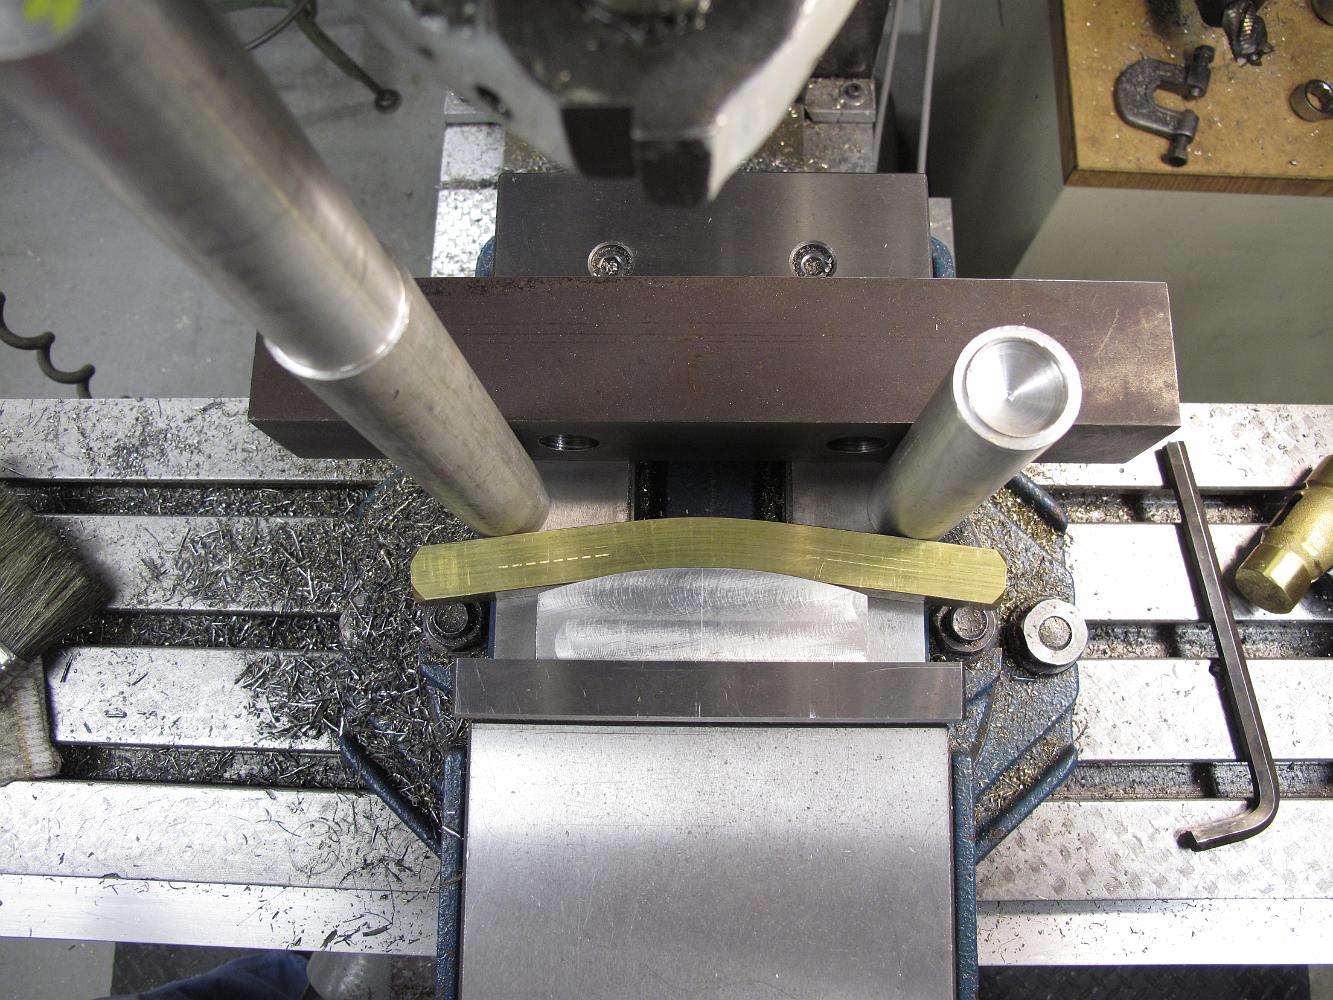
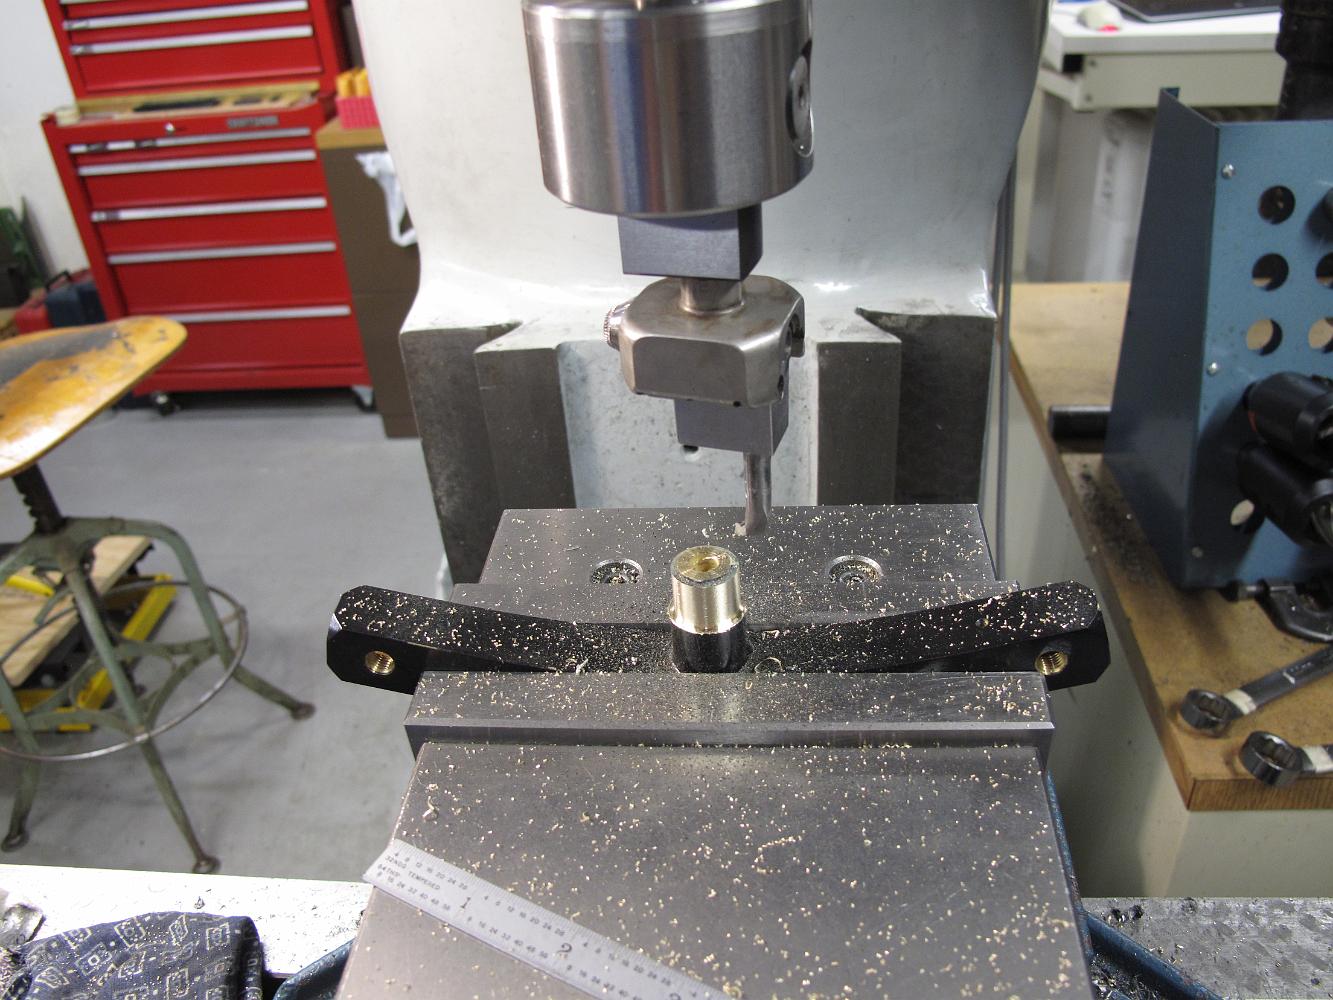
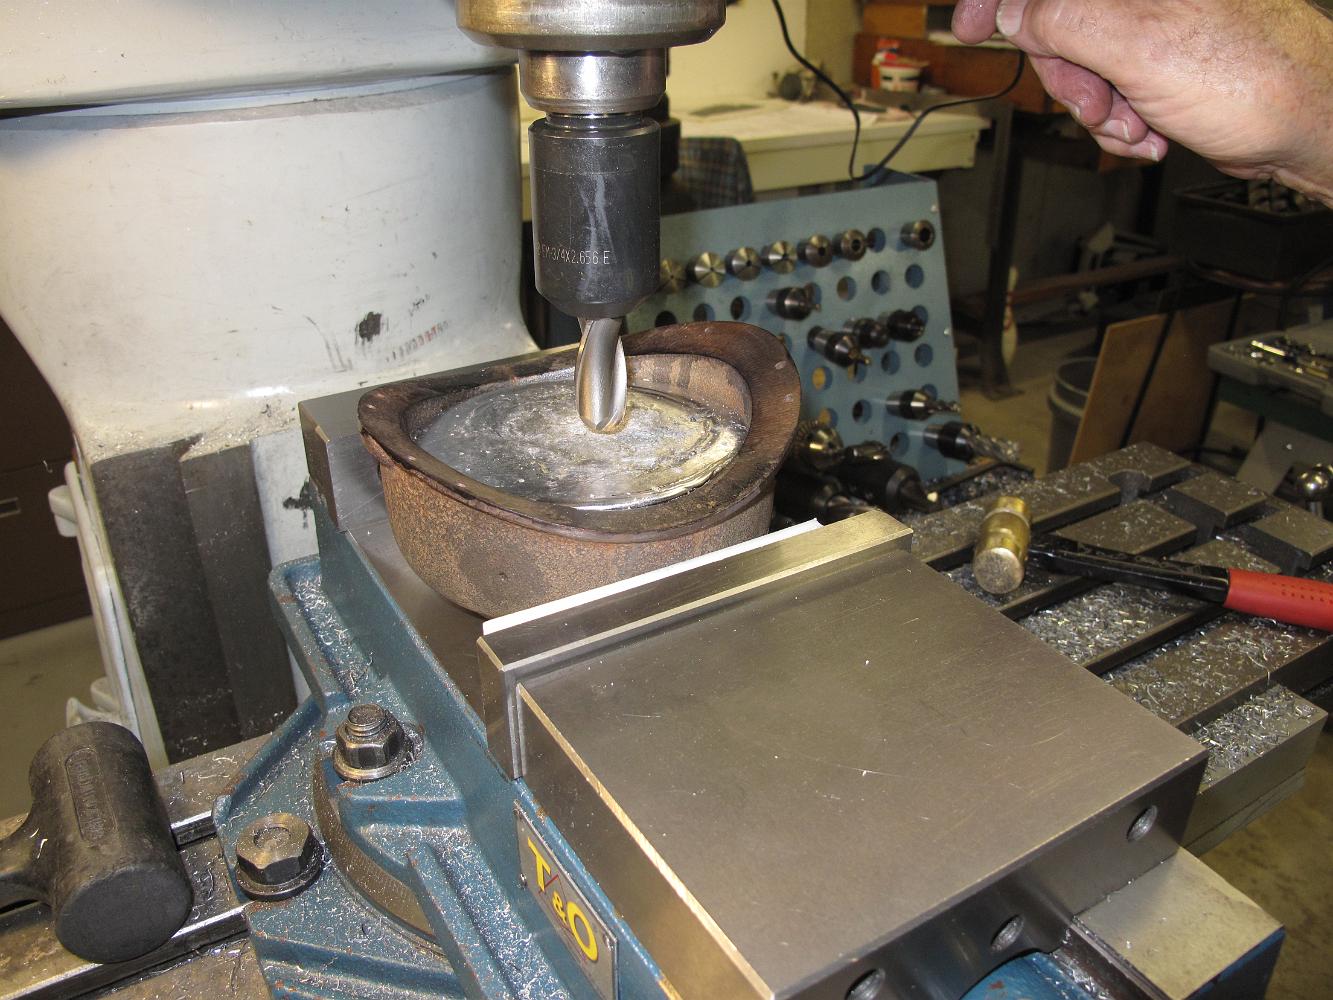
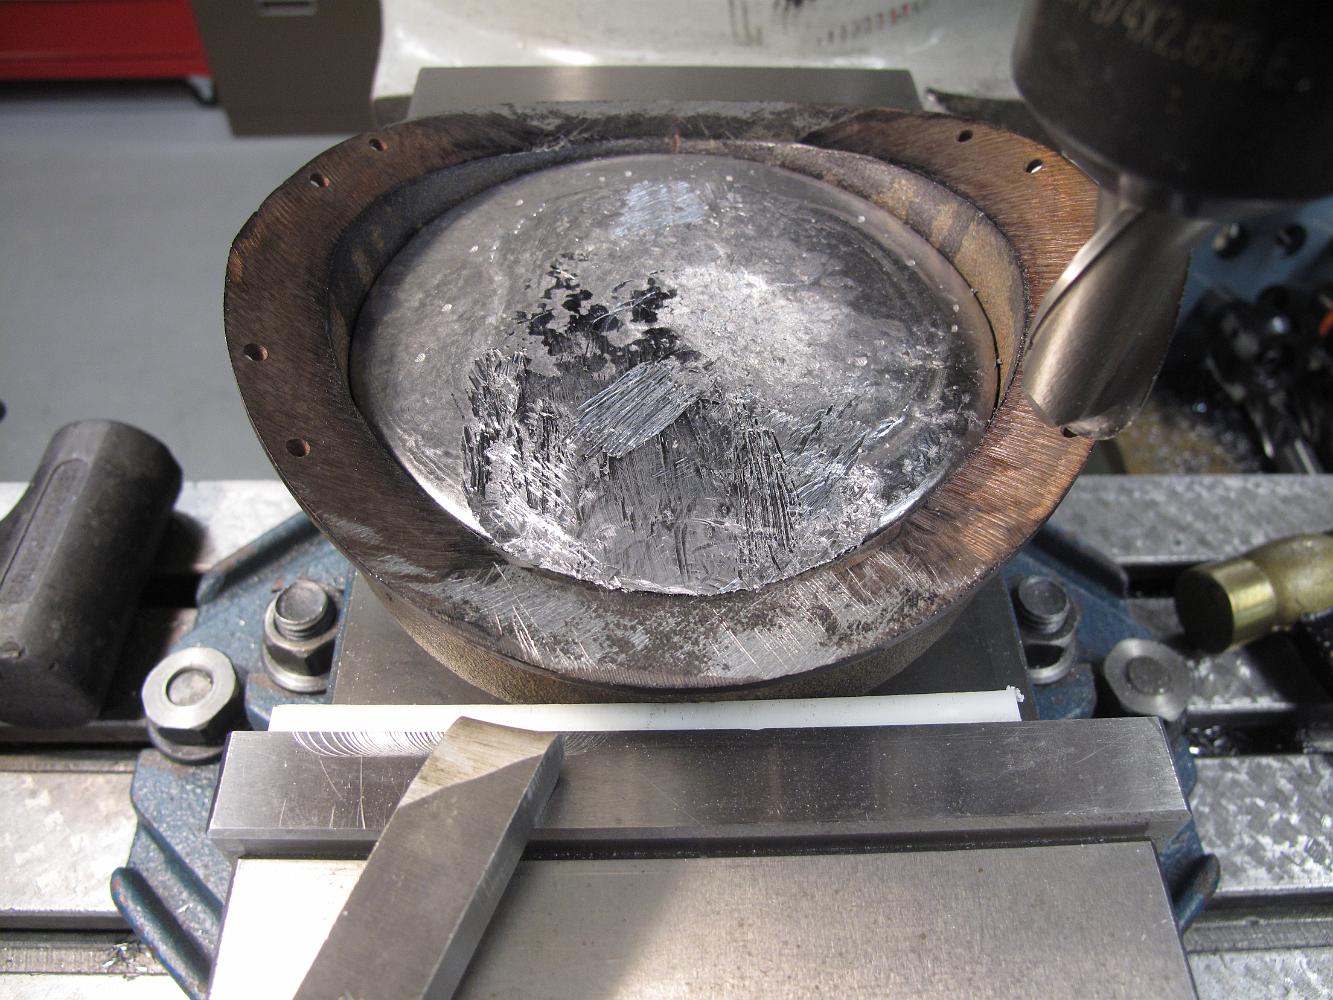
26-Jan-2011 Machining the other half of the flaring tool
26-Jan-2011 Making a flaring tool
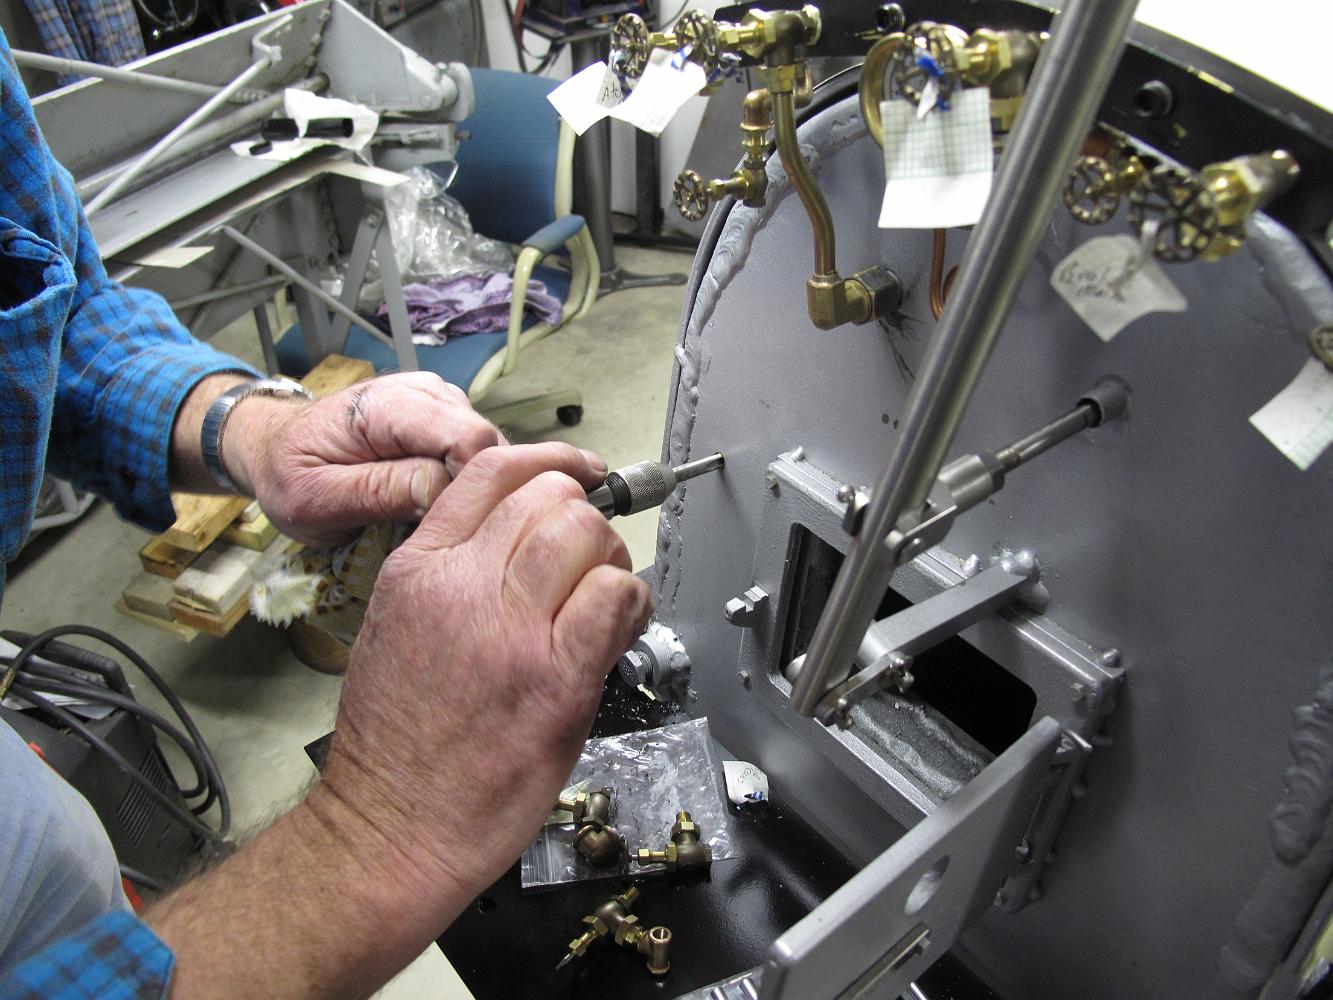
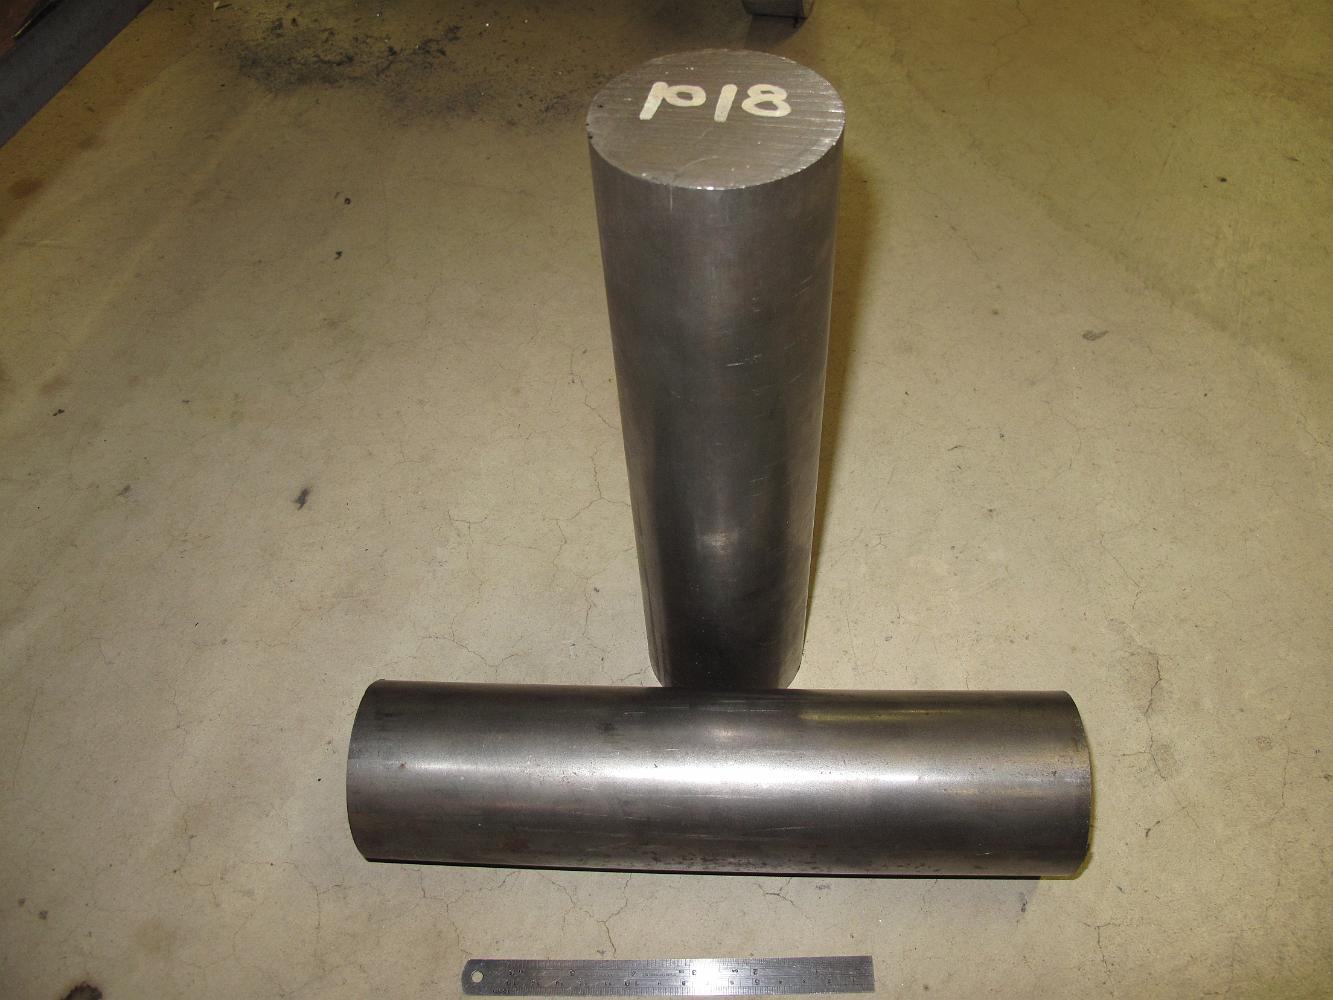
26-Jan-2011 Our challenge: put a flare on the end of the dry pip (top pipe). our existing flaring tools will not fit into this space.
26-Jan-2011 It worked! we made a small custom flaring tool to fit into the small space and flared the end of the main steam pipe.
11-Feb-2011 We begin work on the turret manifold. Using a button-head end on the dial indicator, we center the 8 long bar in the 4-jaw and drill a hole through…
16-Feb-2011 Using a feeler to see if the door frame is well seated against the parallels. In this case, the feeler is a 6" ruler since the bronze door frame…
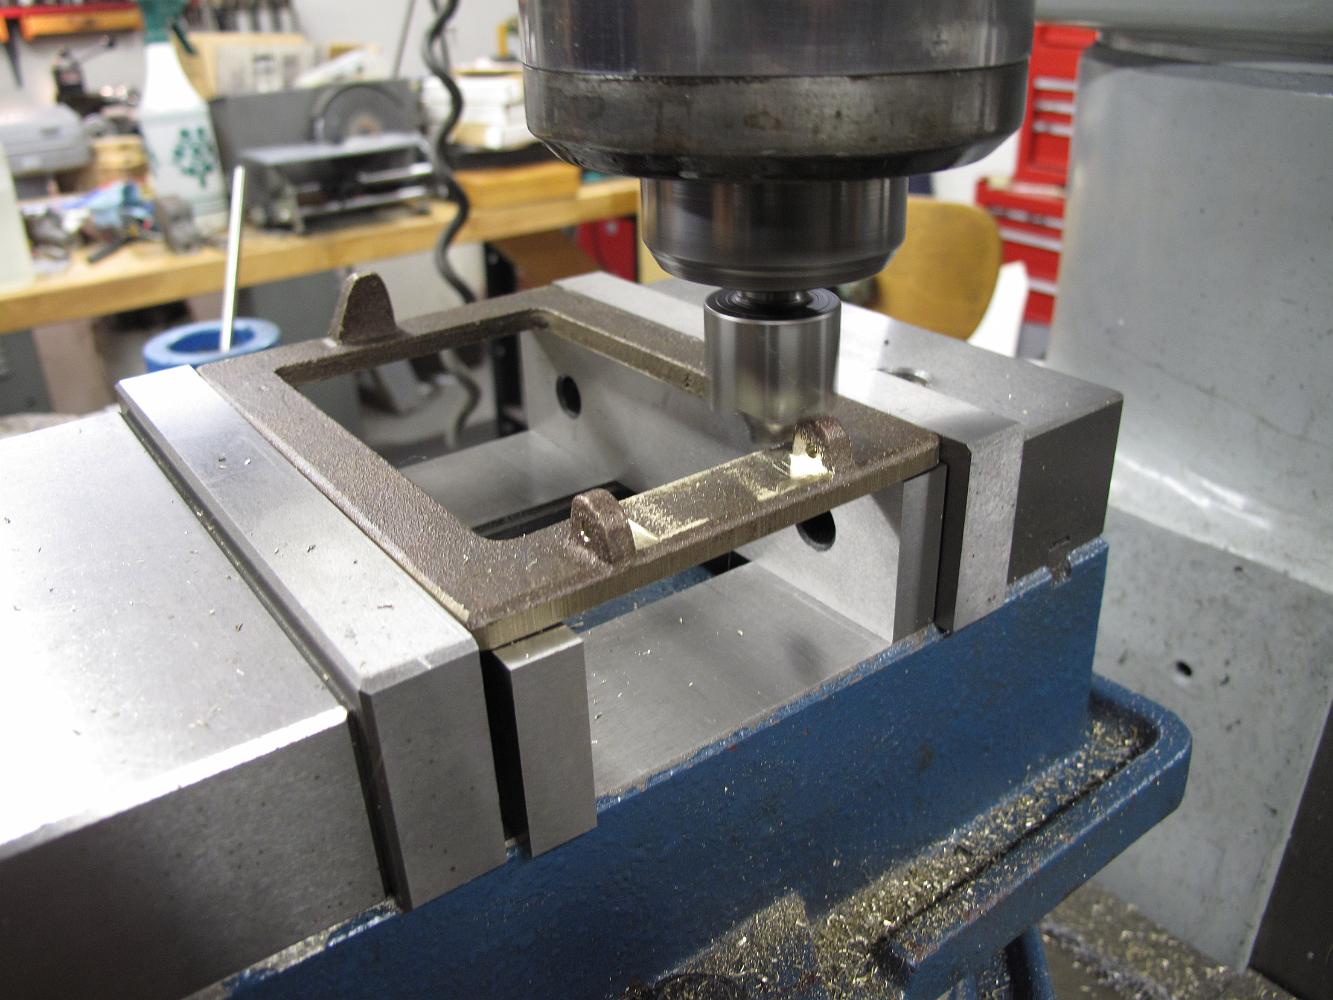
19-Feb-2011 Taking a small clean up cut on the door frame hinges. This gives a nice flat surface for the door to contact by removing the draft from the casting,…
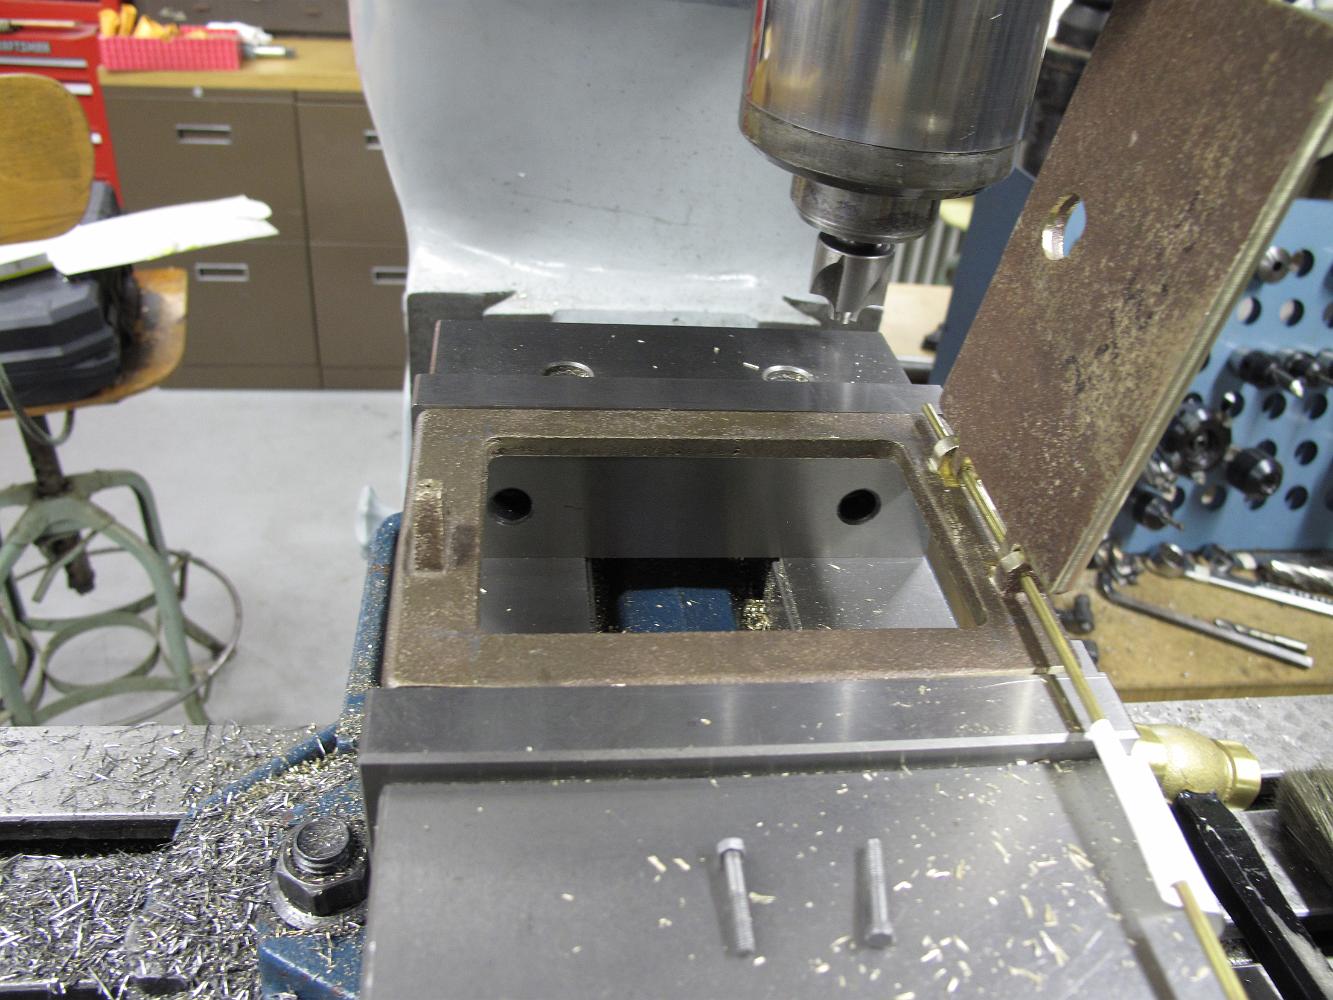
19-Feb-2011 Machining the door hinges flat to match the door frame hinge size. Also in a previous step, Bill has cleaned up the edge of the door casting with an…
Drilling the hinge pin holes. Note use of parallel in horizontal position to hold the assembly, the casting finish is too rough for the vise to solidly hold it…
Using a long aircraft drill to drill the lower hole using the upper hole as a guide. this insures the holes are in line with each other.
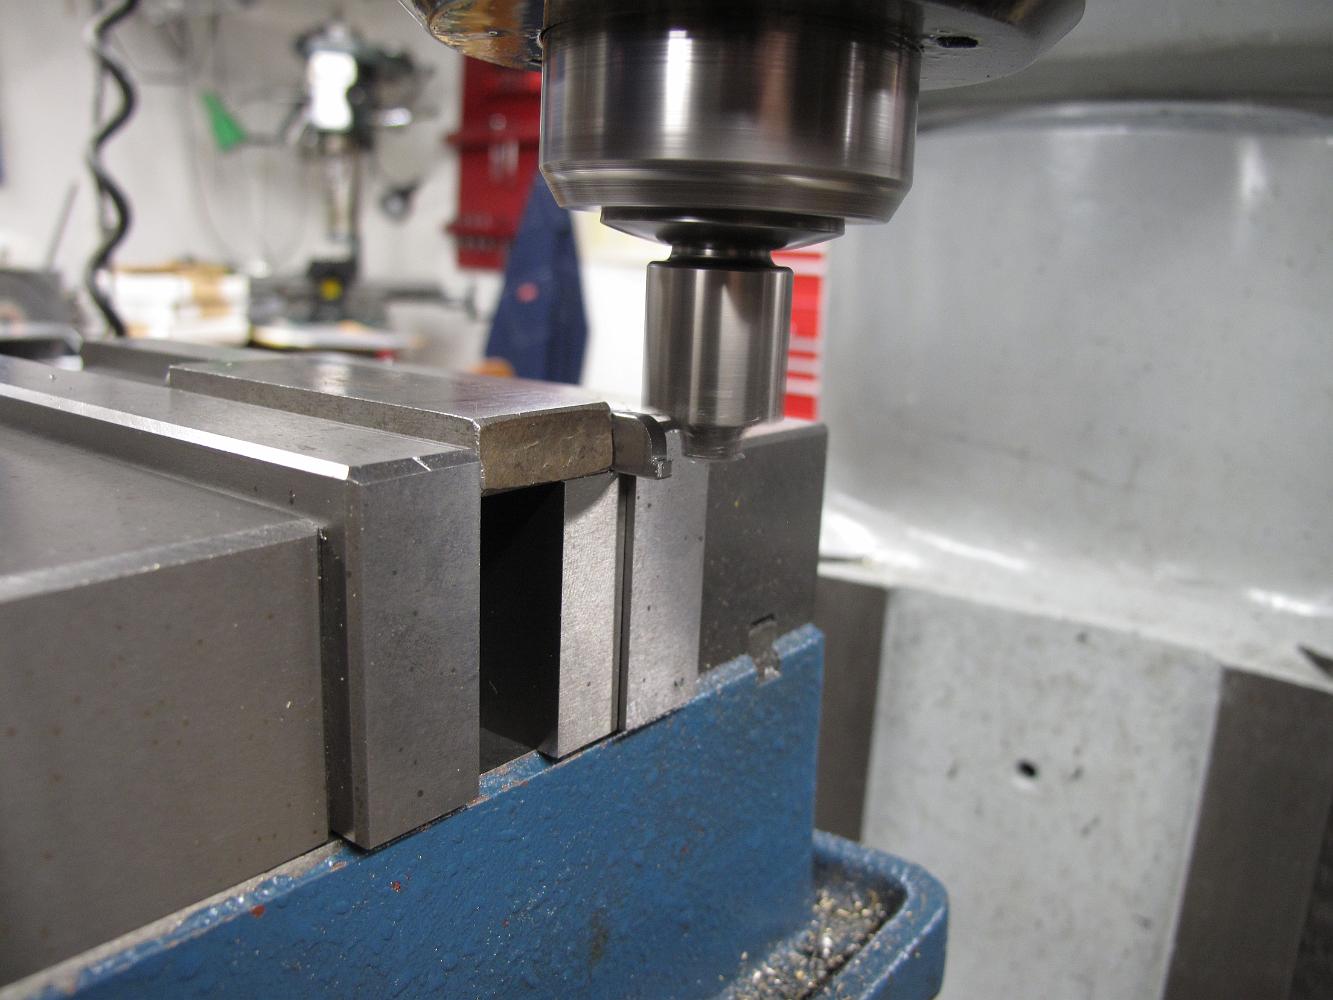
19-Feb-2011 using a slitting saw to put a concave clearance area under the door hinge location on the door frame.
19-Feb-2011 Rounding the door frame hinges to provide clearance and to center the door in the opening.
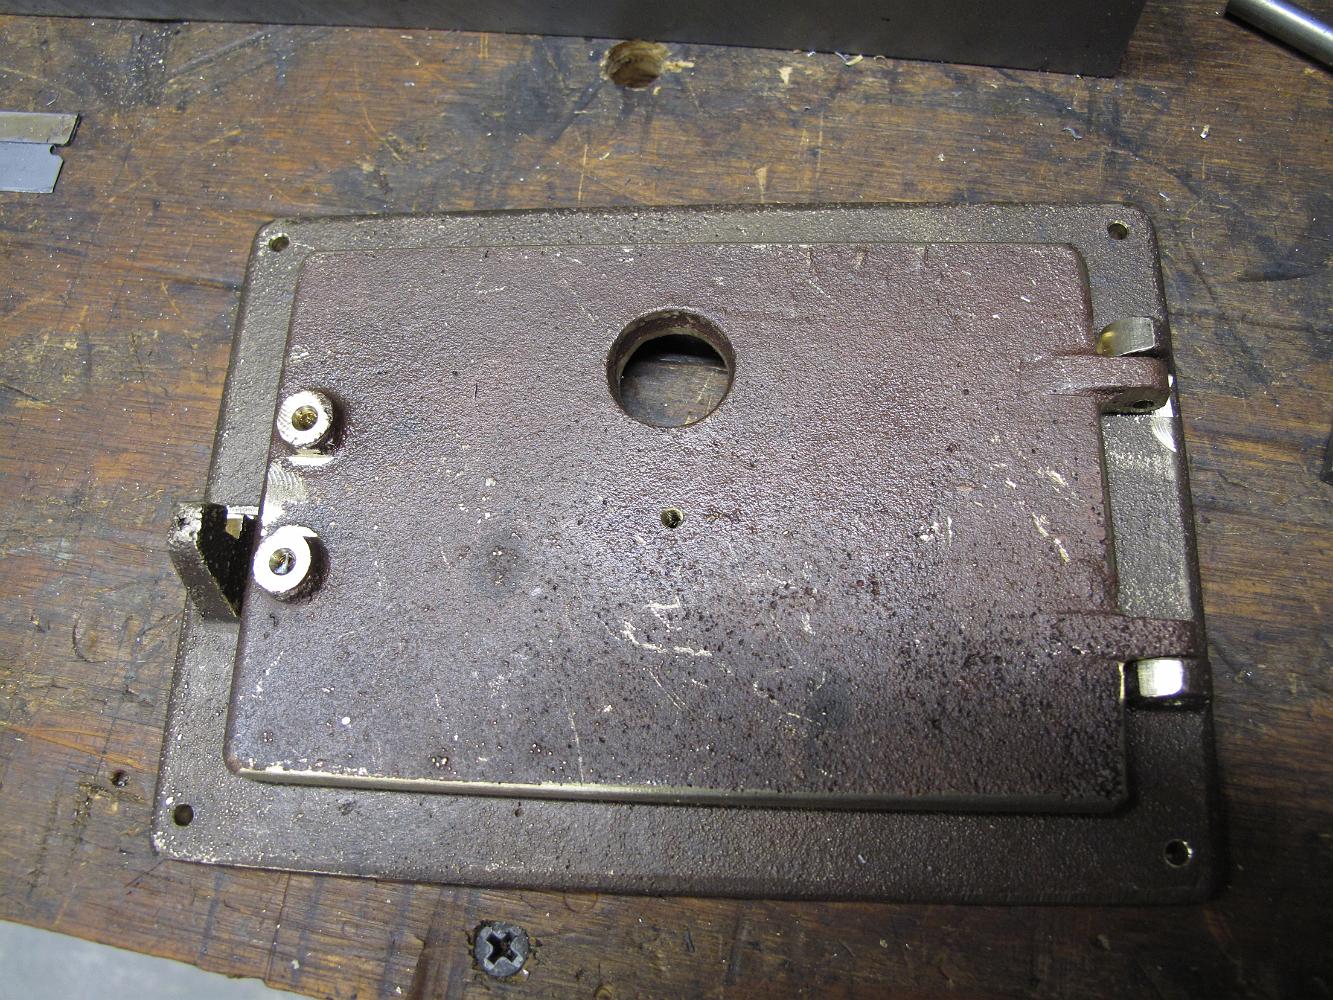
22-Feb-2011 A neat trick: to get a nice radius on the end of part, use a corner rounding bit to make one-half, then flip the part over and do the other half.
22-Feb-2011 Marking the bolt hole location for the fire door on the boiler. I'm not sure how we are going to accurately drill and tap these 5-40 bolt holes only…
2-Feb-2011 Back to the turret manifold. The large fixed jaw face is installed on the vice again and the radius block use to bend the tumbling shaft is put to…
The bending is not quite even across the whole bar, we work on moving the to round bars out some more.
2-Mar-2011 After much discussion about dual burners, inside mixing burners and the Bagely burner (which I was partial to) we decide to build a slot style…
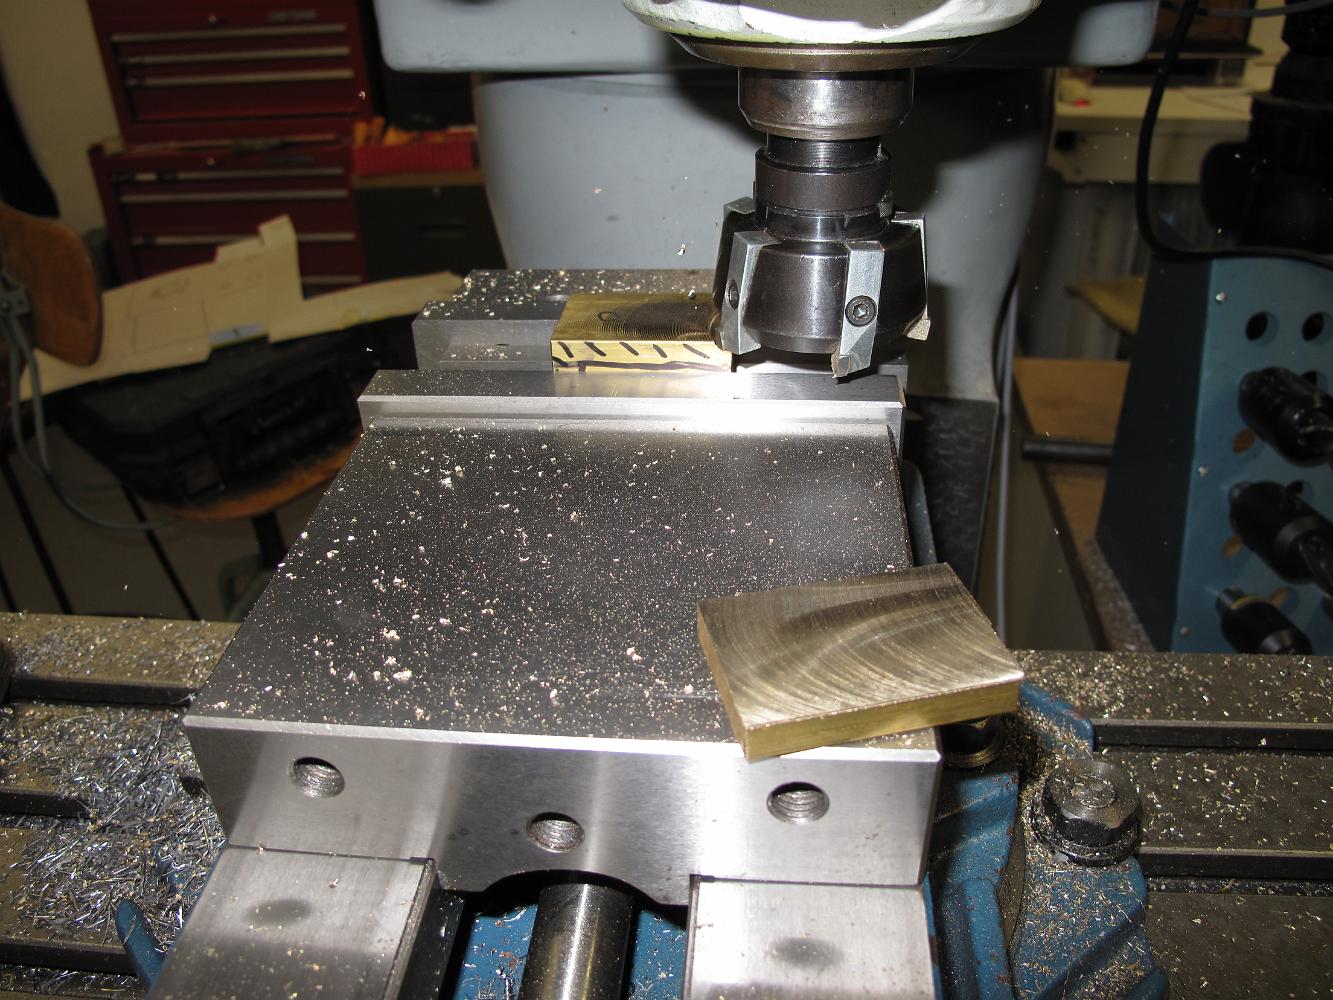
I cut two slices of bar stock leftover from the water pump in the bandsaw, Bill uses the flycutter to clean them up.
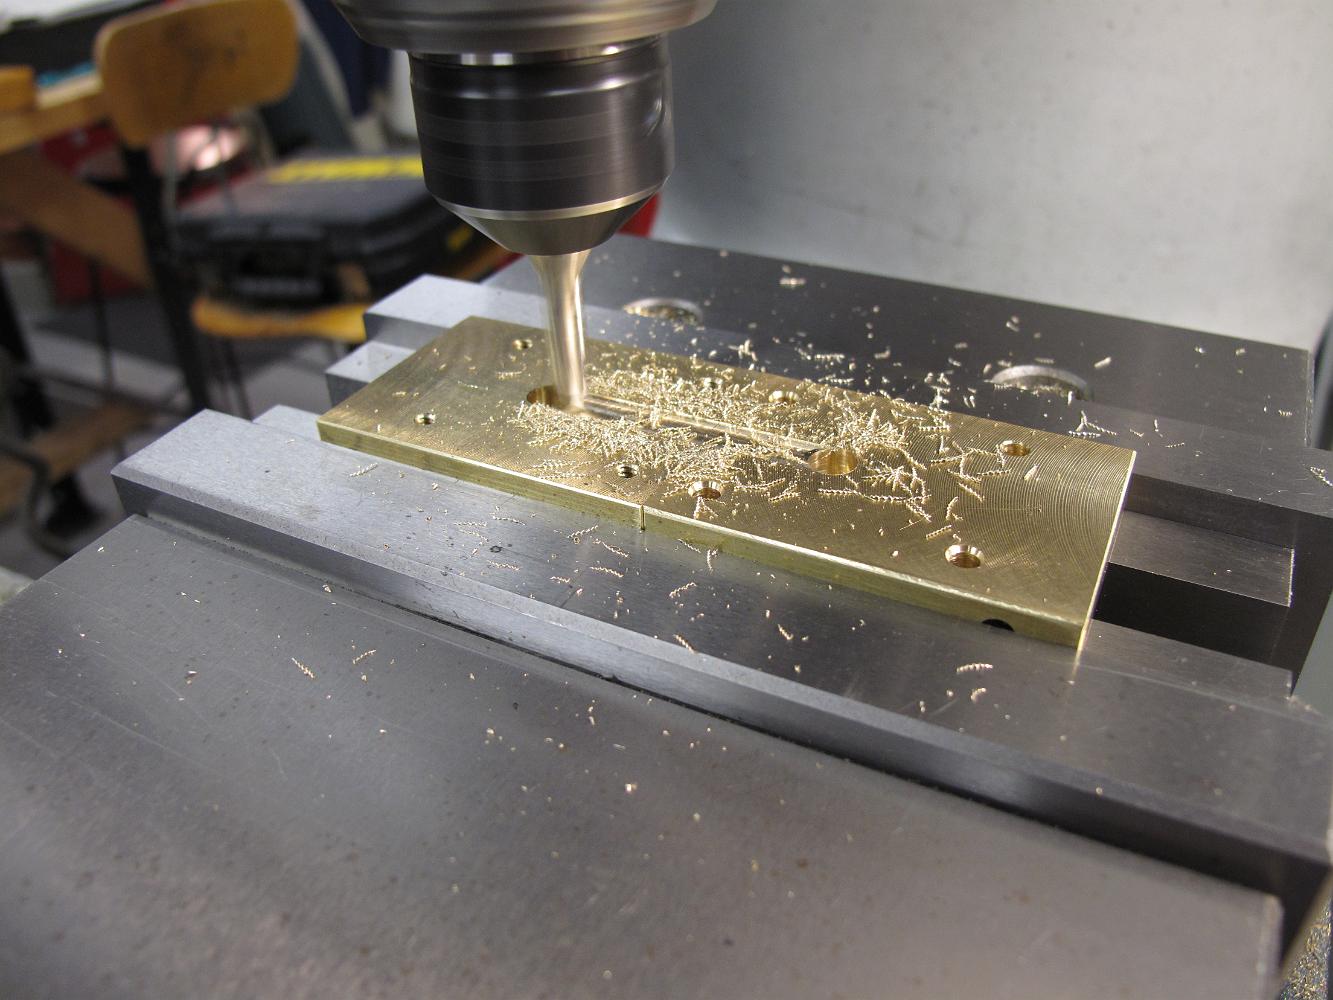
5-Mar-2011 We use a 1/4" endmill to mill the steam and oil slots in both block simultaneously. The blocks are extra long so we can machine them to identical…
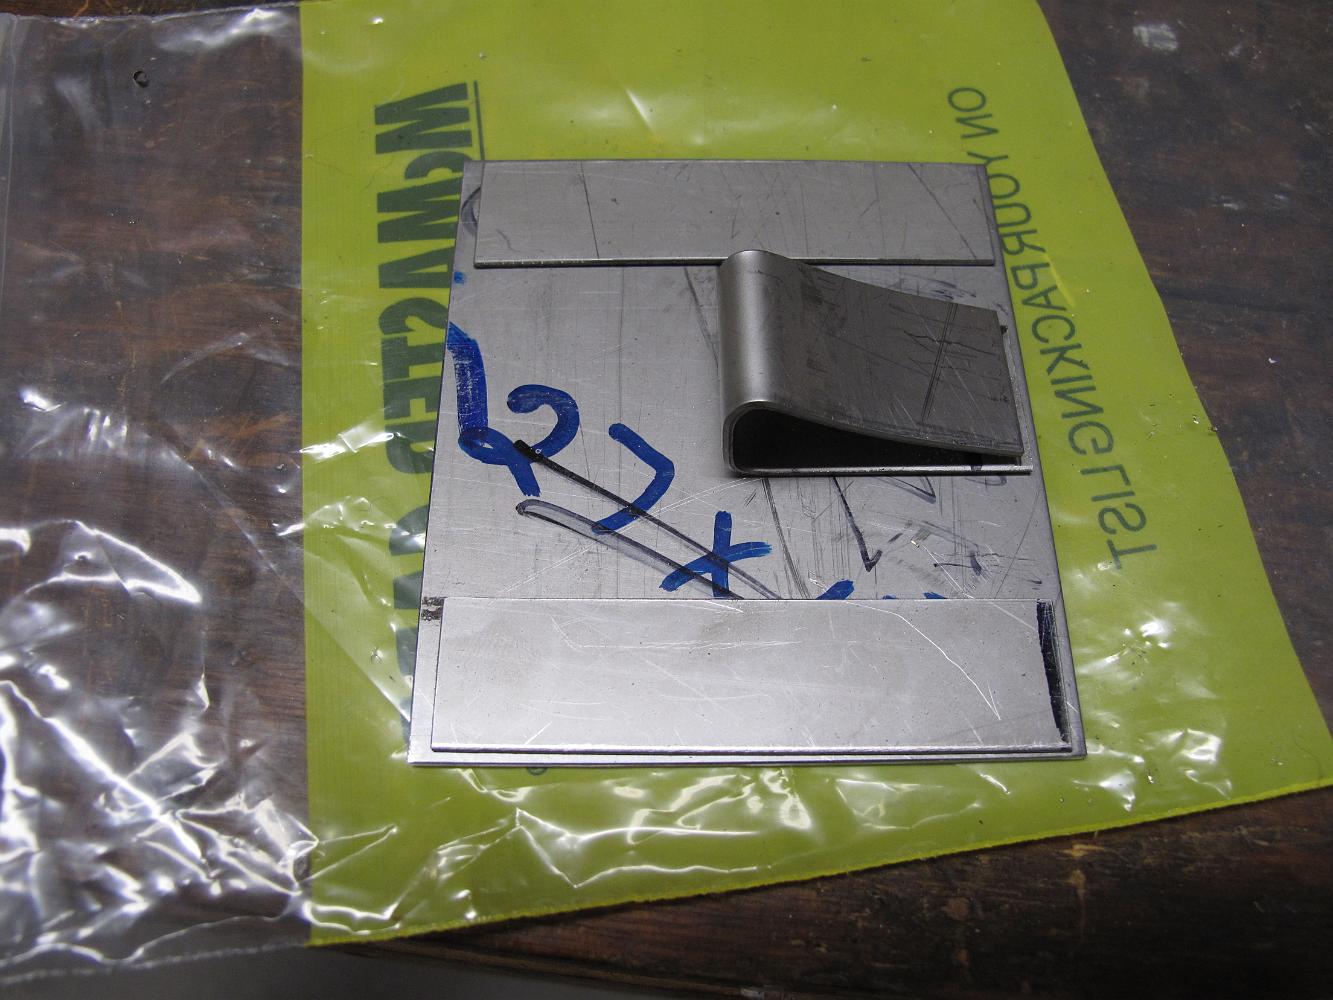
5-Mar-2011 Milling a step int he burner to reduce its size in the firepan opening, we've also beveled the corners and machined the end faces together.
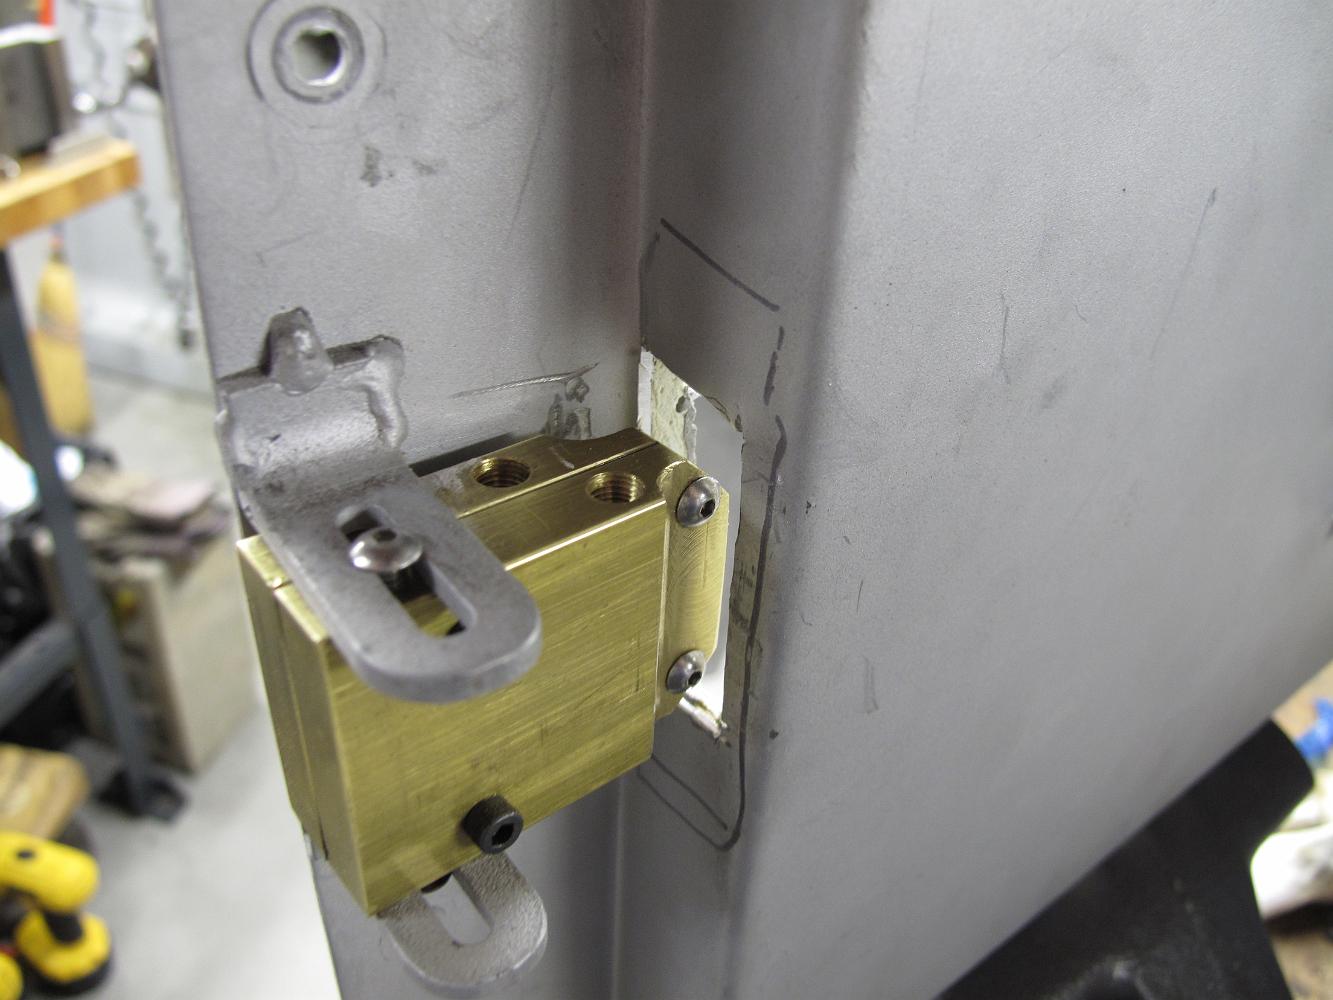
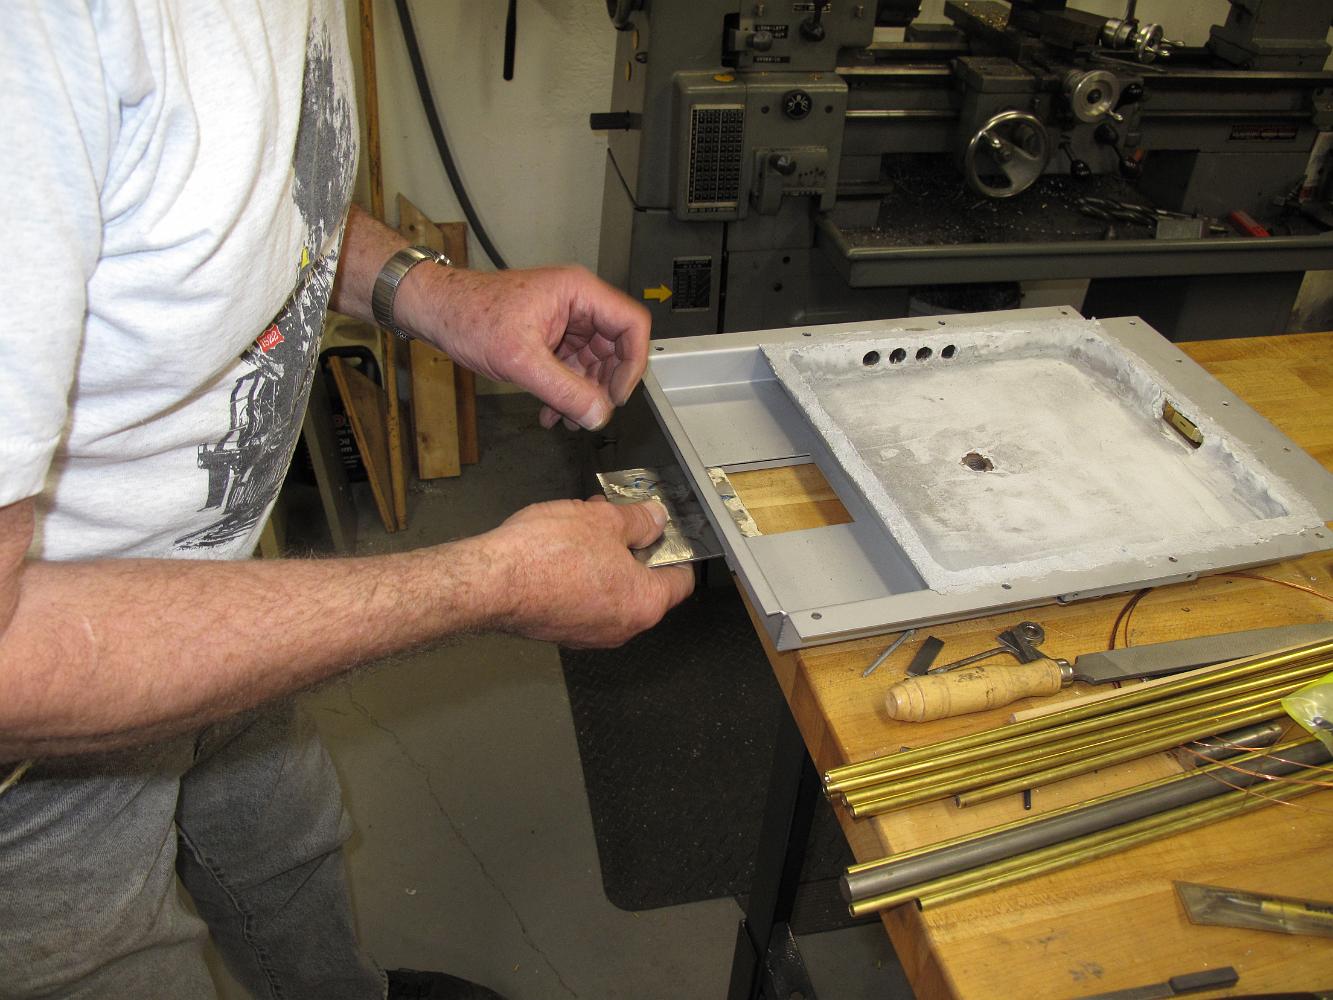
5-Mar-2011 I have the idea to weld a frame on to the boiler which is already drilled and taped for the firedoor to mount to. Here I've tack welded the pieces to…
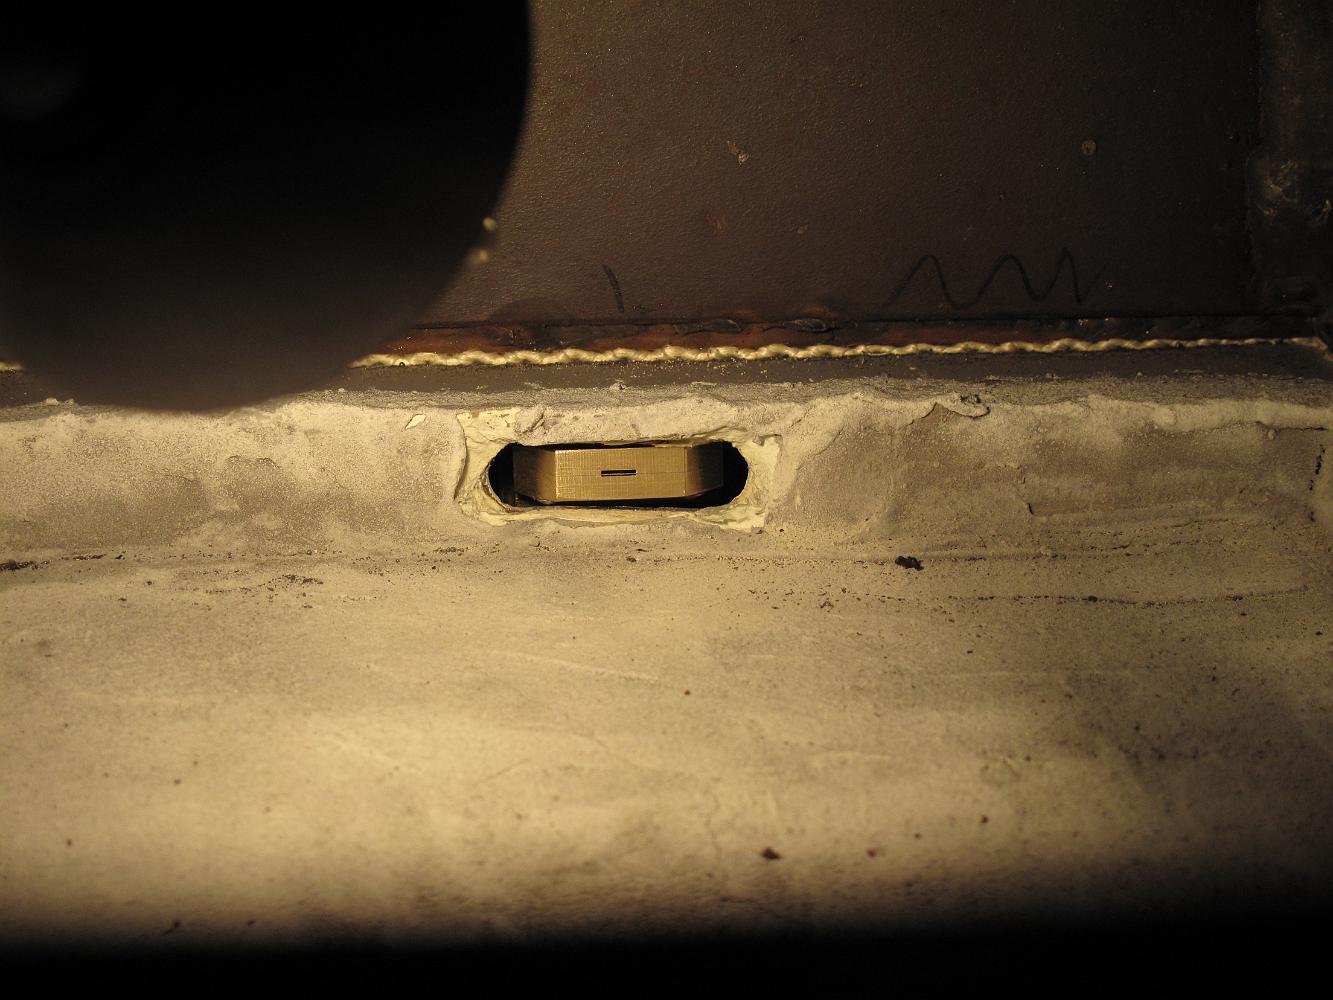
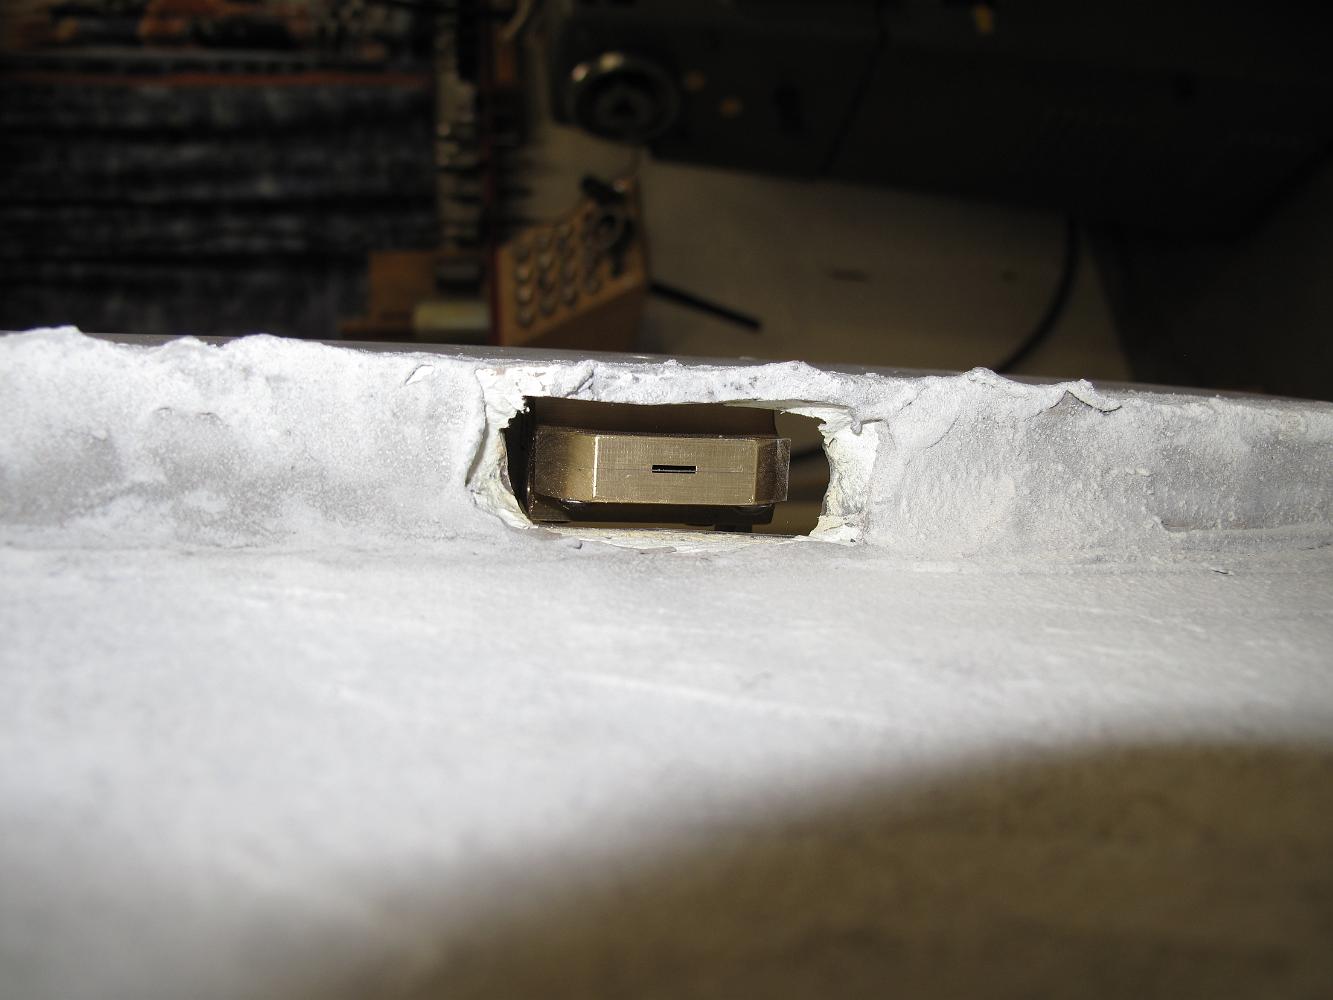
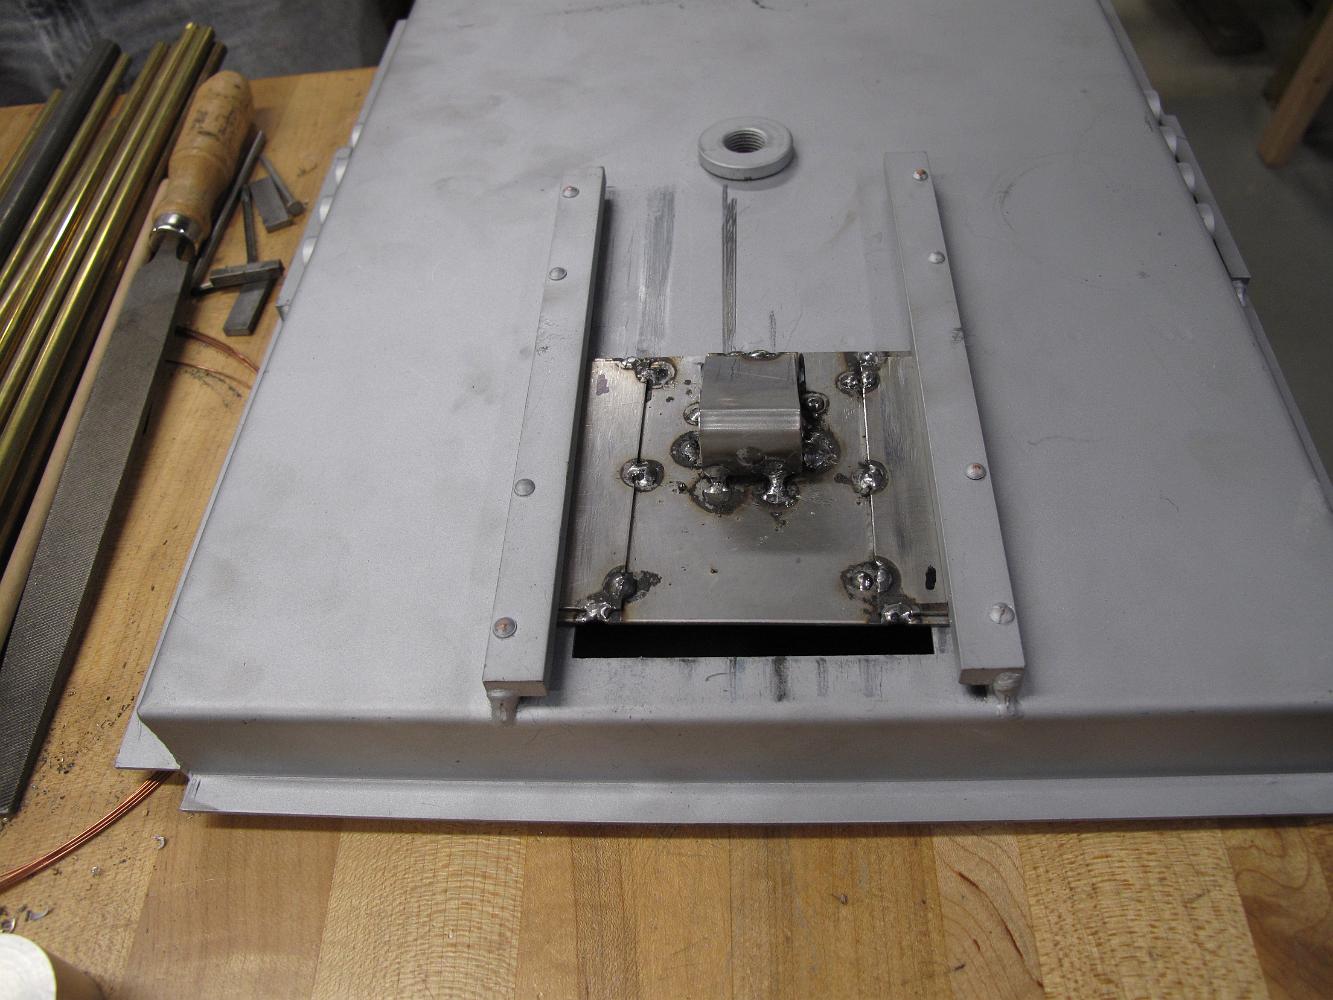
5-Mar-2011 I have to take the firepan down once again to enlarge the burner opening. After this is done, here's how it looks with the burner installed.
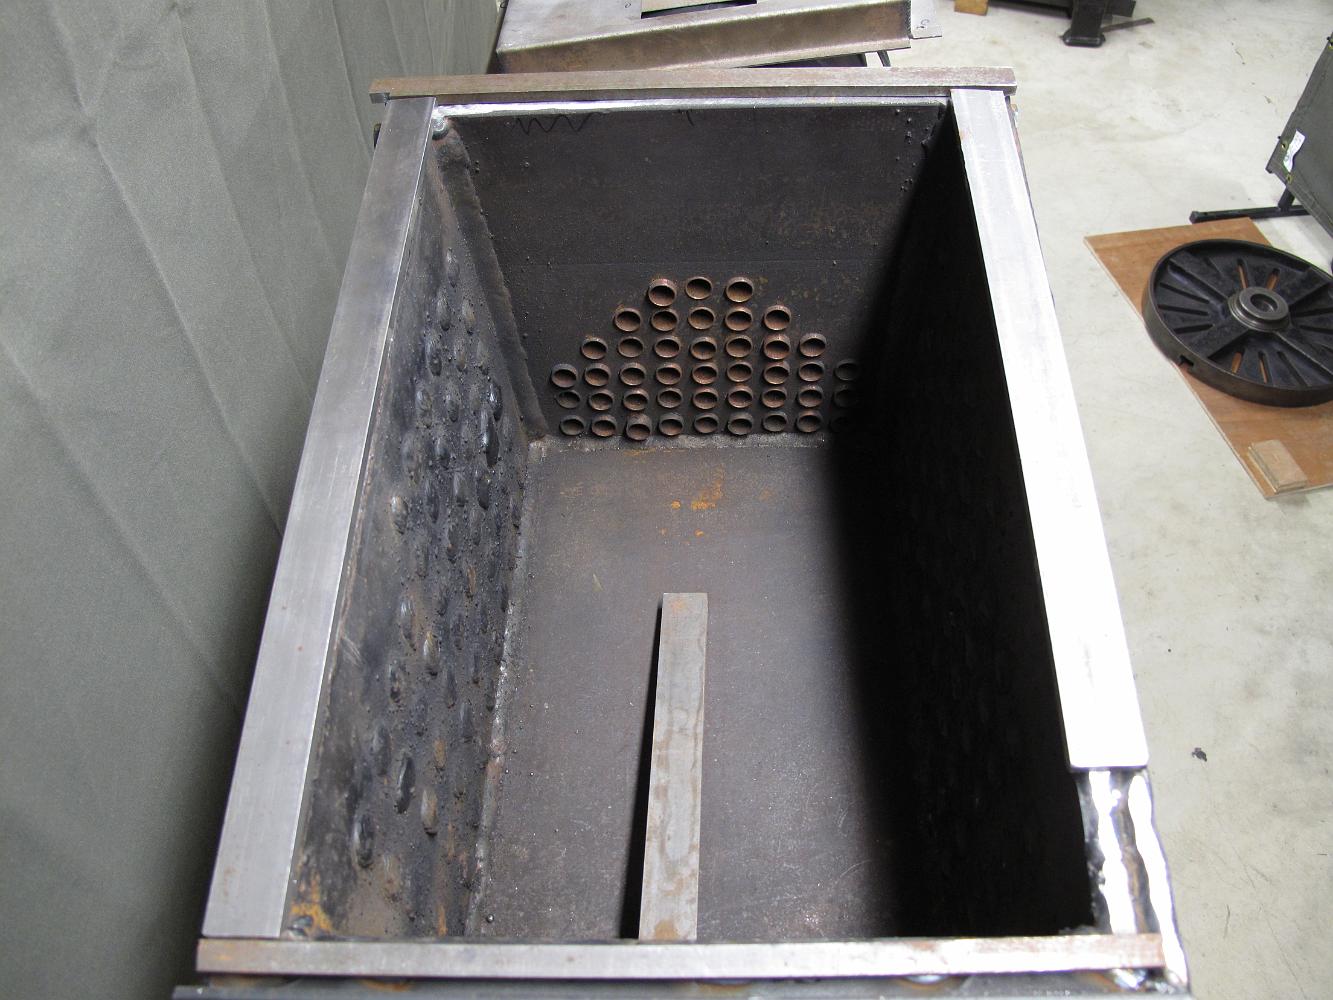
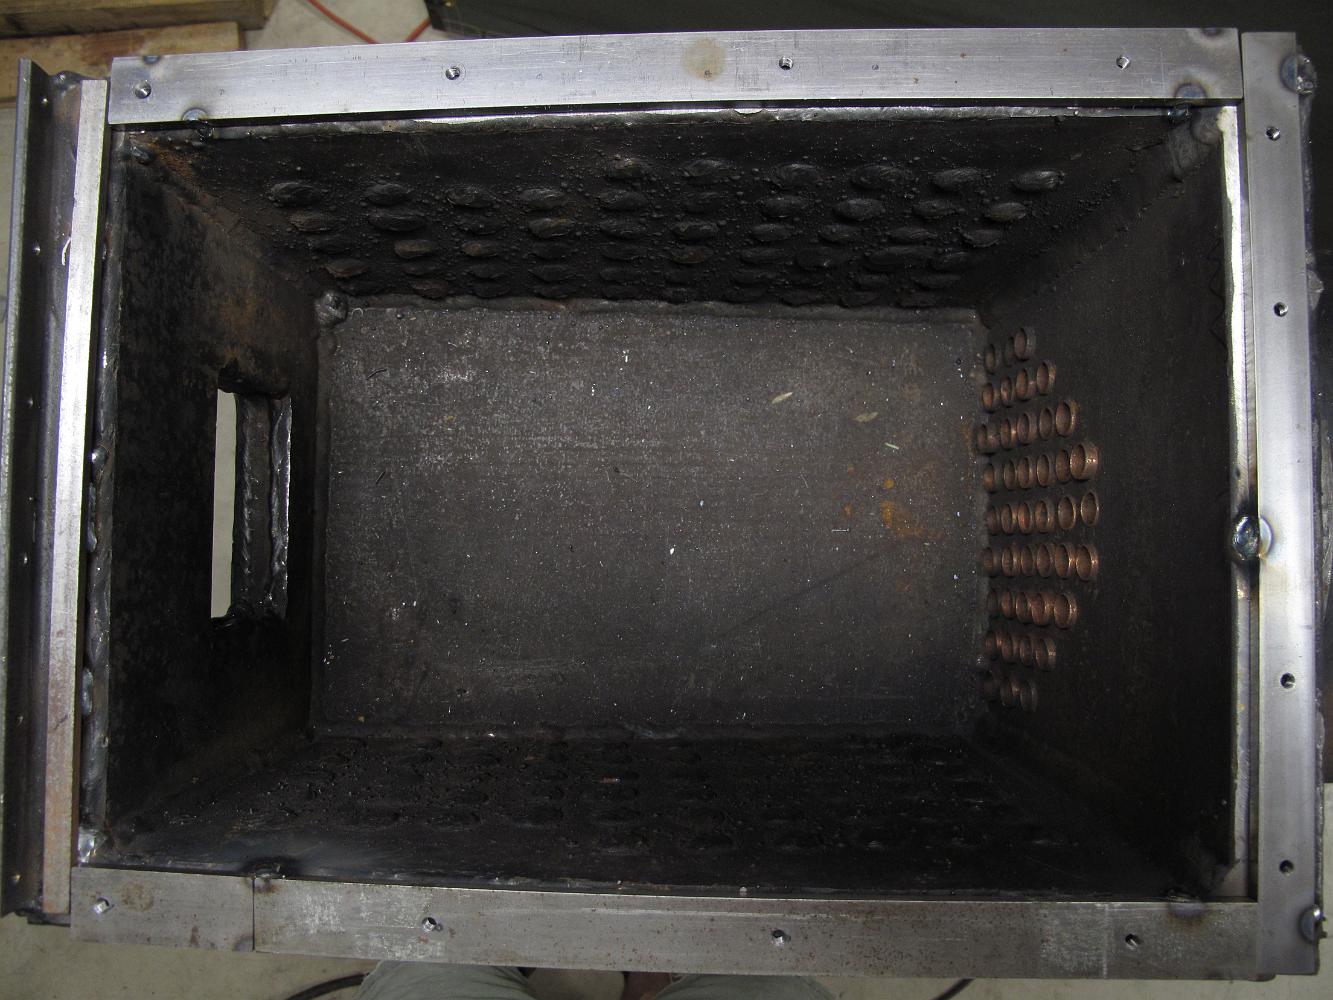
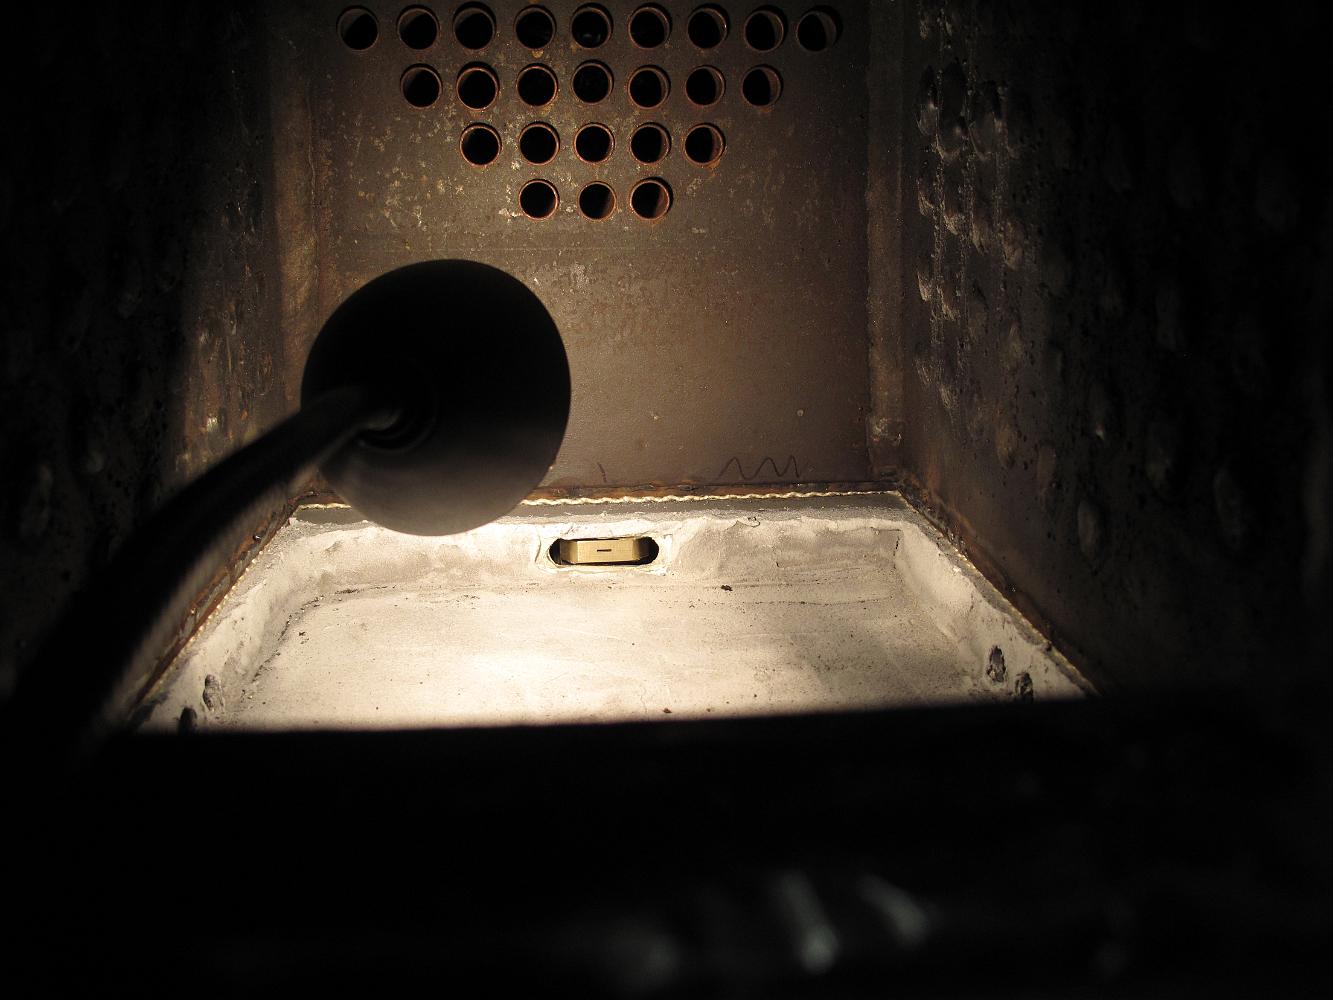
5-Mar-2011 Firebox interior showing burner assembly installed in firepan. We think the primary air should be drawing in around the burner, which keeps the…
9-Mar-2011 We begin work on the damper. We use stainless steel and have gone off print a bit, using thinner .062 thick pieces. We also don't like the 10-32…
23-Mar-2011 The damper door assembled. When you weld thin metal like this, it really move around. It warped at the edges which caused binding. we straightened…
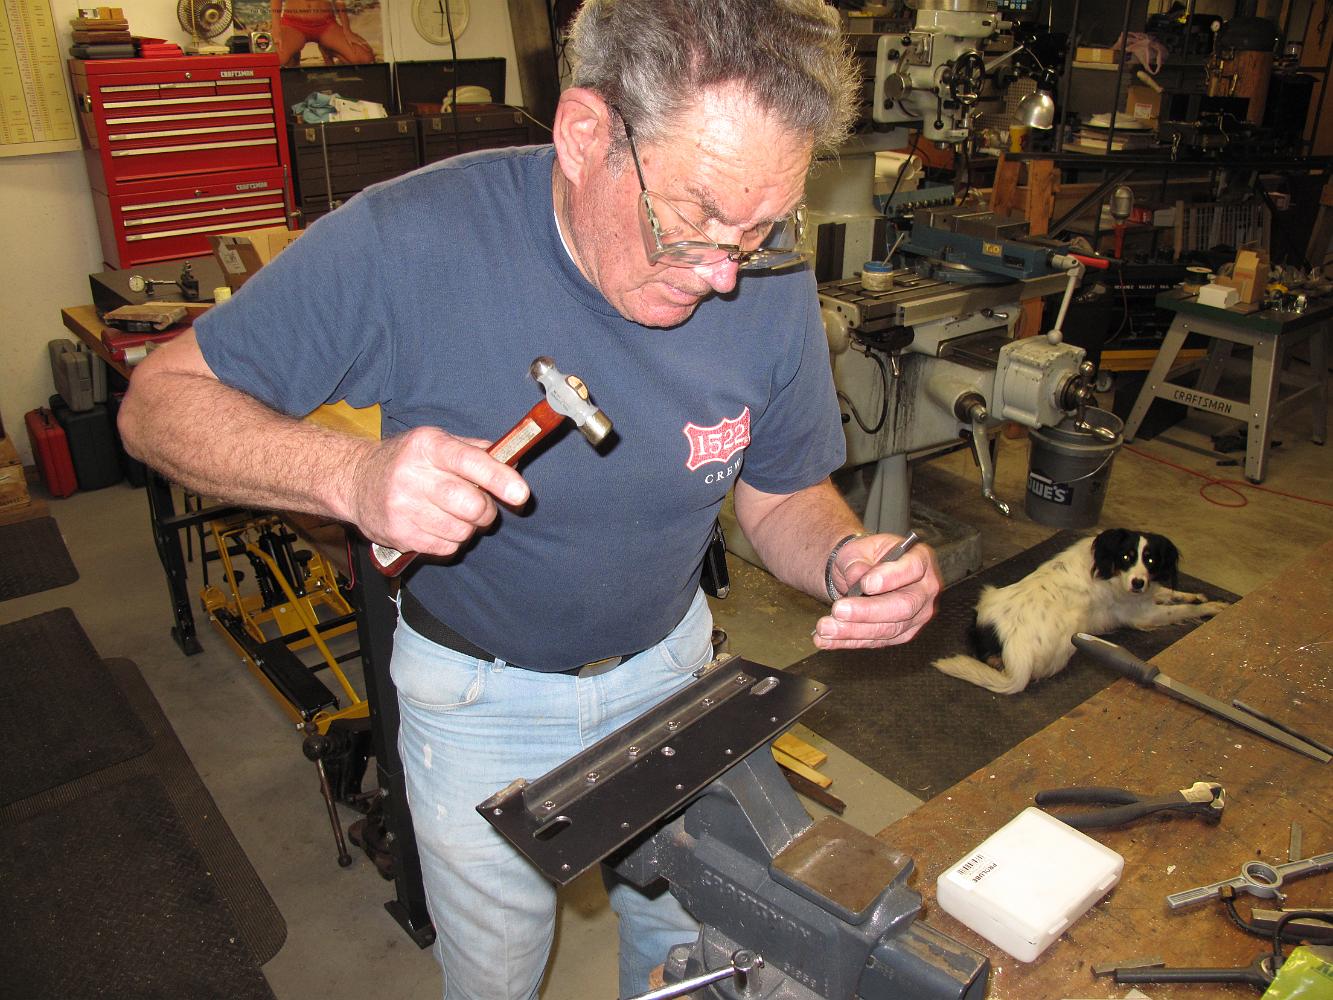
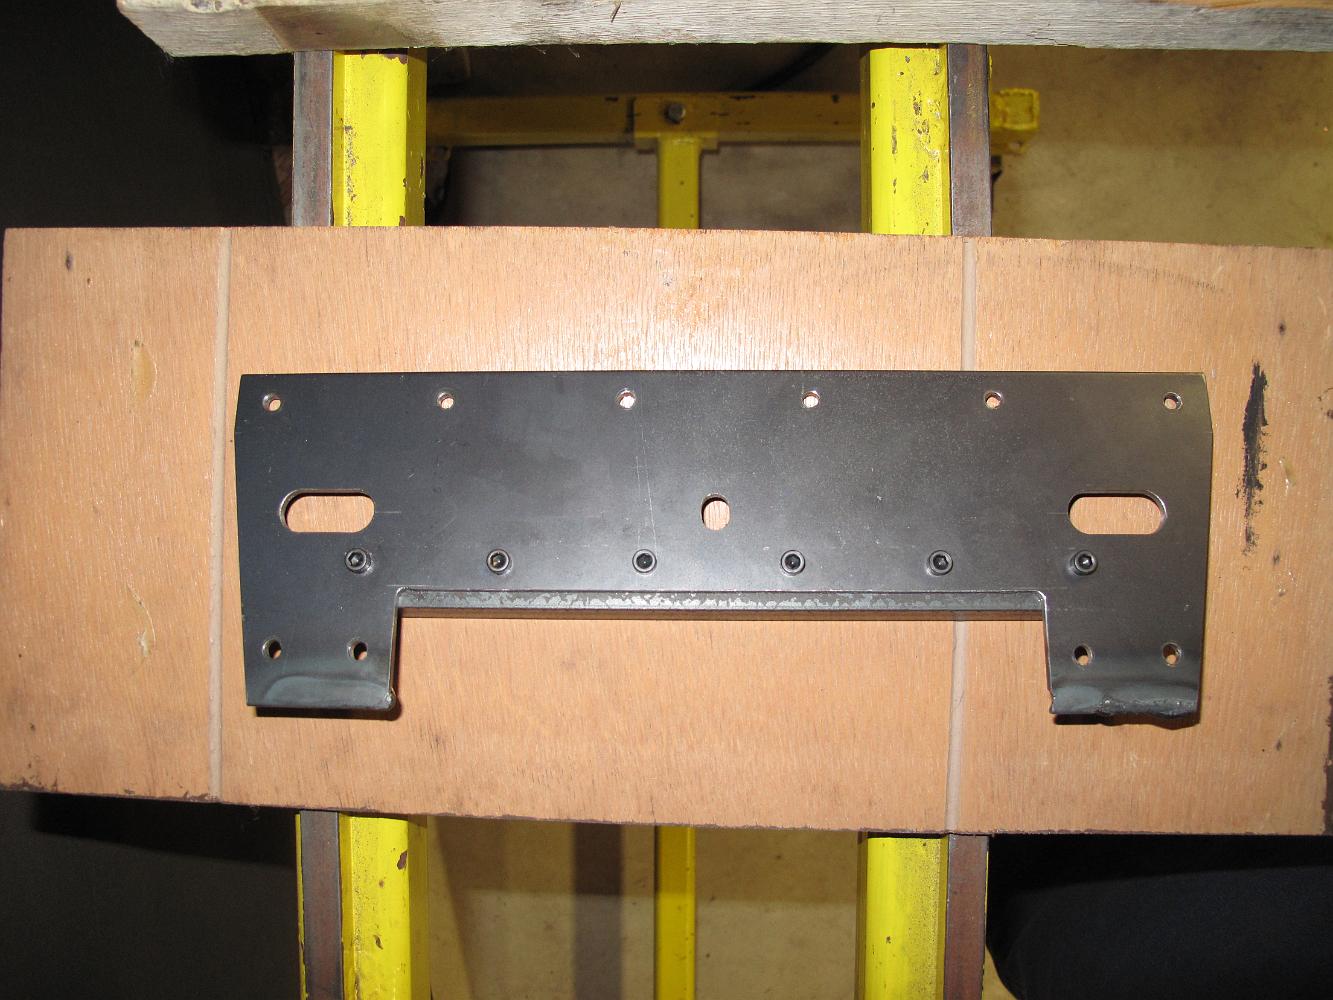
26-Mar-2011 Bill peens over the bolts of the boiler support bracket to make sure they do not come loose.
26-Mar-2011 We have machined a hole for the damper door rod which is not on the prints and cut a couple slots for piping, which also is not on the print.
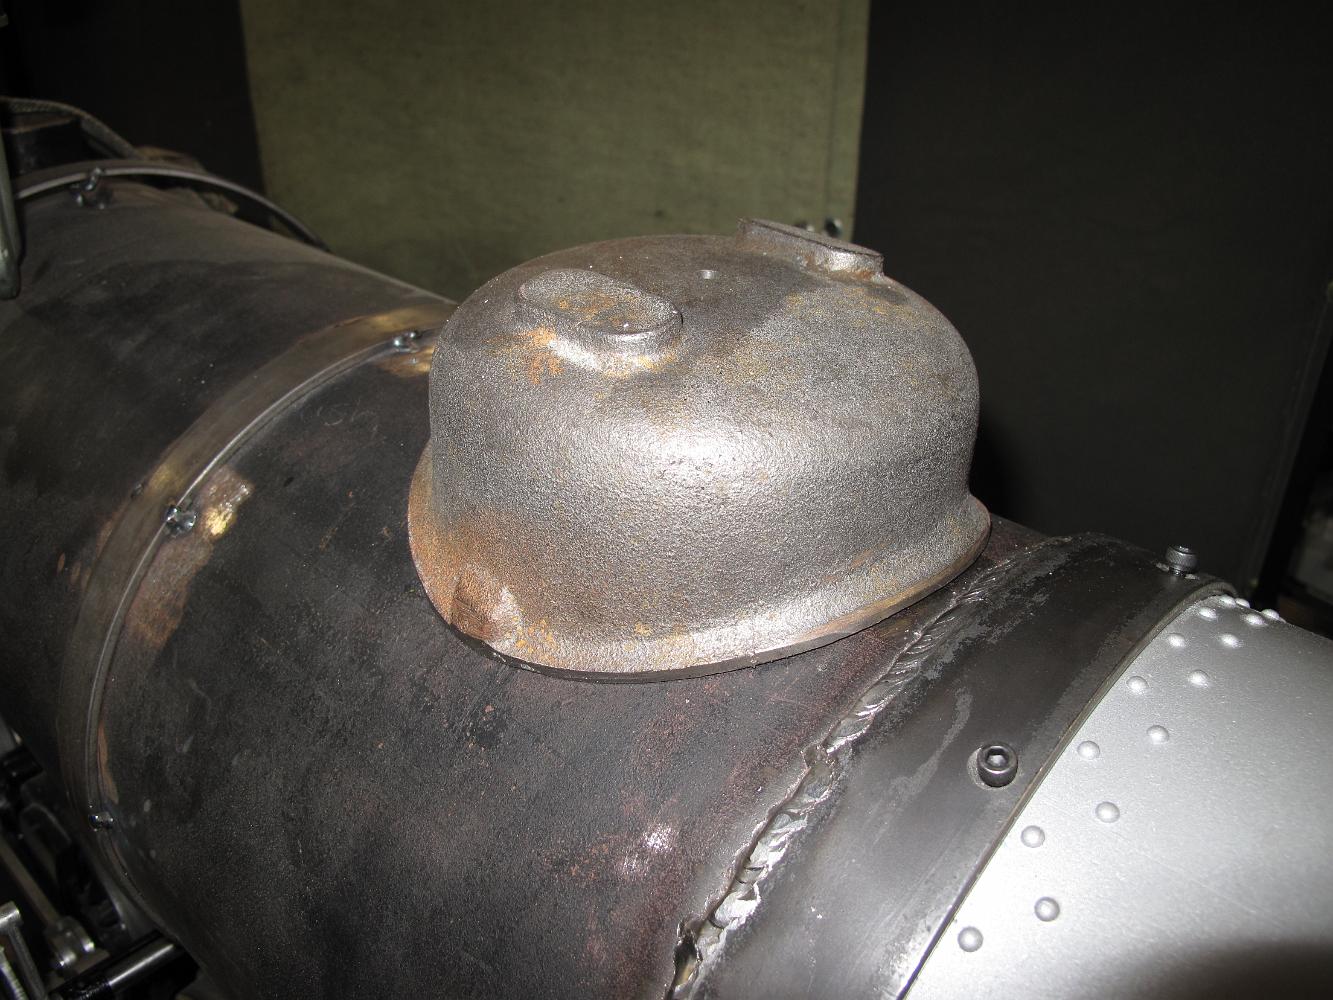
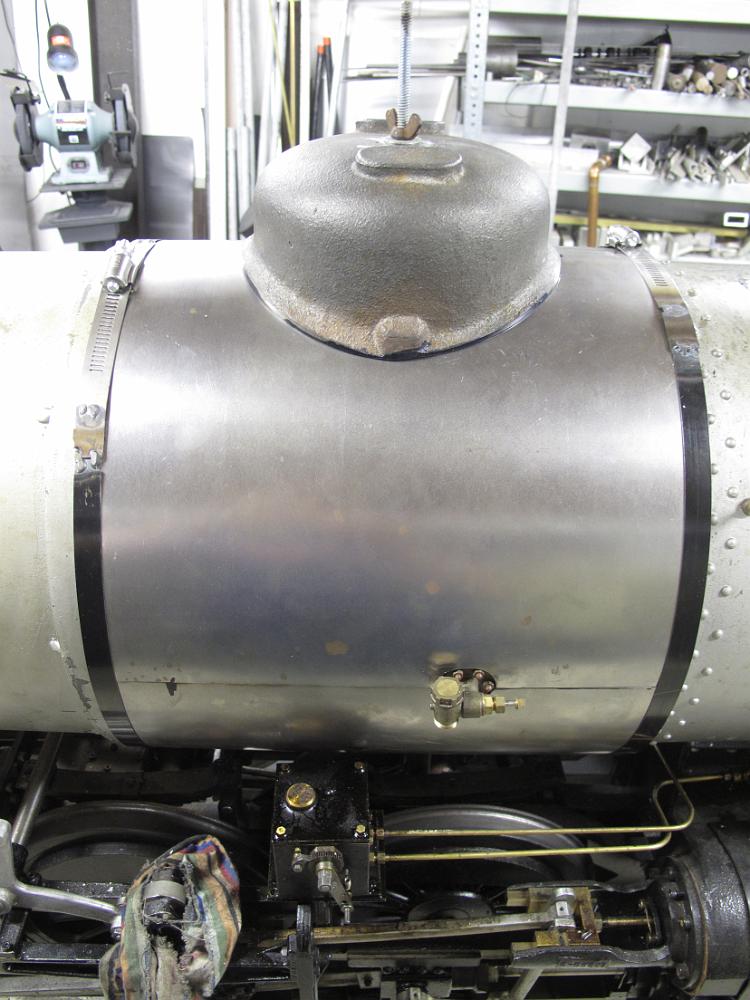
20-Apr-11 Check out the New old stock Mercer steam dome I just picked up! Much closer to the Frisco design than the big USRA one!
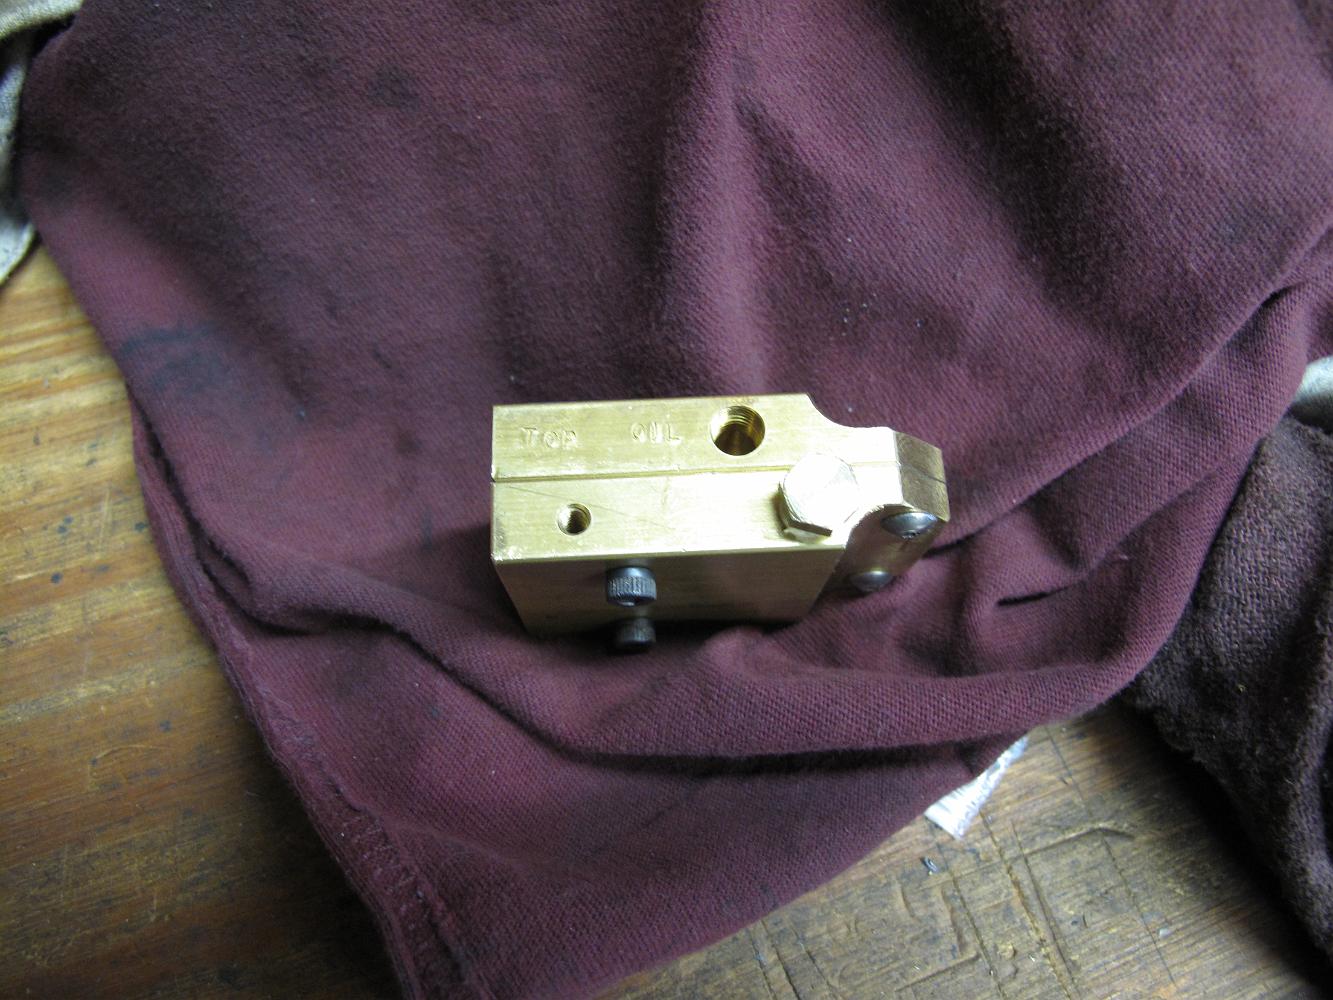
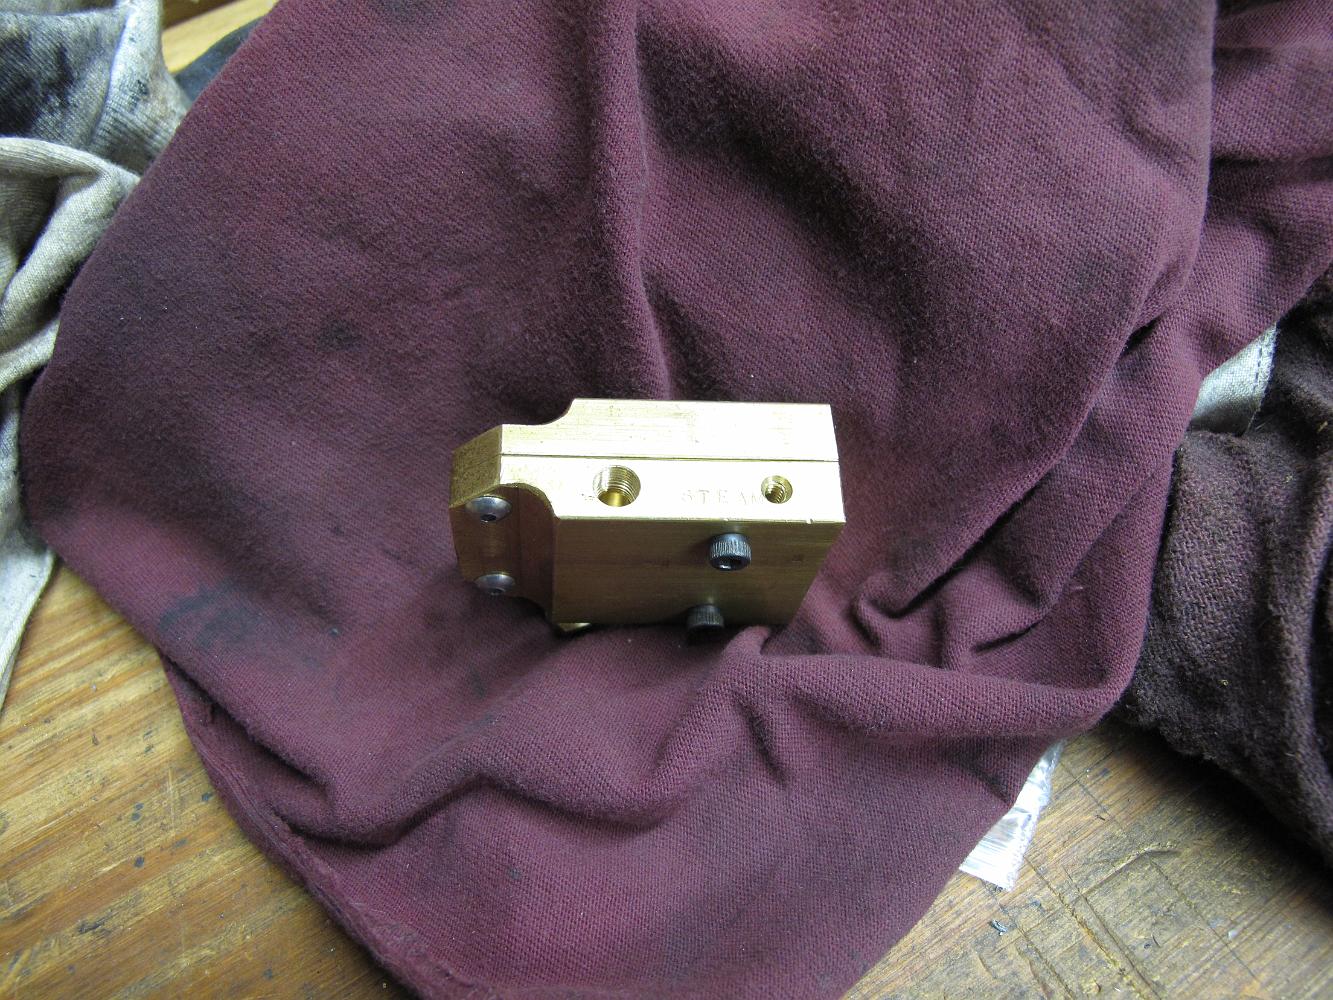
This slot style burner is made of two plates of brass bolted together. it has two 1/4" wide slots, steam on the bottom, oil on the top. The steam slot is 0.010…
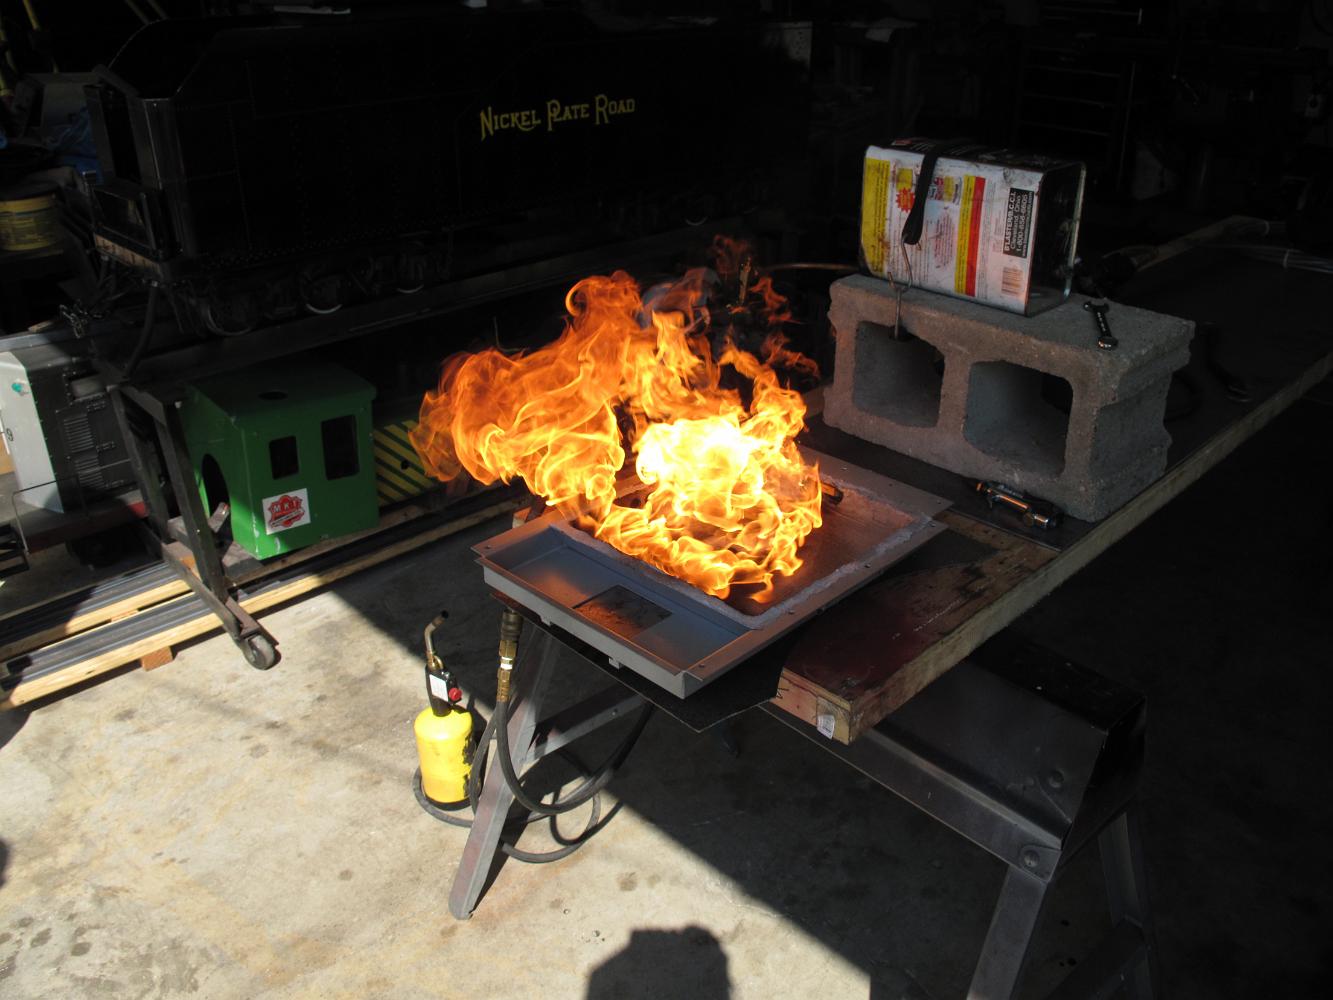
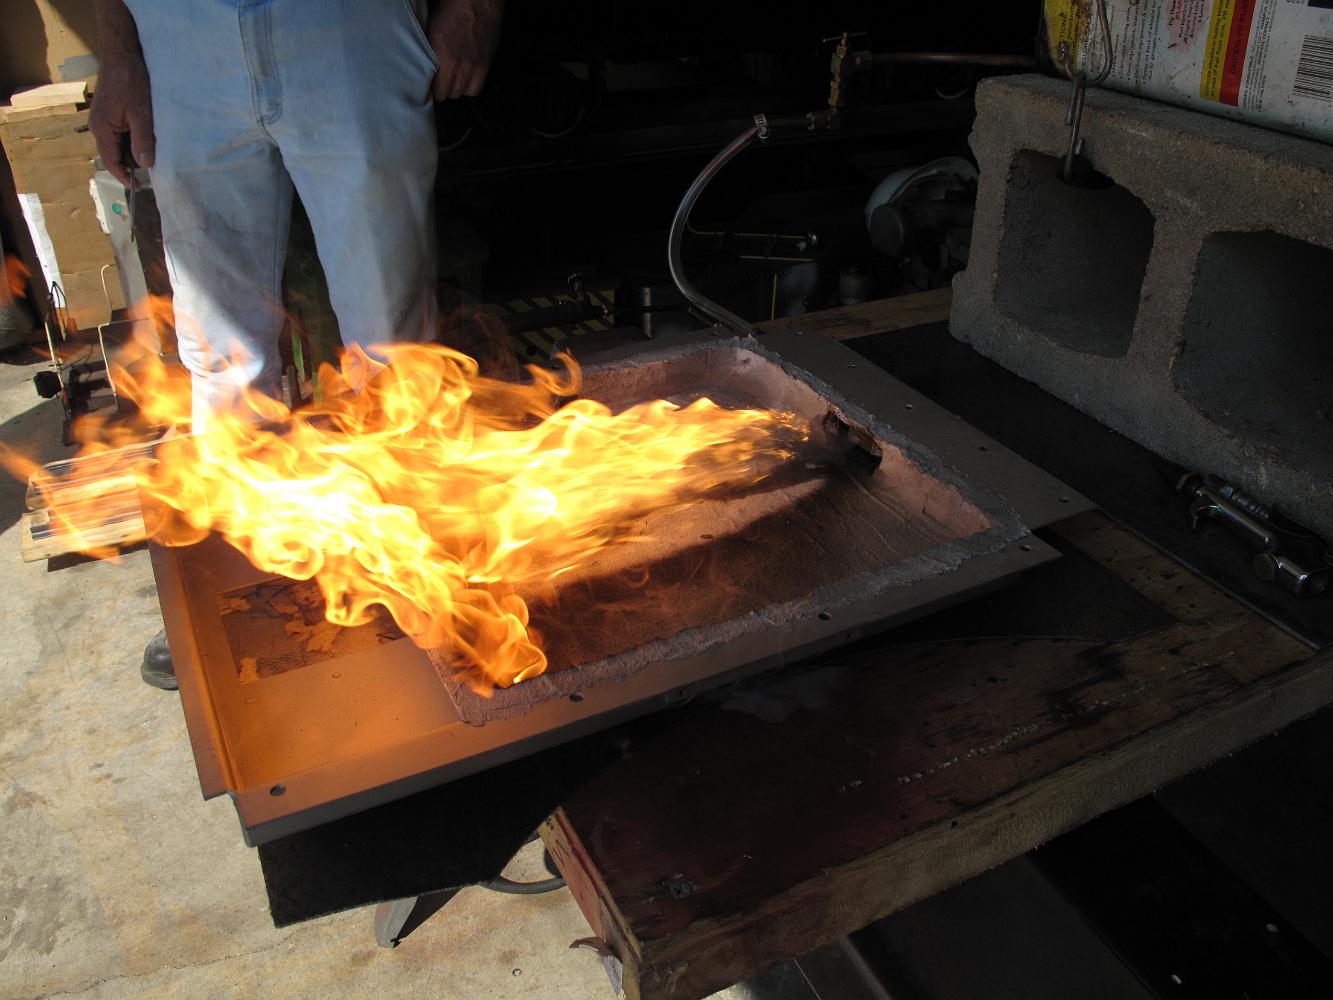
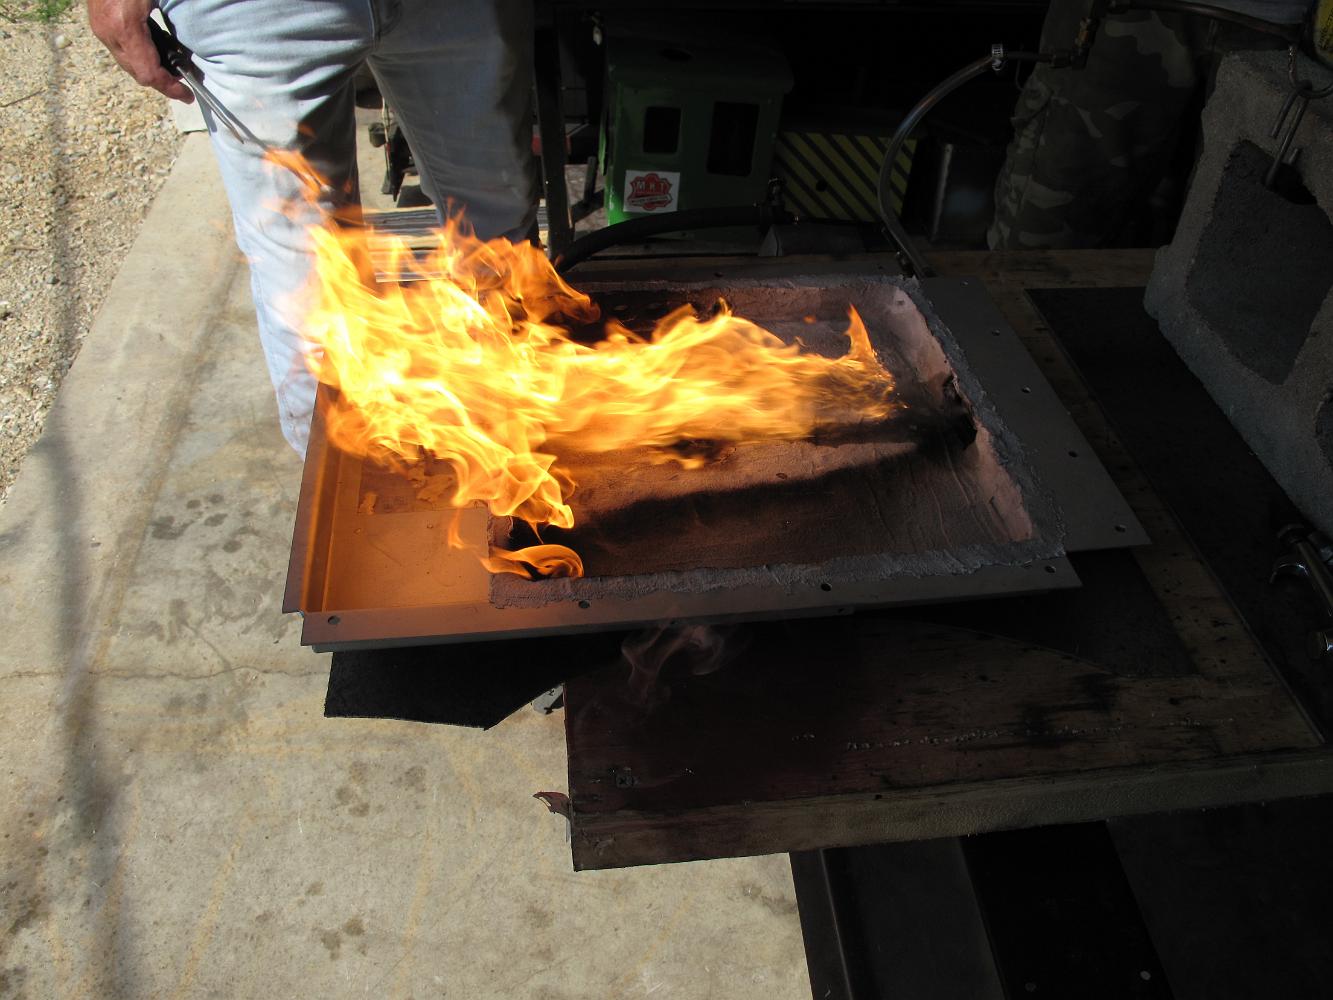
9-July-2011 Test firing the slot-style burner in open air with diesel fuel. After adjusting the burner to point upwards more, we were able to get a satisfying…
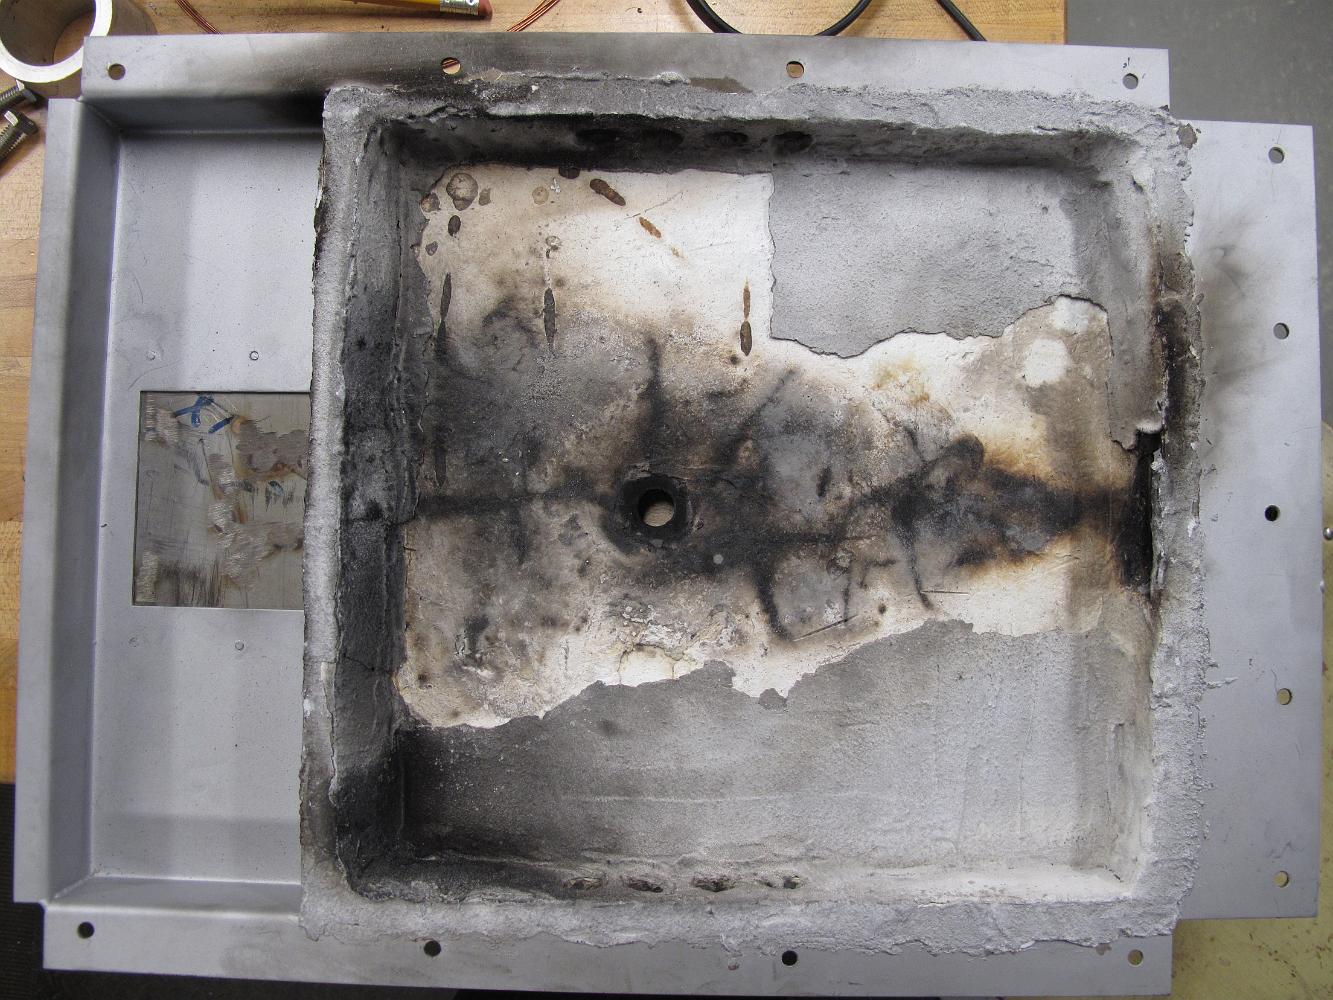
20-Aug-2011 The after-effects of the burner test. The use of mortar grout as a protective skin over the softer high temperature insulating cement was a failure.…
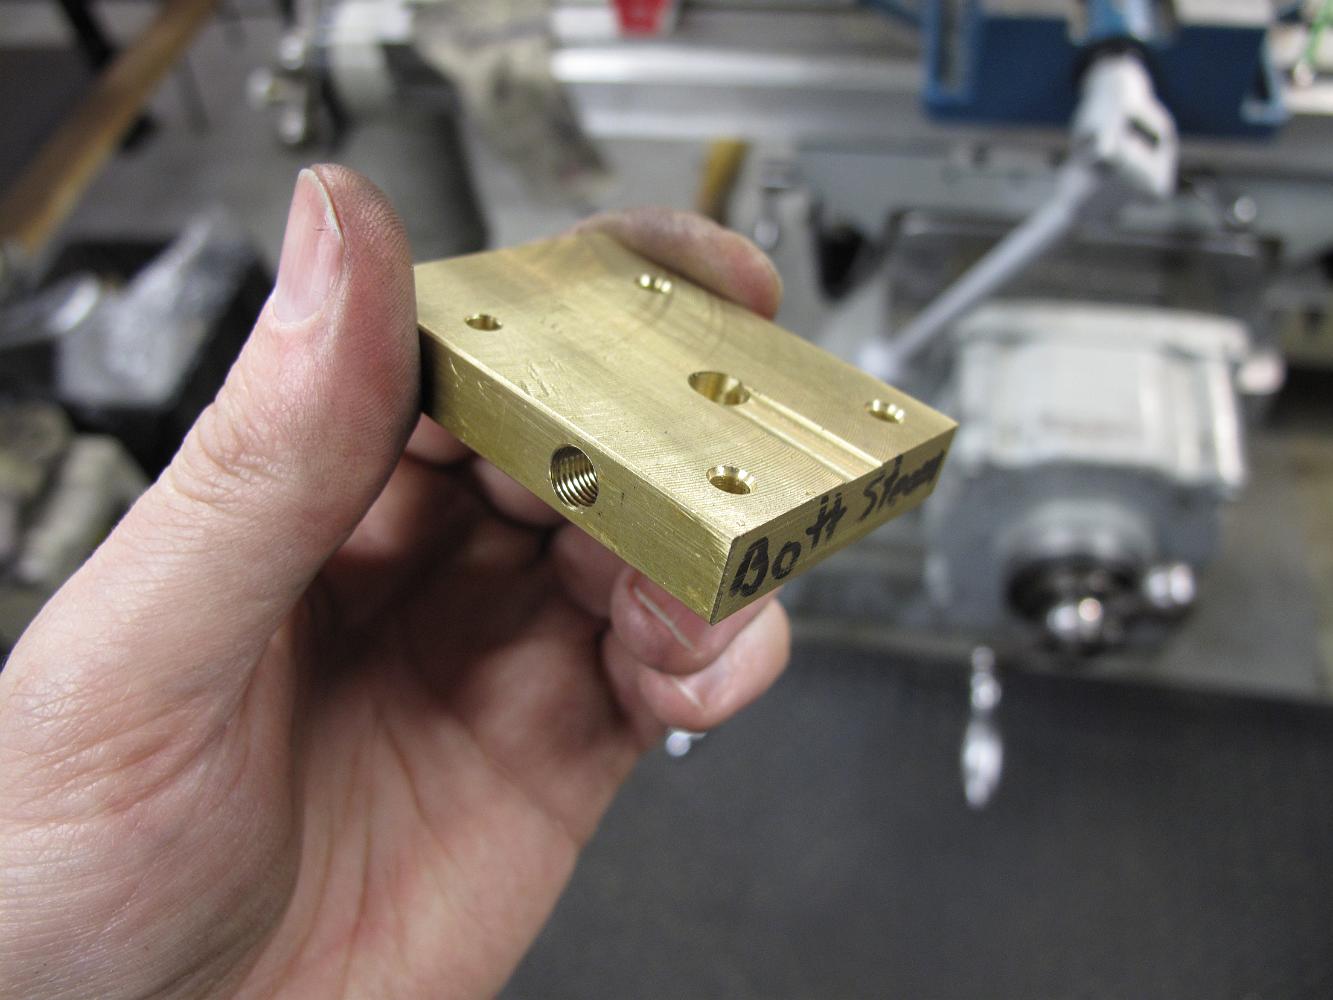
5-Sept-2011 Cleaned up Backhead manifold after silver soldering on some firebricks. I held the Mapp gas torch to the brass bar stock, Bill held the propane…
5-sept-2011 Manifold in the vise, laying out the valve spacing. We decide on 1-1/4" spacing between centers.
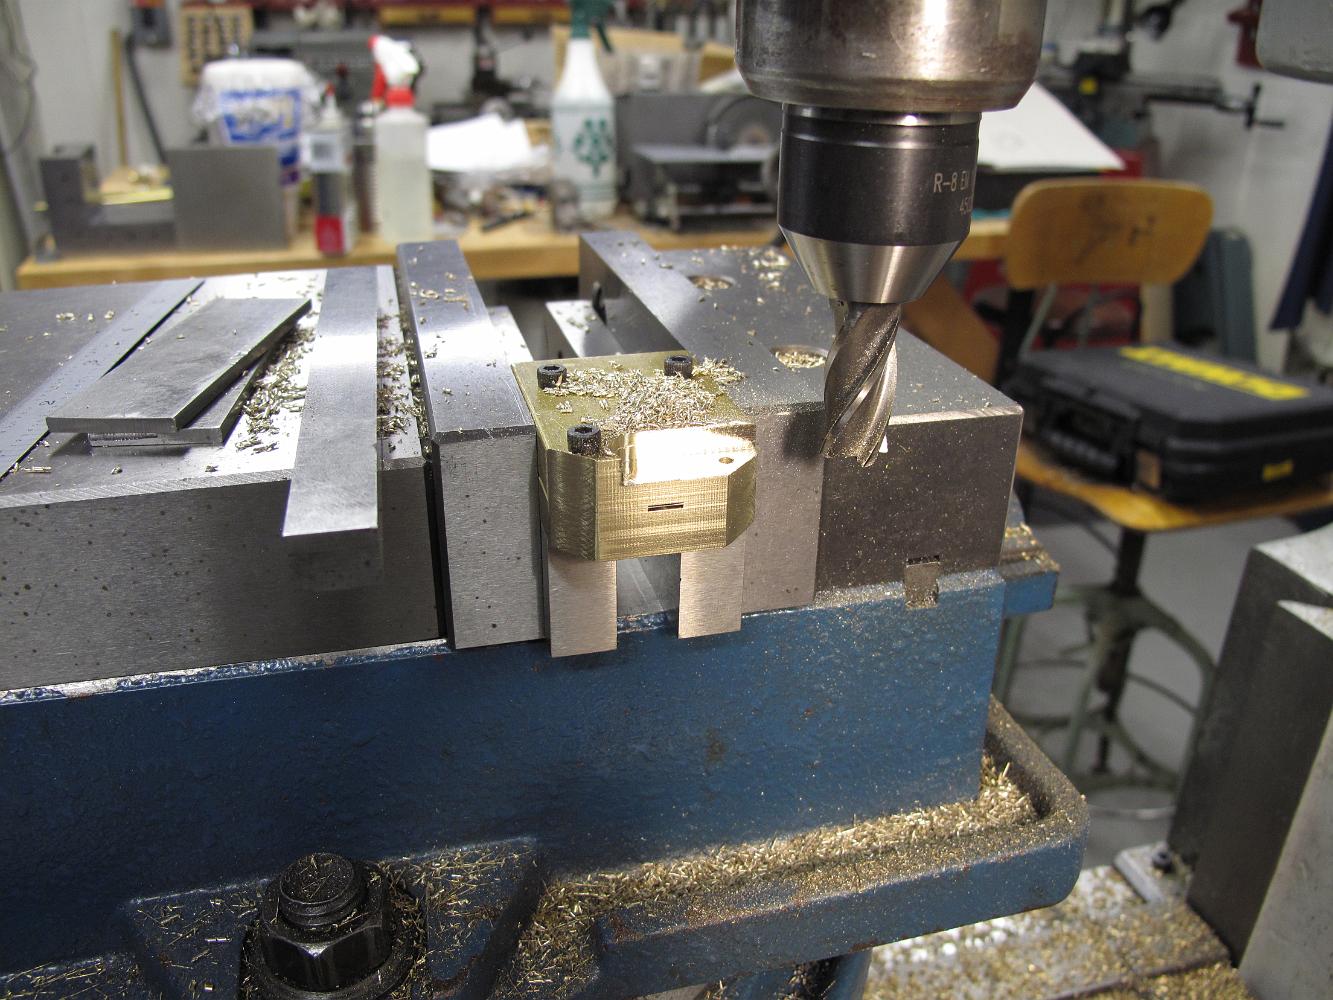
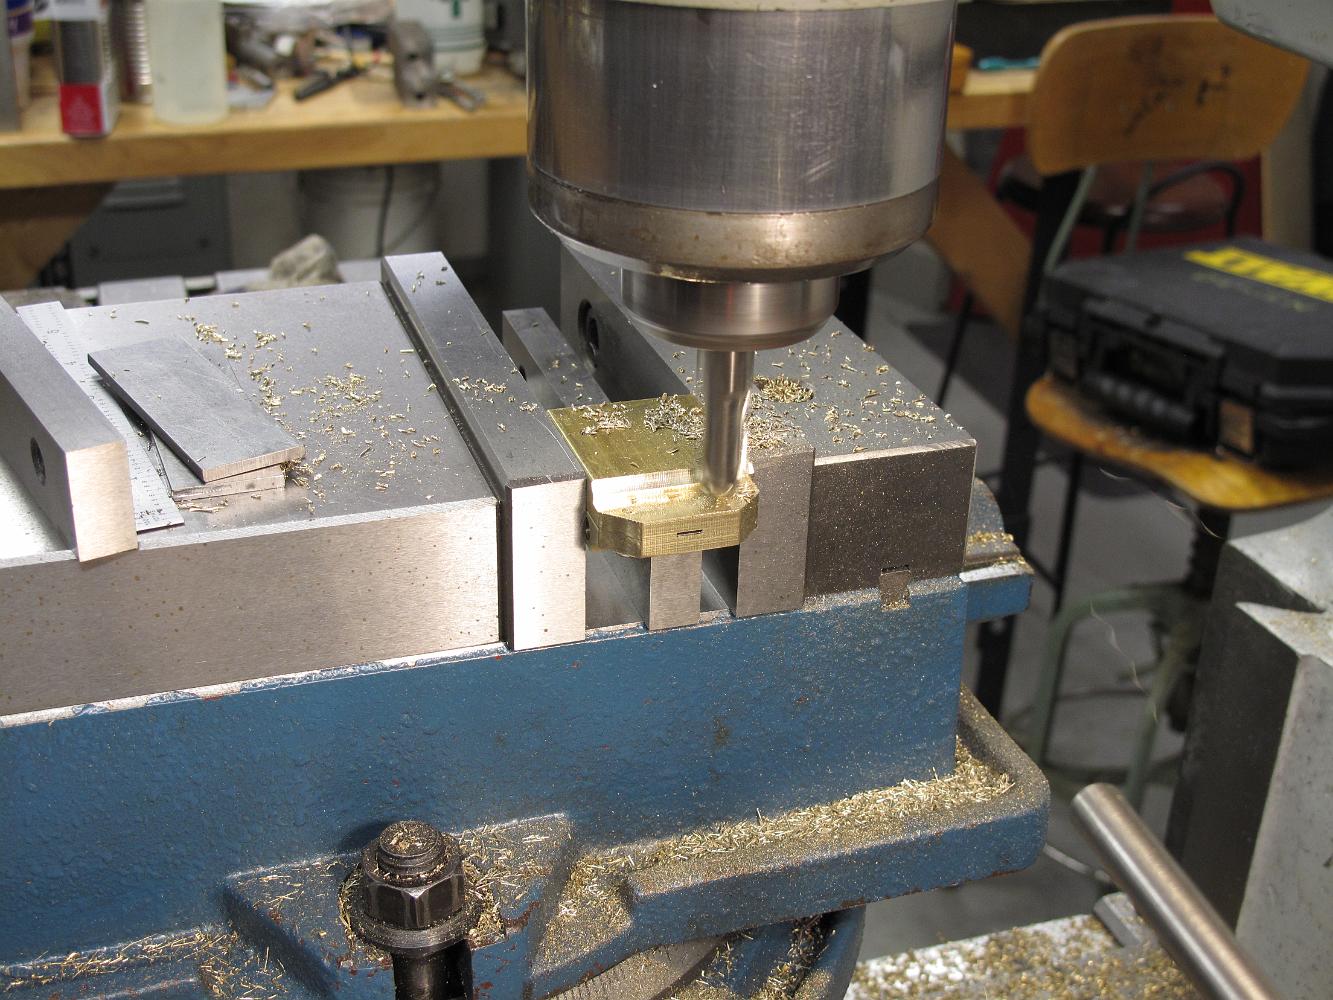
5-Sept-2011 Using an inside angle plate to line up the holes on the end of the bar for tapping. The angle plate was checked for level first, then the top of the…
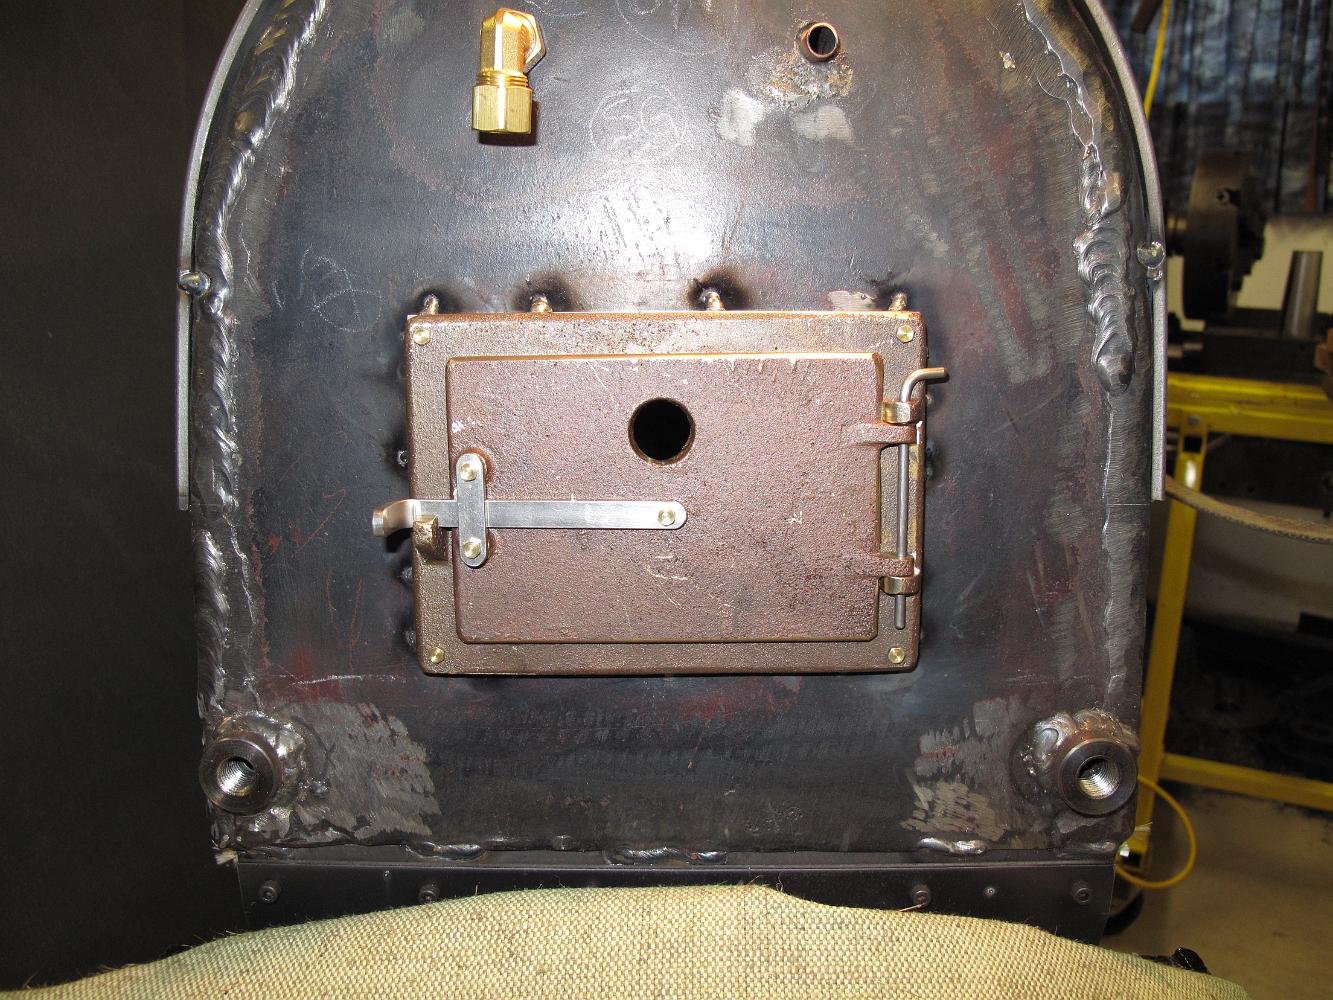
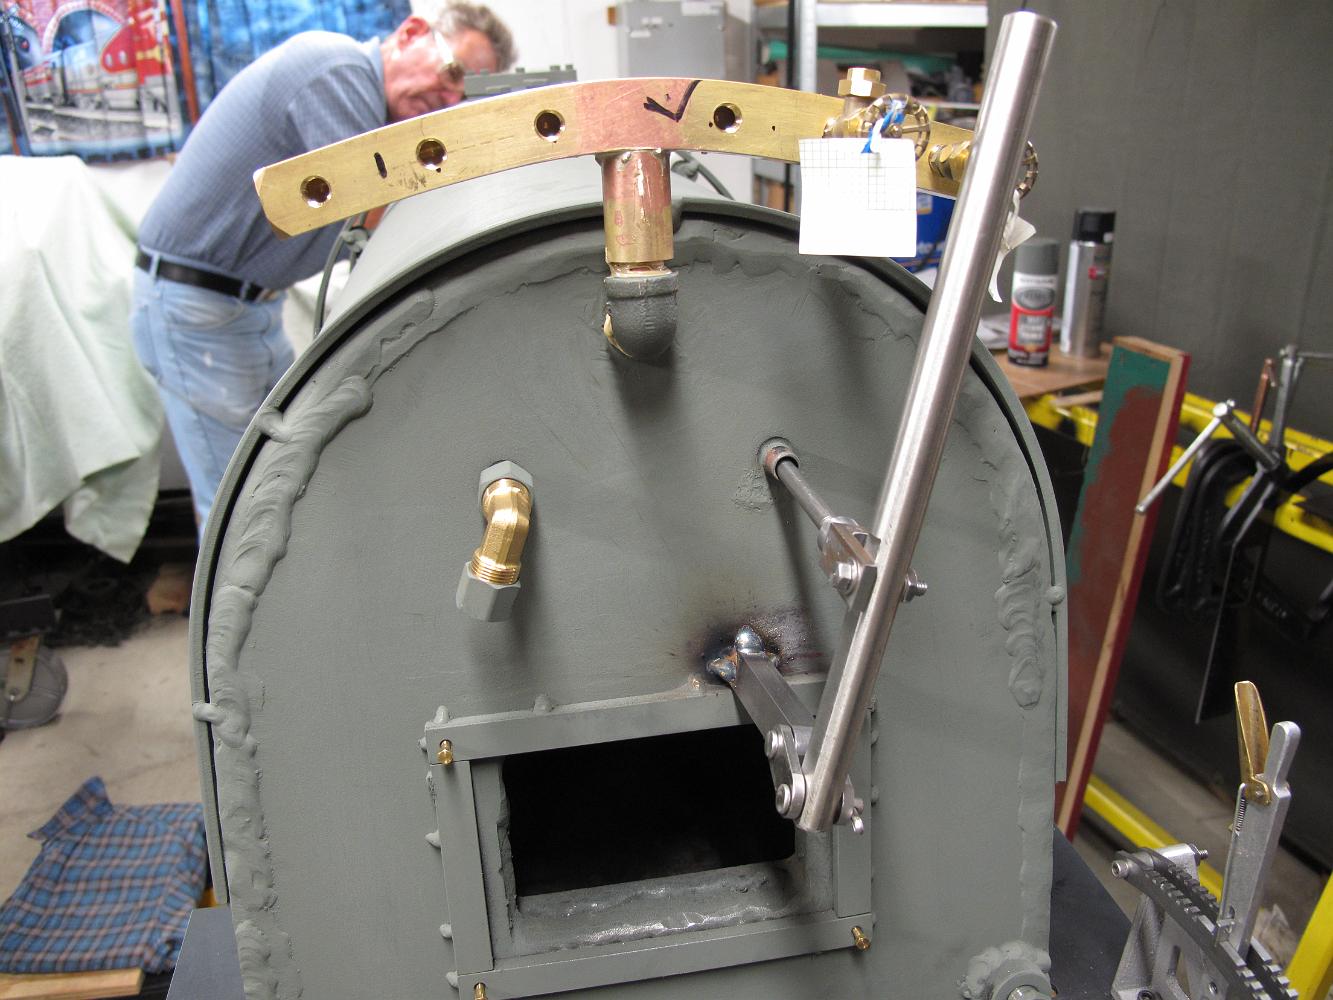
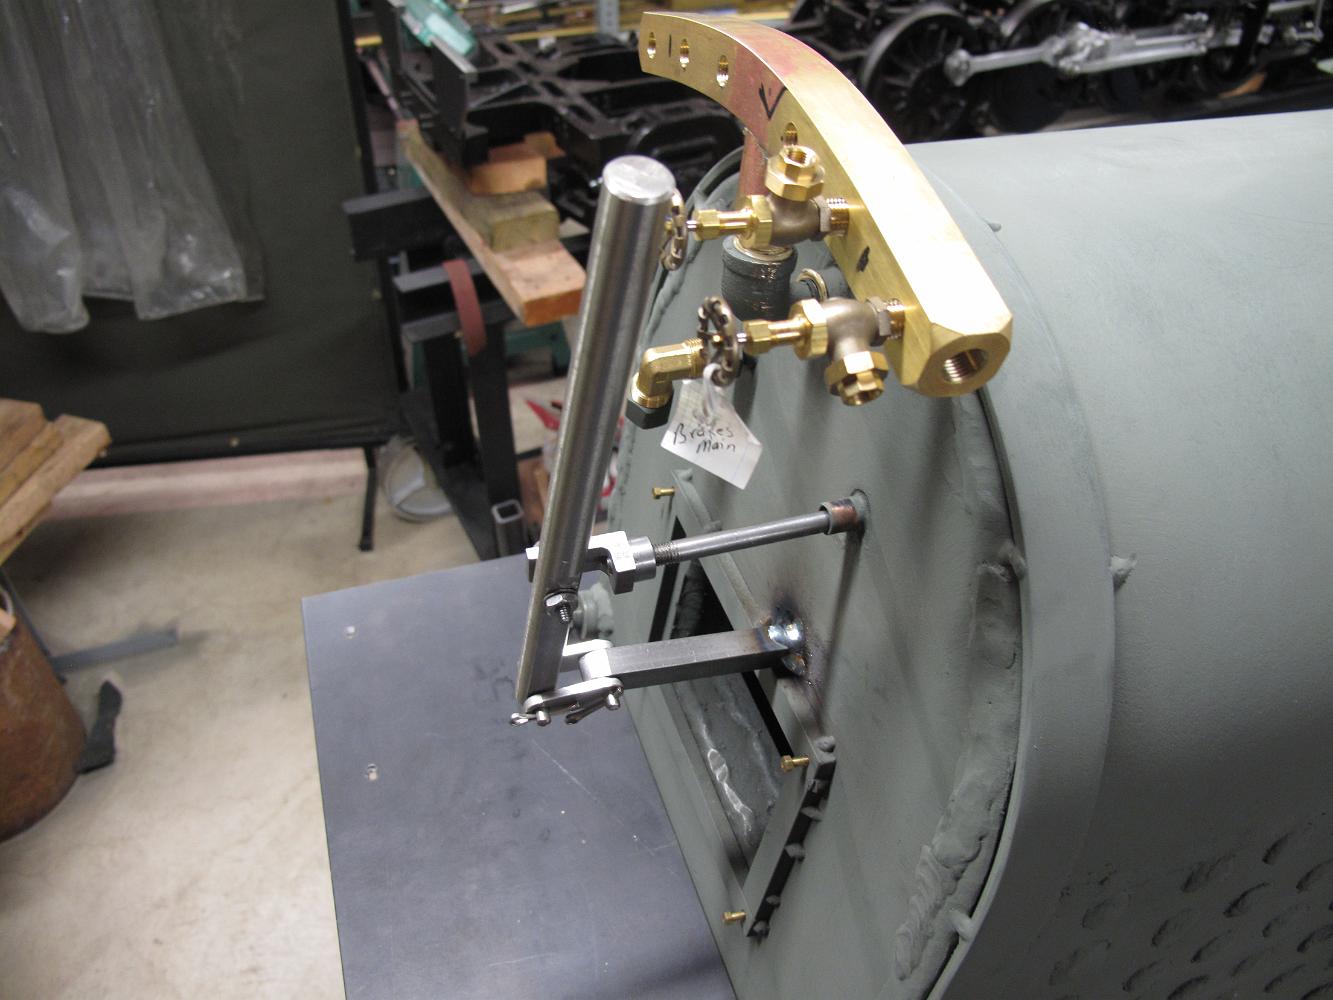
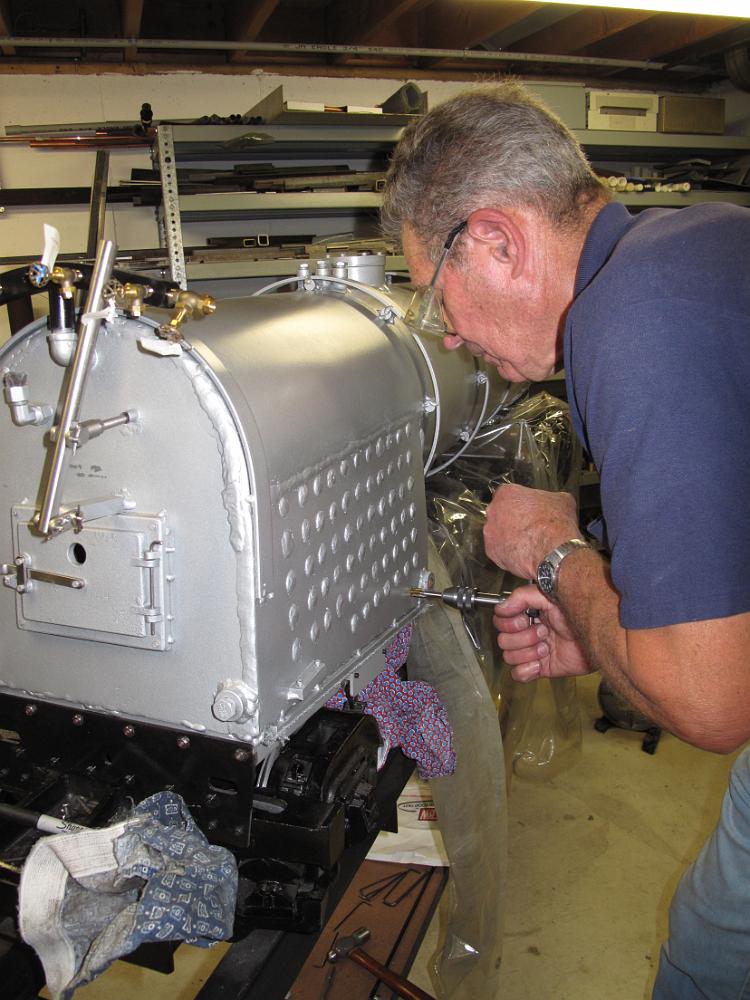
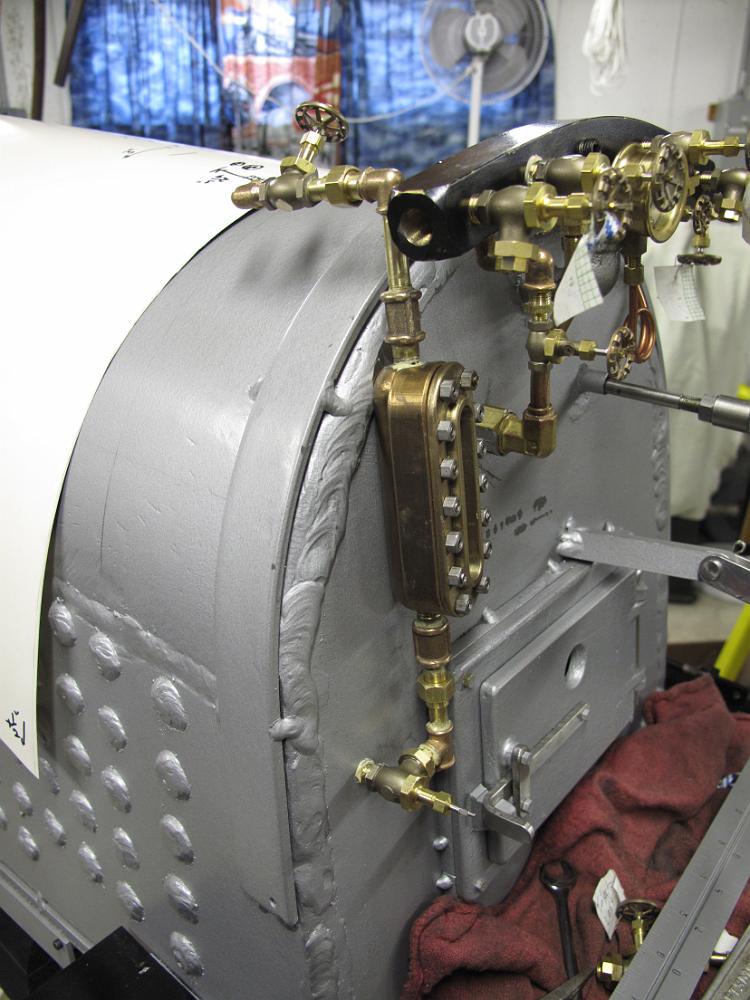
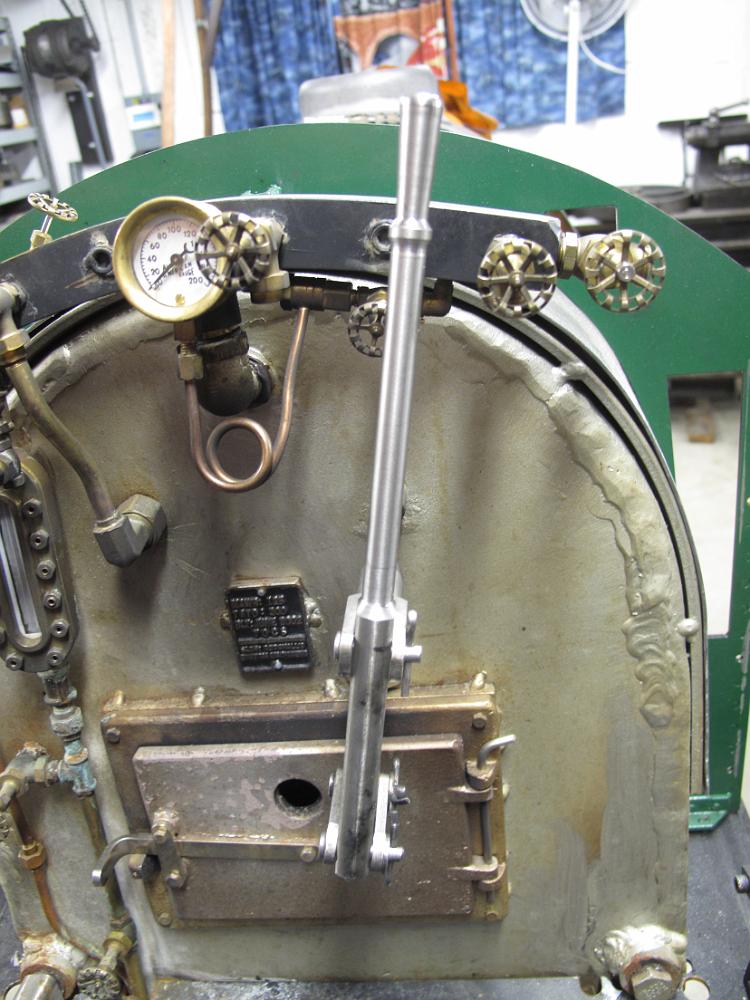
5-Sept-2011 Backhead Manifold installed on the boiler! Also pictured: throttle lever temporarily installed.
5-Sept-2011 Also completed this labor day: throttle bracket welded to the boiler, throttle momentarily installed to check clearances.
14-Sept-2011 The piece of 303 machinable stainless steel 1/2x1/2 stock came in, Bill made up the throttle clevis end from it.
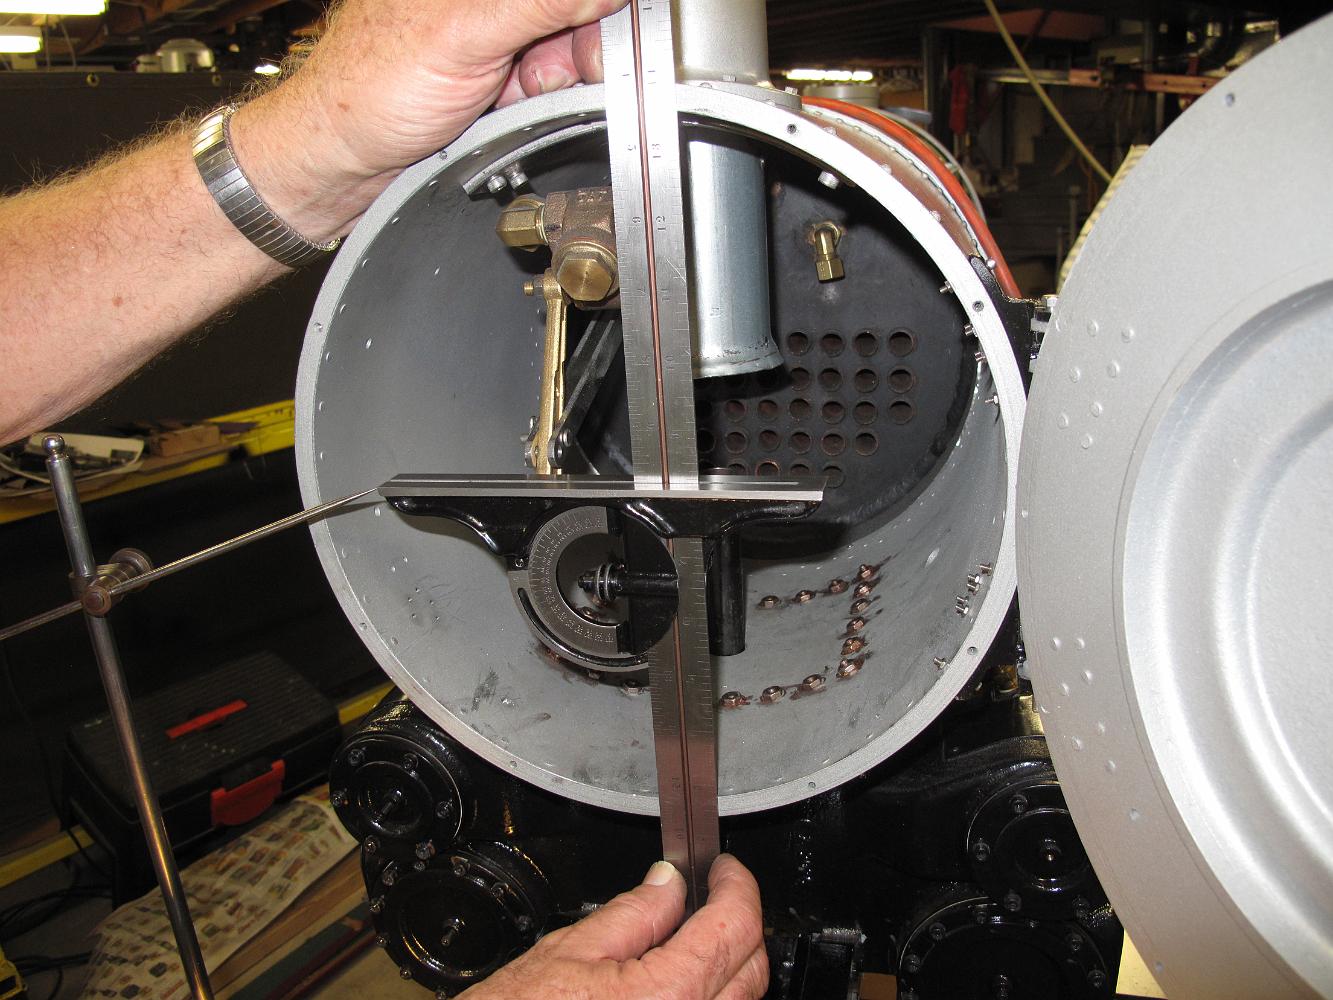
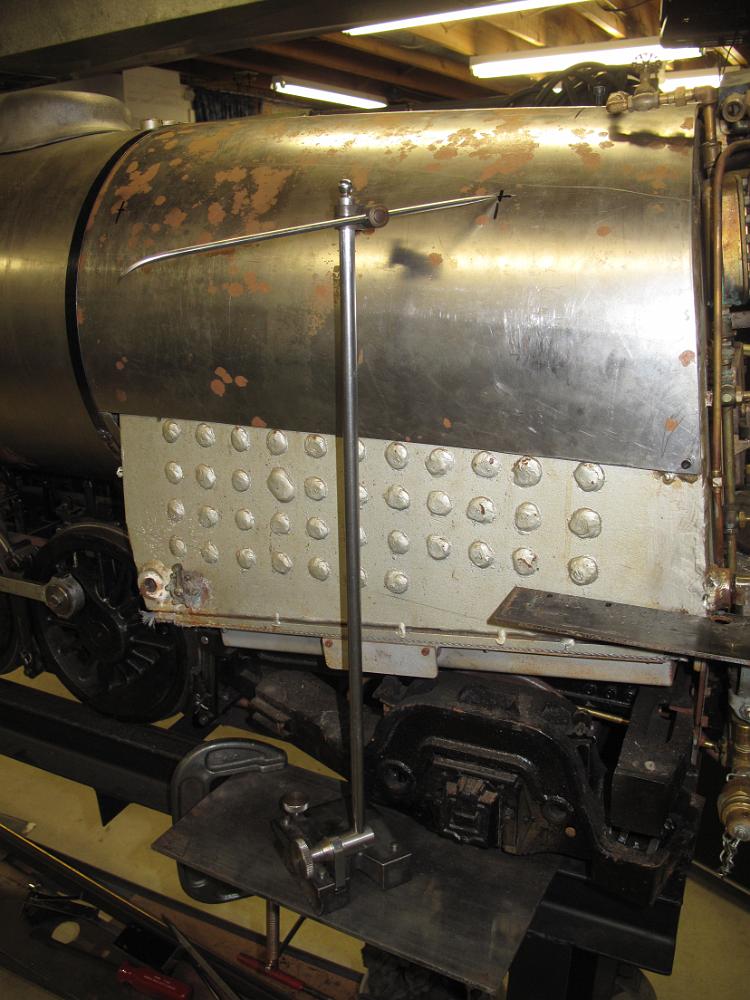
19-Sept-2011 With the angle head set at 90 and the rule on the vertical up and down marks, we set the scriber to 5-13/16" - the center of the boiler.
19-Sept-2011 Having previously set the scriber on center, we lay out the water inlet holes on the boiler. We clamp a piece of 1/4" steel to the bottom of the…
19-Sept-2011 on the fireman's side, we mark two inlets on center, one for the water pump and the other for the injector. The holes are two inches apart on…
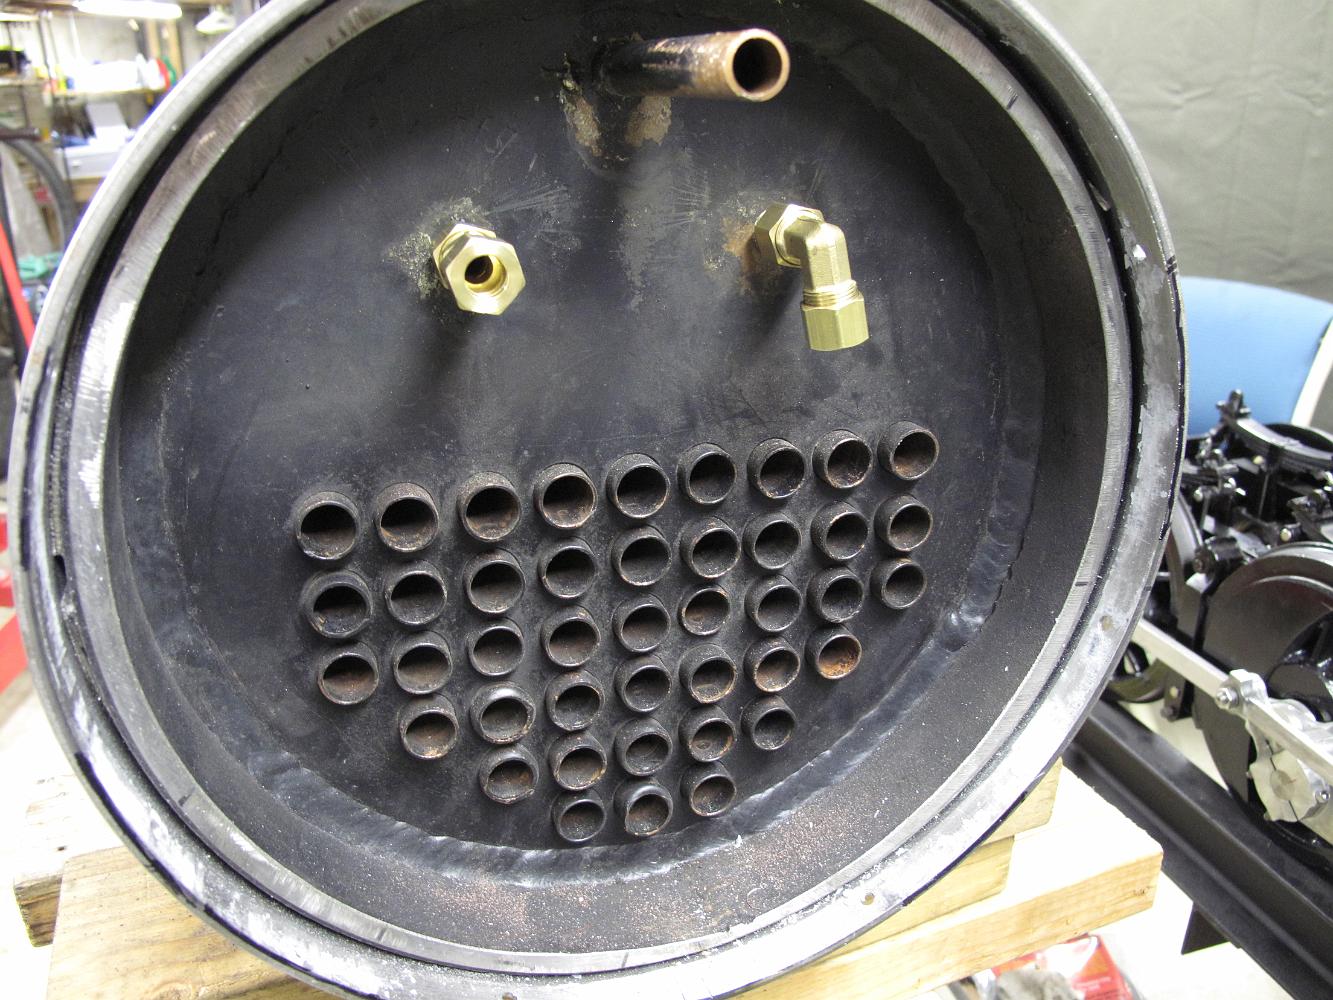
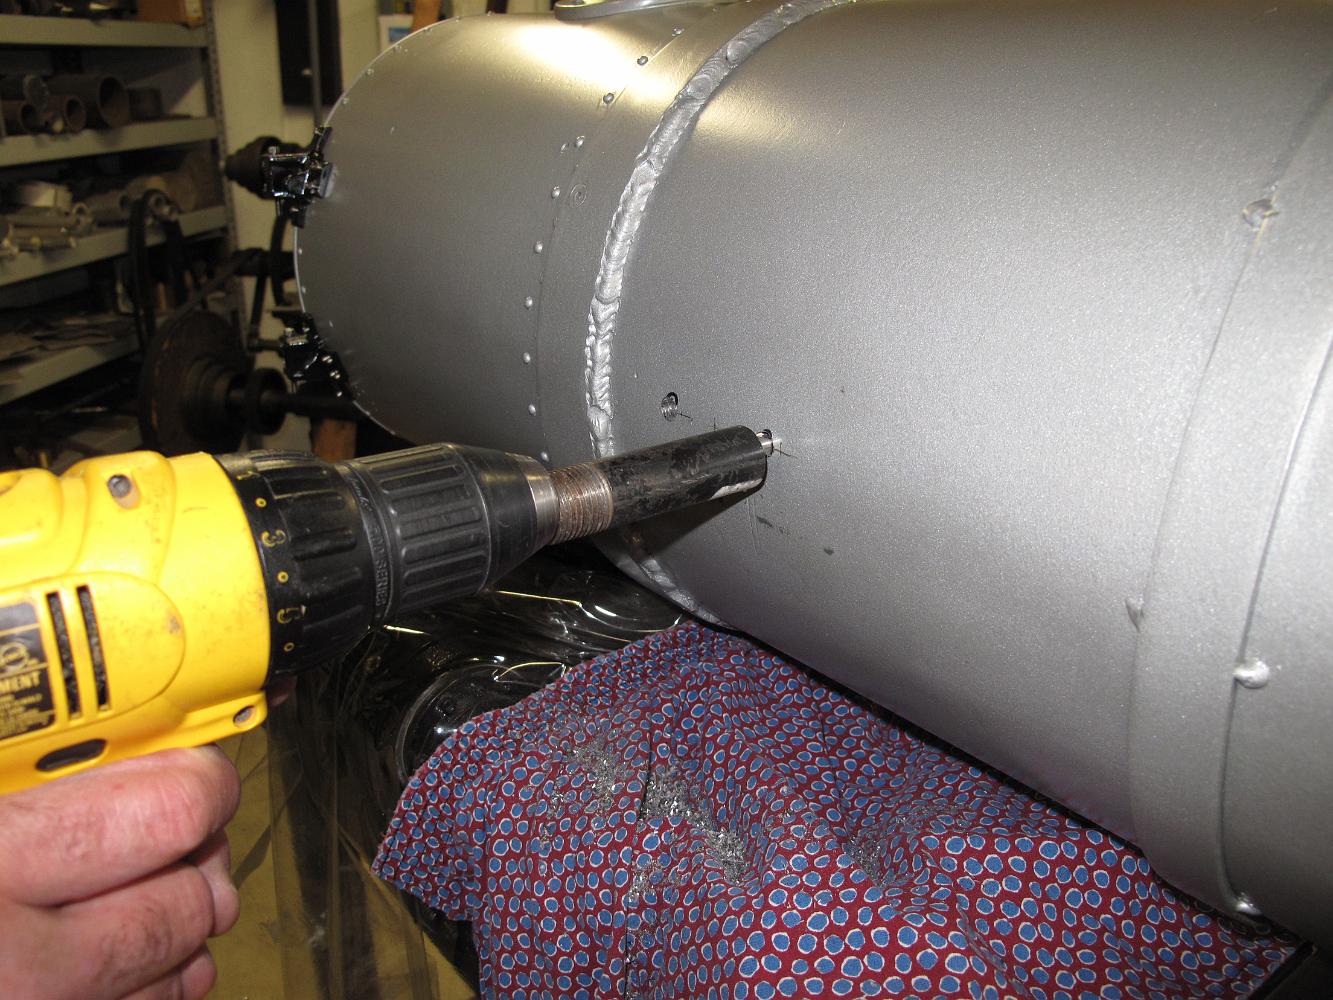
3-Oct-2011 Not wanting to drill a hole into the soft copper flues inside the boiler, we use a piece of pipe as a 'drill stop' when drilling the pilot holes for…
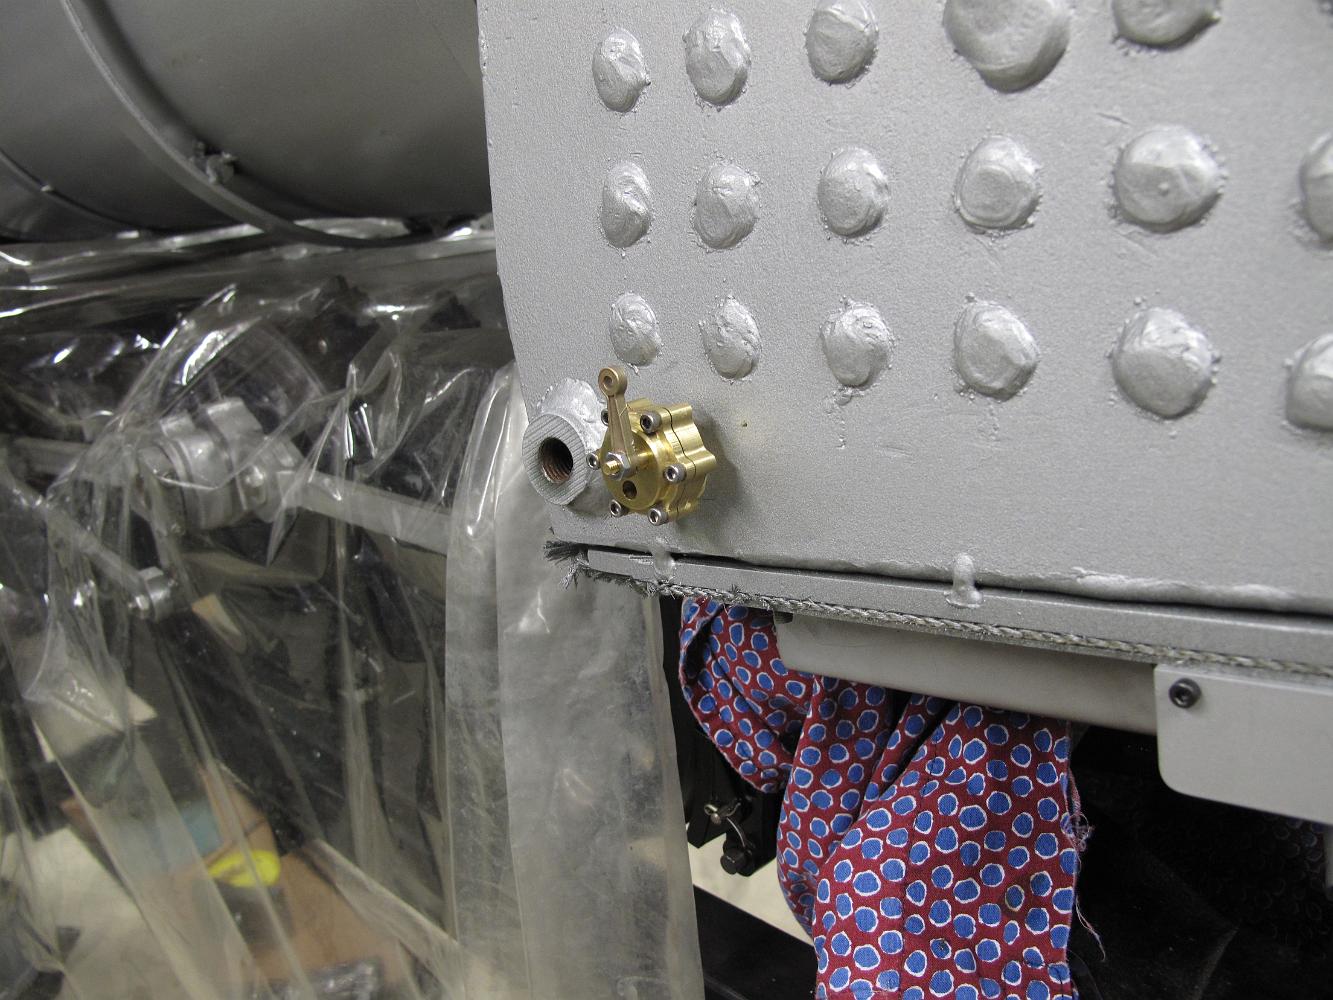
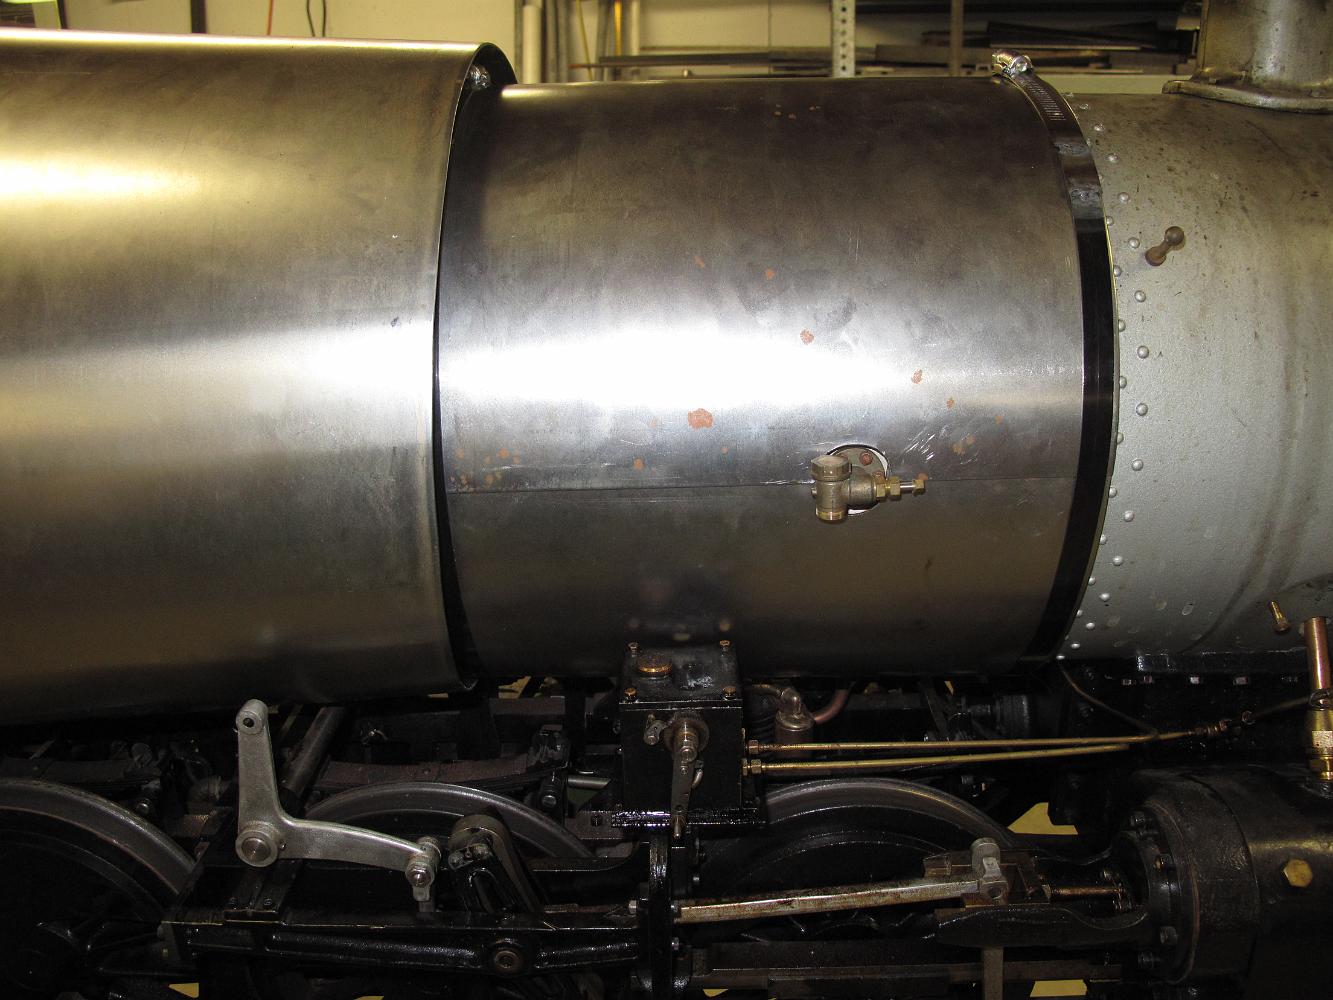
3-Oct-2011 Blowdown valve aligned and installed! Decided not to use the washout plug hole for the blowdown so we would not have to unscrew the blowdown every…
10-Oct-2011 Another "not everything goes to plan" example. The manifold ended up projecting ABOVE the cab roof, which will not do. Upon assembly, the street…
10-Oct-2011 We've centered and indicated the spindle directly over the manifold nipple. Using an endmill machined the nipple shorter and now are using a boring…
10-Oct-2011 My larger boring head did not have enough travel to allow outside machining, so we chucked up another smaller head to achieve the outside distance…
2-Jan-2012 A New Year and a full day in the shop. We continue working on mounting the water glass. Putting another hole in a "perfectly good boiler", we drill…
2-Jan-12 Here's how the bottom of the glass is shaping up. The bottom of the _glass_ is 1/2" above the crown sheet, in keeping with accepted model boiler…
7-Jan-12 Picking the top centerline of the boiler, we locate the upper water glass fitting point and mark it for drilling. I also used the tagboard jacket and…
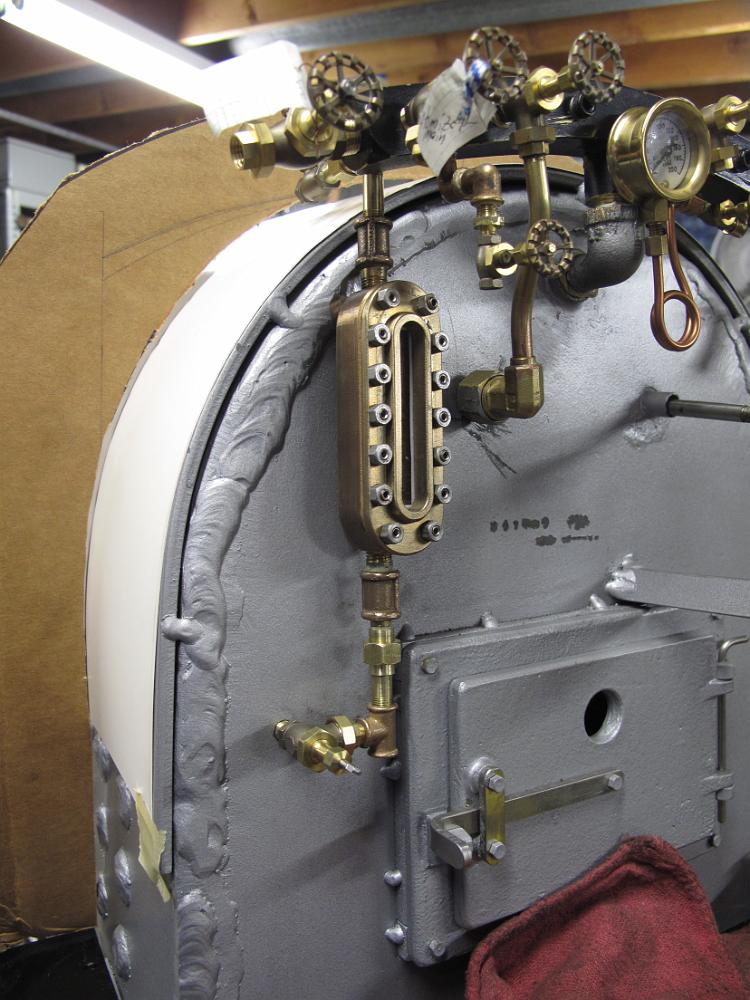
10-Jan-12 The finished piping for the water glass. We spent the rest of the night on our elbows leaning over the plumbing drawing to figure out what to do next.
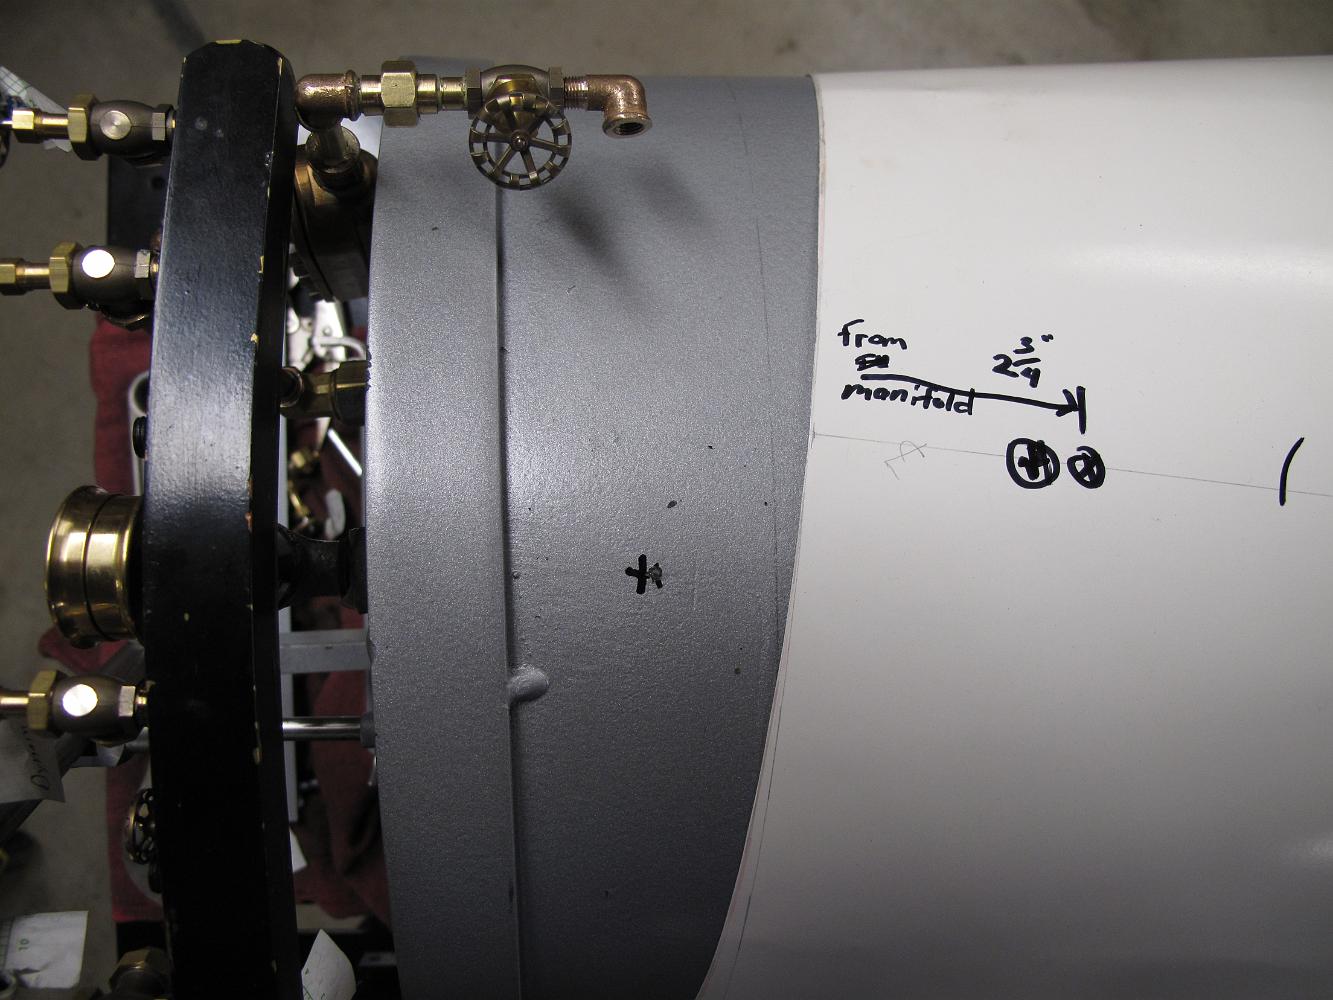
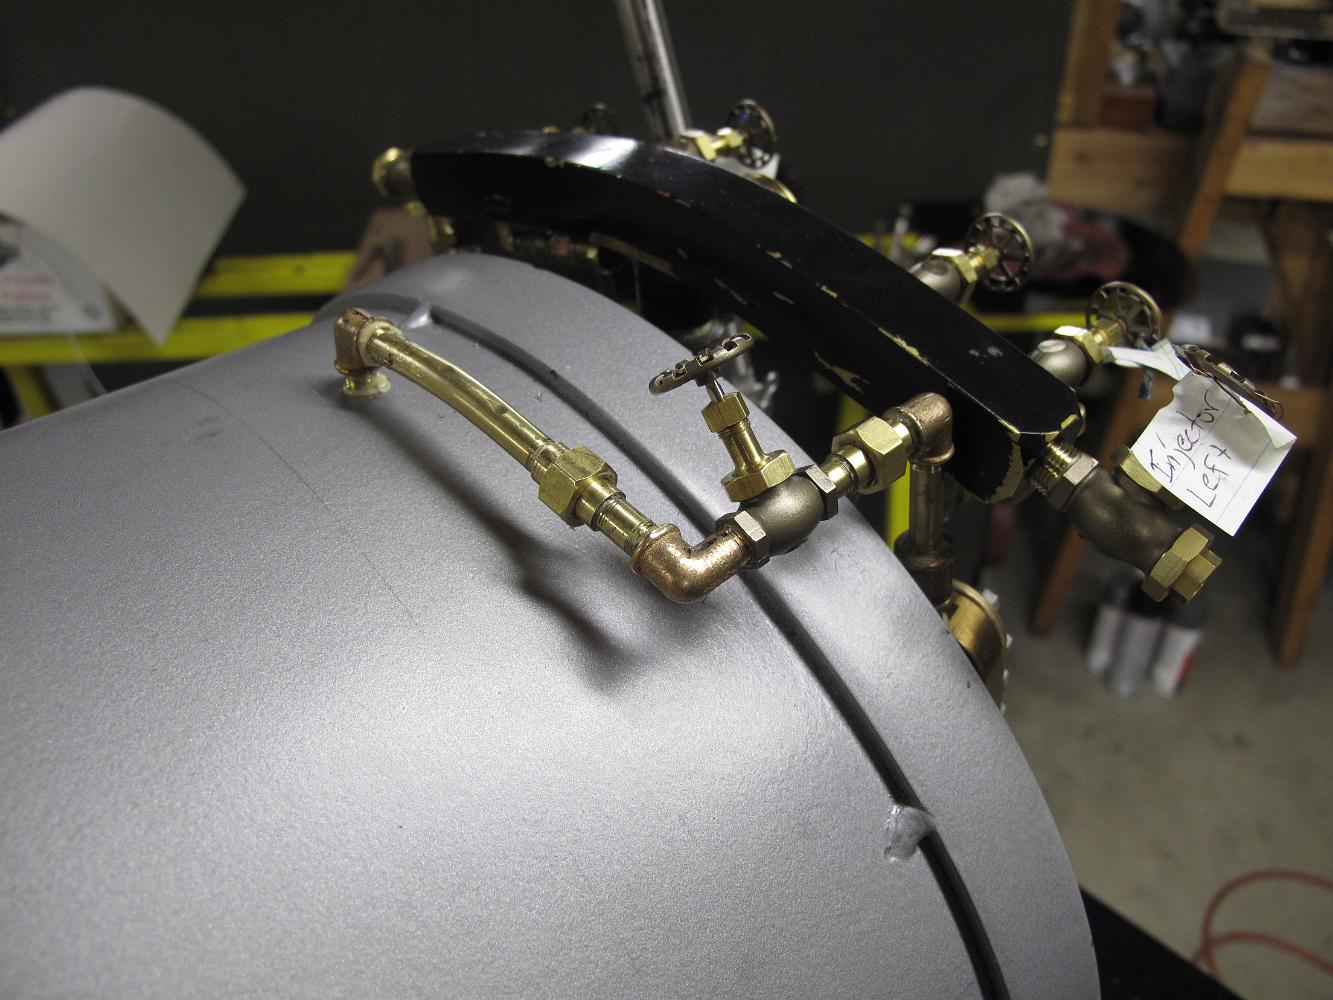
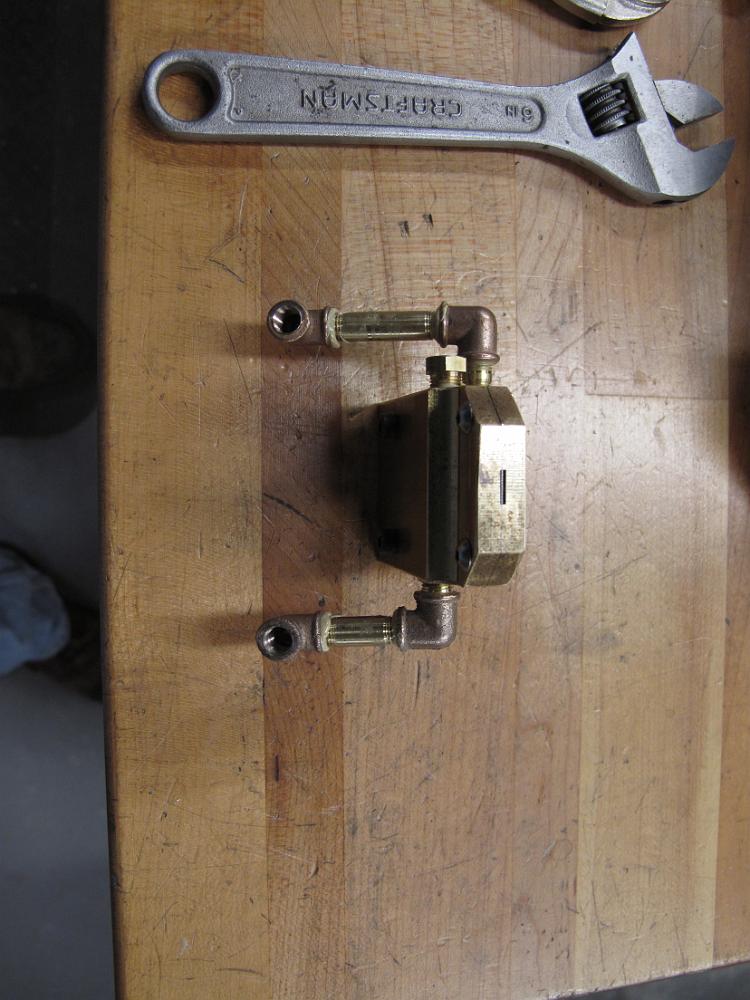
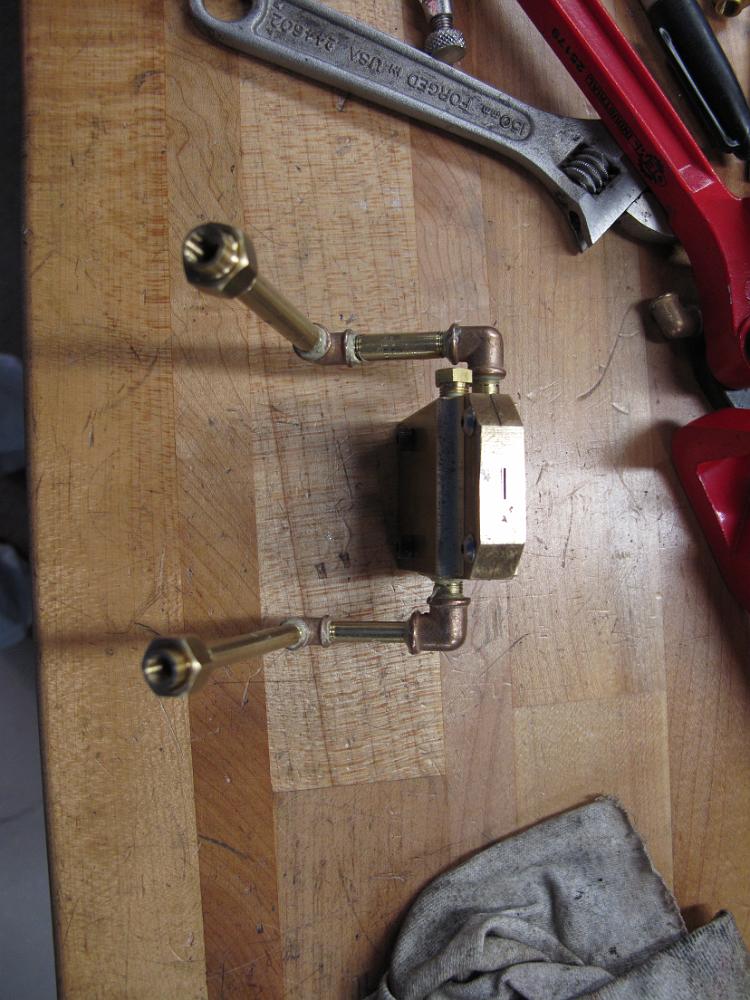
16-Jan-12 After installing the burner we have changed our minds about how to route the plumbing and not have both the oil and steam lines on the same side. A…
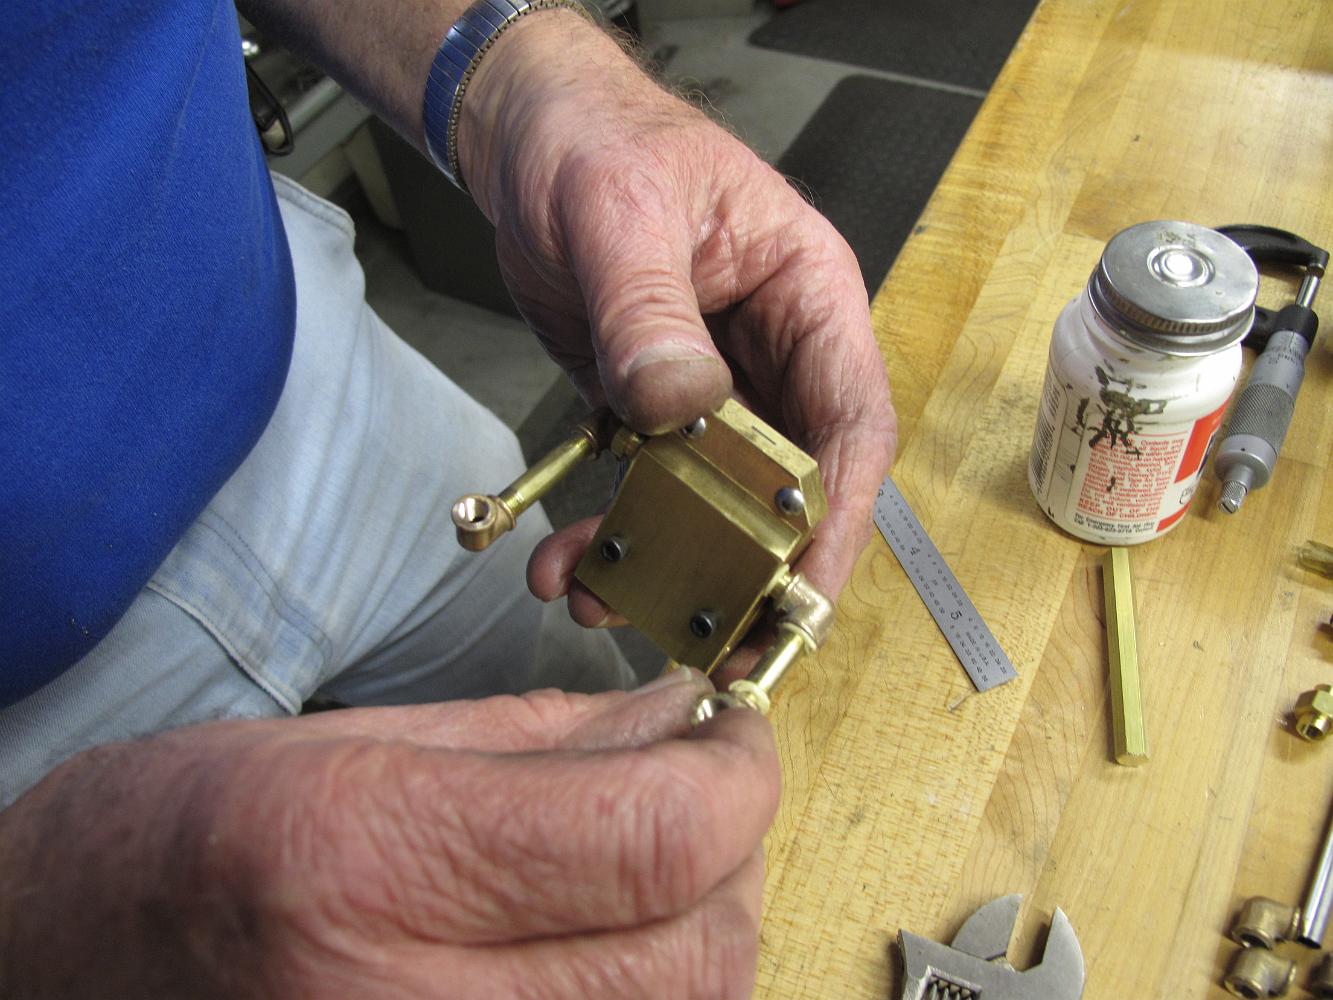
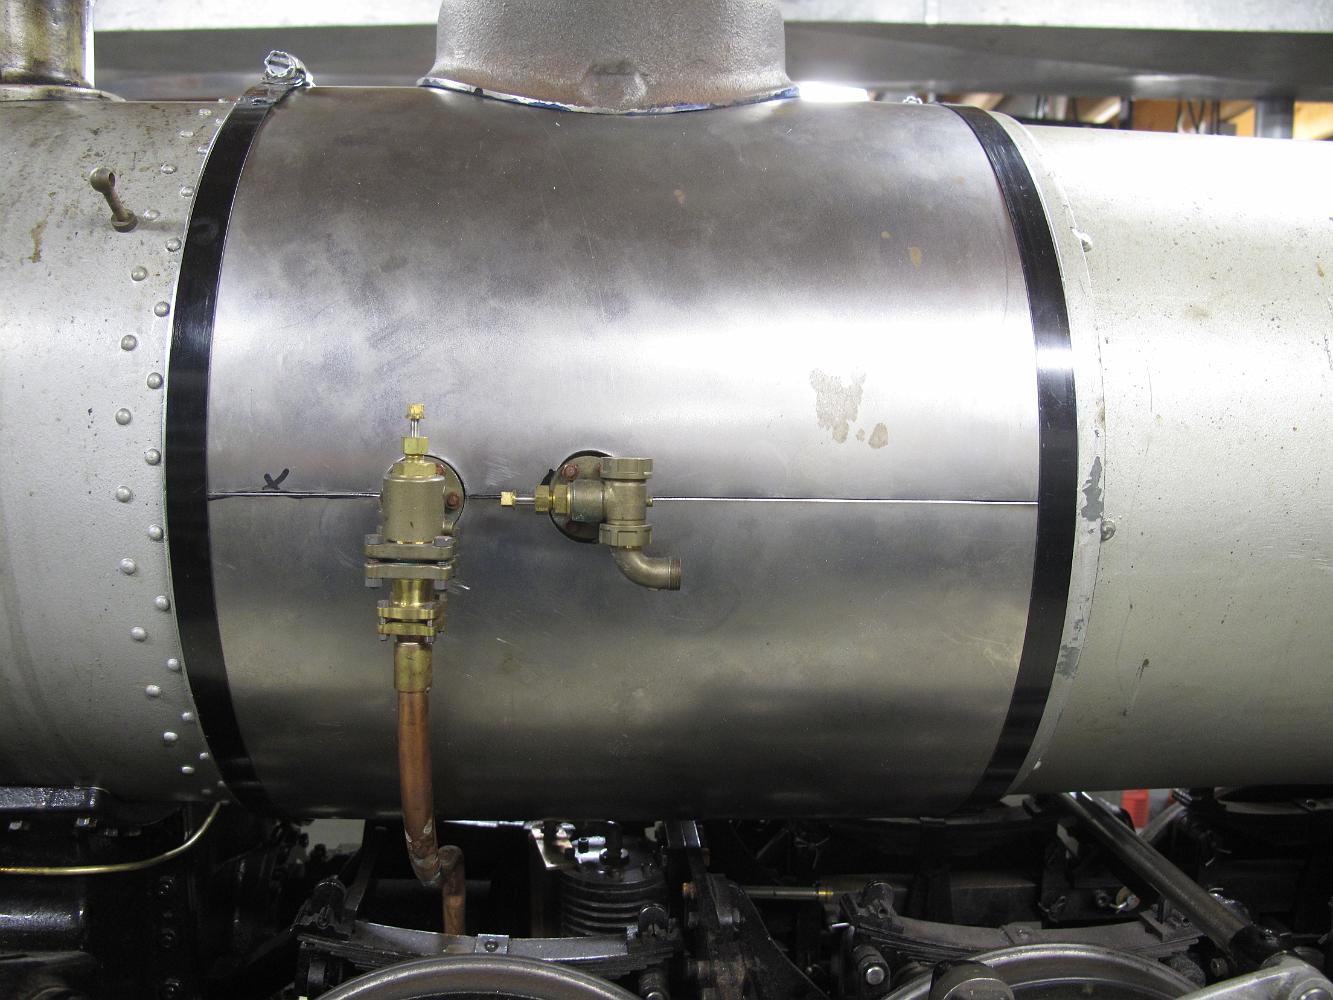
30-Jan-12 Not a duplicate picture of the burner. After studying plumbing diagram some more, and looking at the atomizer control valve with a 3/16" line, we…
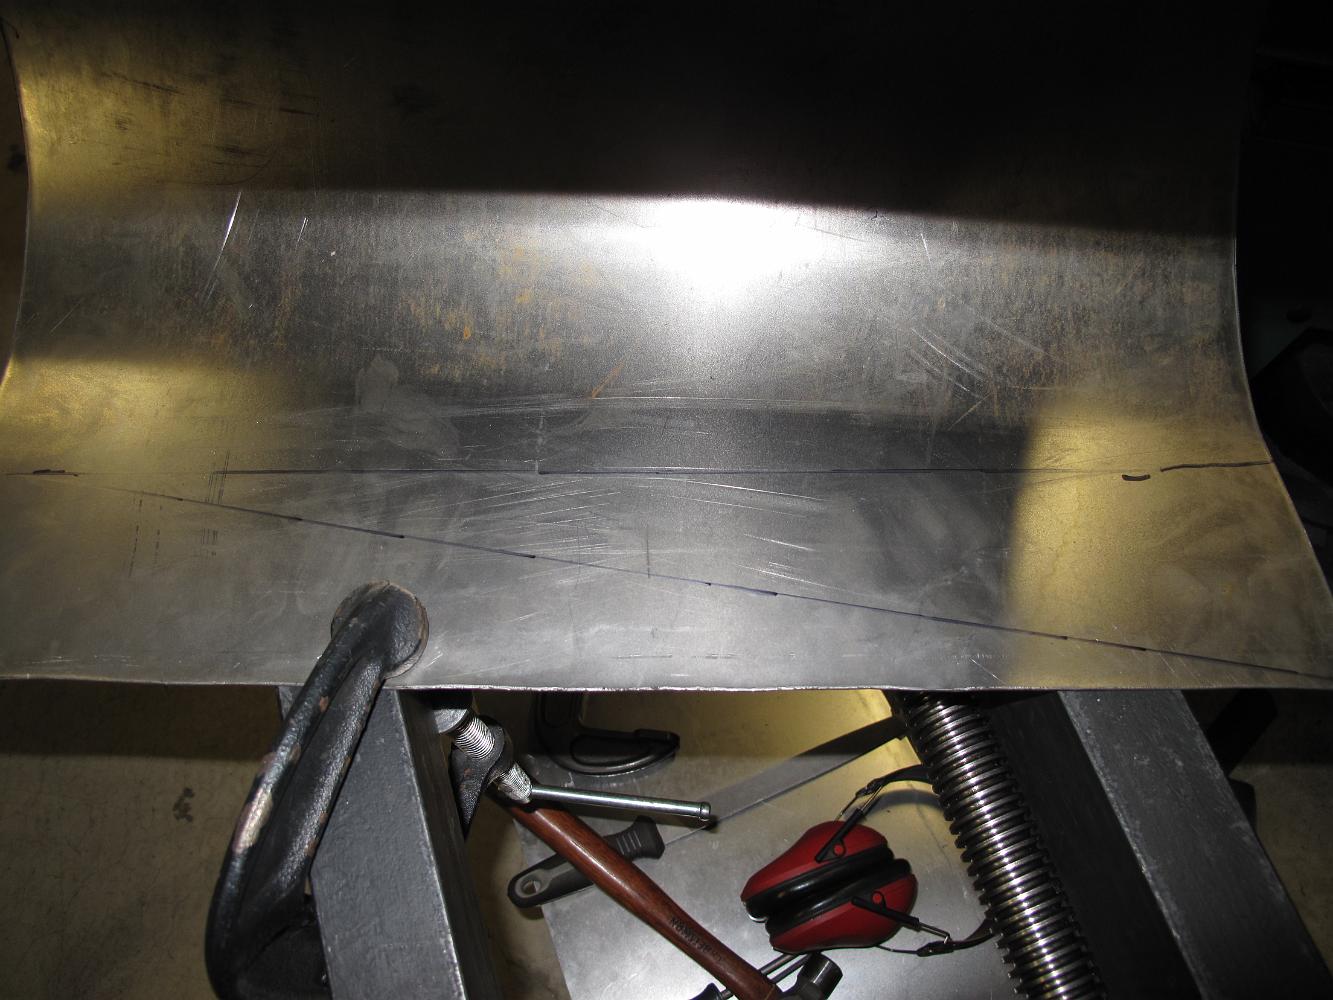
28-July-2012 With a paper template made from the drawings and notes made about actual fit, I use power shears to cut the 16 gage mild steel to shape.
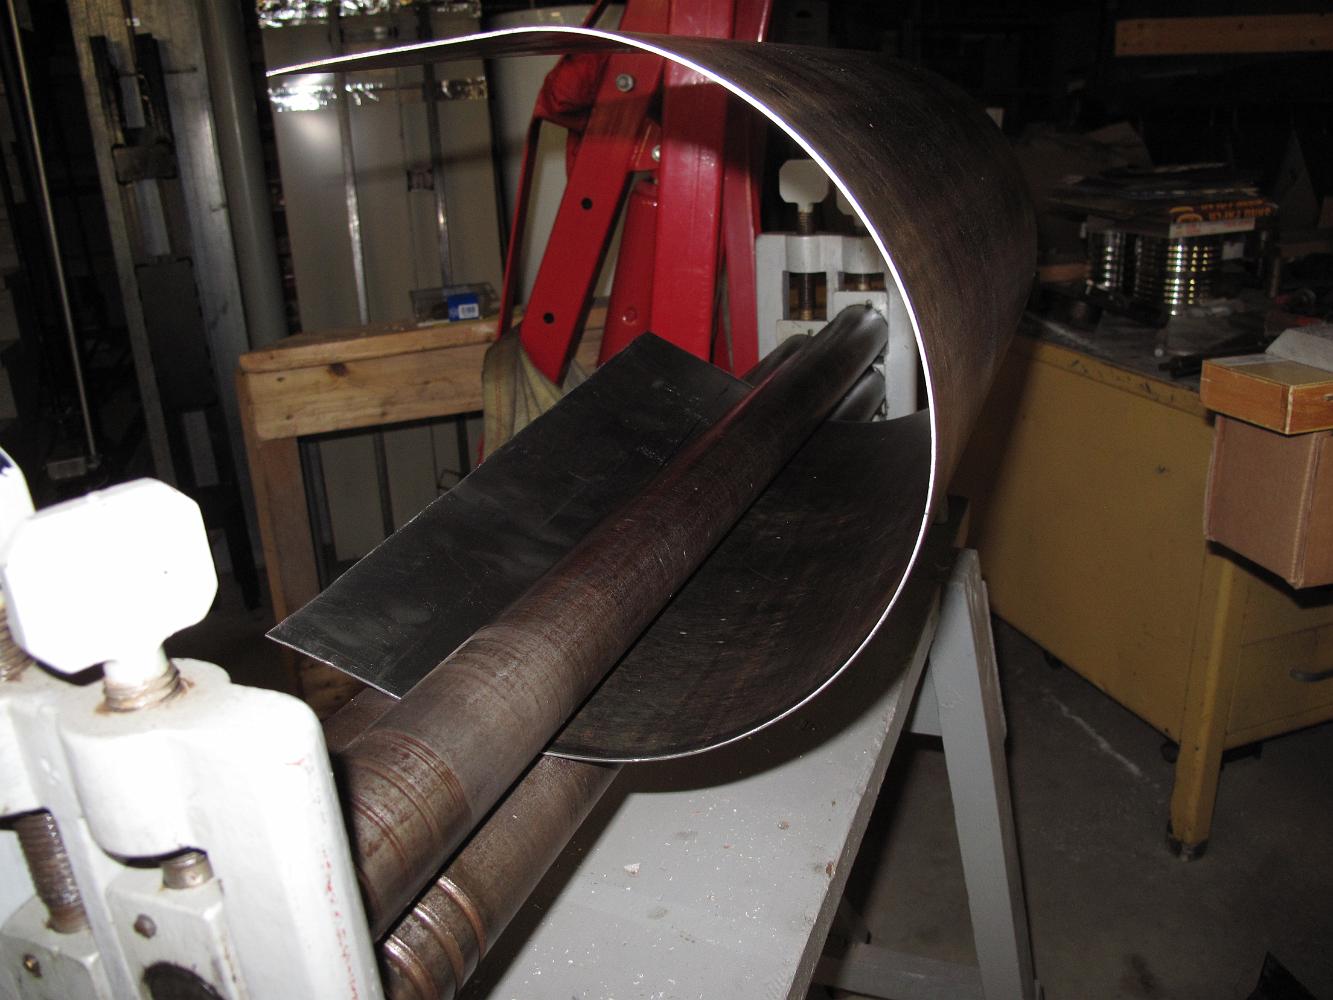
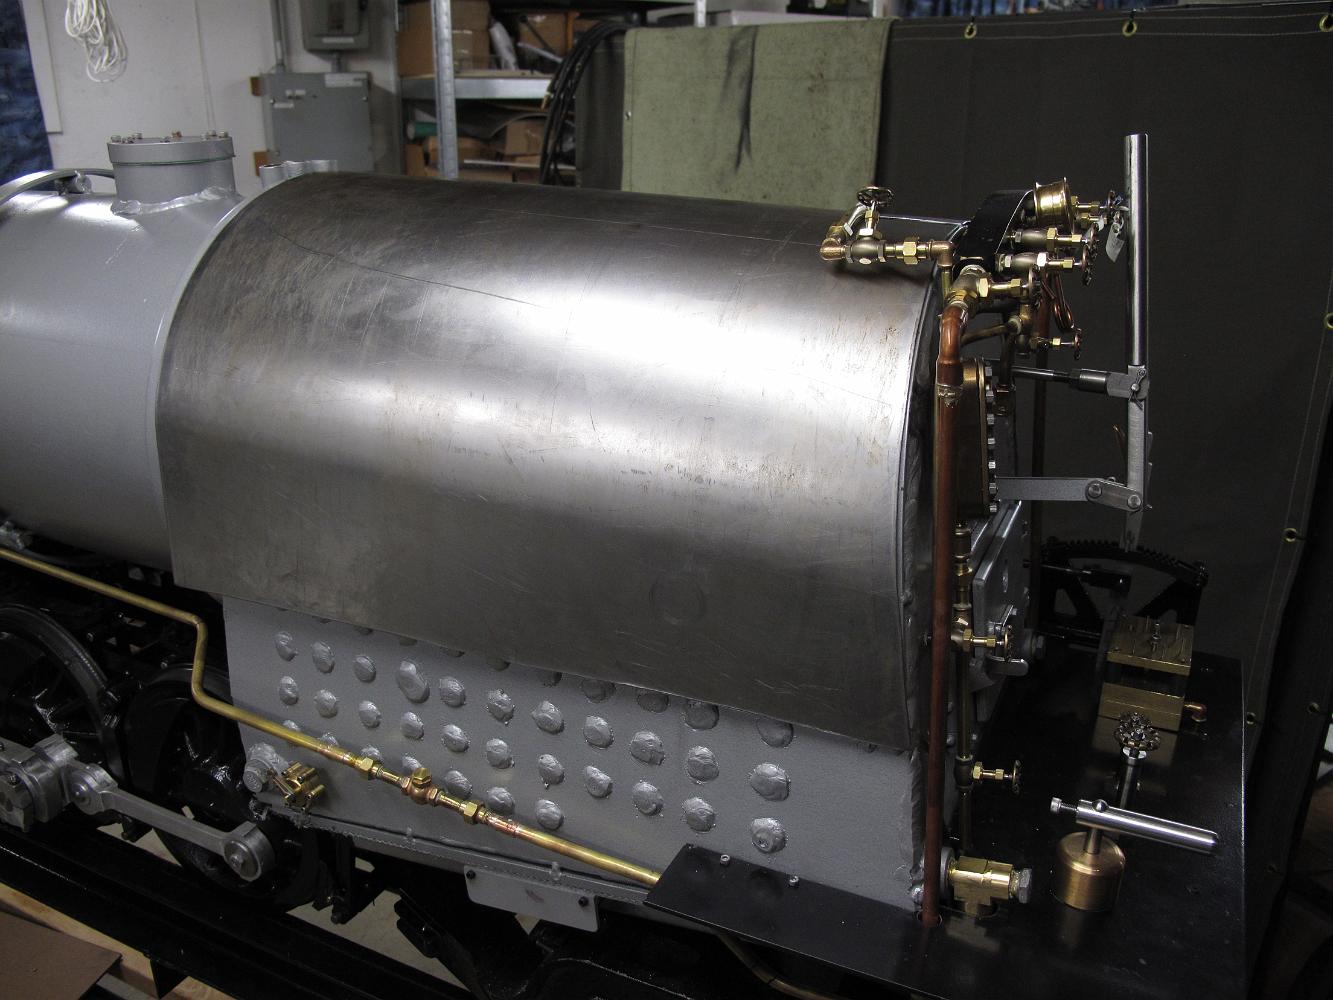
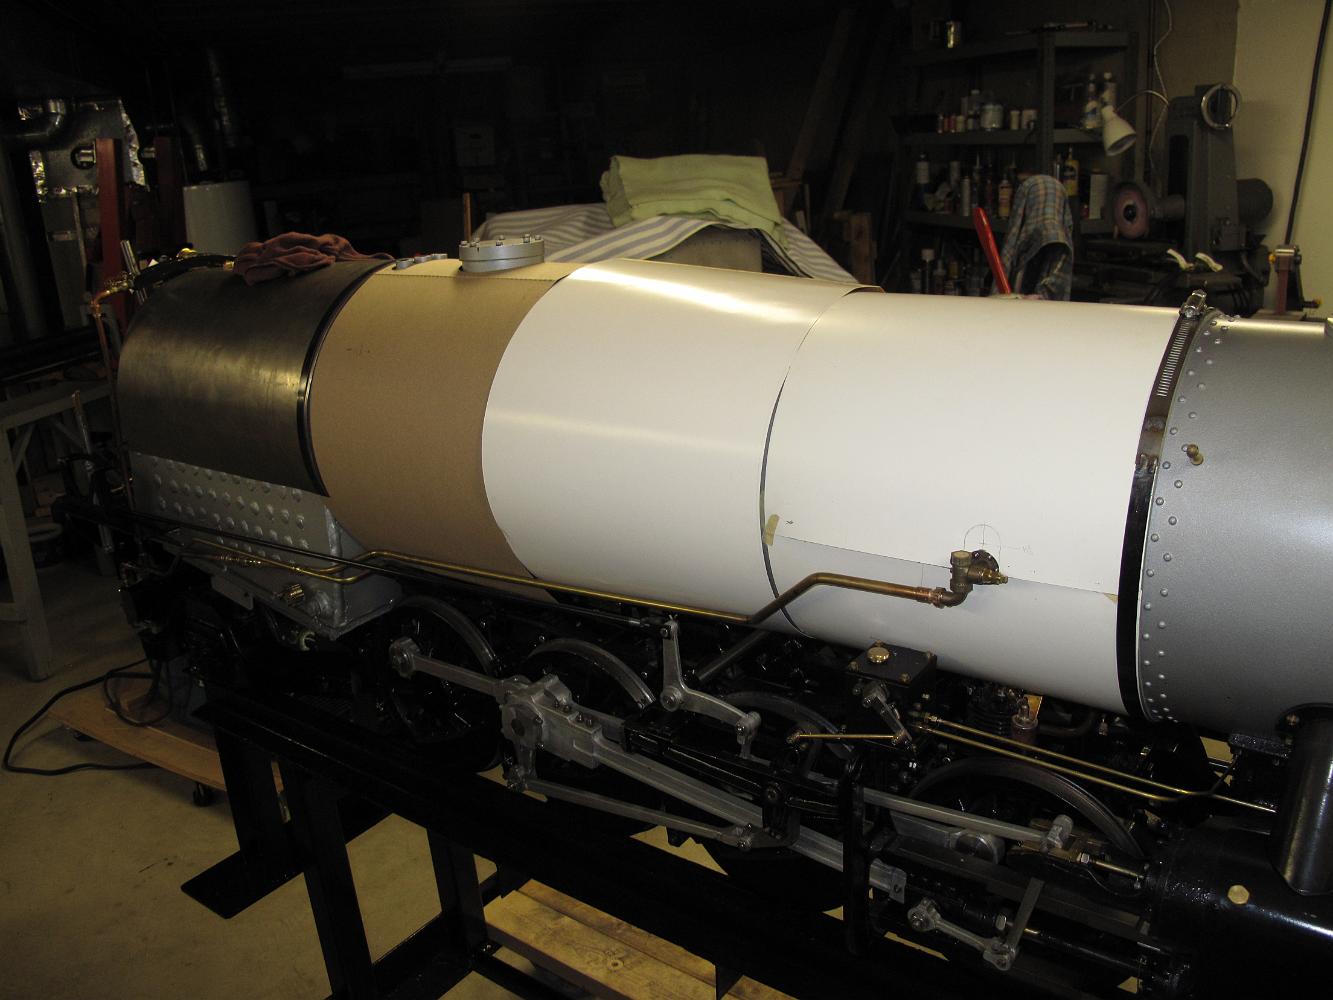
30-July-2012 The rear jacket was a bit of a challenge due to the compound curve at the end closest to the steam dome. The sides of the jacketing are straight in…
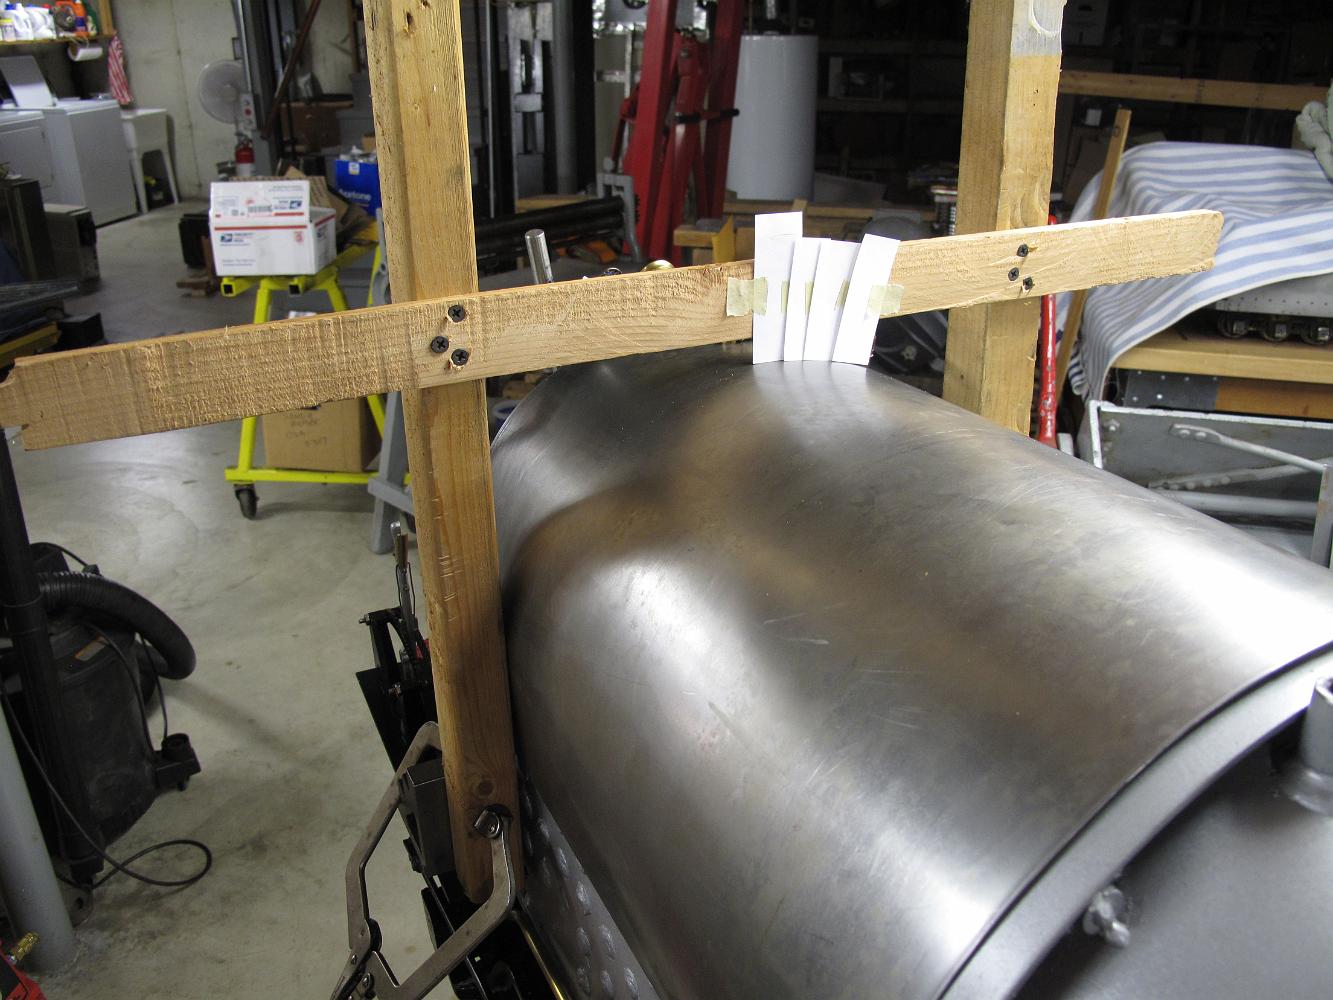
4-Aug-2012 How to match the actual jacketing curve so you can cut out the cab front: dozens of slips of paper. With a wood frame stationary over the boiler,…
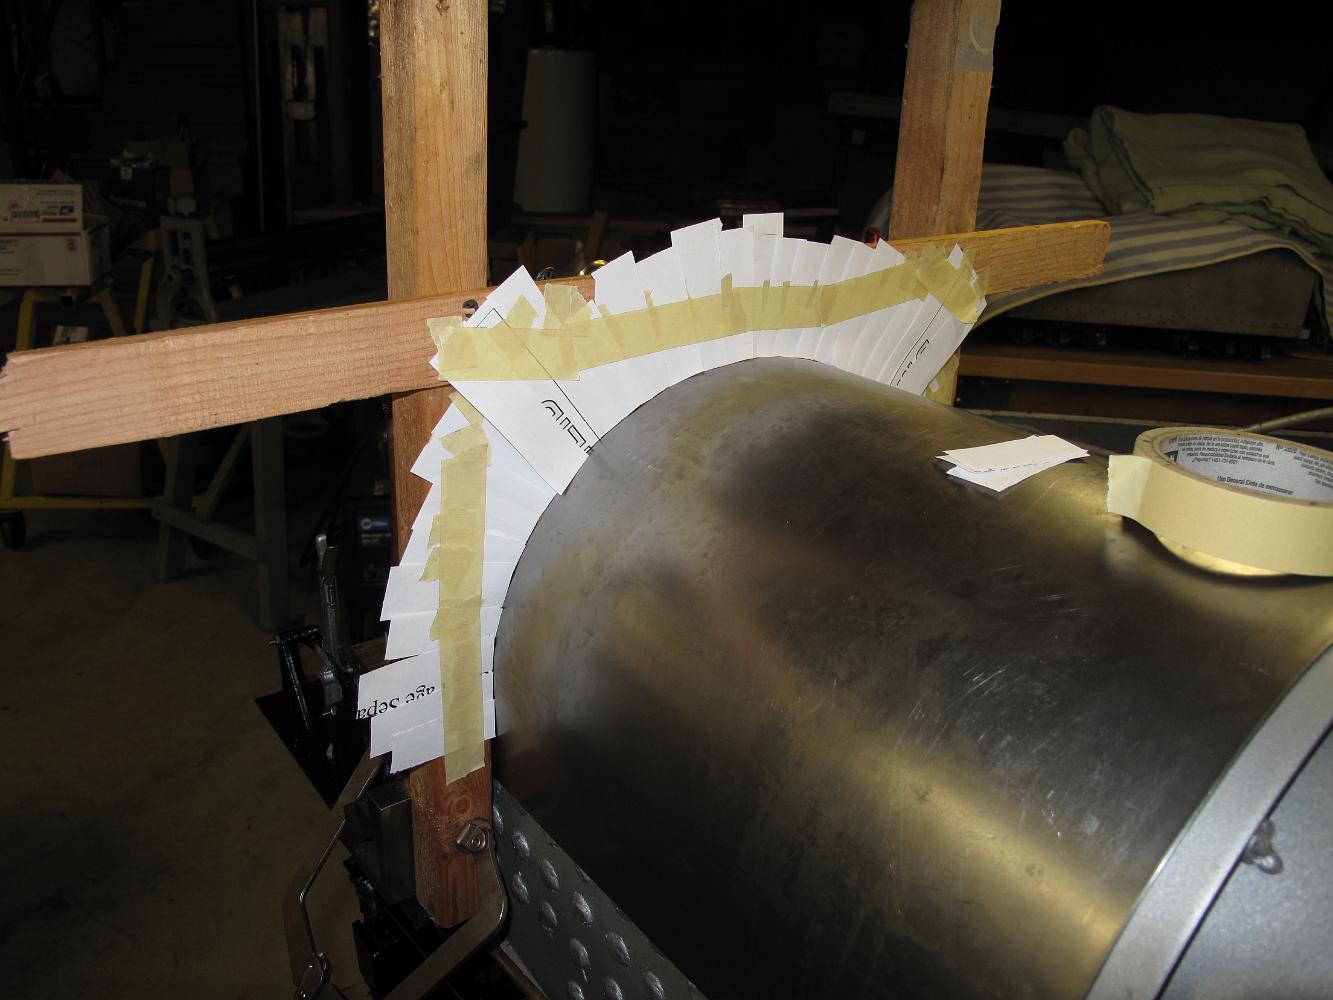
4-Aug-2012 With dozens of paper strips taped to the frame, the profile of the jacketing is outlined. Next up: remove the frame, lay it flat on the bench on top…
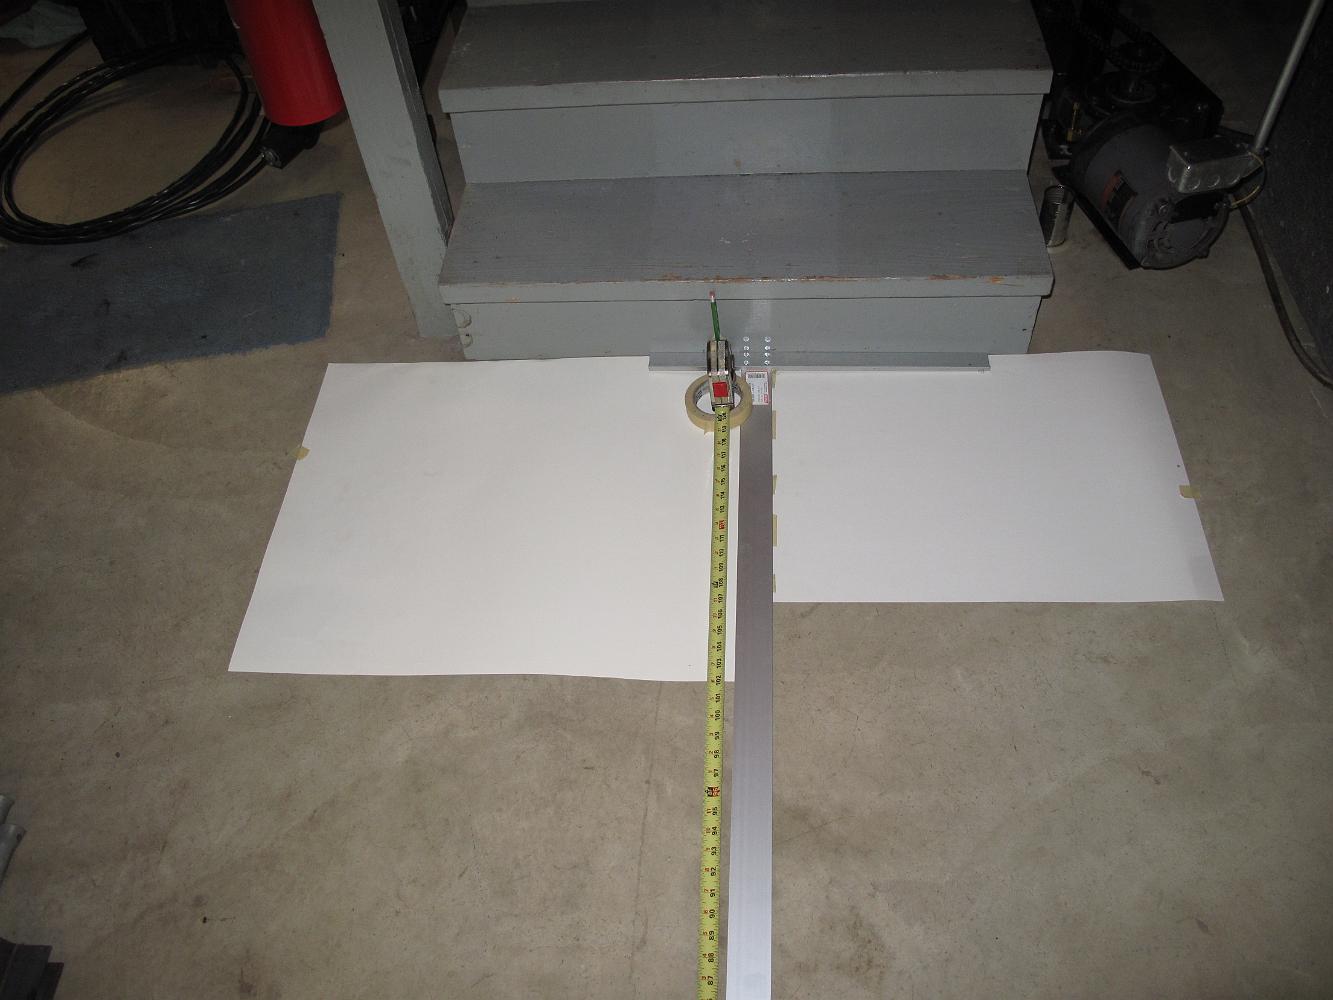
20-Aug-2012 How I laid out the third transition course of jacketing. Start with some old posters taped to the floor, use a four foot carpenters square to line…
20-Aug-2012 Tonight I made on the paper stencils for the jacketing courses 1,2 and 3. After this I taped them to the 16 gauge sheet metal and cut them to rough…
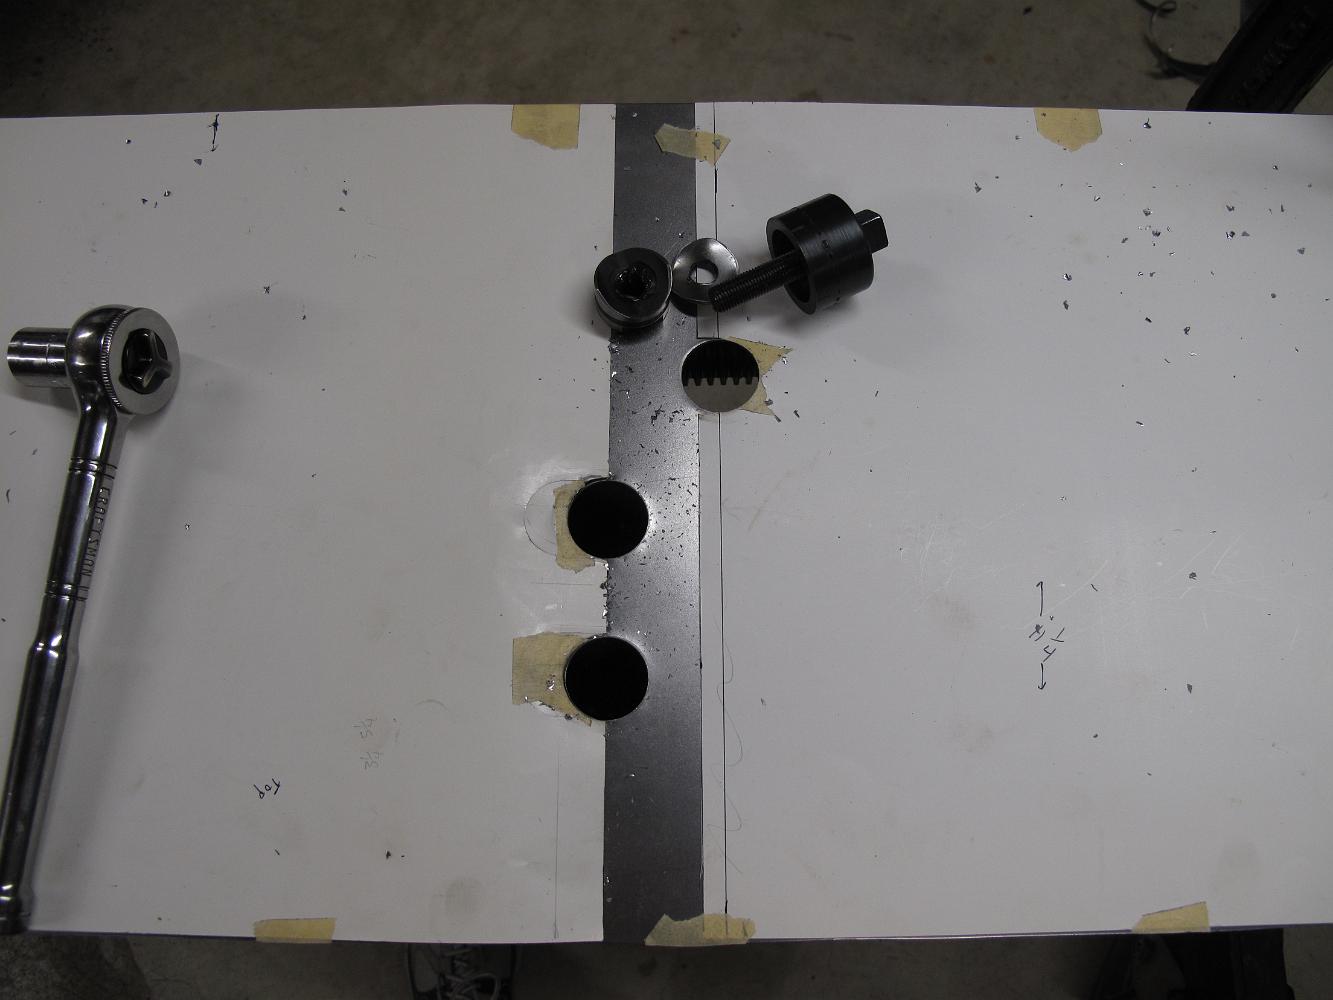
Jacket course #1 needed some one inch holes in it for the check valves, so I grabbed the electircal knockout tool for some easy holes.
22-July-2013 We spend the better part of one evening fitting the first course. We had a lot of trouble getting the top piece to sit down snugly on the boiler.…
29-July-2013 The first course of jacketing fits nicely after we removed the boiler mounting pads for the sand dome. Now we have to figure out how to anchor the…
12-August-2013 We continue fitting and fussing with each course of jacketing until we get everything to fit, including the boiler bands. We needed to use nylon…
15-August-2013 Based on measurements from the SLSF 4100 erecting card print, I begin locating the handrail positions. The turns out to be the start of a small…
15-Aug-2013 After two unsuccessful rounds of using the scriber to mark the handrail positions, I realize my problem is I have not adjusted for the different…
18-Aug-2013 Fourth attempt to mark where the handrail stanchions go on the jacketing. This time I will use a straightedge and flat scriber for the marks.
18-Aug-2013 I go back to the drawing board and figure out the actual handrail stanchion mount points for each course of jacketing.
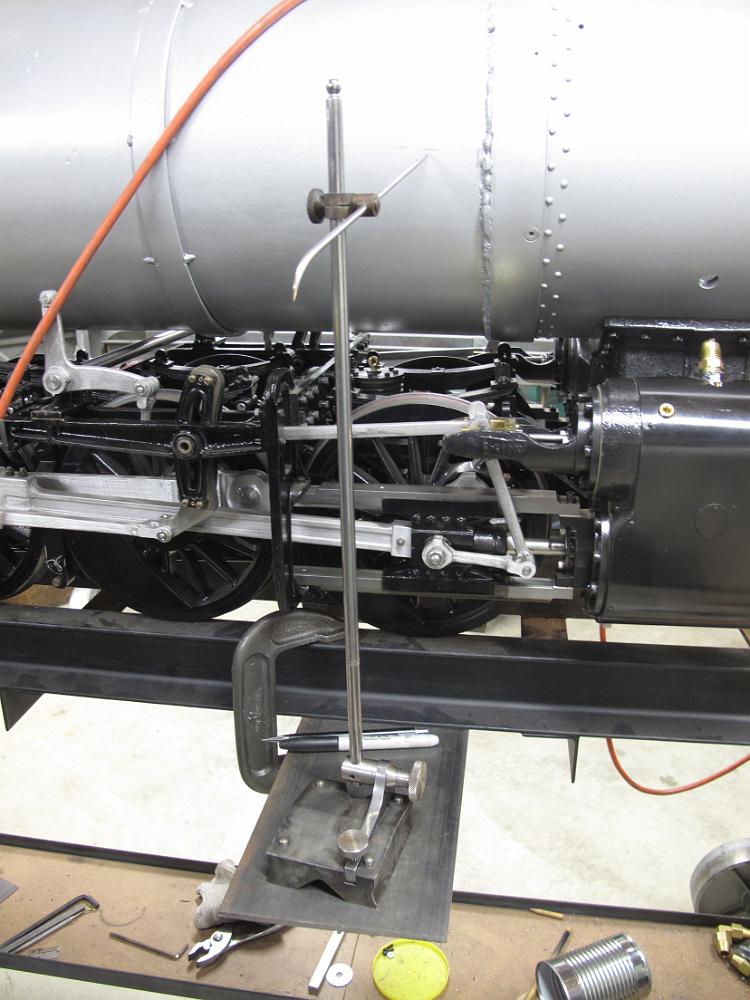
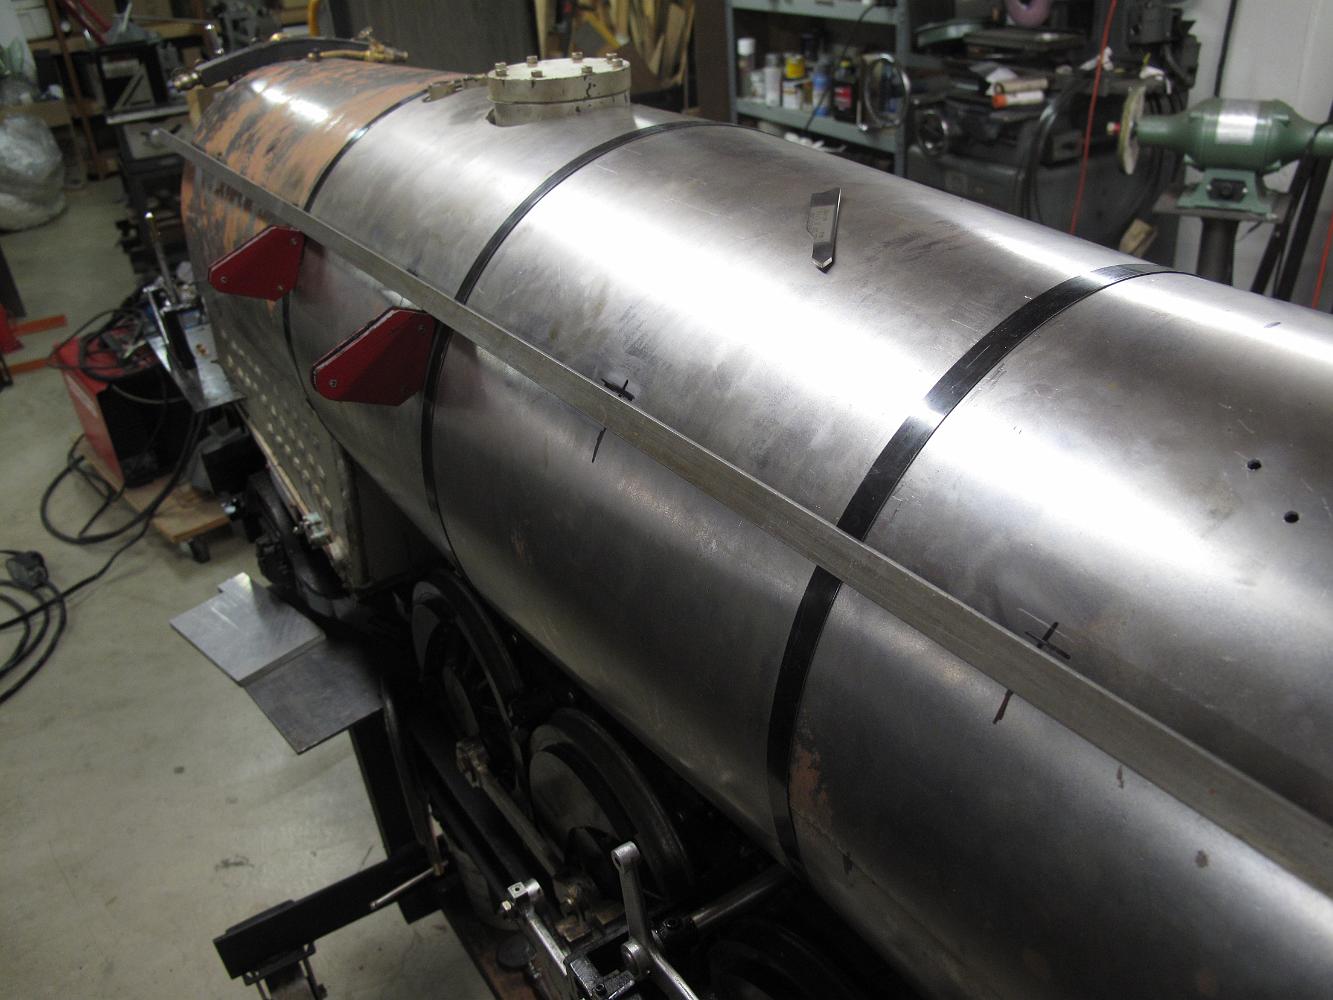
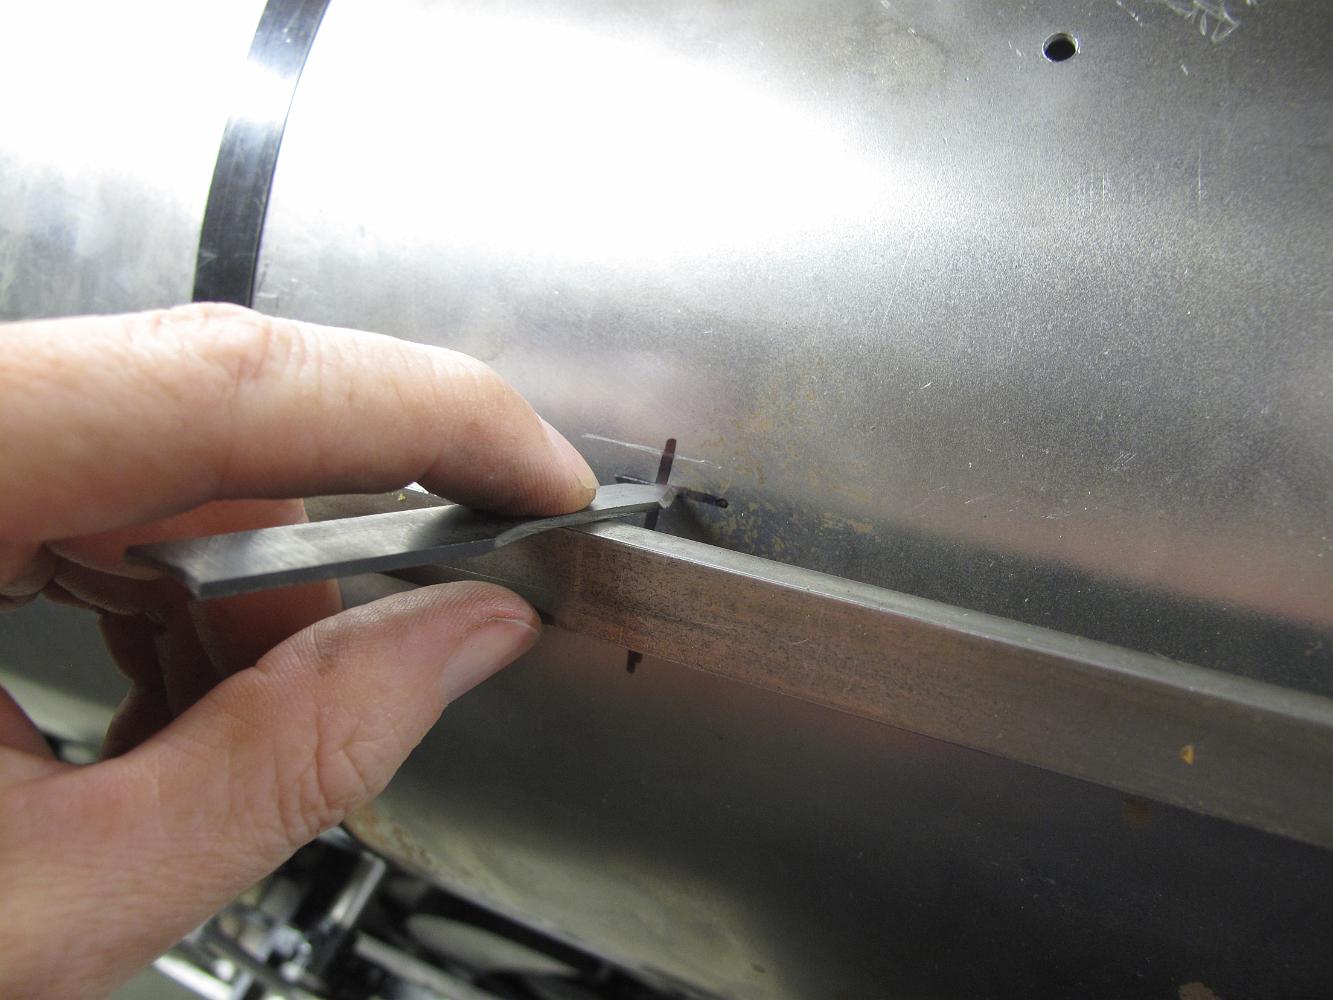
18-Aug-2013 Using a straightedge set to the correct height at both ends of the boiler, I take the flat scriber and mark the stanchion positions. The straight…
9-Aug-2013 The steam dome is chucked in the four jaw, centered using the inside of the dome for reference, and drilled in the center for mounting.
19-Aug-2013 I want to pour lead into the sand dome, but worry that it will not stick to the cast iron casting. So, using the hole in the center of the casting,…
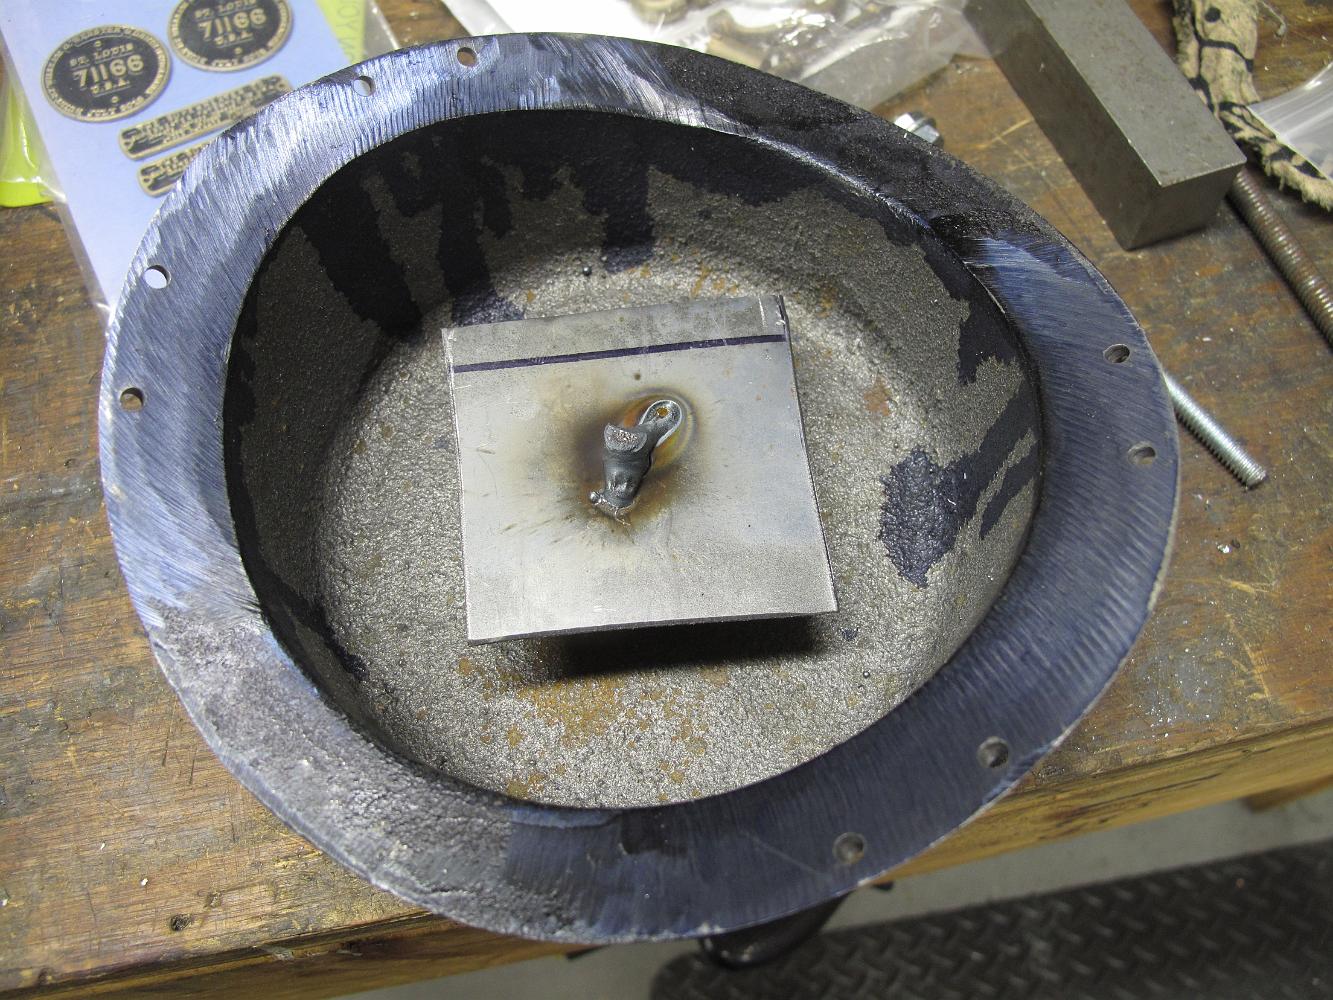
26-Aug-2013 Thinking it might help to preheat the casting, and to more safely contain any possible spills, I put the casting in a bed of dry sand, in a tray, on…
26-Aug-2013 Leaving the sand dome filled with lead to cool, we modify and silver solder the handrail stanchions I purchased to a length appropriate for a Frisco…
27-Aug-2013 Weighing the casting filled with lead - 19.2 pounds. The cast iron dome itself weight about 10 pounds, meaning I only poured 9 pounds of lead. I am…
31-Aug-2013 The 'one more little pour' of lead created a mound of lead which would interfere with the jacketing, so a ball mill and the slowest speed in back…
31-Aug-2013 After machining and a little scraping with a bastard file, none of the lead will interfere with the jacketing when we flip it right side up.
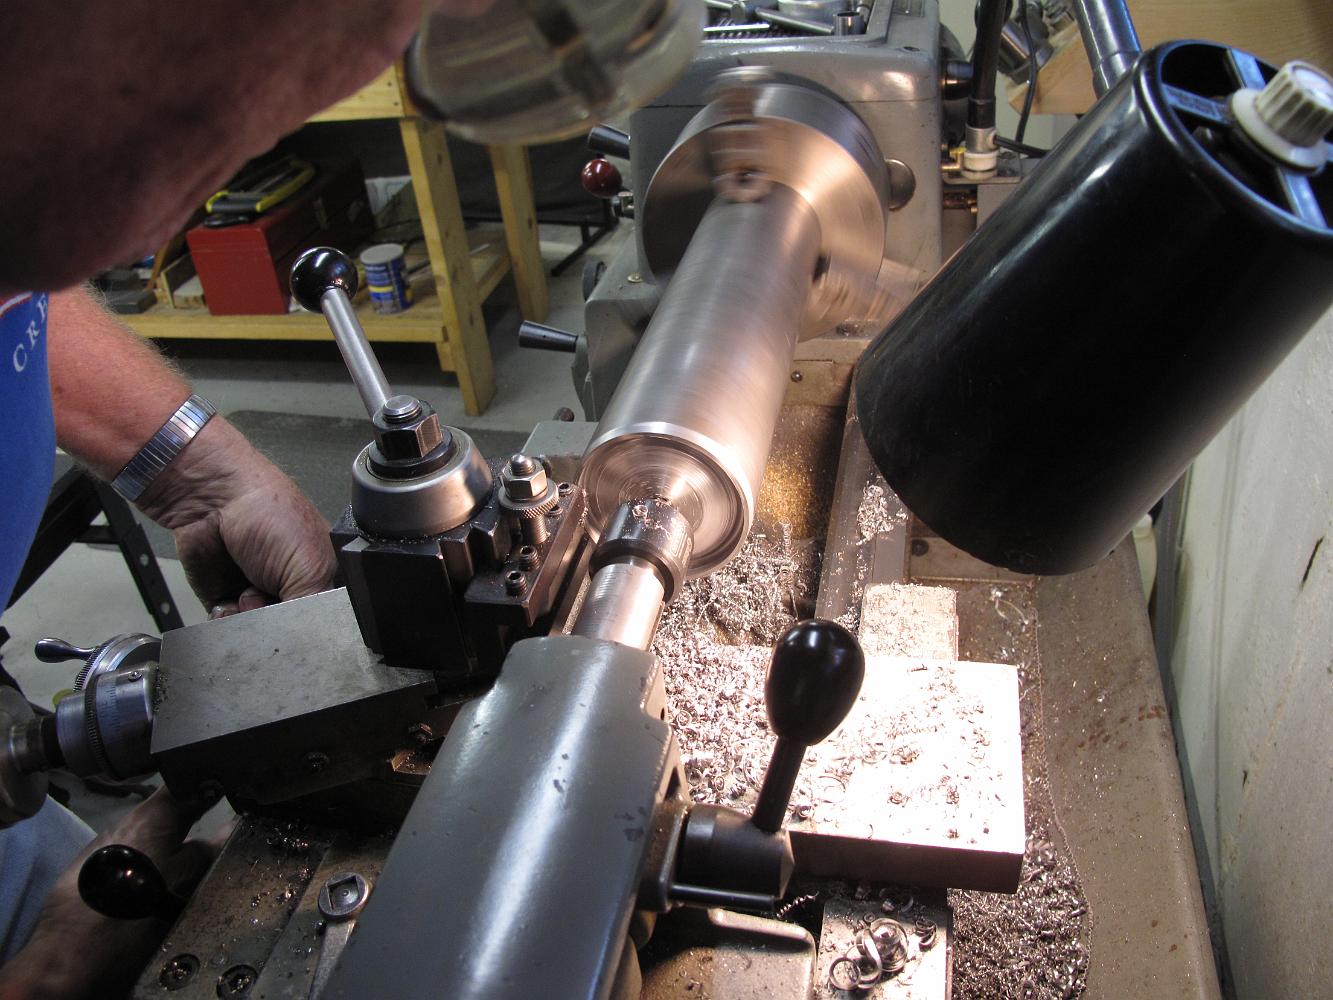
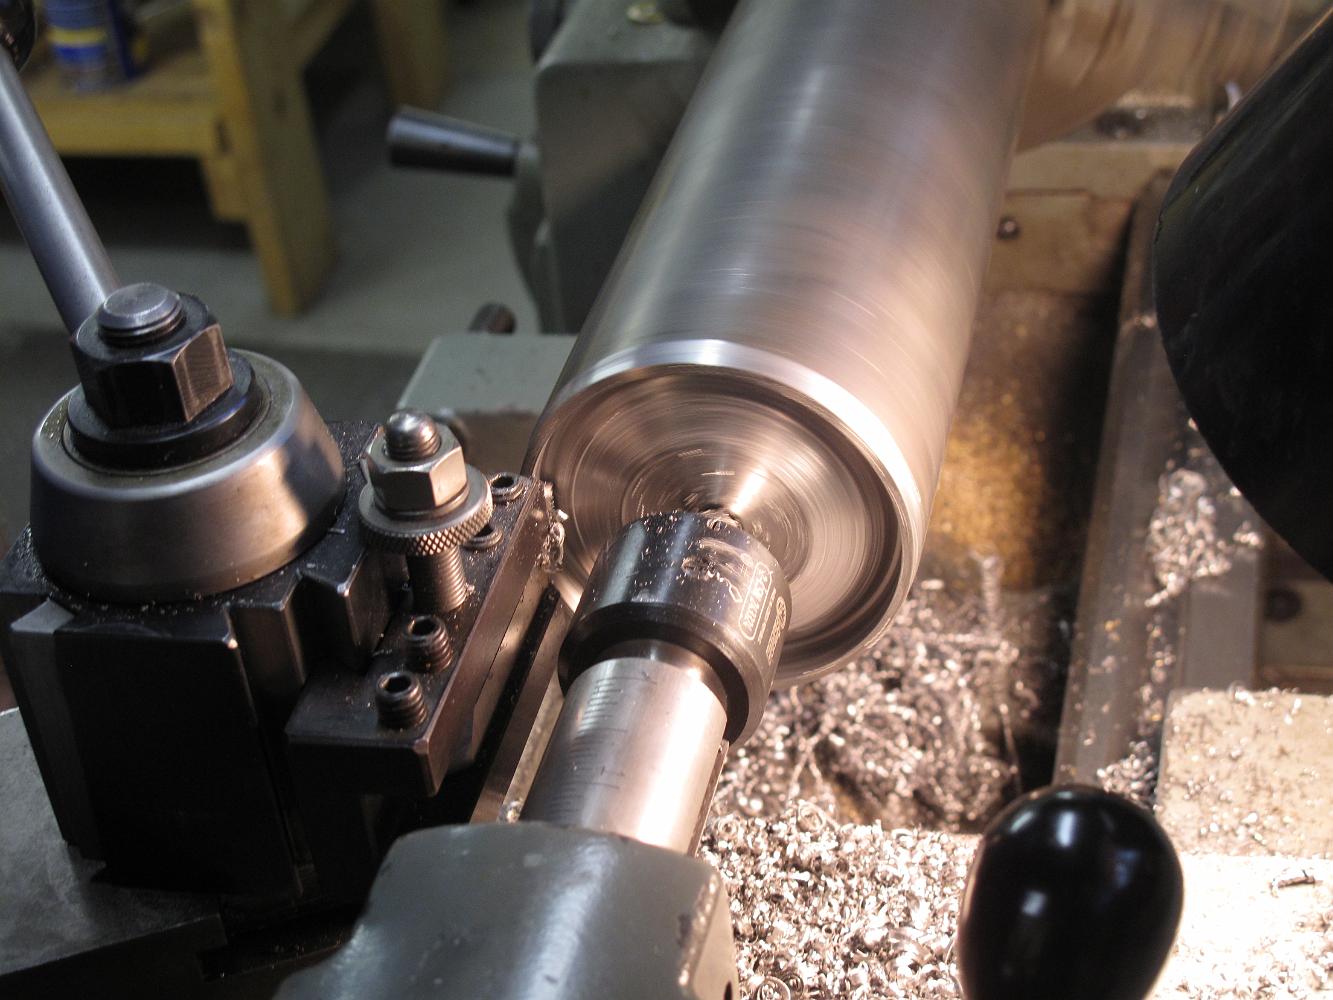
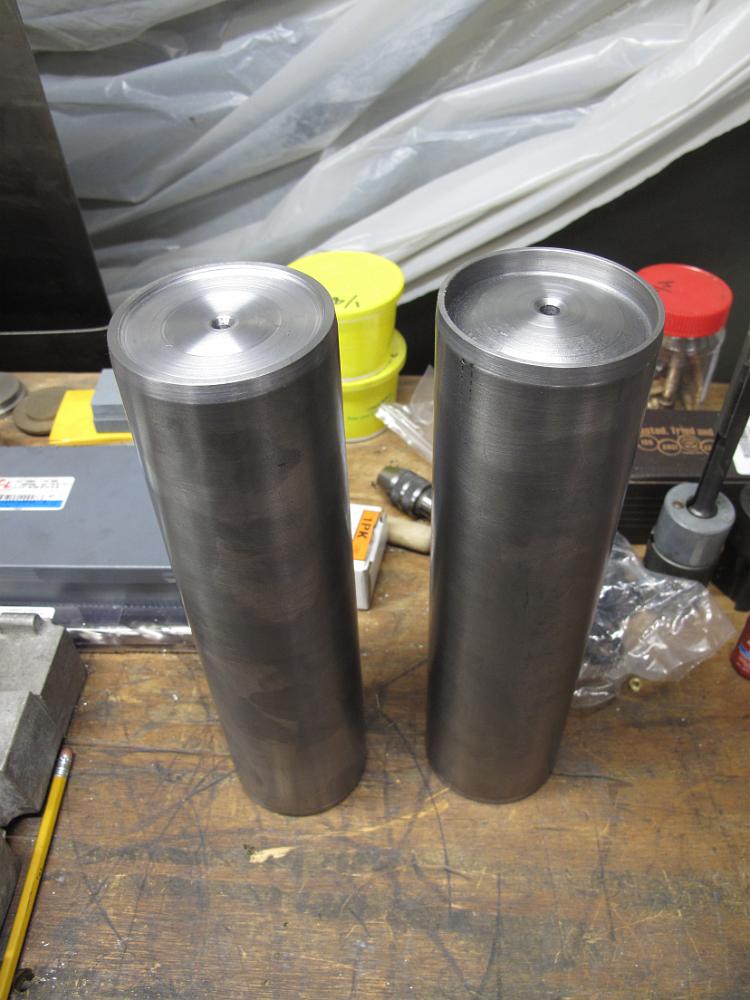
31-Aug-2013 Bill starts machining the decorative air tanks. On the Frisco, the tanks had bell end swedged inside the tank, held in place by crushing down the…
31-Aug-2013 My poor little Clausing steady rest has a maximum capacity of 2-7/8", and these are 3" in diameter. Bill has to machine them between centers without…
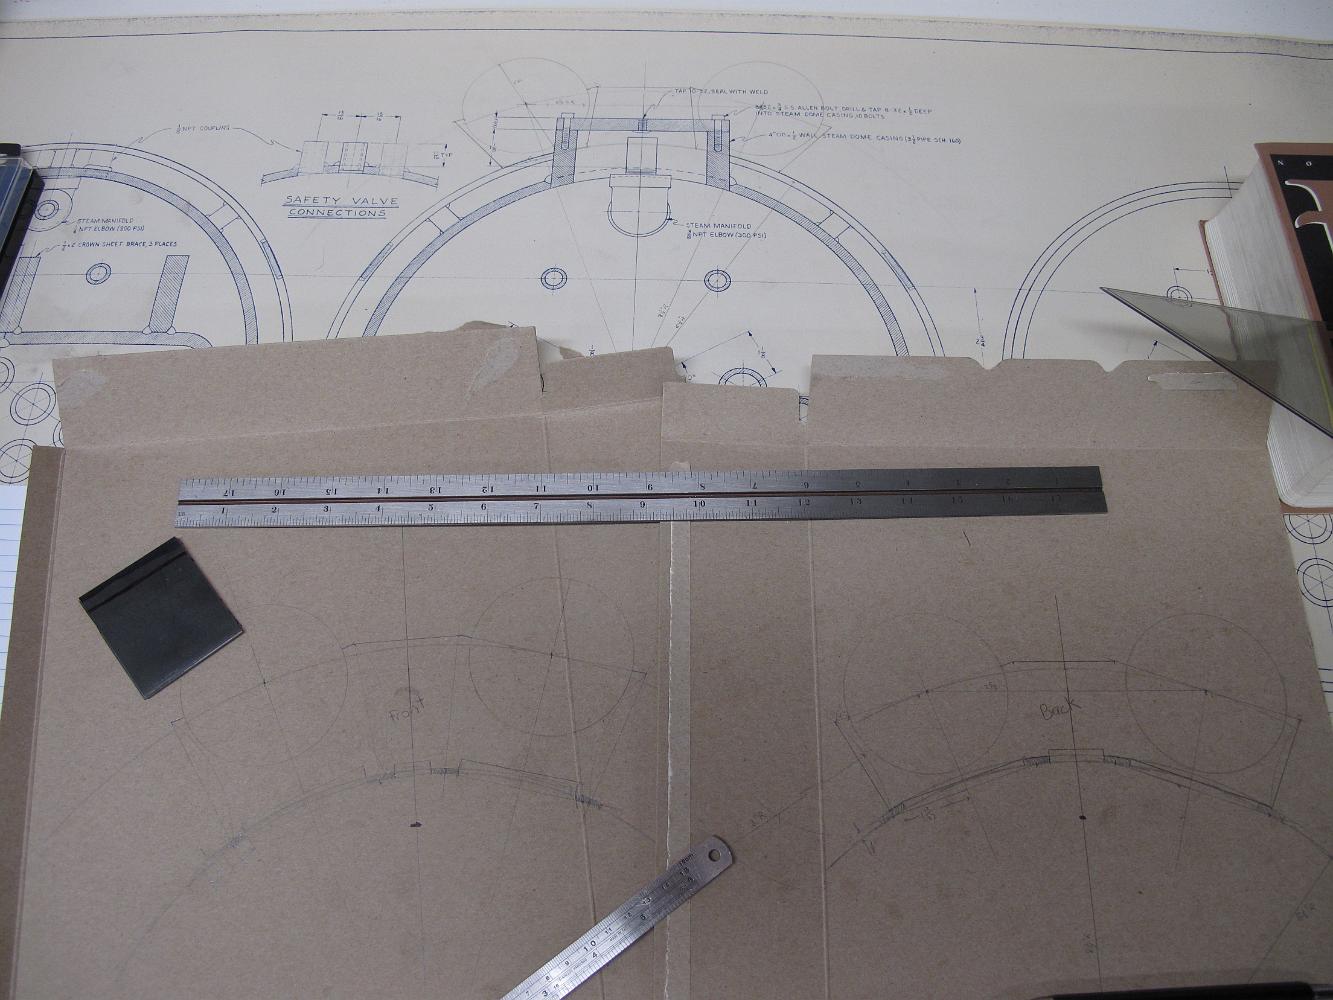
2-Sept-2013 I work on creating templates for the air tank brackets. The tanks are mounted on top of the boiler, not underneath like most roads.
9-Sept-2013 Cardboard templates made and key locations pin punched onto 1/8" flat plate. I rough saw the two pieces out and Bill drills and reams two holes for…
9-Sept-2013 Since the centerlines of both brackets are identical, the pieces are stacked onto each other and locating using pins. Next I tack welded both plates…
9-Sept-2013 With sacrificial board underneath, we step through a succession of boring tools and then boring heads in the boring head to machine out the 3"…
14-Sept-2013 Bill uses a bore gage to verify the holes are three inches in diameter, which match the air tank diameters.
14-Sept-2013 We open a pocket in the center to lighten the appearance of the brackets. The prototype brackets are separate cast pieces, but we make them…
15-Sept-2013 The brackets after machining, with the two air tanks on the right. Next the mounting feet and bolt-down pieces need to be installed.
15-Sept-2013 After some frustrating time with the TIG welder, the feet and mounting pads are welded on.
16-Sept-2013 Standoff pads are welded to the boiler. We plan to match drill and tap the holes into the pads from the bracket feet, after the jacketing is…
September 2013 After pulling the fire out, We have been using a wick dipped in oil, lighting the wick, putting it in the firebox and re-opening the oil valve.…
23-Sept-2013 In a rush to get the brackets ready and mount the air tanks on the engine before taking it out in public view, Bill takes the brackets home to…
30-Sept-2013 ?Why a picture of a dirty burner you might ask? Well, we found that after hard running with the oil valve open, then throttling down to a pilot…
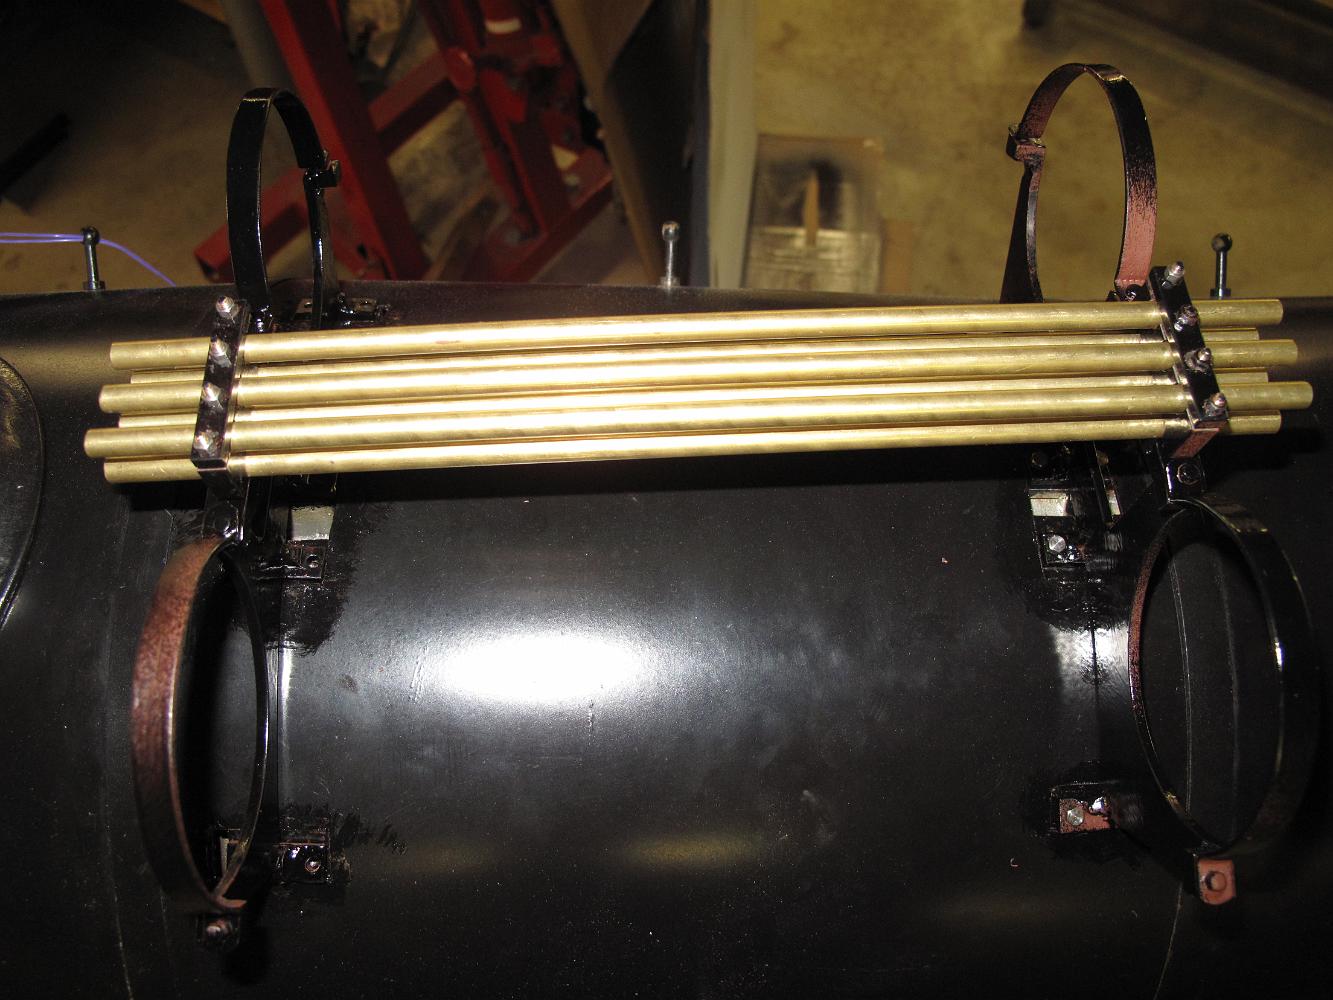
7-Oct-2013 Milling grooves in the top of the air tank bracket to hold the air pipes which are in between the two tanks.
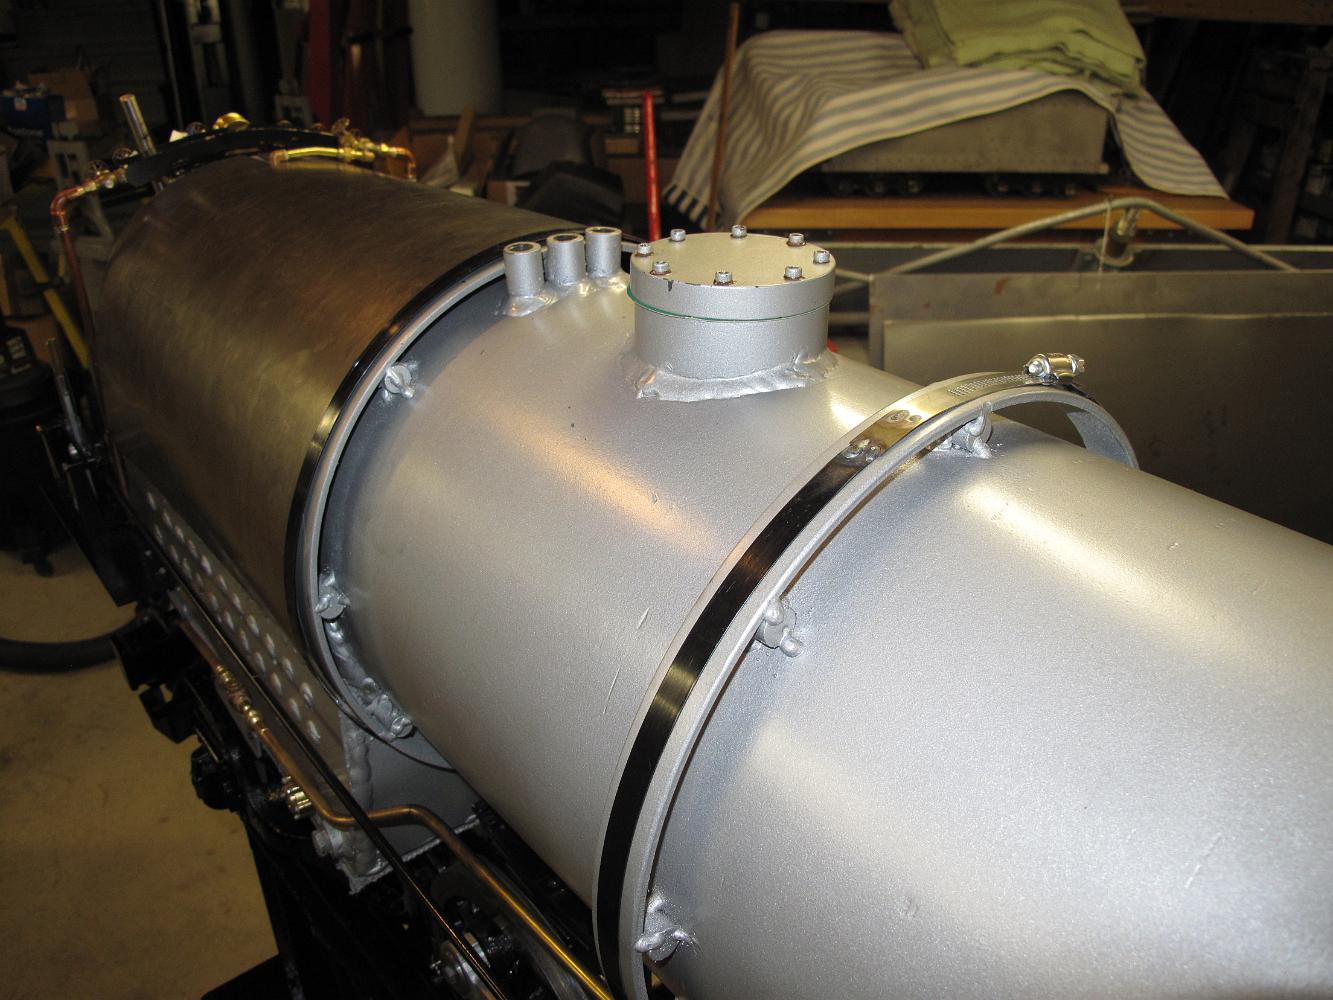
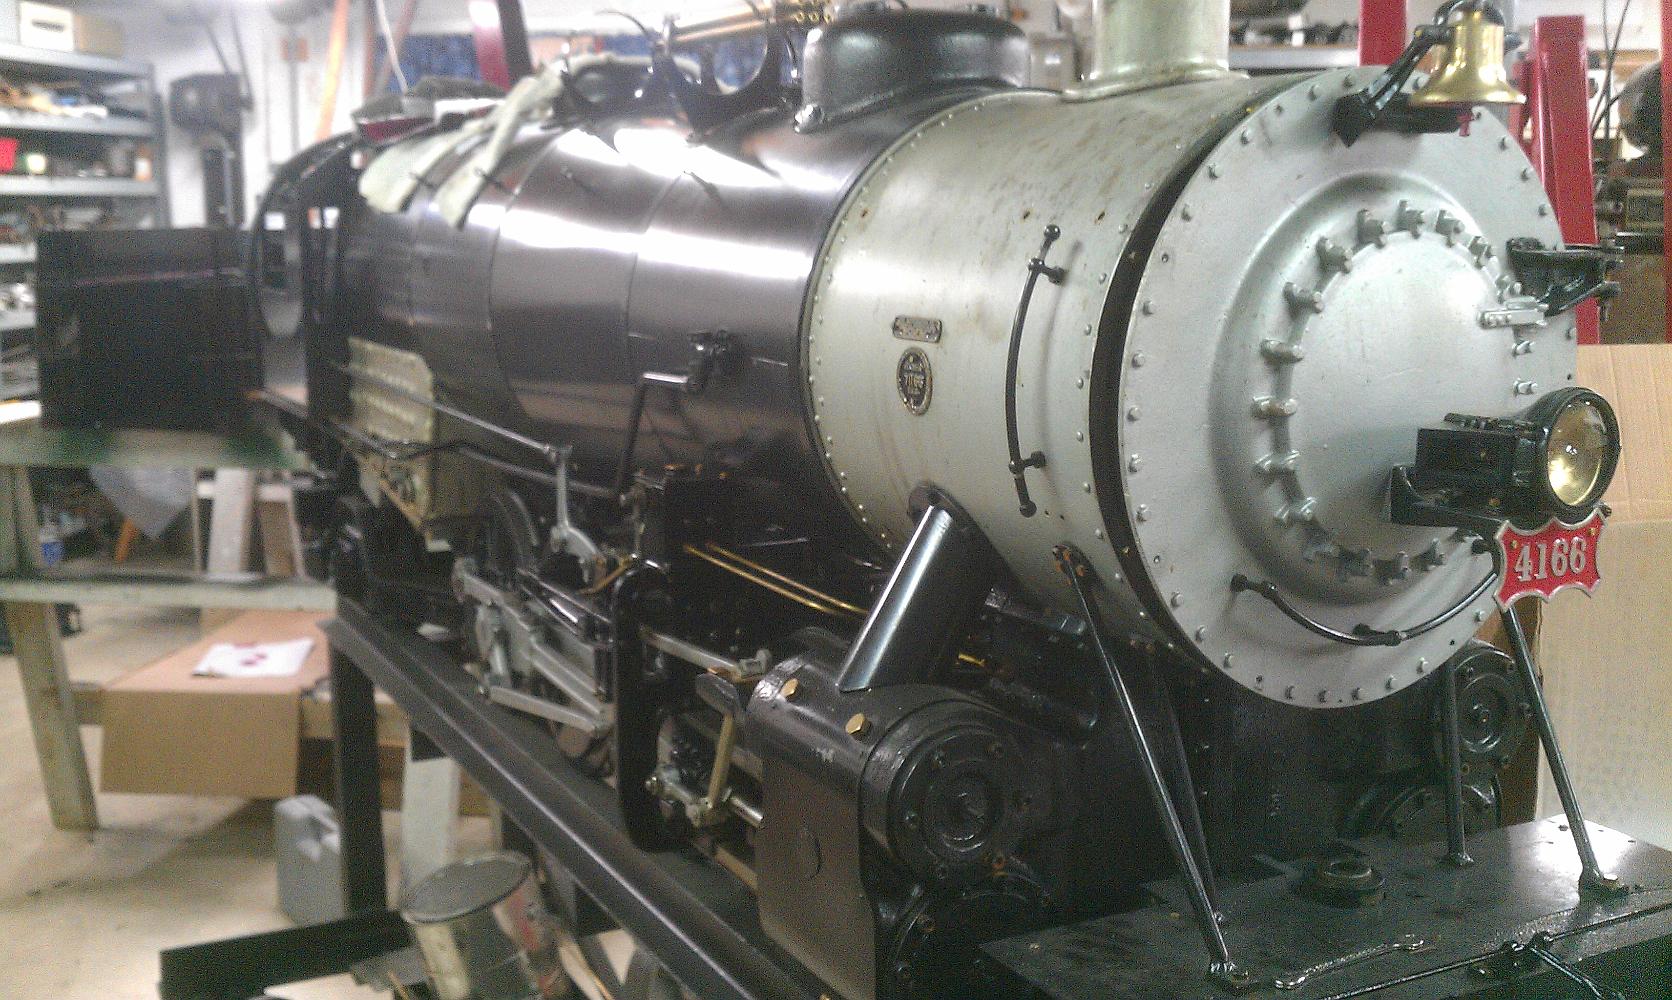
17-Apr-2014 The air tanks in their newly installed brackets. Also plainly visible: brushed paint vs. sprayed paint. Brushed paint, even from the same…
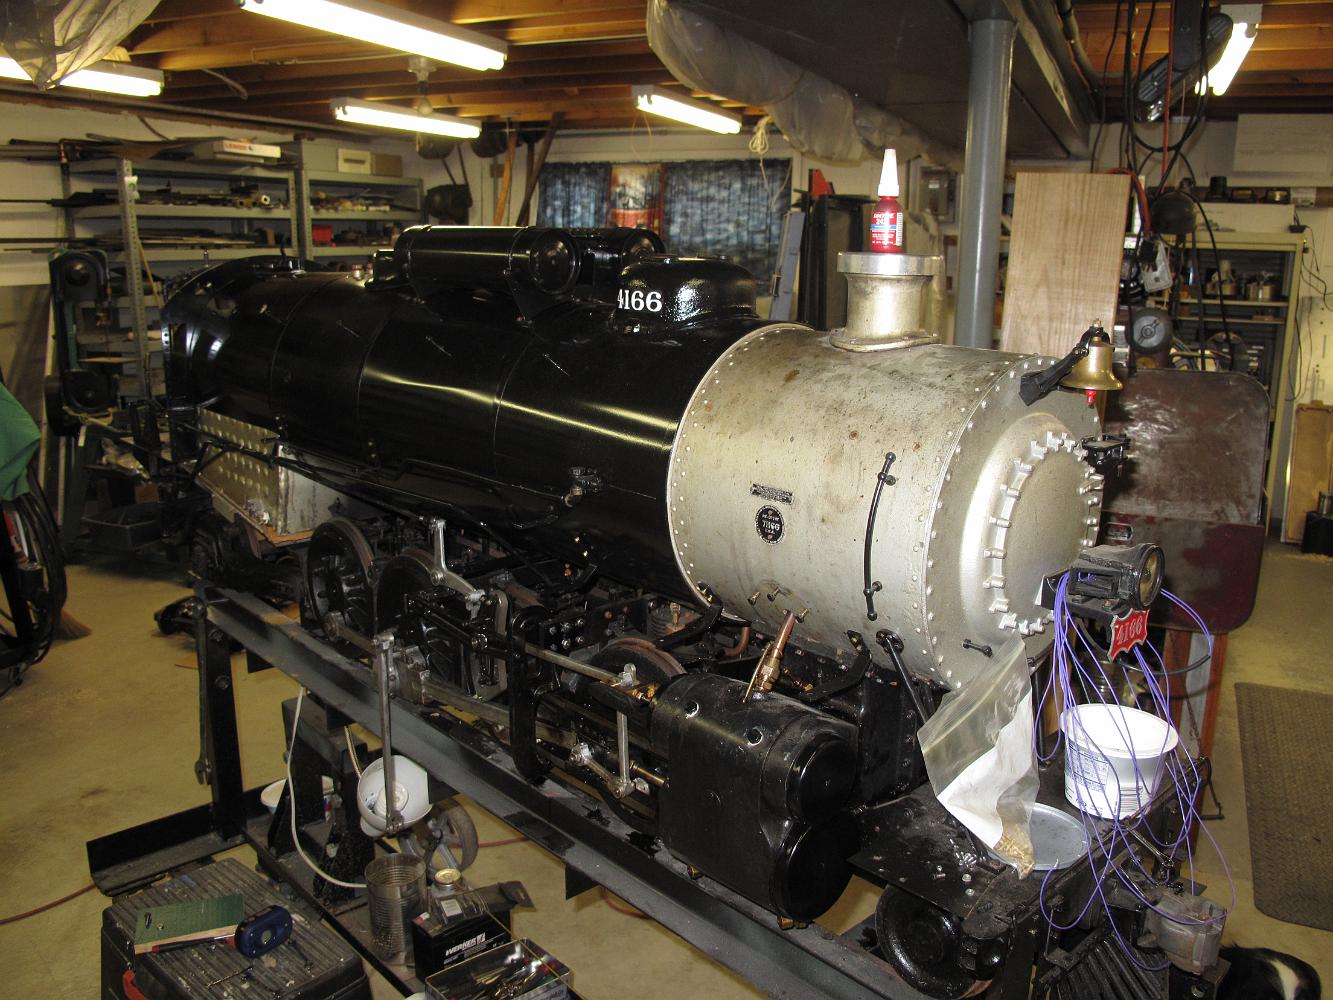
18-Apr-2015 Reinstallation of the boiler jacketing. We had to cut holes for the whistle fitting, a crown sheet washout plug, and repaint.
18-Apr-2015 Reinstalling the jacketing. We added mineral wool insulation to the second and third courses where there was the most room. There is only 3/16" on…
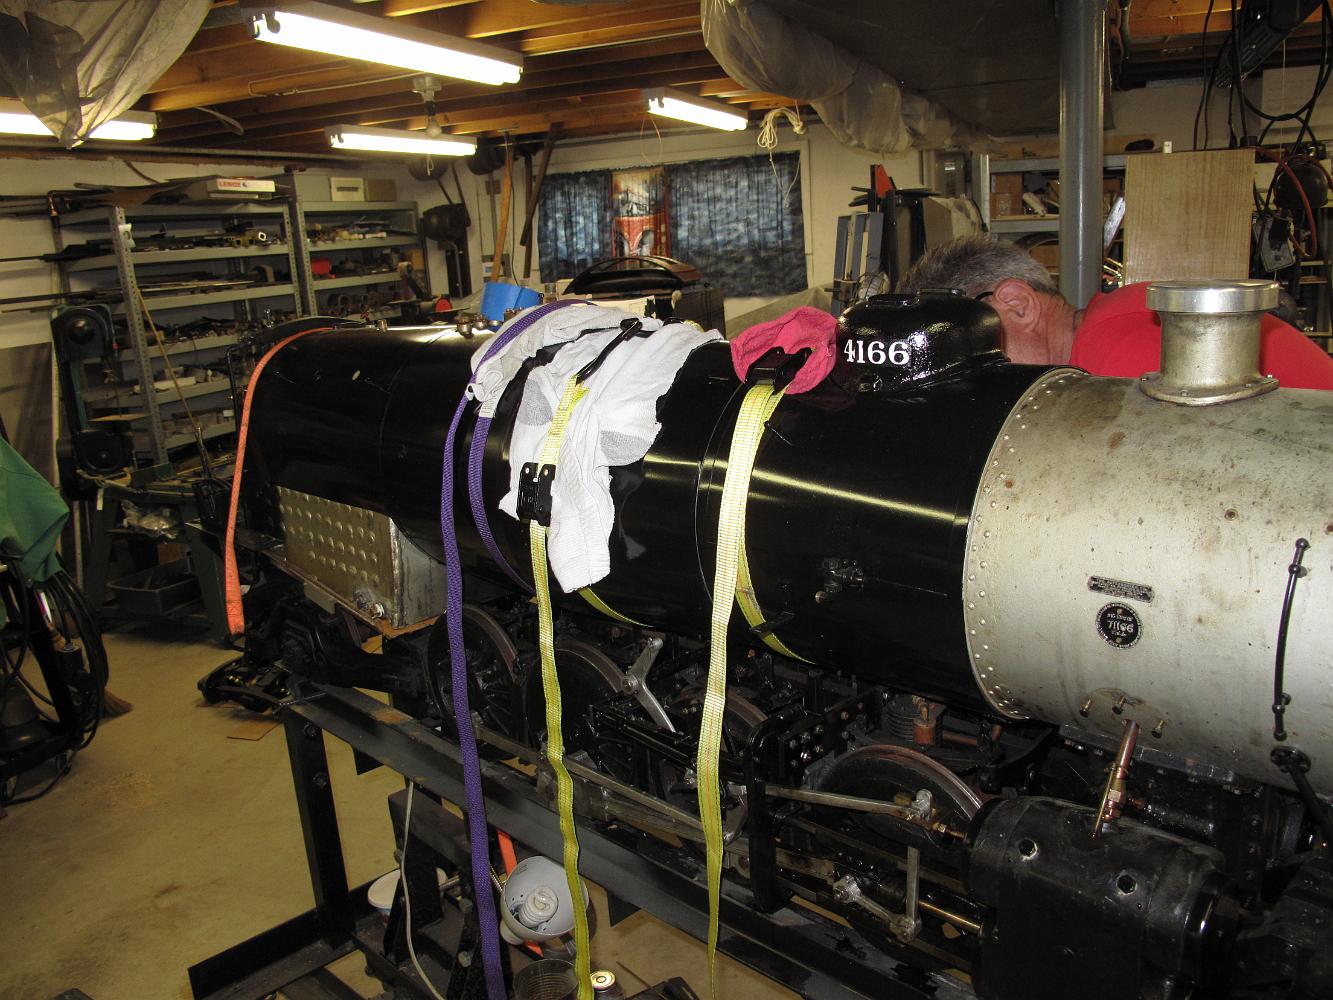
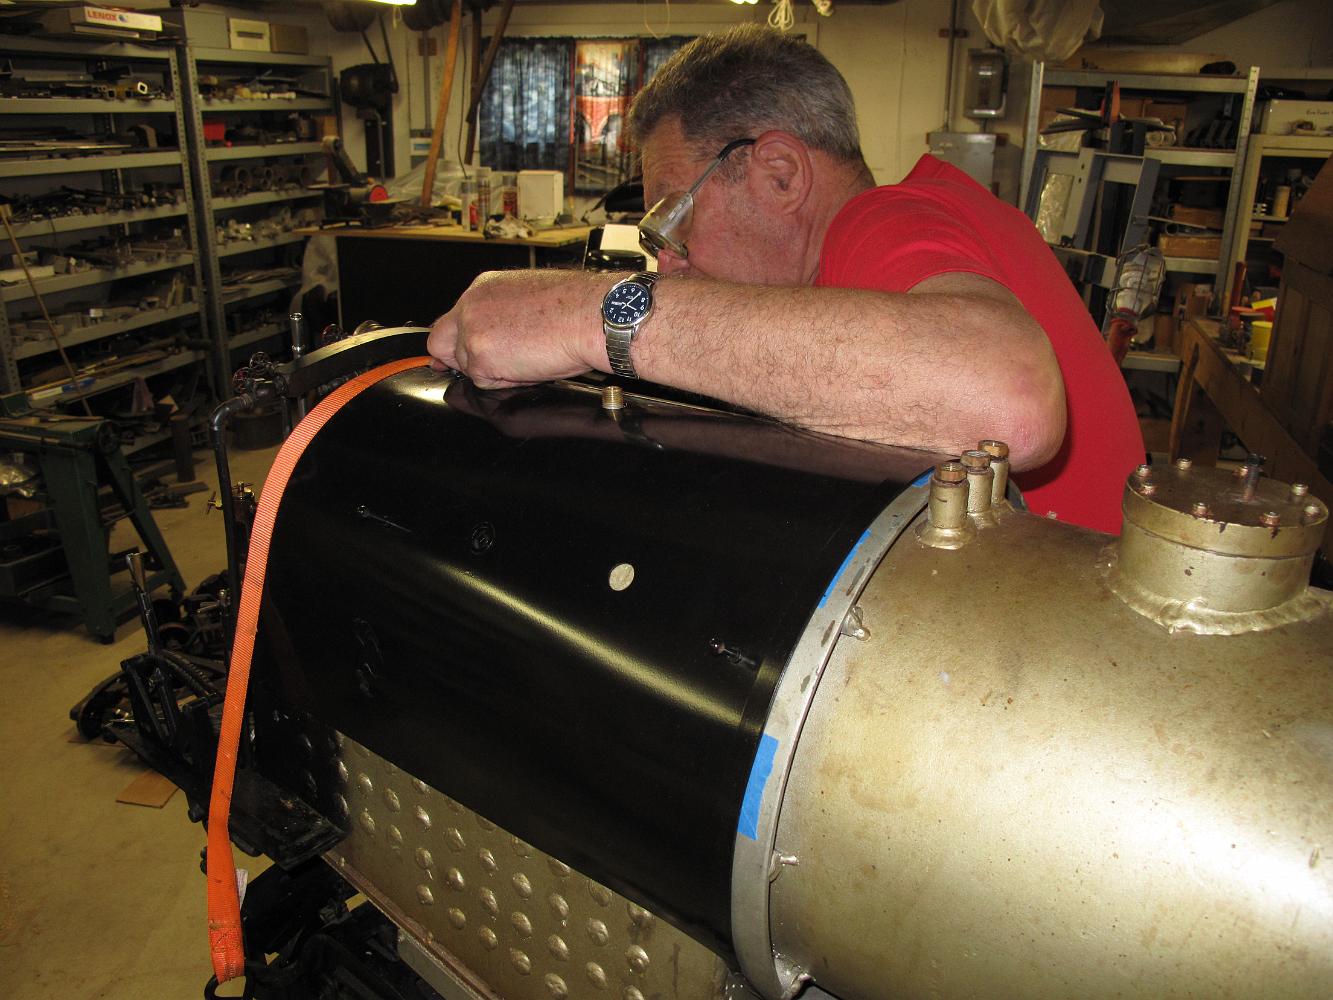
18-Apr-2015 The heavy gauge jacketing is pain to wrestle into place. Lots of ratchet straps and rags to minimize paint damage were used to reinstall the…
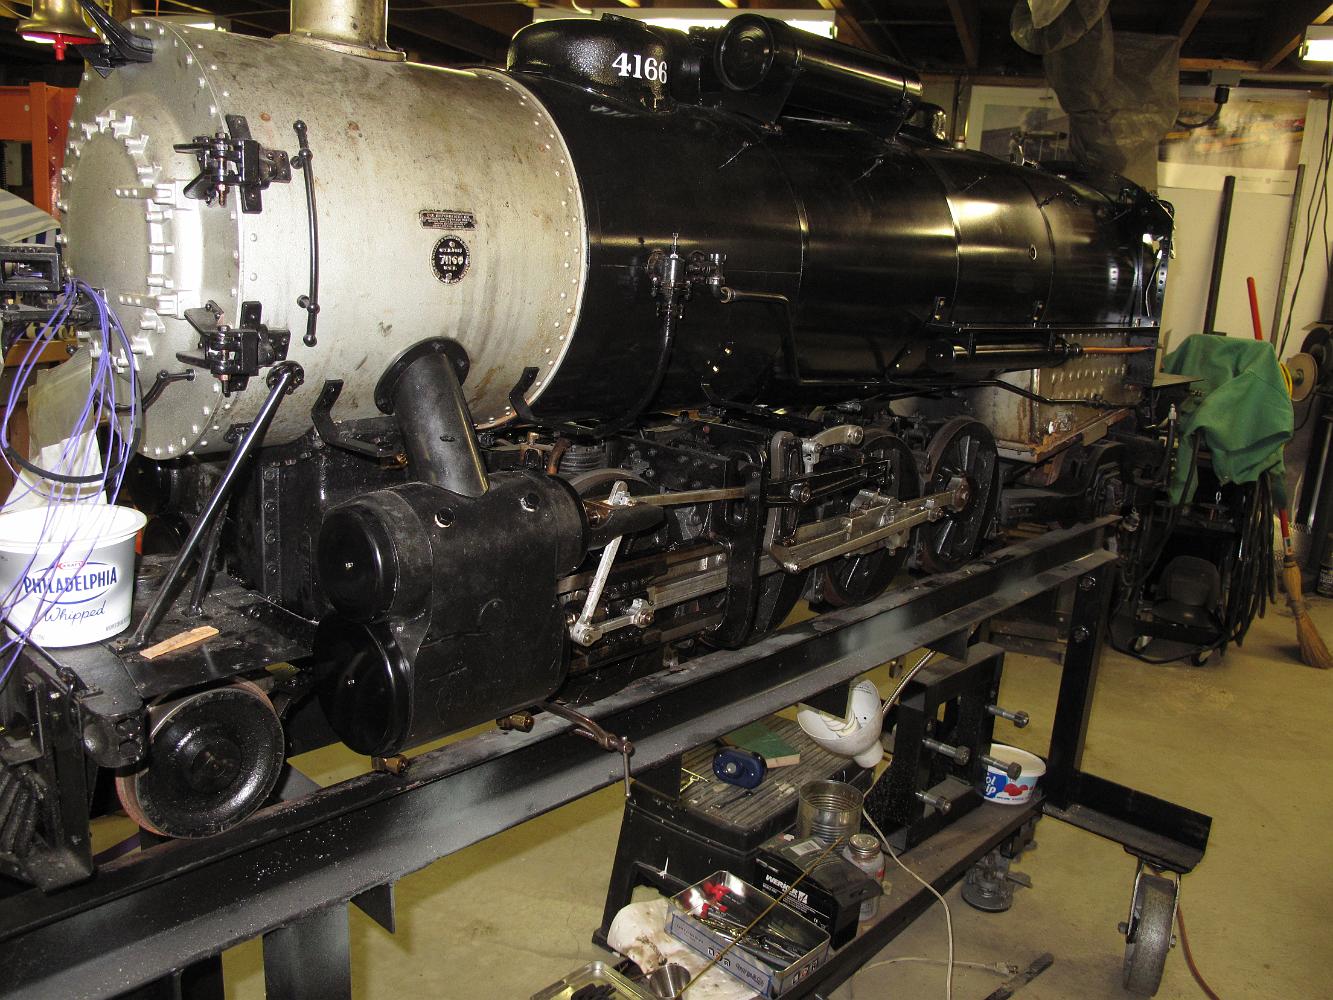
18-Apr-2015 Freshly painted jacketing reinstalled. Tapped nuts have been welded to the inside to mount the running boards and insulation added to the boiler.