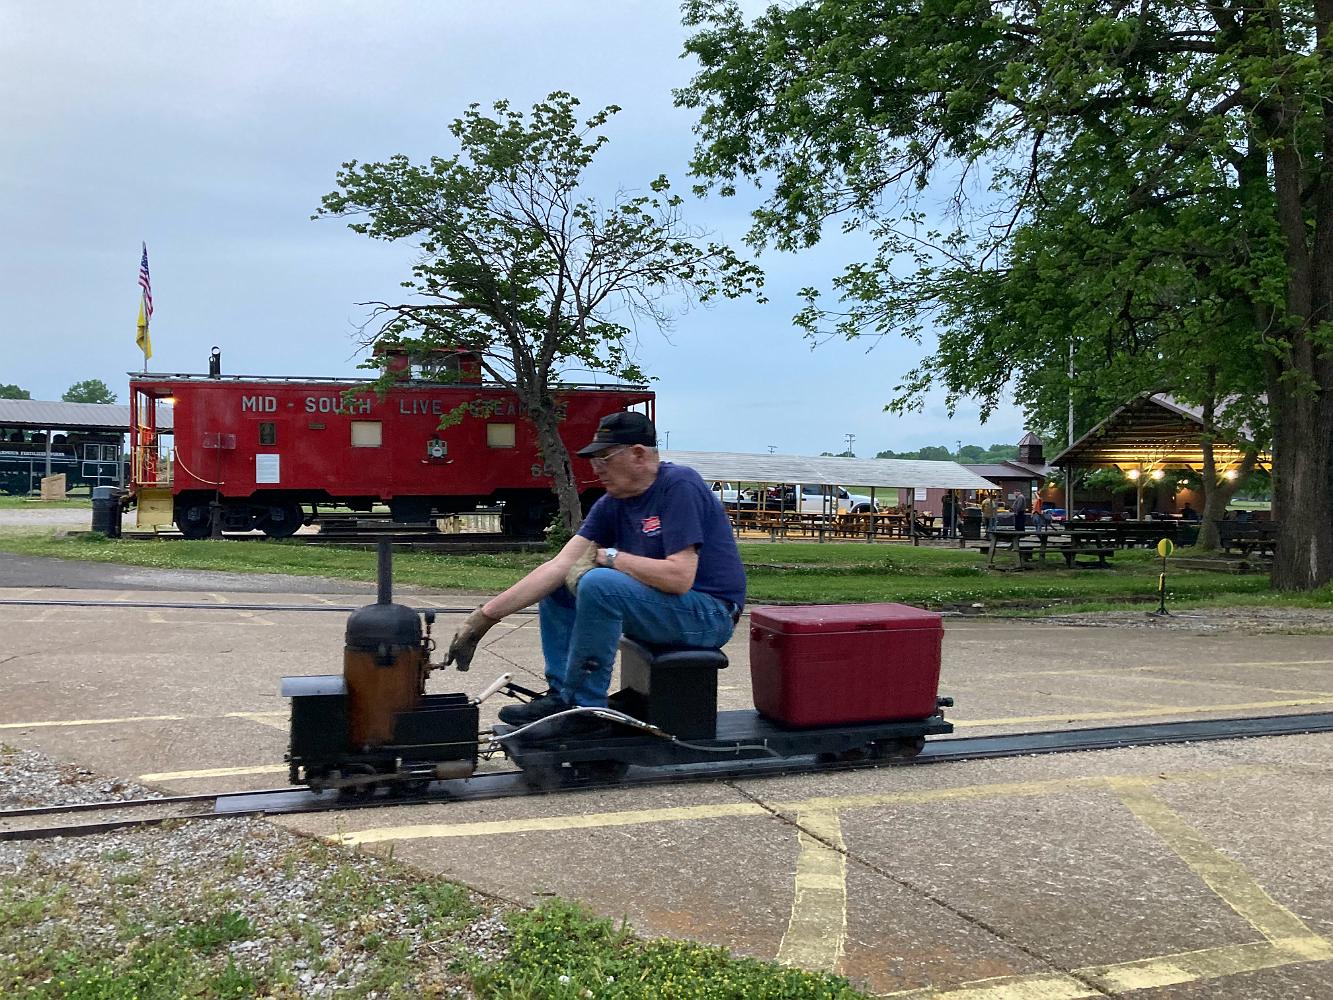
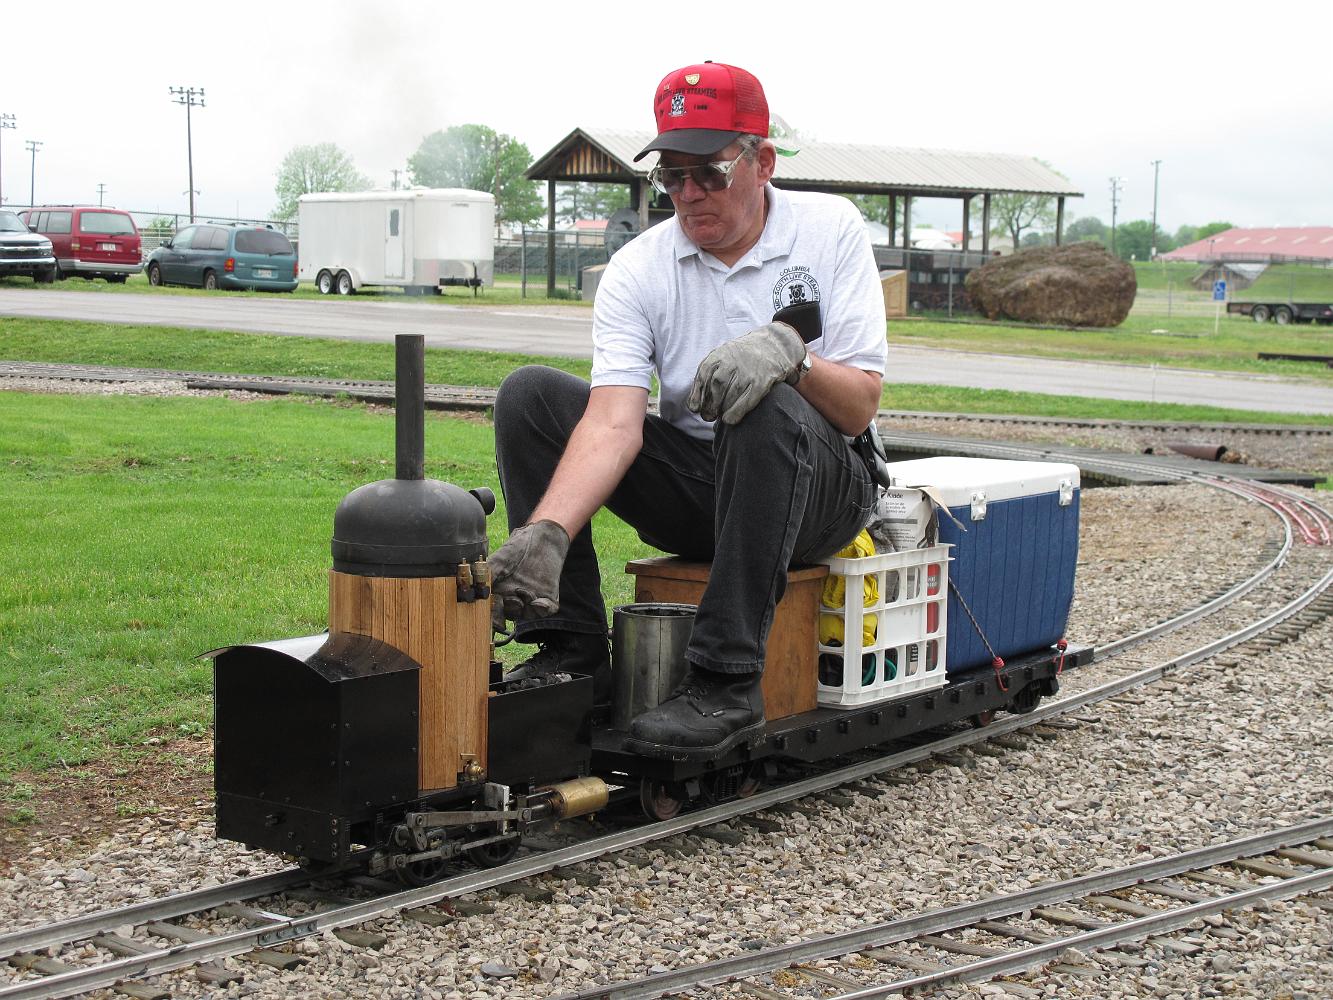
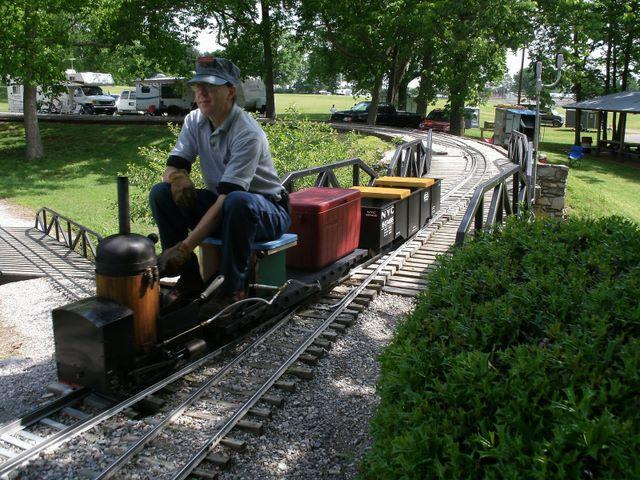
5-May-2022 Bill chargees around the lower loop at the Mid-South Live Steamers track in Columbia TN. It's been four years since it's last steam up and she ran…
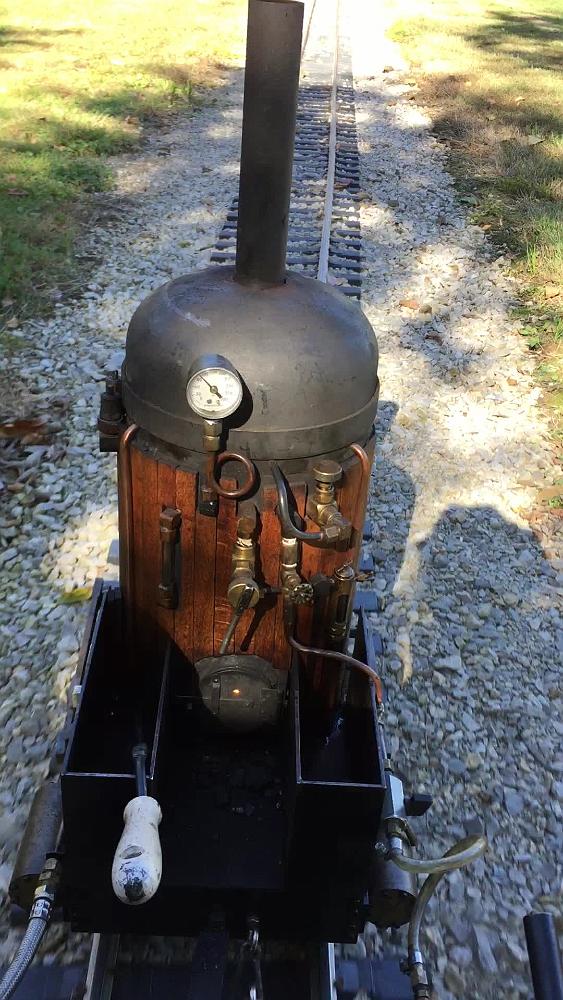
Engineers view of the Crab charging up a hill.
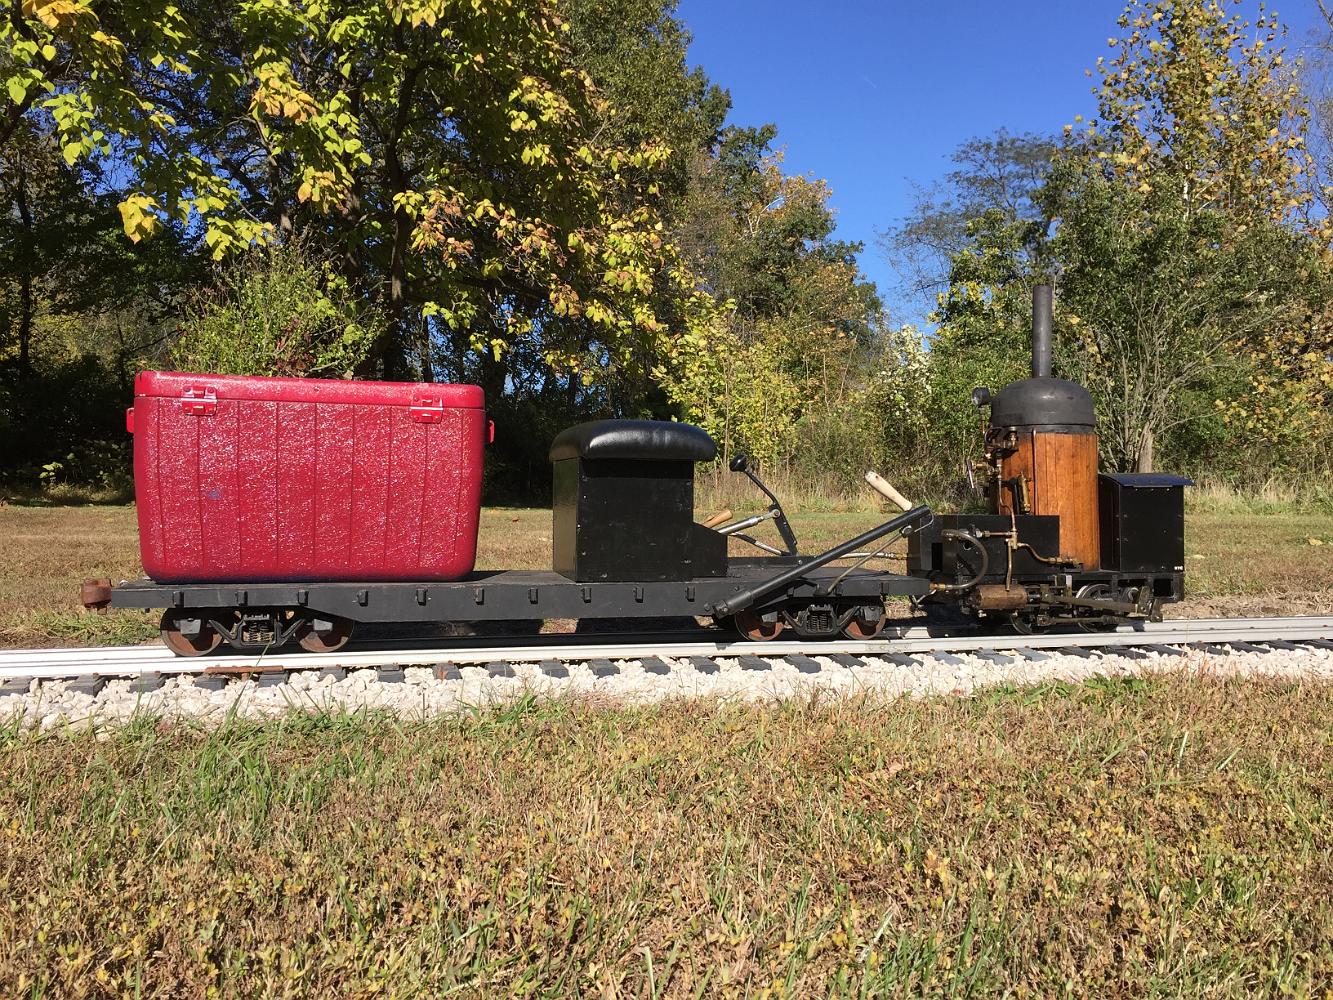
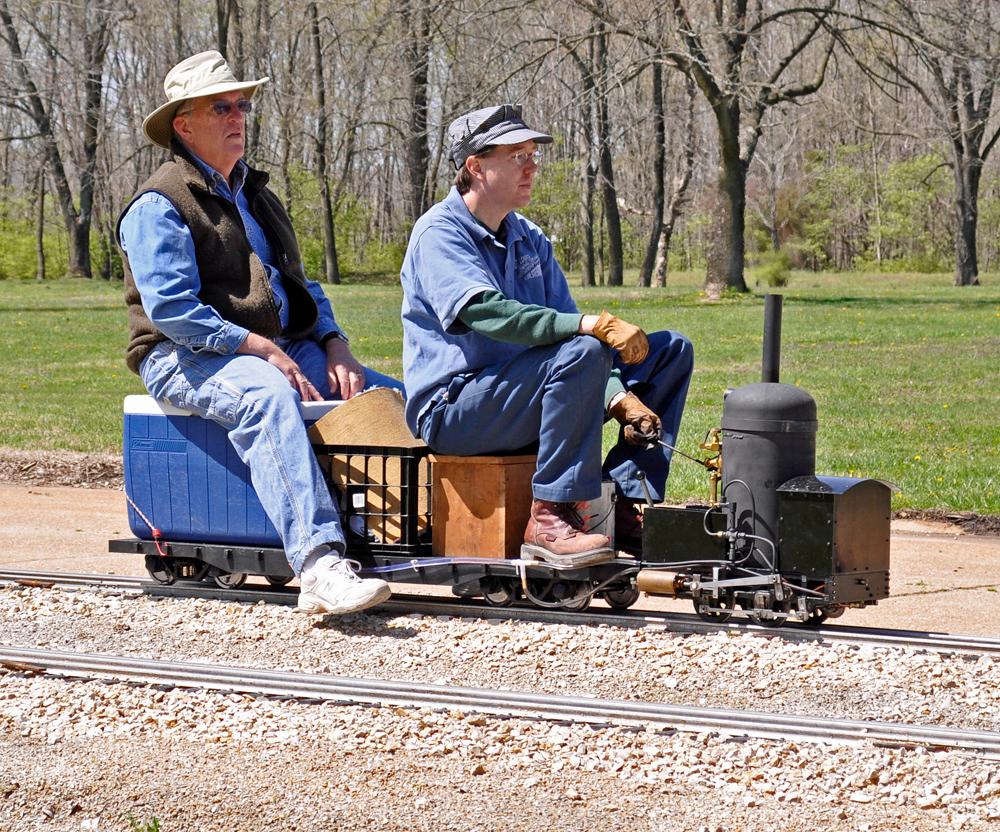
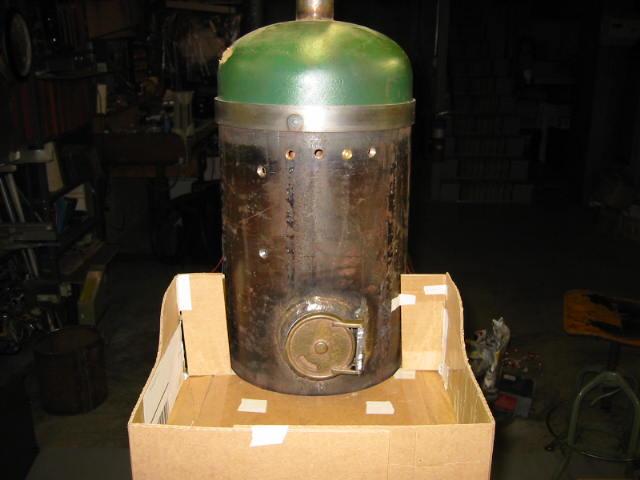
Ten years later after first steam up, the Crab is still a fun little engine to run around the track!
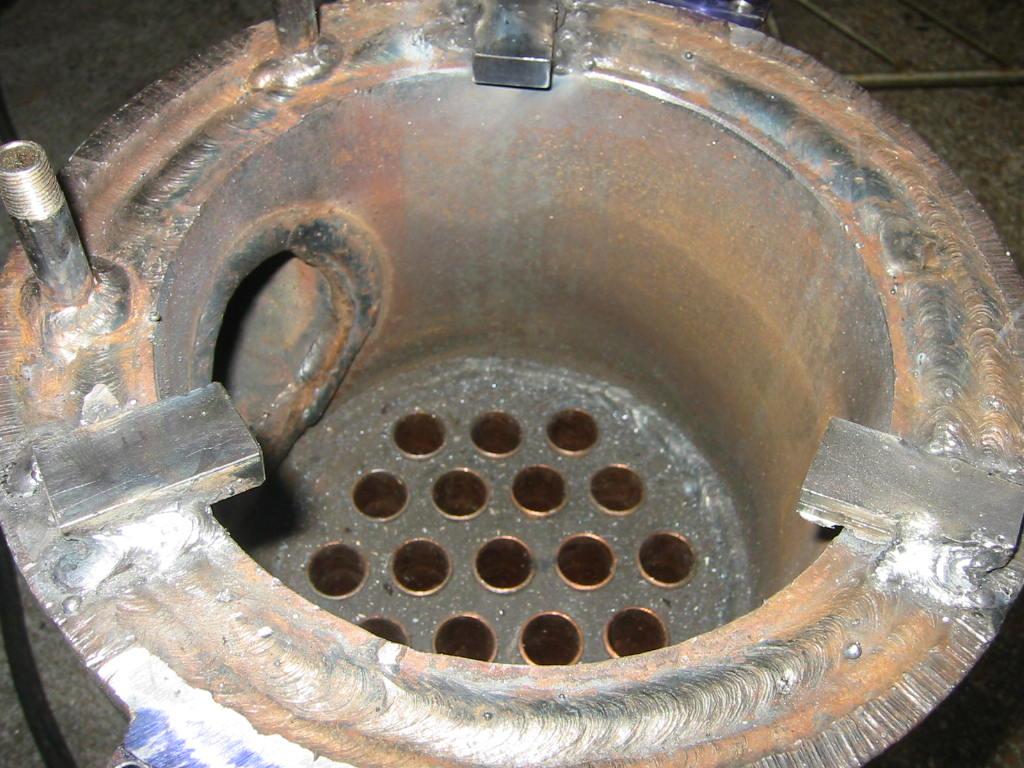
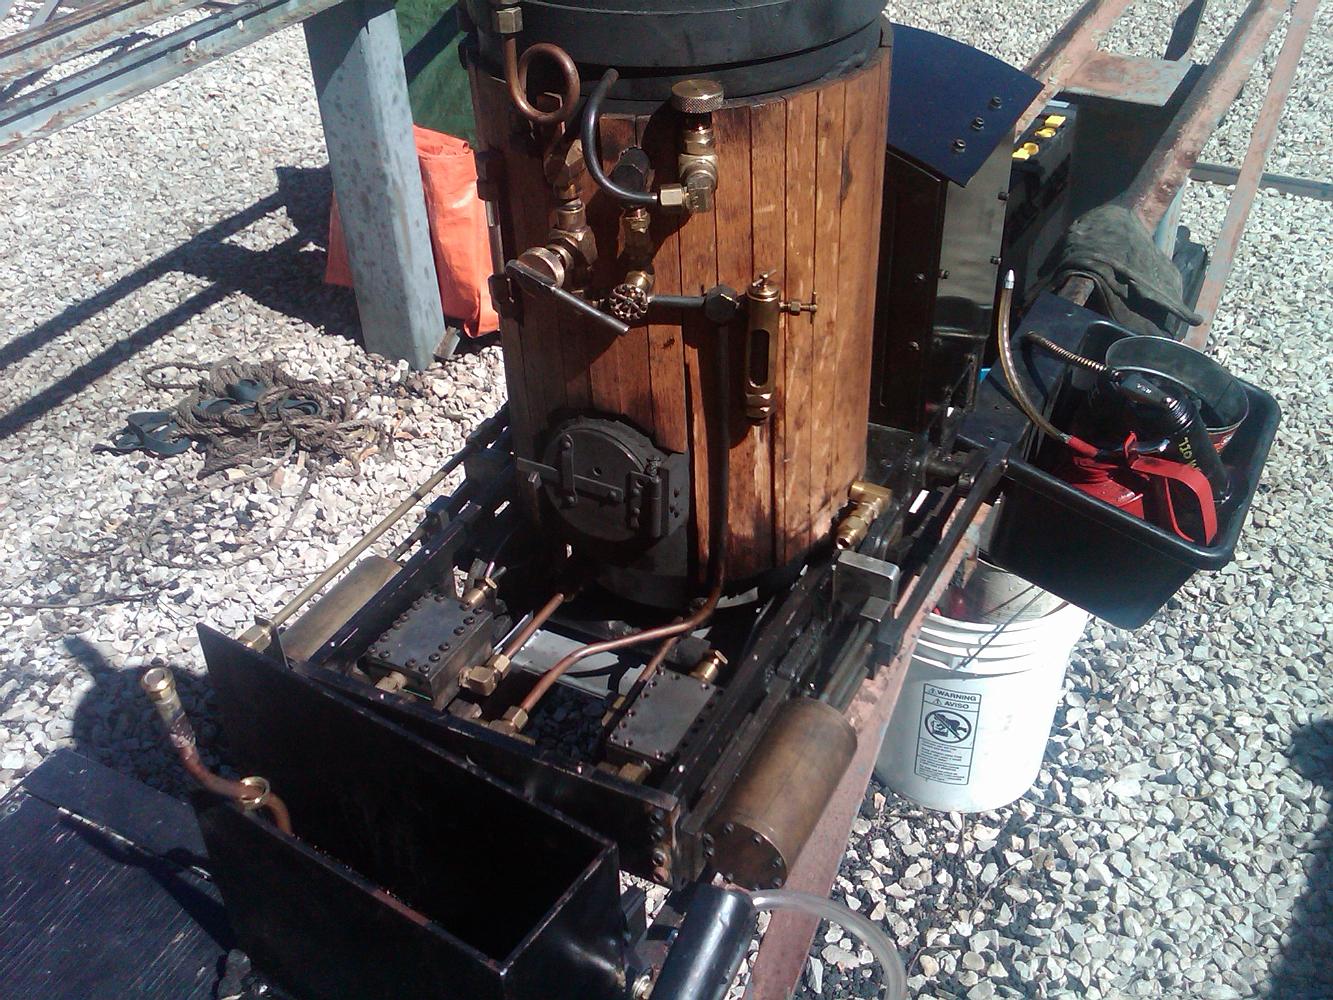
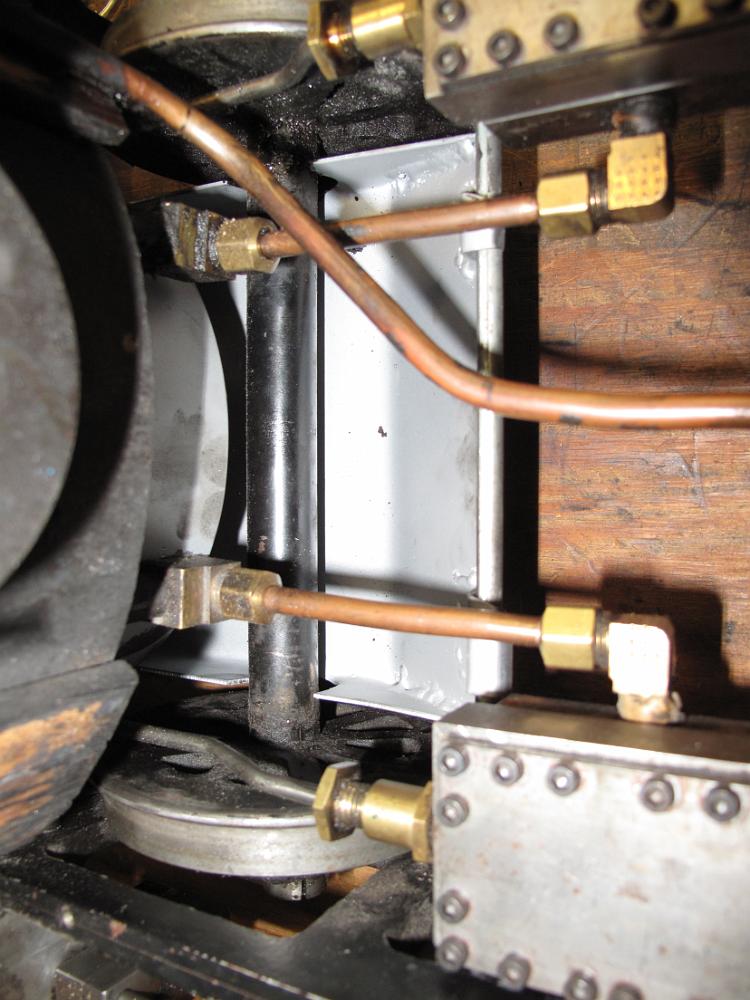
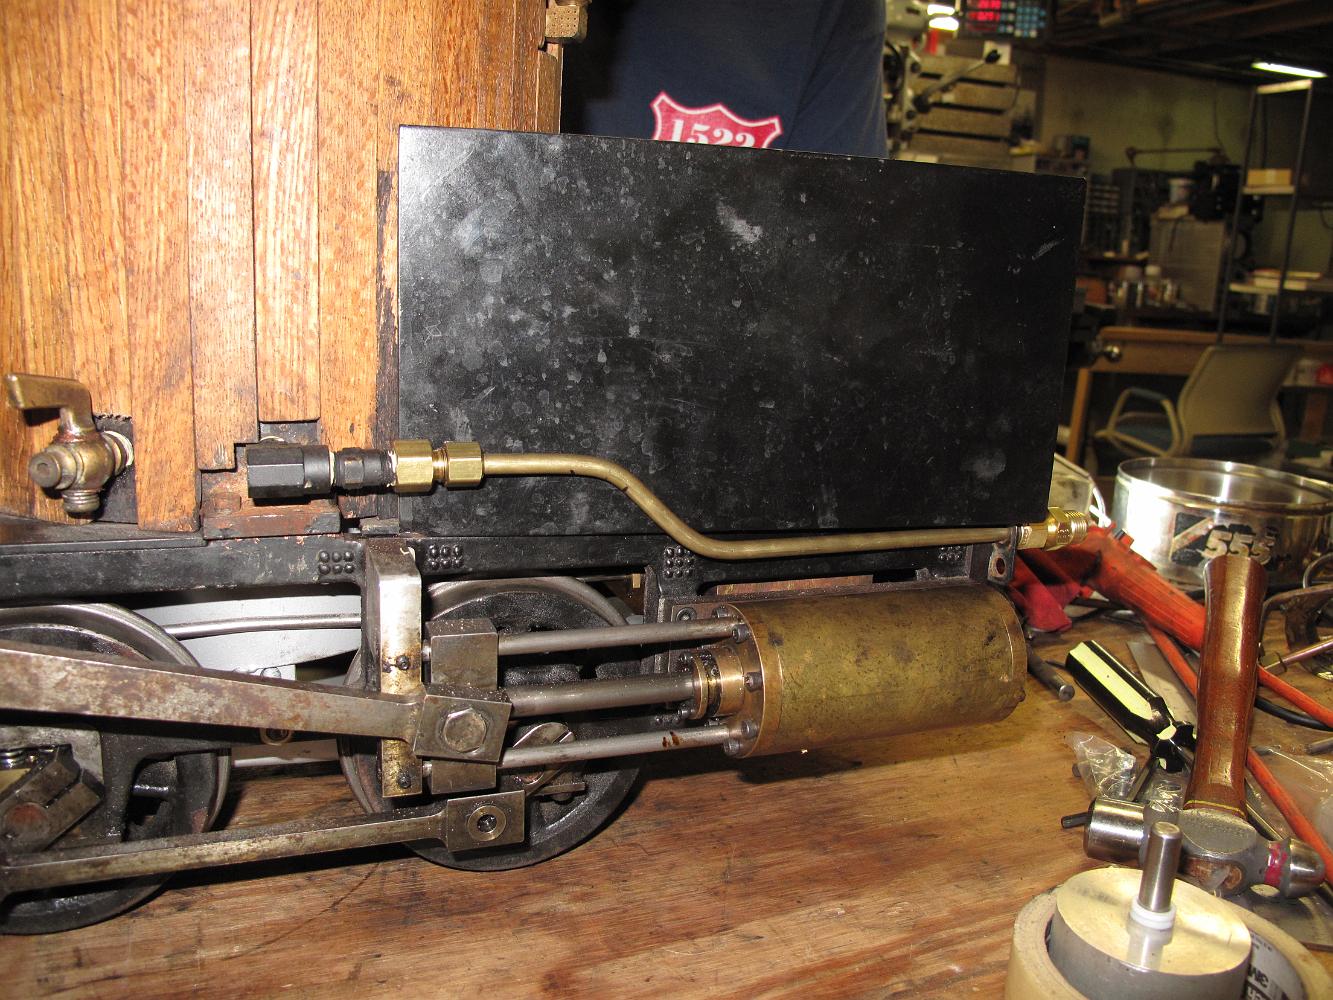
2018-May-20 Notice the shiney copper pipes on both sides of the boiler? After 10 years of service, the steel exhaust pipes, which run through the waterspace of…
Mid-South Live Steamers, May 1, 2009 Spring Meet. Here is Bill rounding the curve with the crab. The wood jacketing was installed earlier that week.
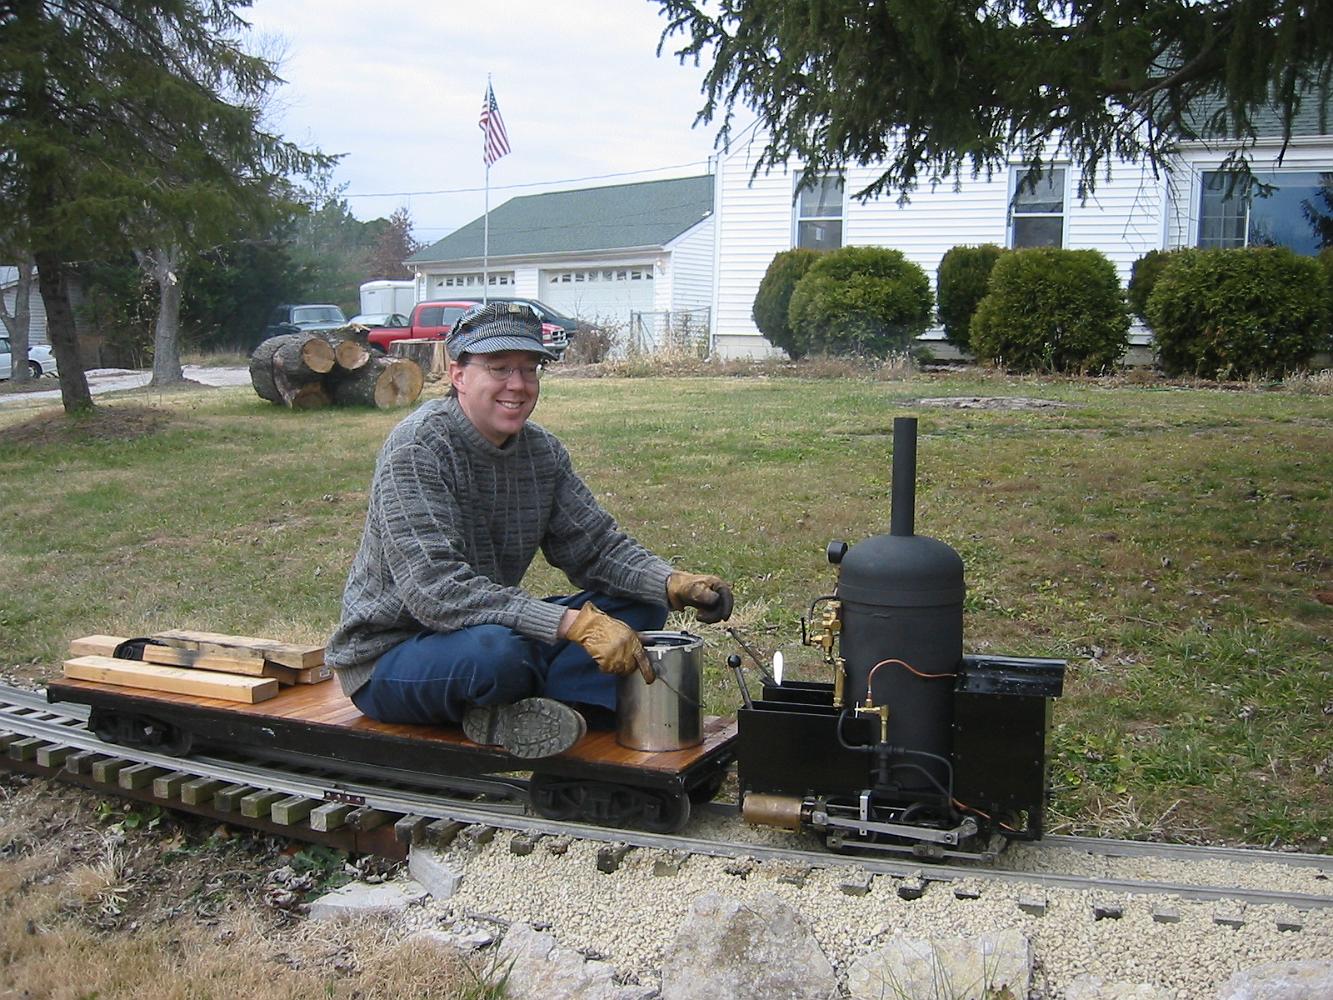
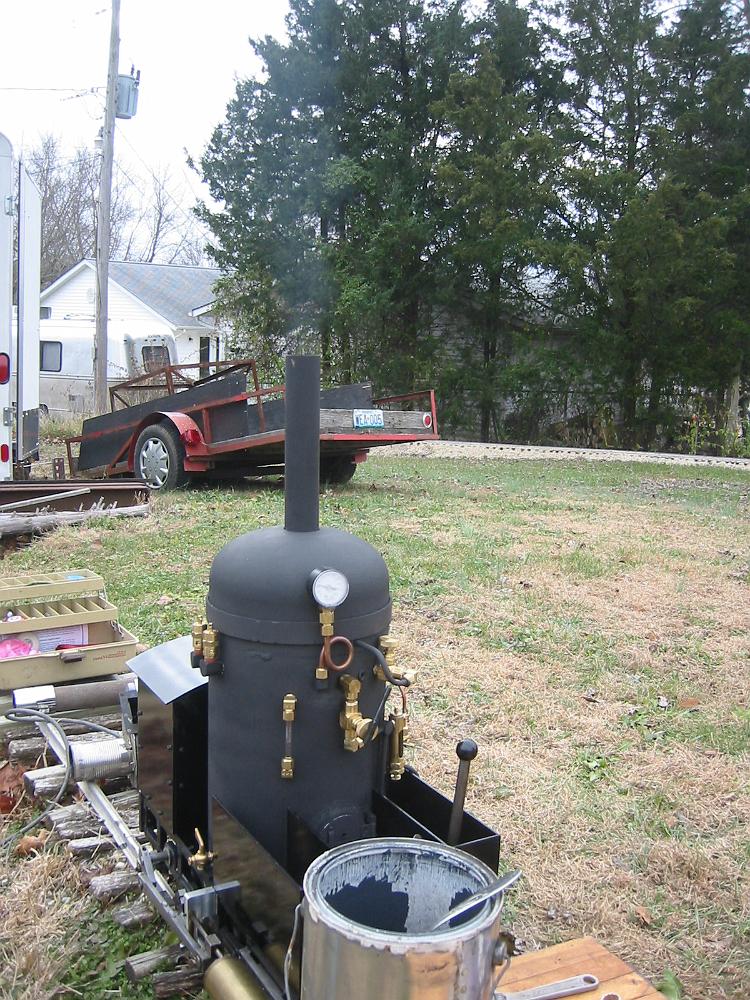
28-November-2008 -- I present to the world the first locomotive out of the Neidrauer shops on its first ever steam up. Big Smile for the very successful run…
Photograph (C)2009 F Axtell Kramer Builder Denis and Dad behind the still new Crab locomotive on 11-April-2009, the first steam up of the year for the St. Louis…

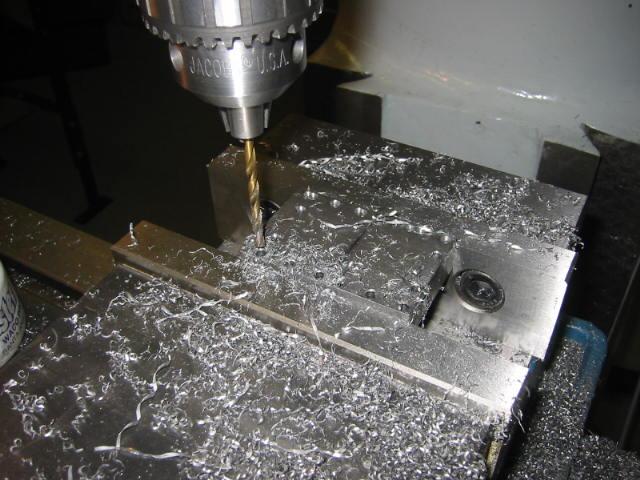
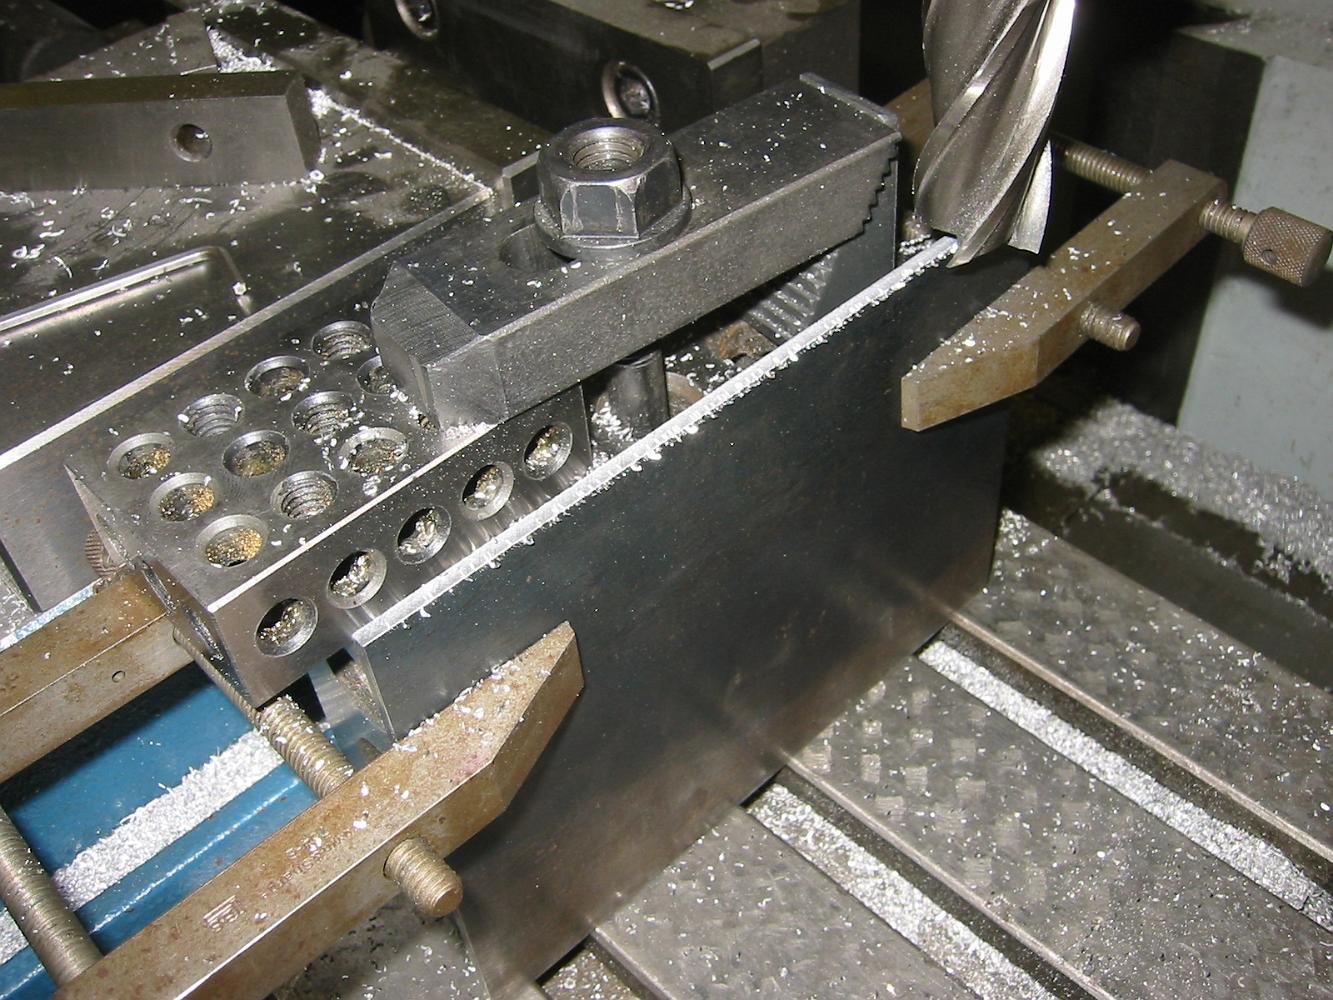
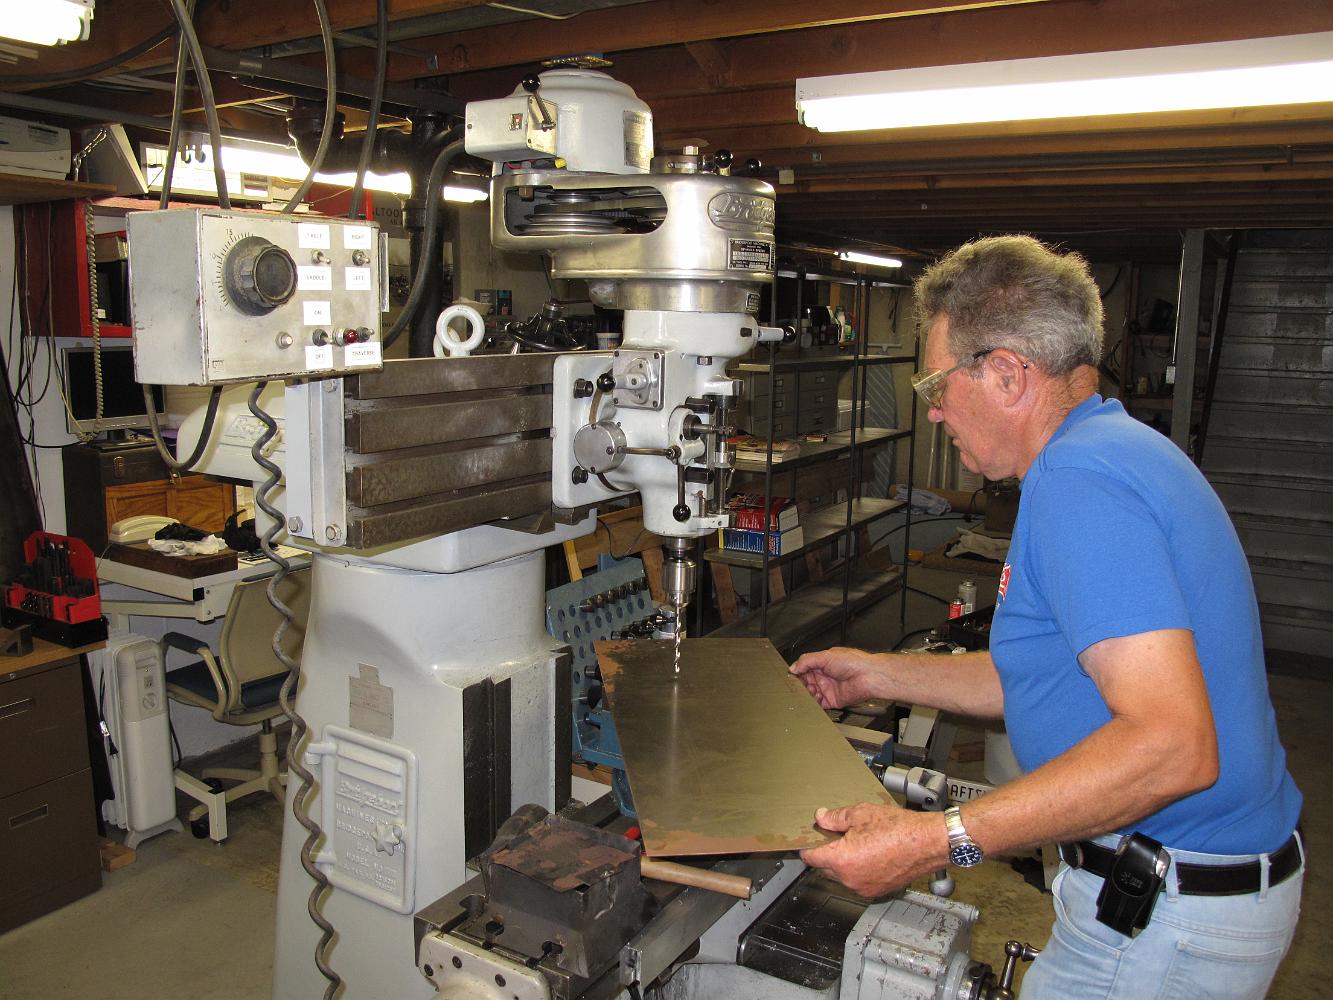
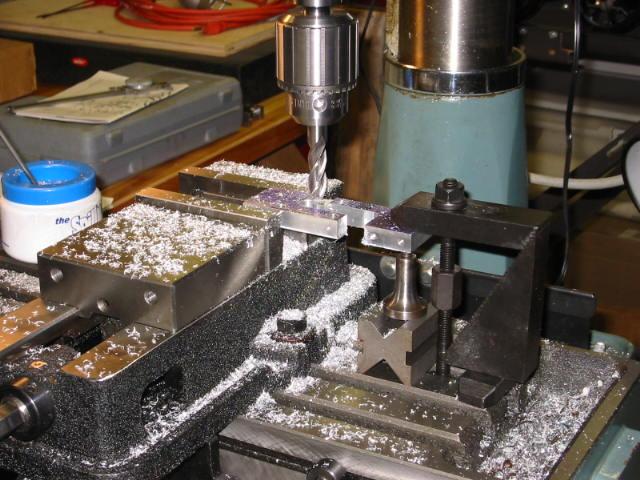
17-Nov-02 Milling a keyway slot in the spur shaft. With the table cranked all the way over to the other end, I machine this slot with an endmill bit, insuring…
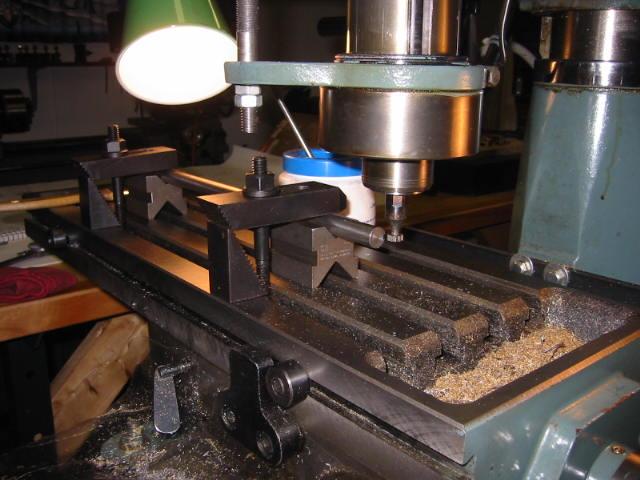
17-Nov-02 Milling a keyway slot in the spur shaft. The shaft is 12.50 inches long, and the table is cranked all the way over to get to the end. I'm using a…
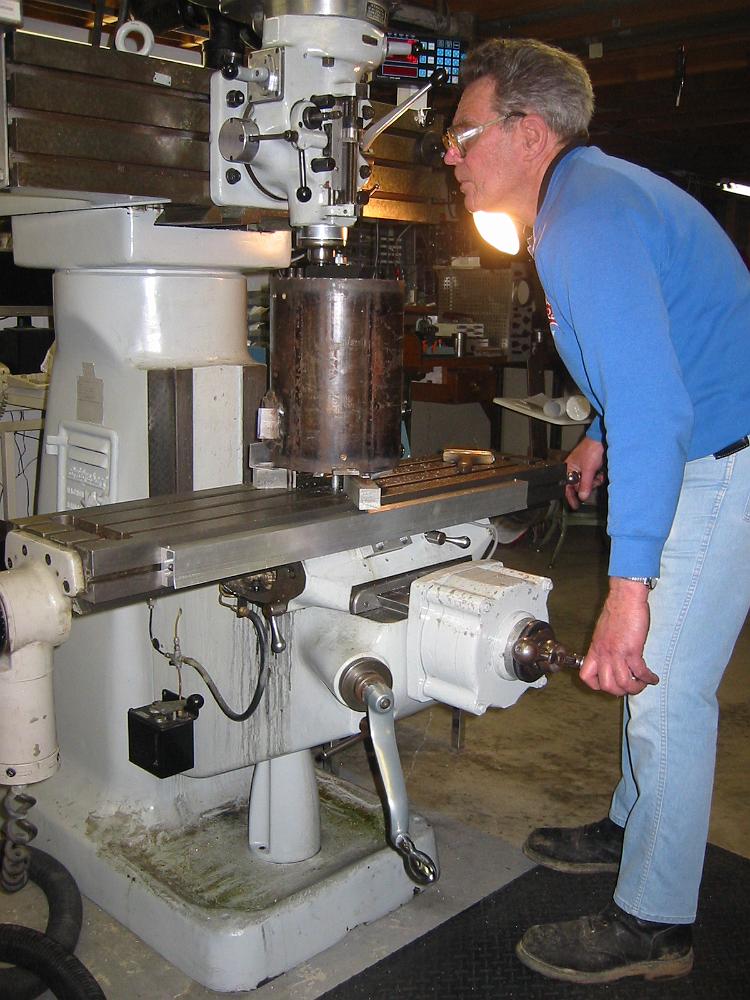
17-Nov-02 I discovered the spur shaft provided by the locomotive company was off-spec. Way off. One-half inch short and when the tolerances are in the thousanth…
With the wider deck, I can have a bigger coal bunker area. 2-Nov-02
More ideas on how to model the crab. Here I have widened the deck so it hangs over the wheels, added a small square water tank and 'railing' (the red wire).…
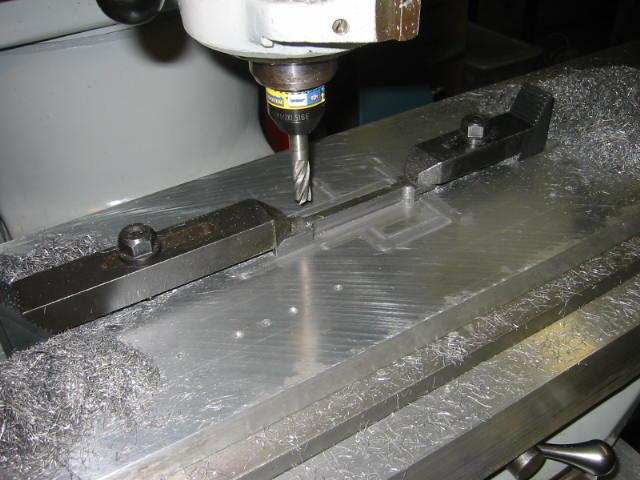
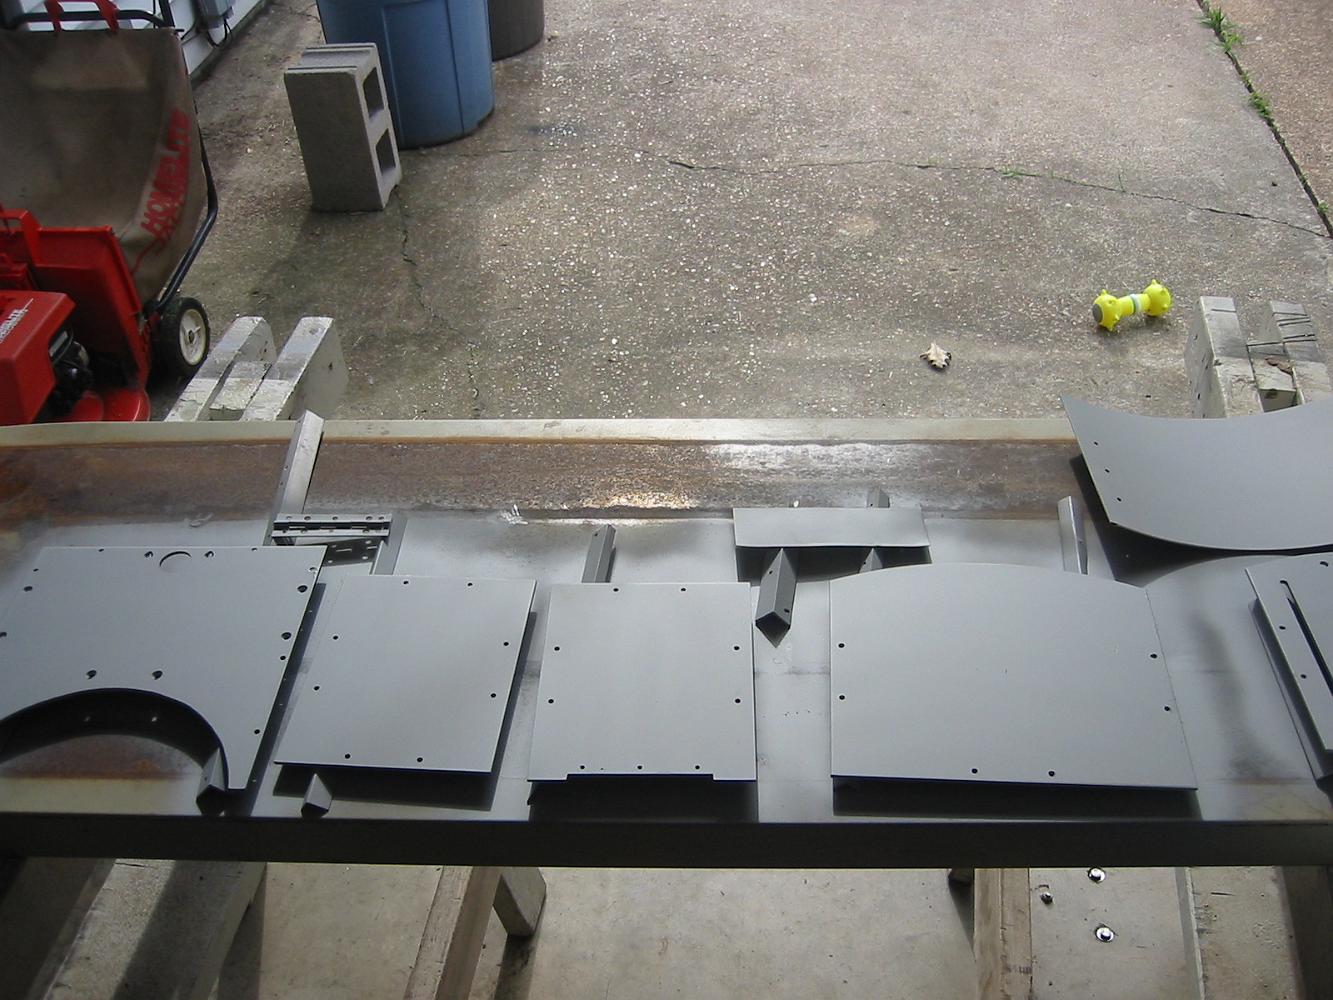
15-Aug-04 The cut, trimmed and radiused deck plating ready for bolting onto the frame. I decided not to overhang the deck over the cranks.
15-Aug-04 Cutting the boiler profile in the deck. Since I do not have tiny bandsaw blade that can swing a 4.5" radius, the next best thing is to drill a series…
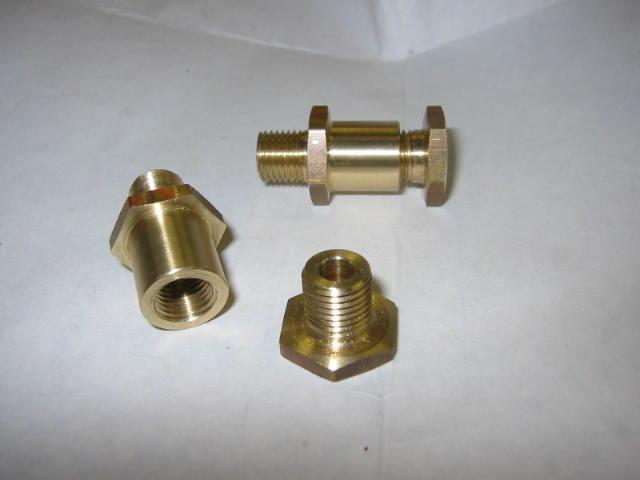
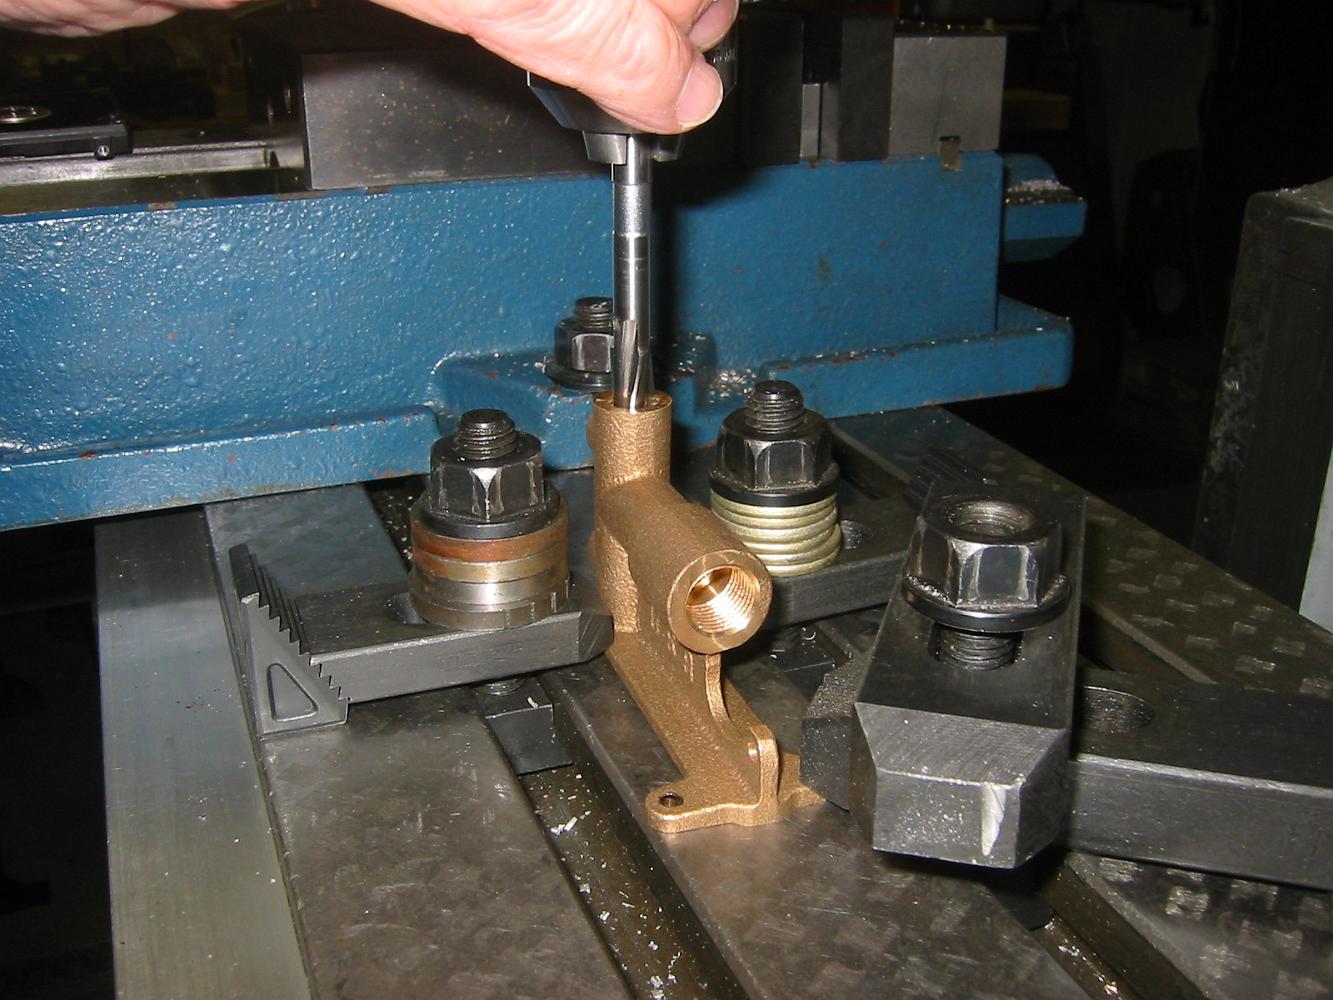
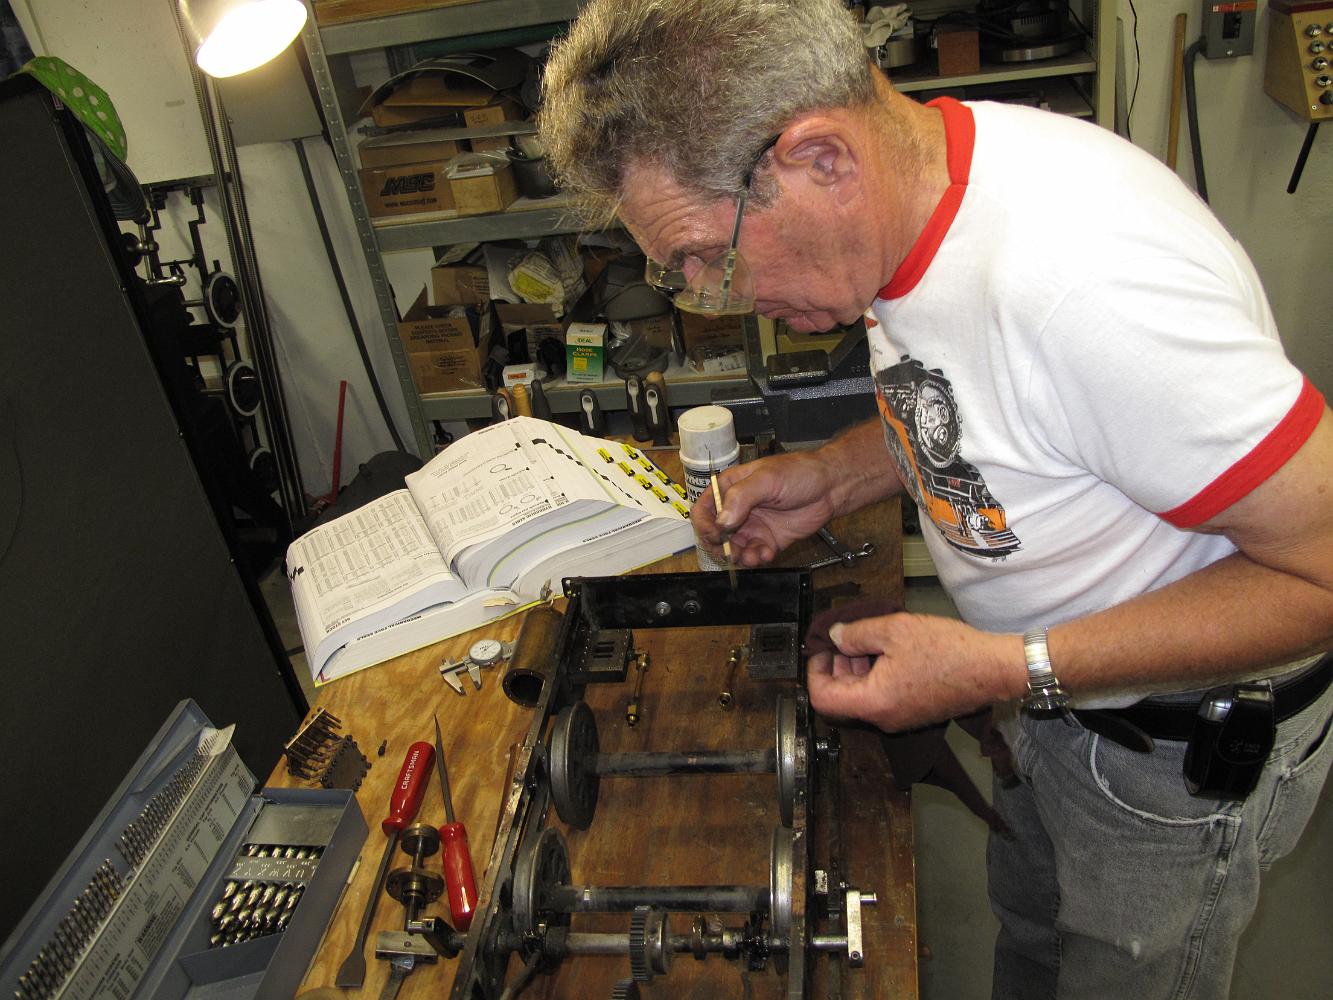
28-Nov-04 Nice shiny brass stuffing boxes for the valves. It was 3-day holiday weekend and the big mill was tied up, so I looked around for a lathe project. All…
27-Feb-05 The finished valve chests. I am really happy with how they came out.
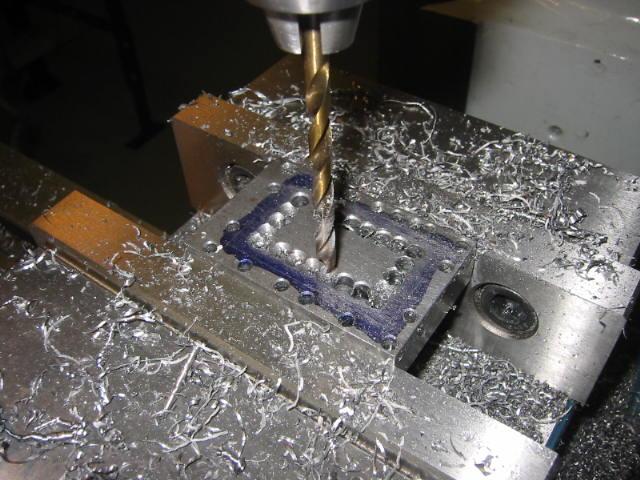
27-Feb-05 Tapping the Valve chest bolt holes. These cast iron valve chests were machined at Joel's shop on his big Cincinati Toolmaster mill. I could take 50…
19-Feb-05 I discovered there was still binding when the wheels rolled, even after I re-made all new crank arms and side rods. Feeling frustrated, I took the…
19-Feb-05 I didn't like the design of the original crank arms, so I'm make six new ones with a different design. Here I've drilled and reamed three out of a…
5-Mar-05 The sacrificial table is back on the mill table and the new side rods are being machined. Small cutting passes and slow speeds made doing one side a…
3-Mar-05 The valve chests mounted. This was the first real progress on this engine in over 2 1/2 years.
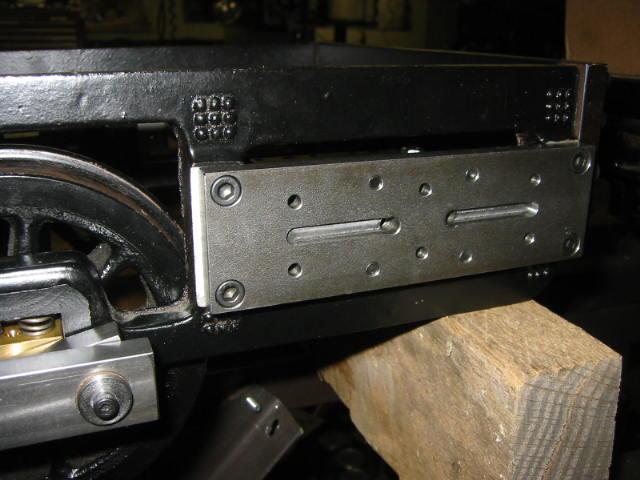
3-Mar-05 The finished cylinder and valve chest mounting plate. This was fun to do--simple milling, drilling and tapping thanks to my Digital Read Out.
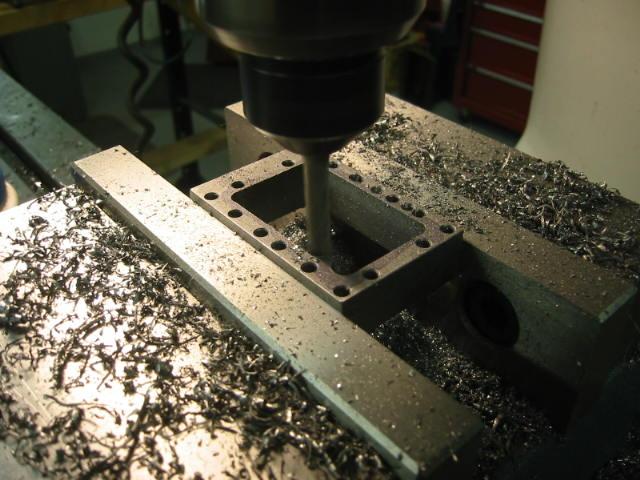
Having drilled all the outside hold-down holes in the chest, I drill pilot holes on the inside to quickly remove material.
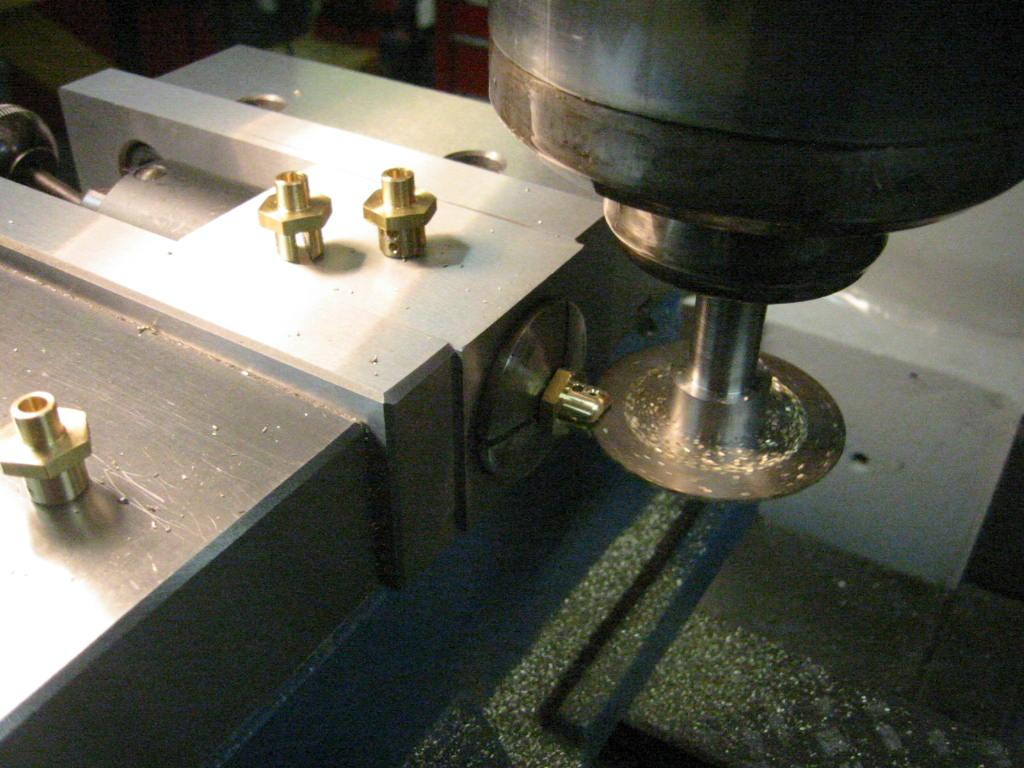
Cutting a slot in the cylinder cocks. These are a scaled up version of an original design by W. Van Brocklin, Jr, from "The North American Live Steamer", vol 1,…
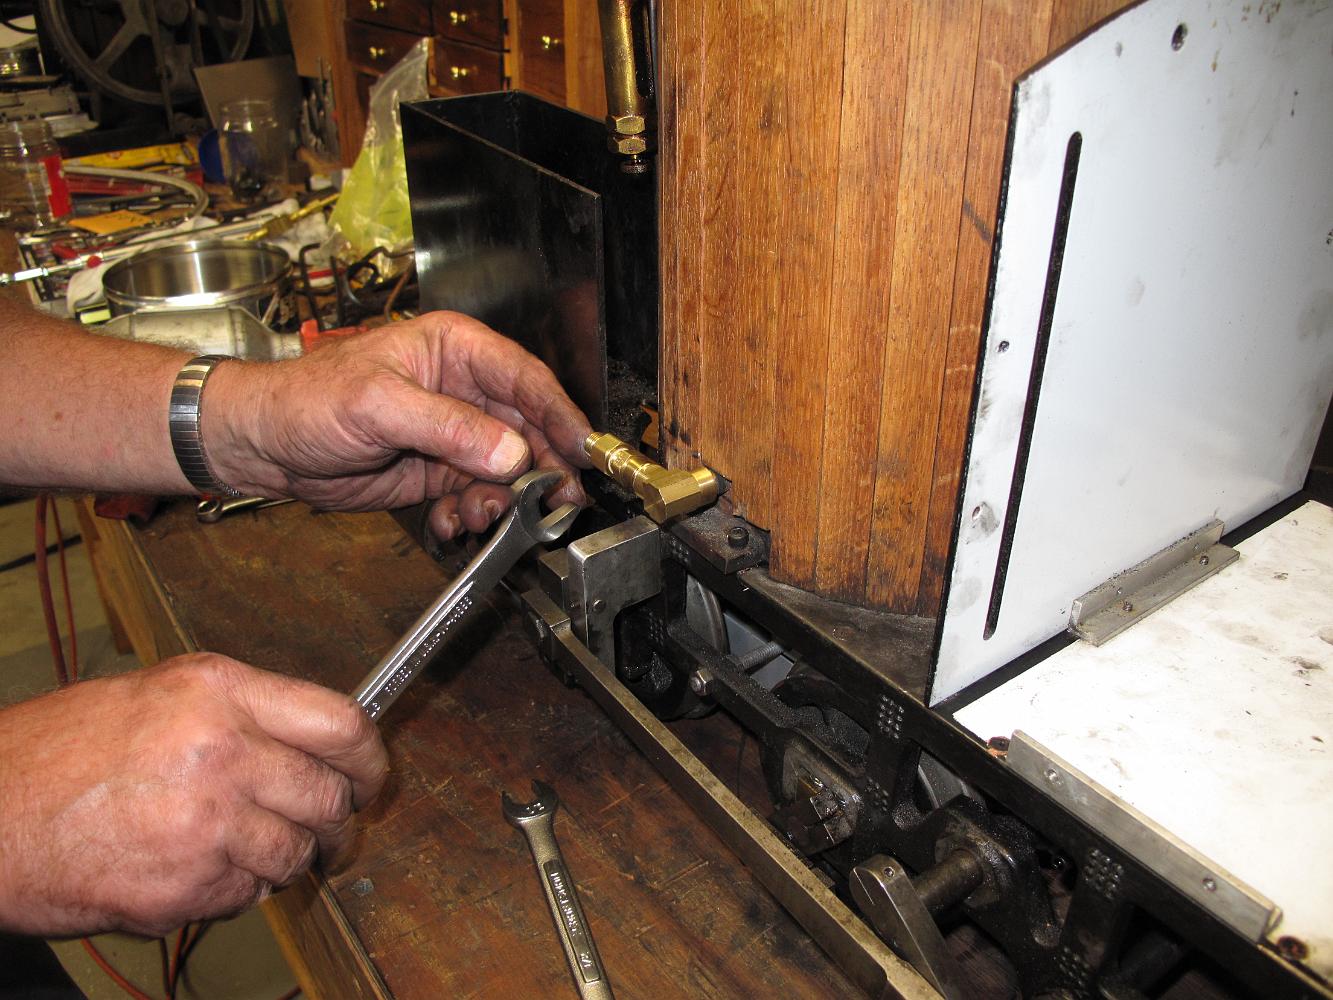
14-Dec-05 The temporary steam line used to run the chassie on air. I later found out the fittings I bought were for plastic tubing, not copper tube, and will…
14-Dec-05 In the past year the new side rods, cranks and crank pins have been completed, along with the valve chest and valve motion. I have to do some work to…
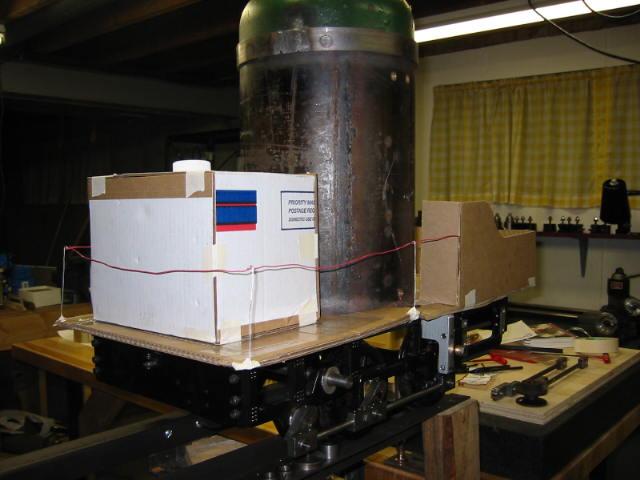
Here's how the Crab looks as of 14-December, 2005. The chassie is done and the running gear has been run on air. I start experimenting with plumbing layouts.
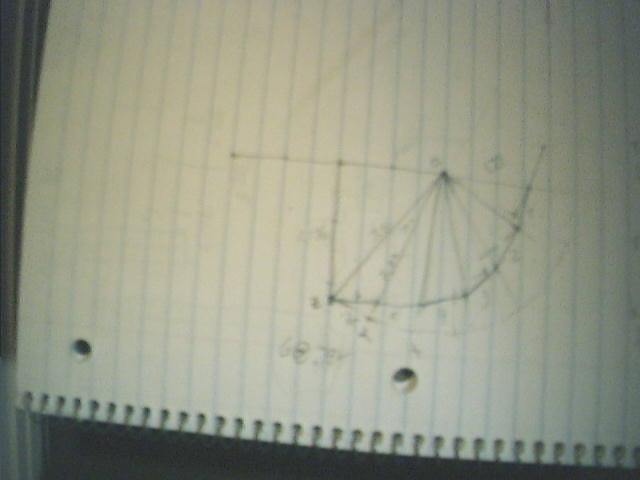
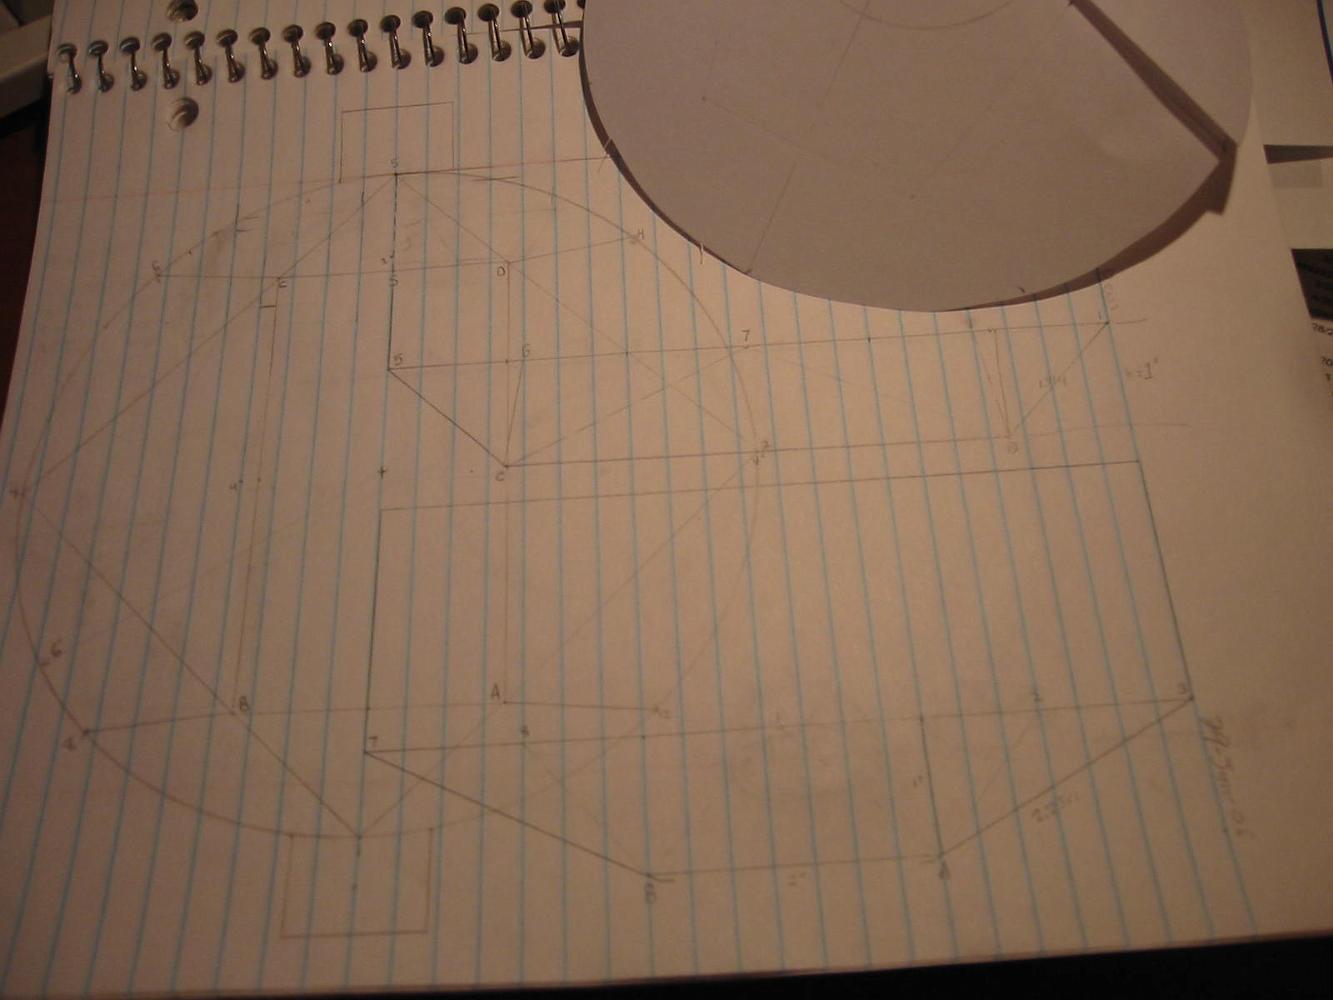
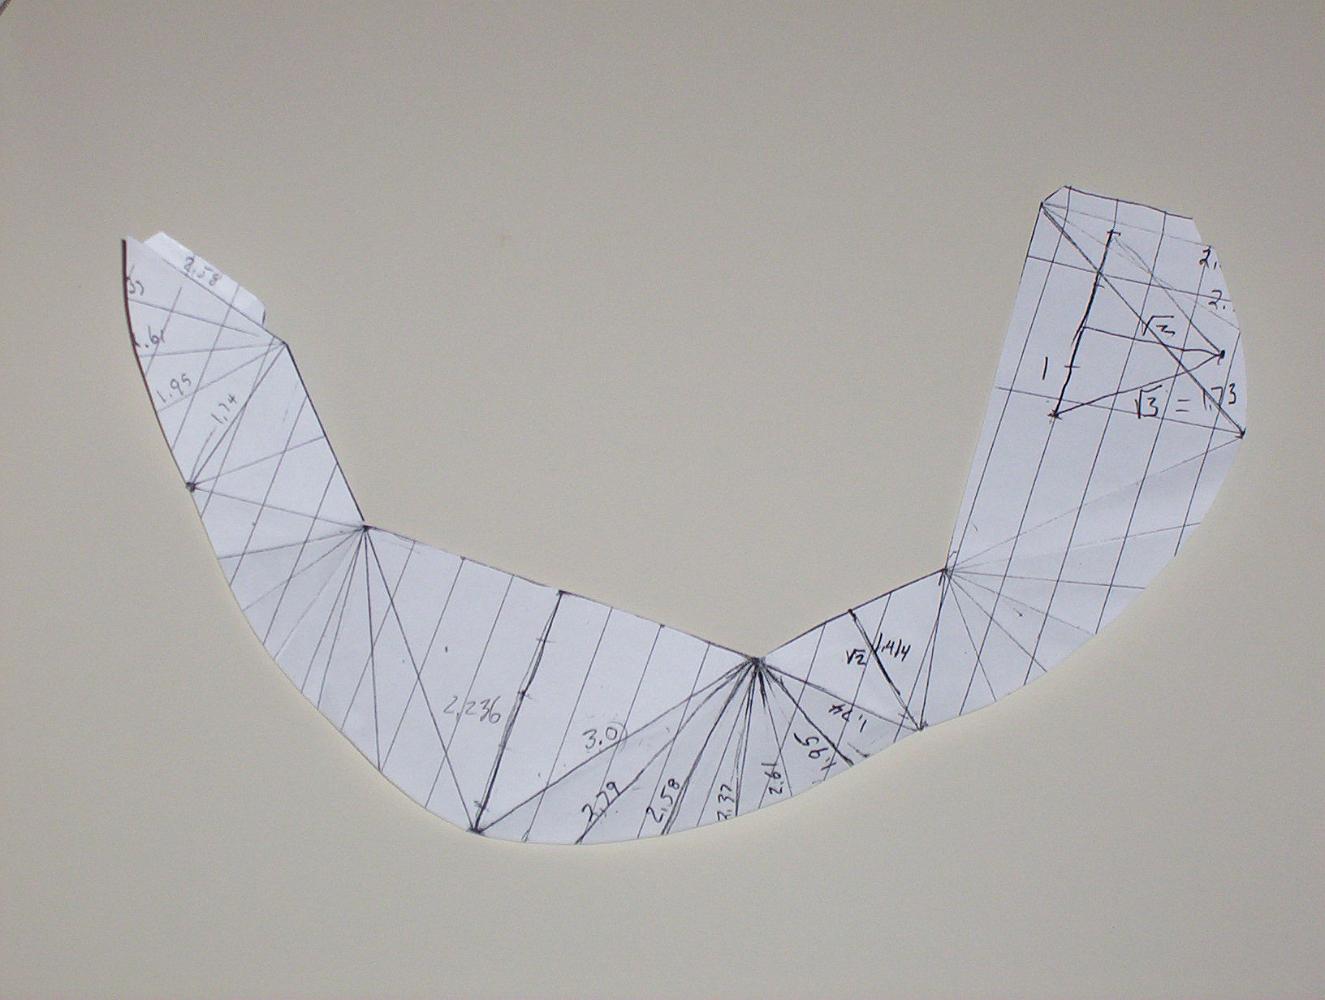
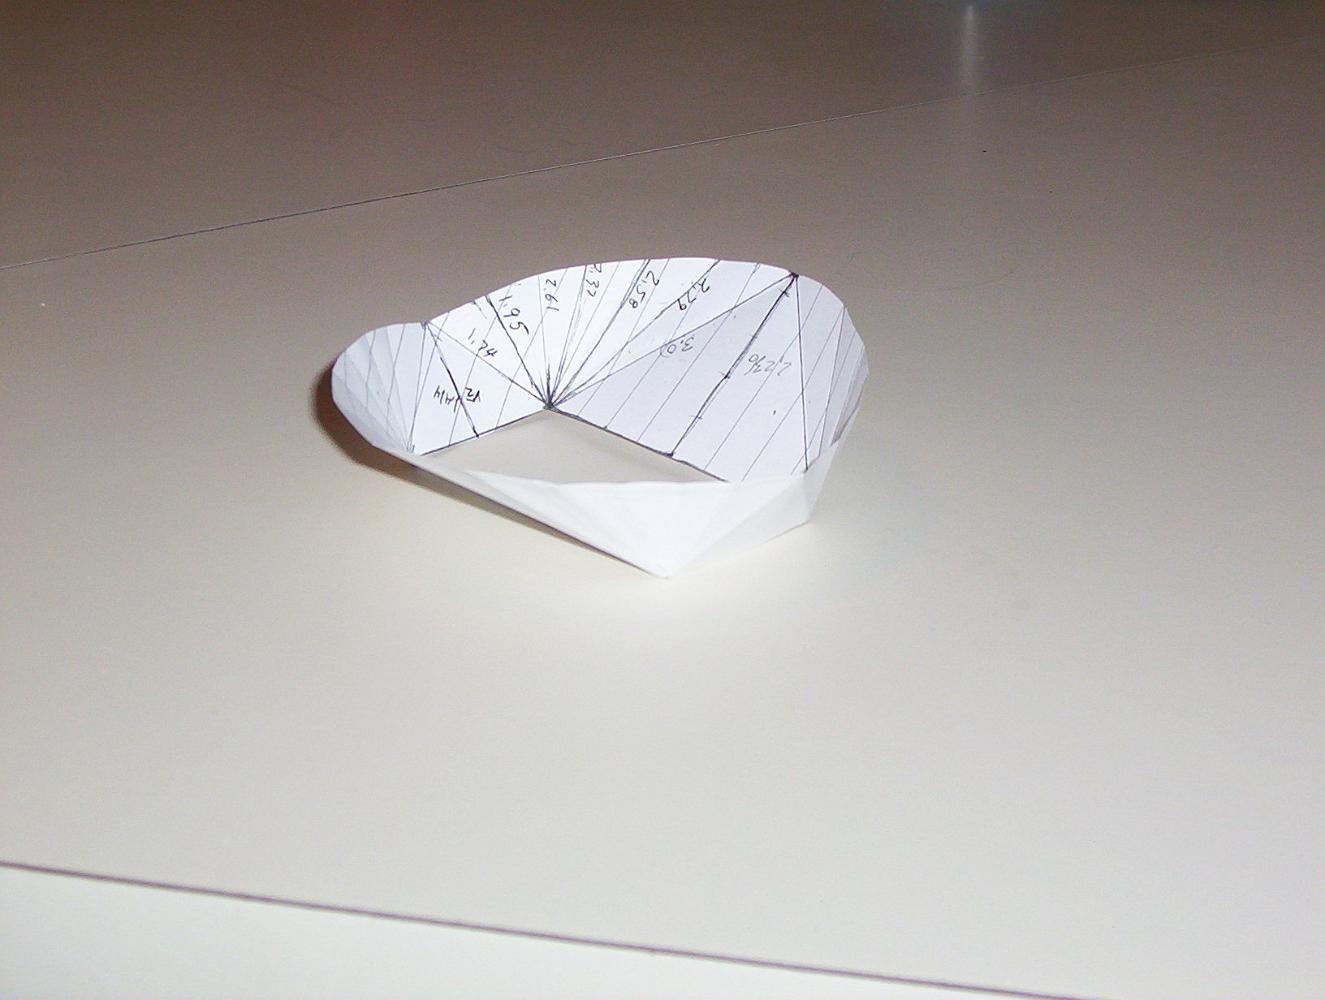
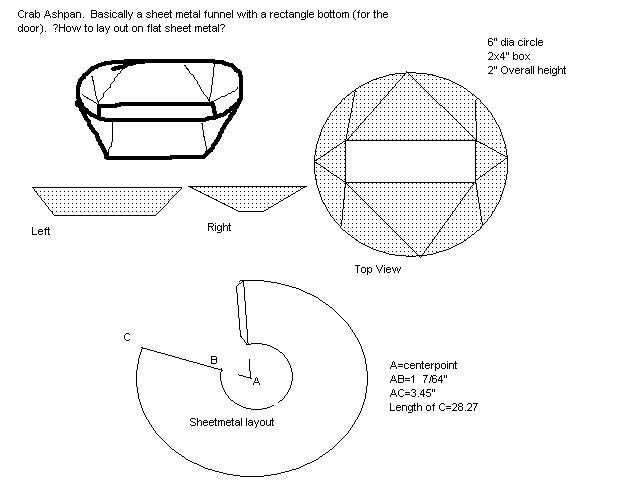
I enlist the help of my friend Ted, who tries to explain the elevation and plan view techniques for sheetmetal layout work.
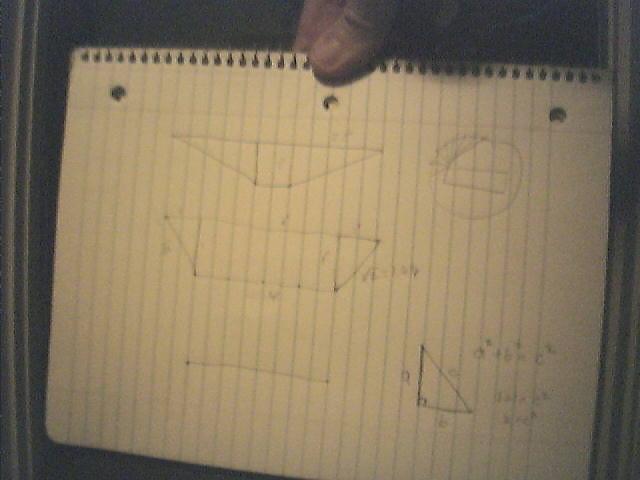
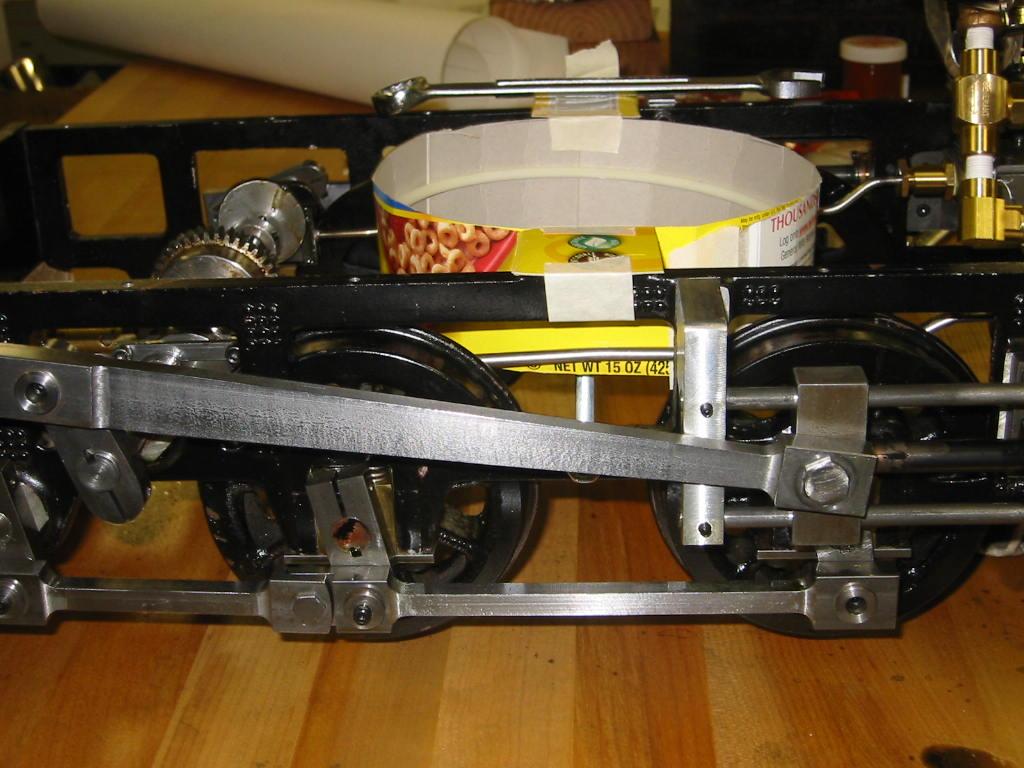
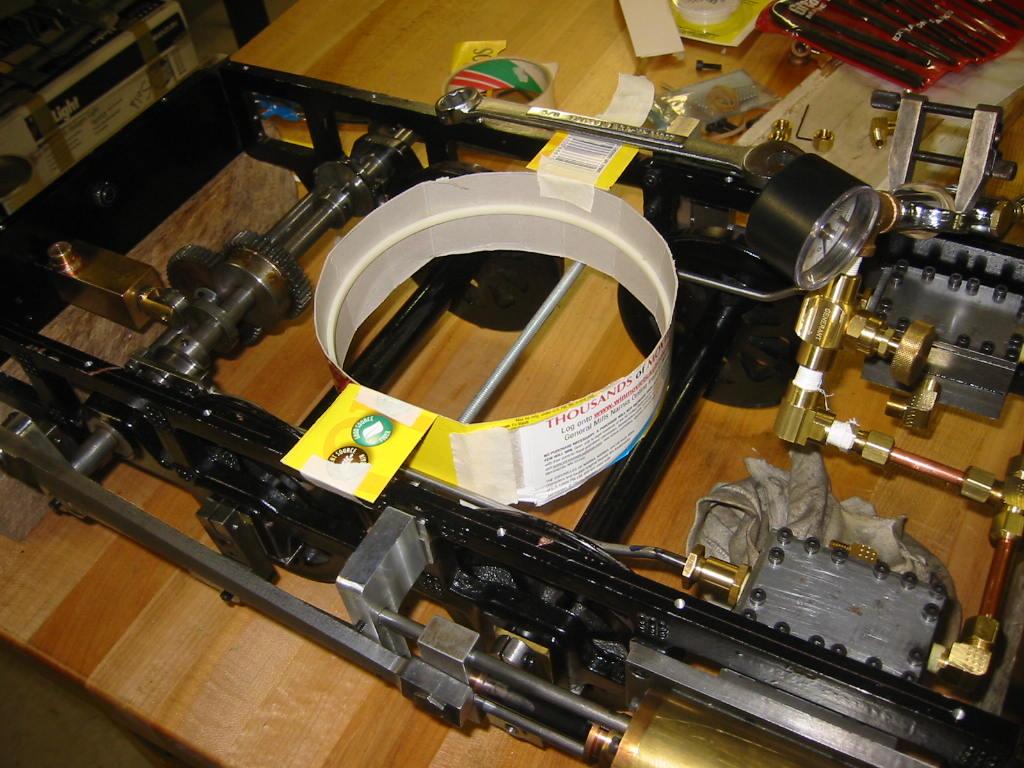
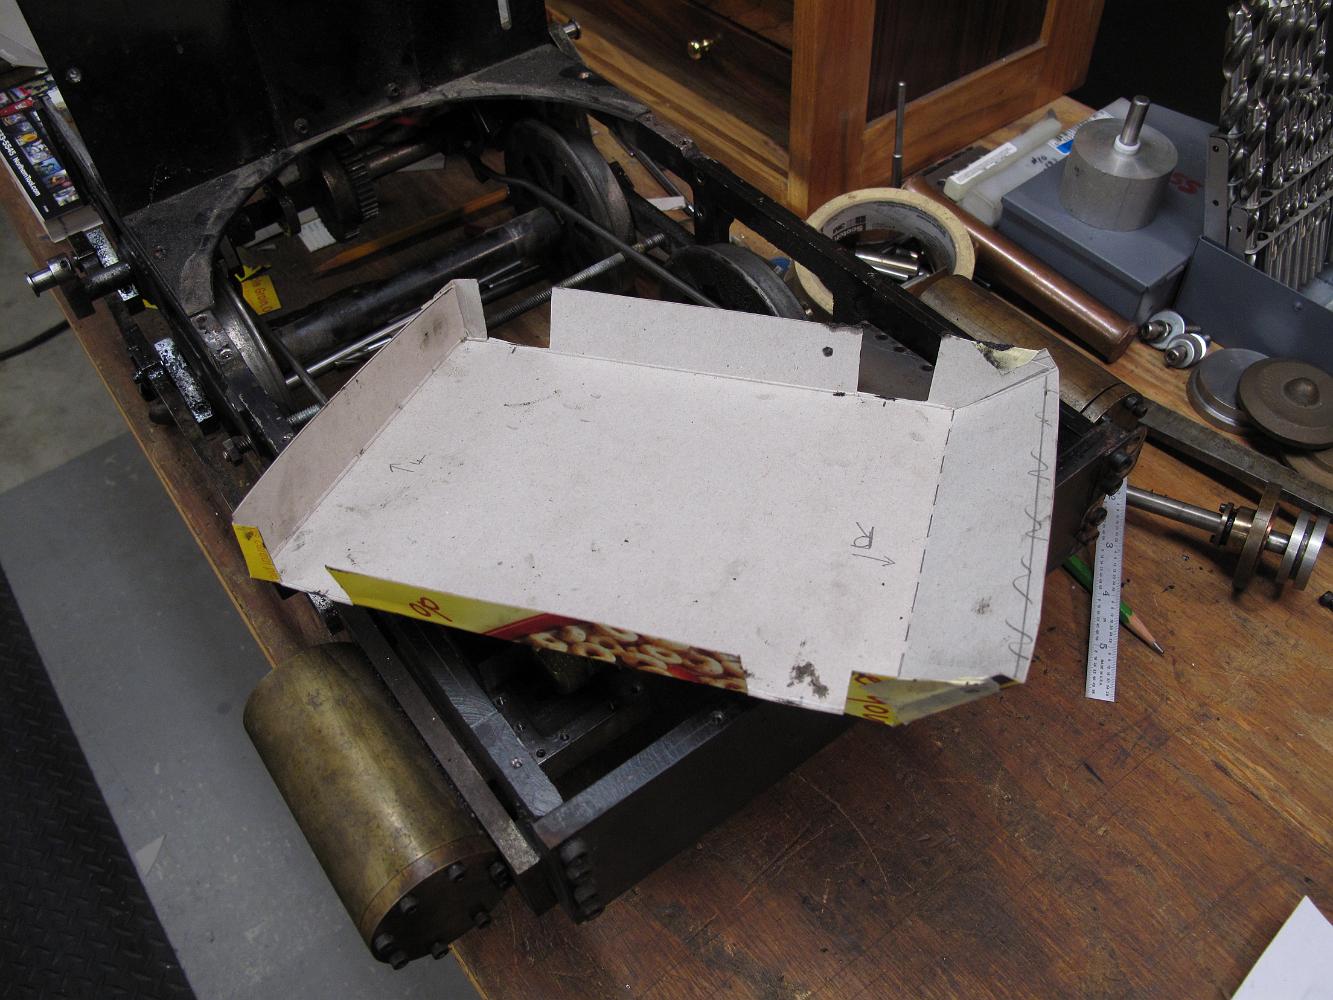
28-Jan-06 Prototyping the ashpan space. The drawings provided to not include the ashpan, so I have to make them myself.
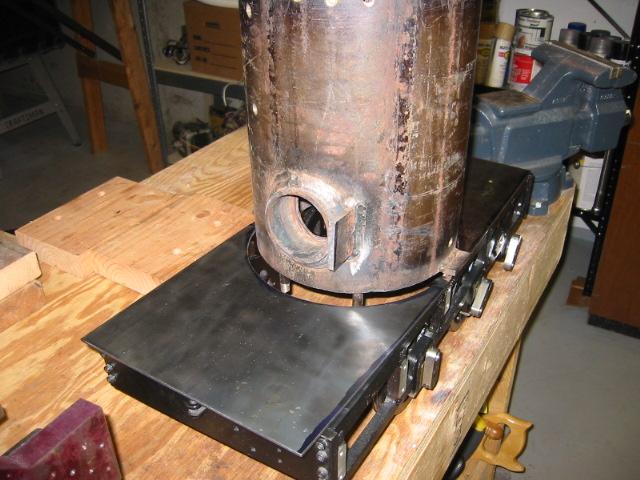
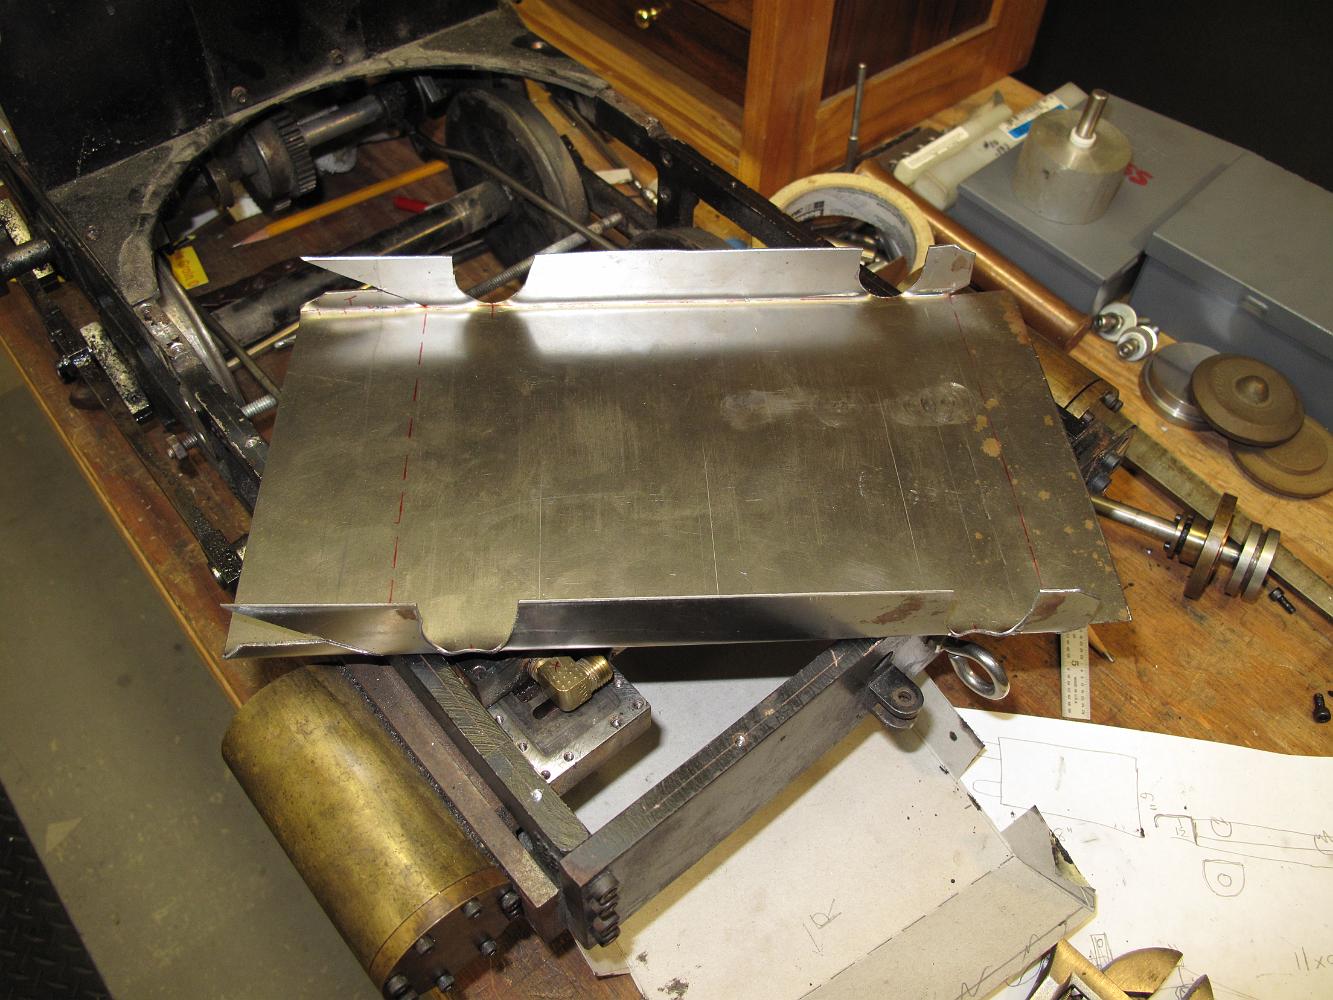
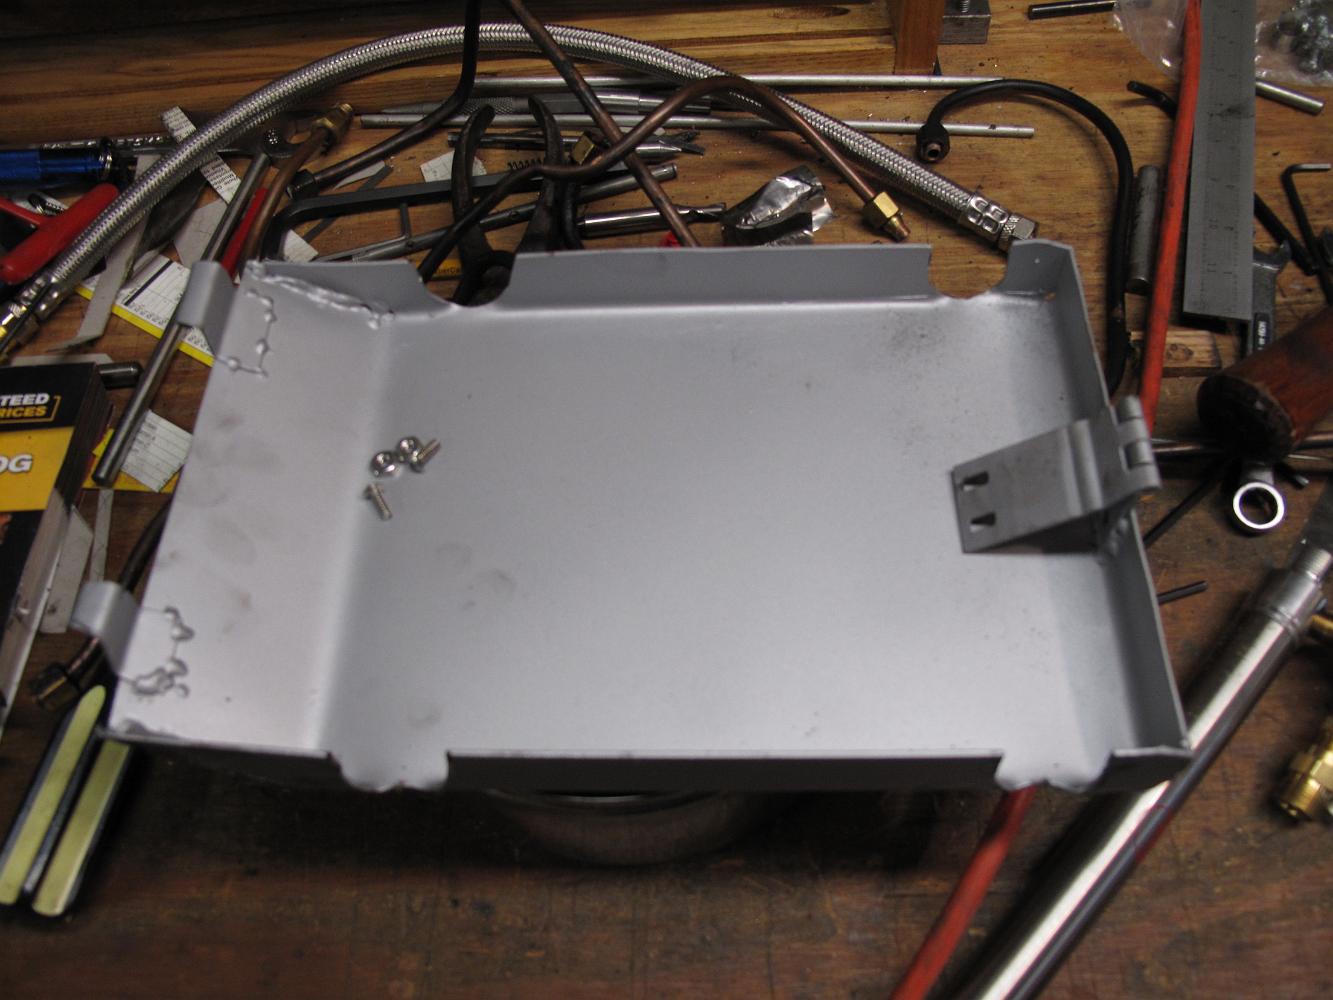
29-Jan-08 The ash pan ready to be bent in the brake. After two years of design ideas, the simple 'box' design seemed best.
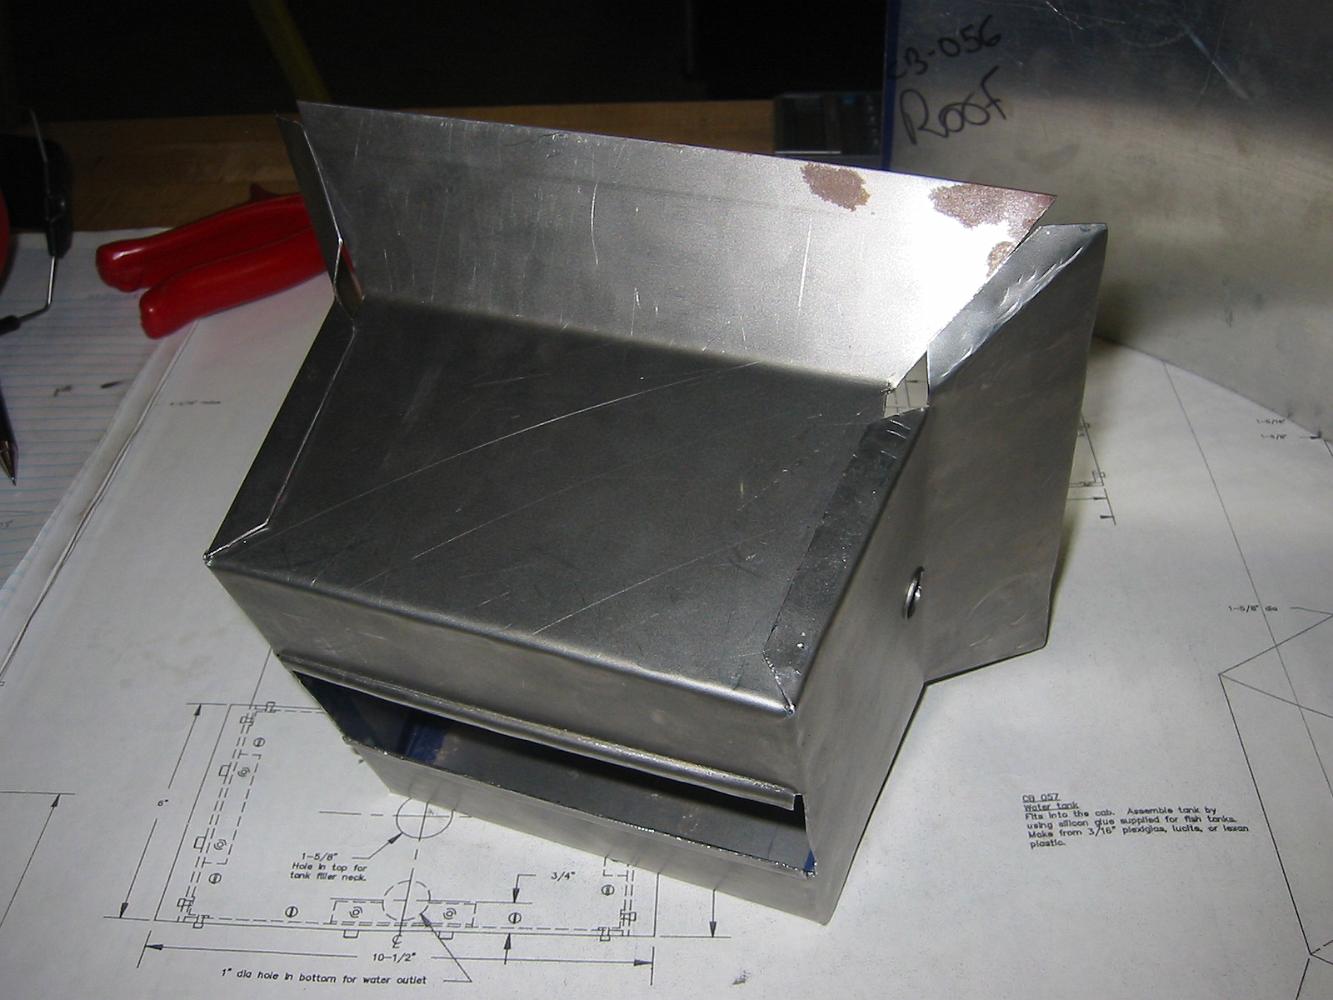
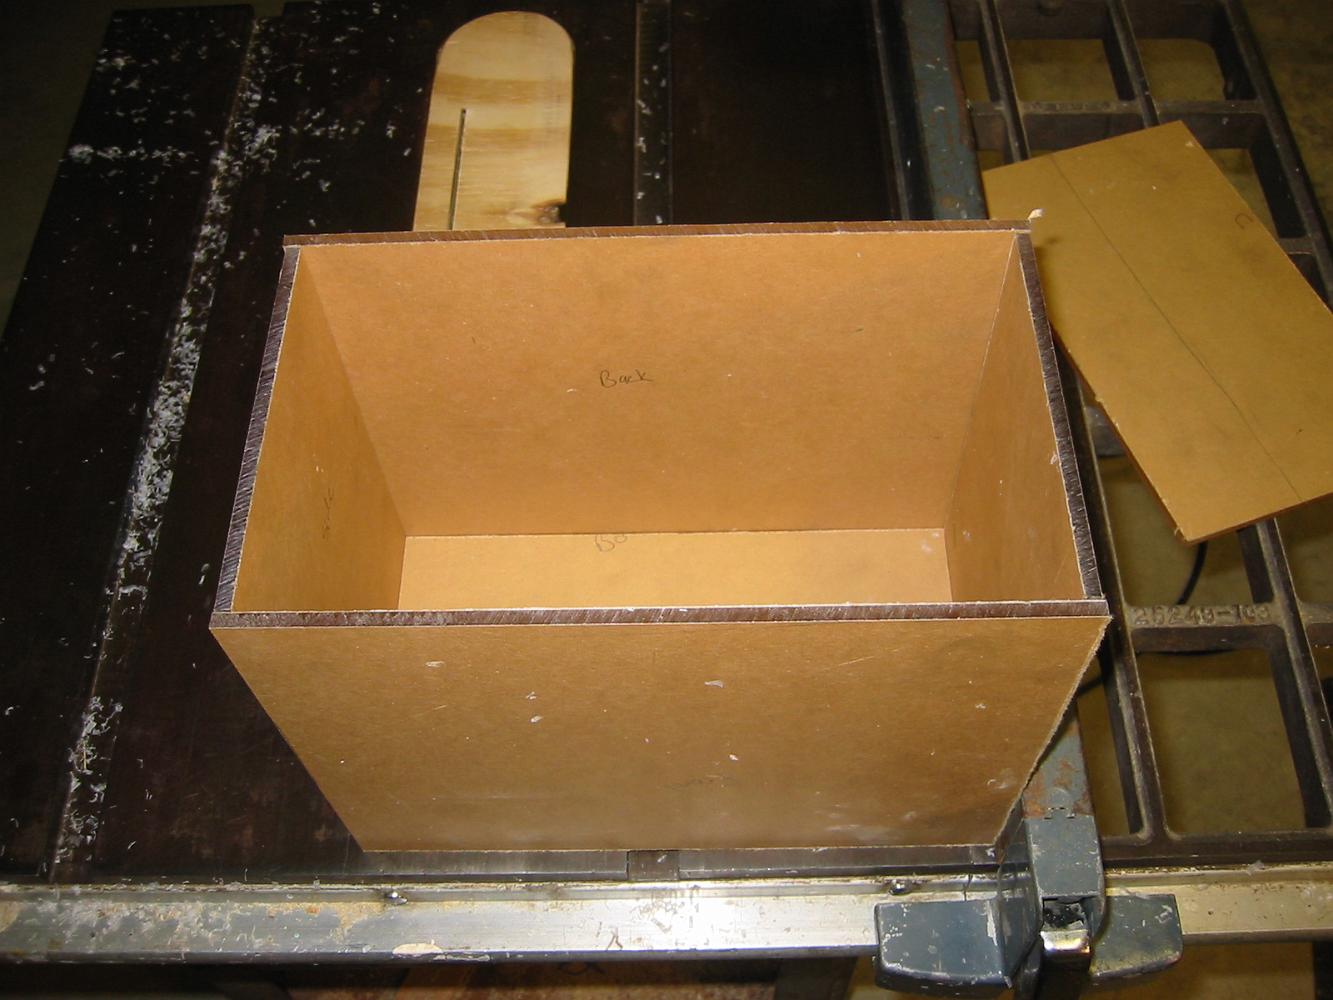
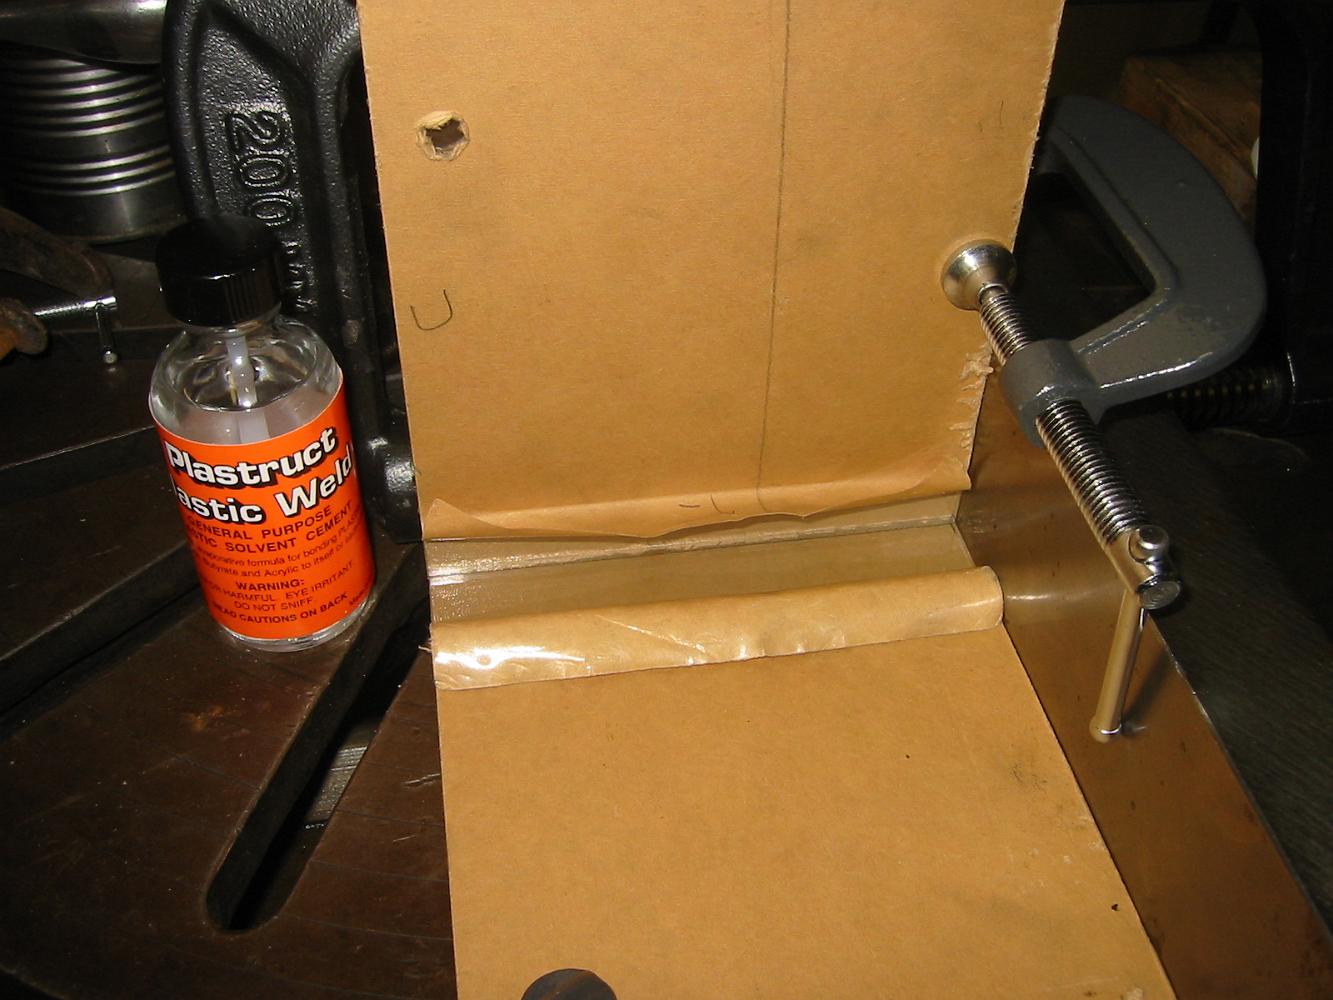
17-Feb-08 Trial fitting of the water tank, still clad in the brown protective paper. I've got to figure out how to hold it during the gluing process. Dad said…
17-Feb-08 After 8 hours of fiddling around with the table saw, making a zero-clearance insert (see the wood piece), and making a replacement part for the fence,…
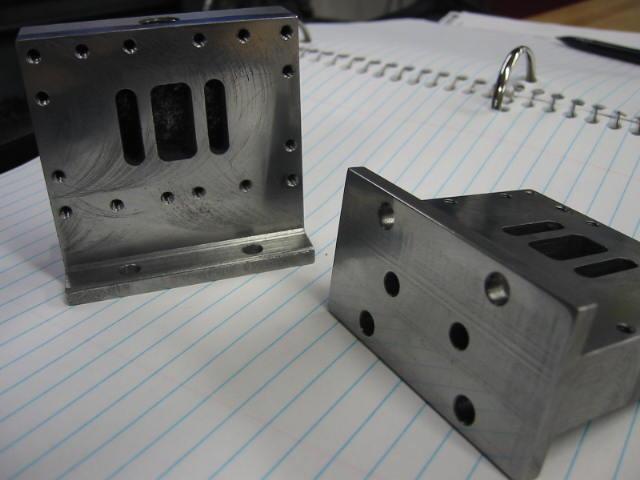
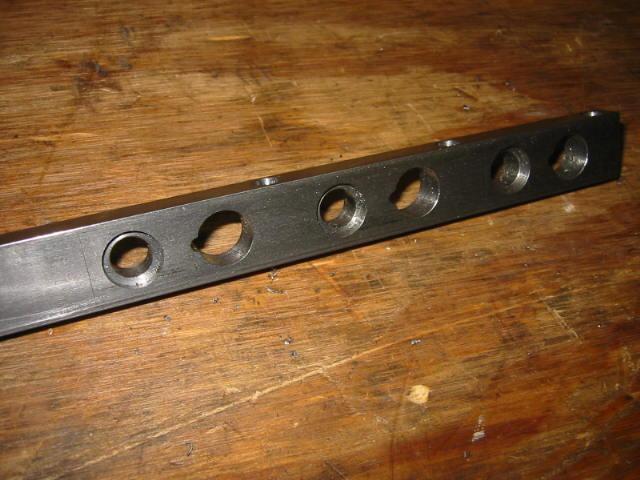
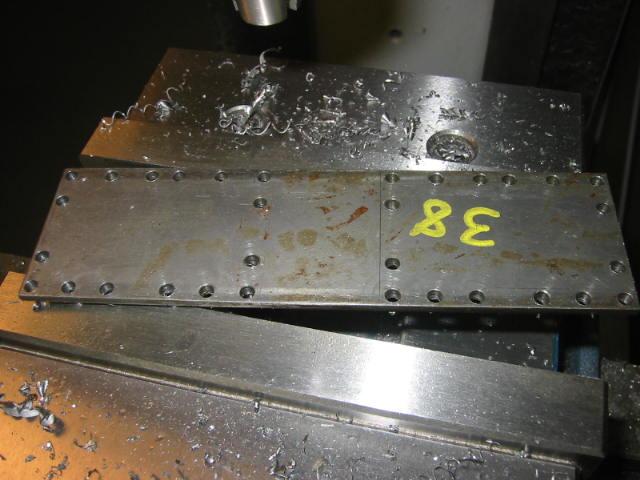
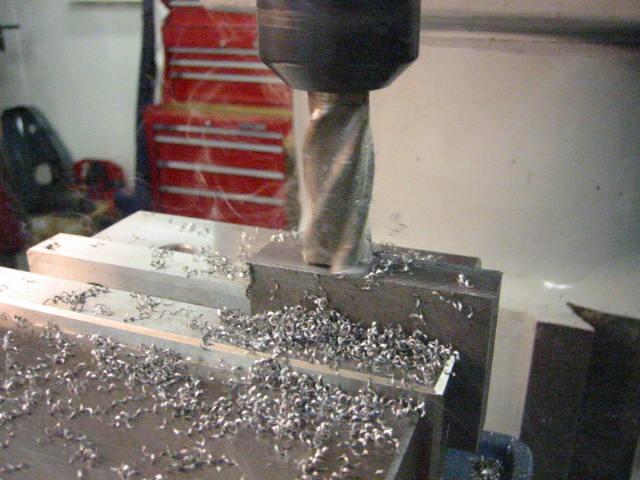
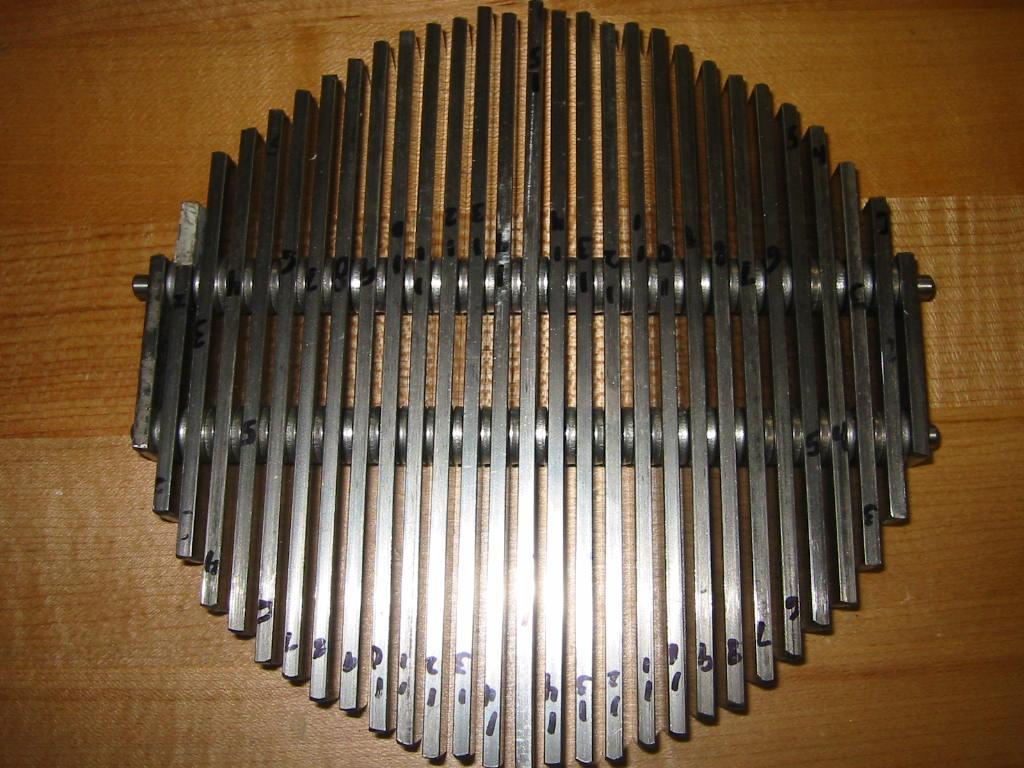
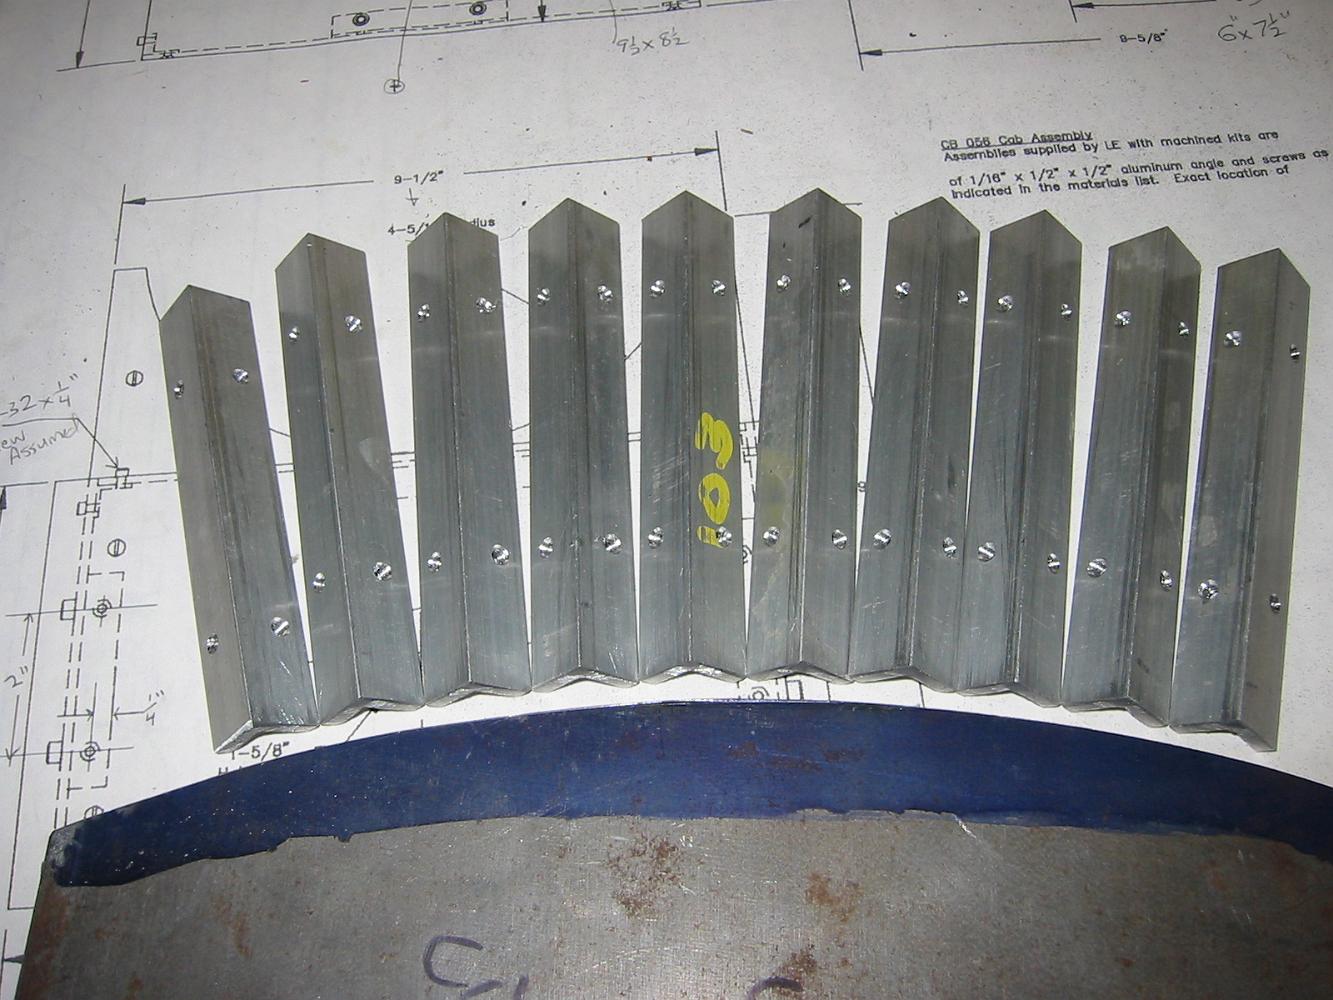
3-Feb-08 Plodding along on the chain gang. Cutting, Drilling, Tapping and finishing the 10 angle-brackets into identical parts is as close to production machine…
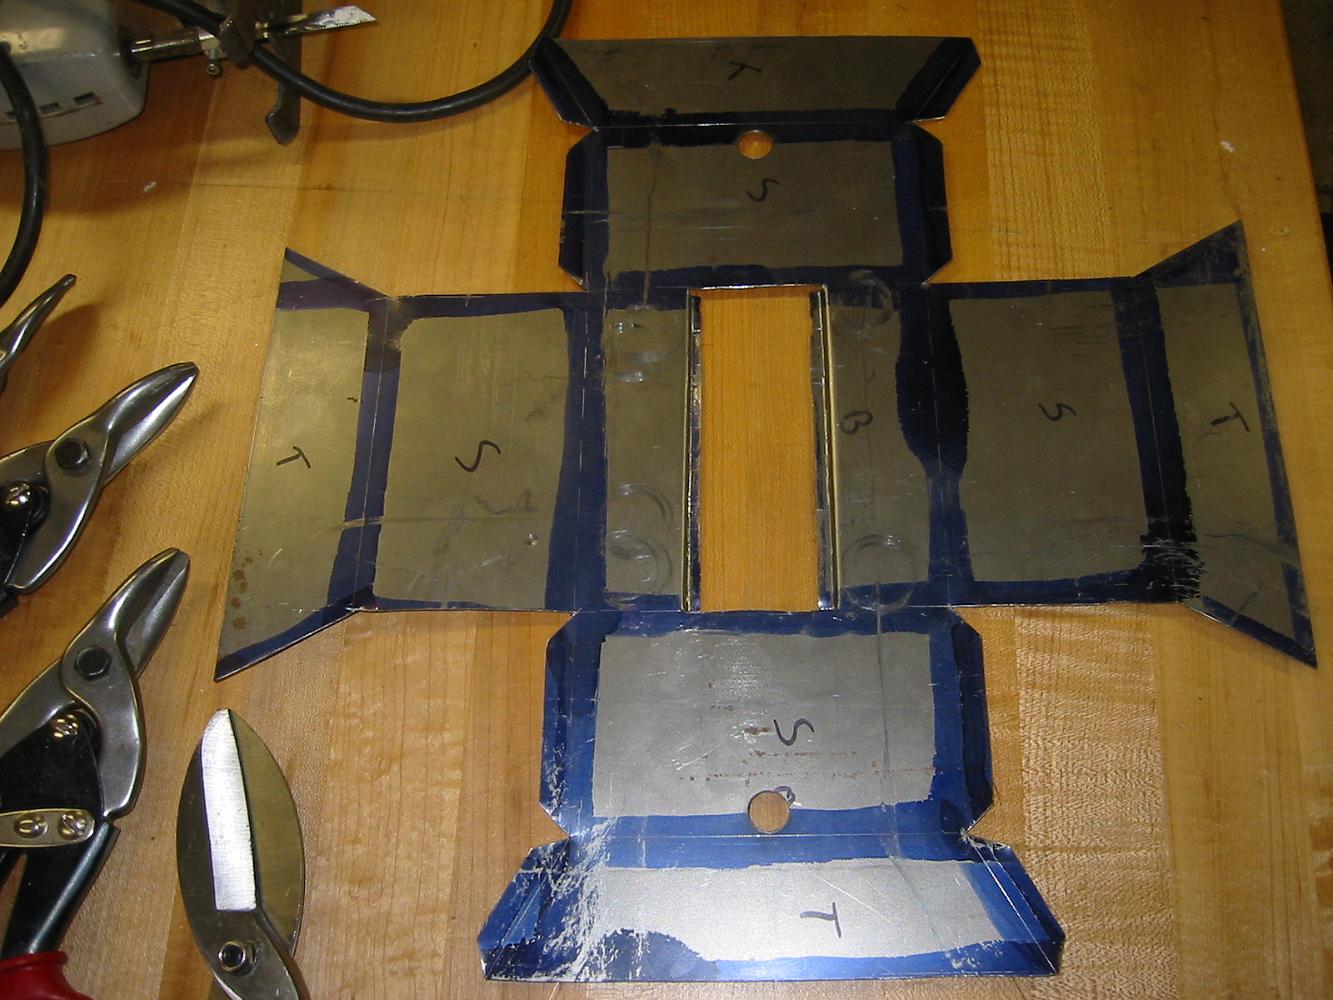
3-Feb-08 While picking up some stock for the Mikado at the Metals Supermarket, I had them shear the cab pieces from the single sheet of 1/8" stock I had. What…
30-Mar-08 Gluing up the water tank. I used the 18" lathe faceplate, angle plate and big parallel to hold everything while I glued it. I found the glue at the…
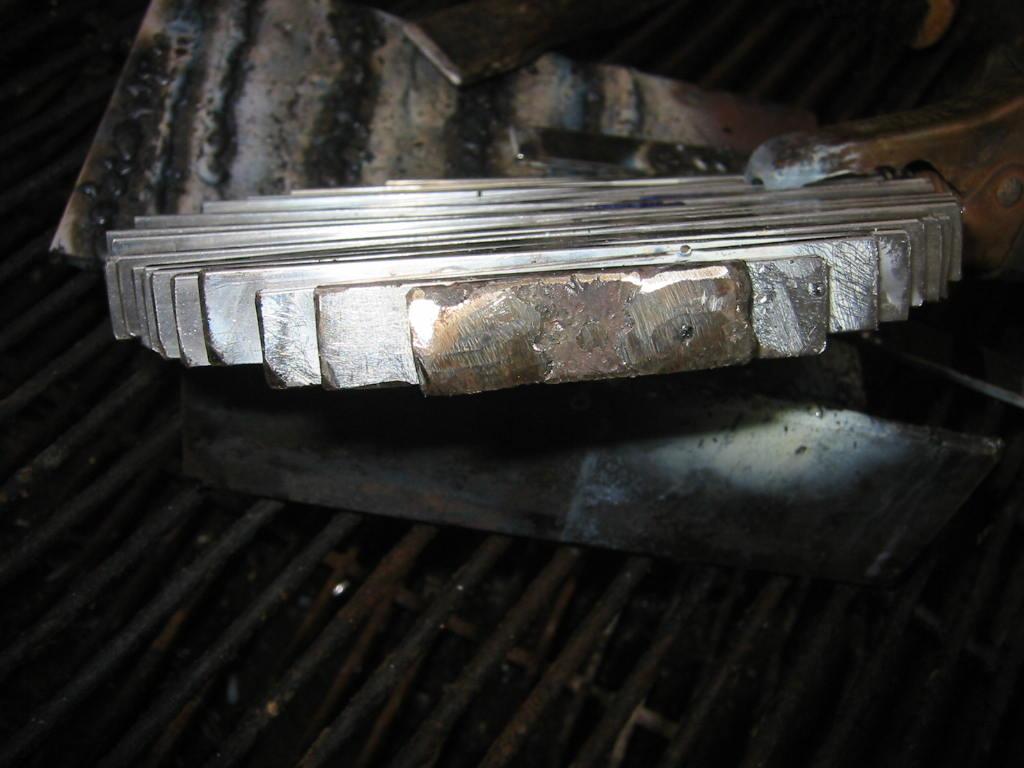
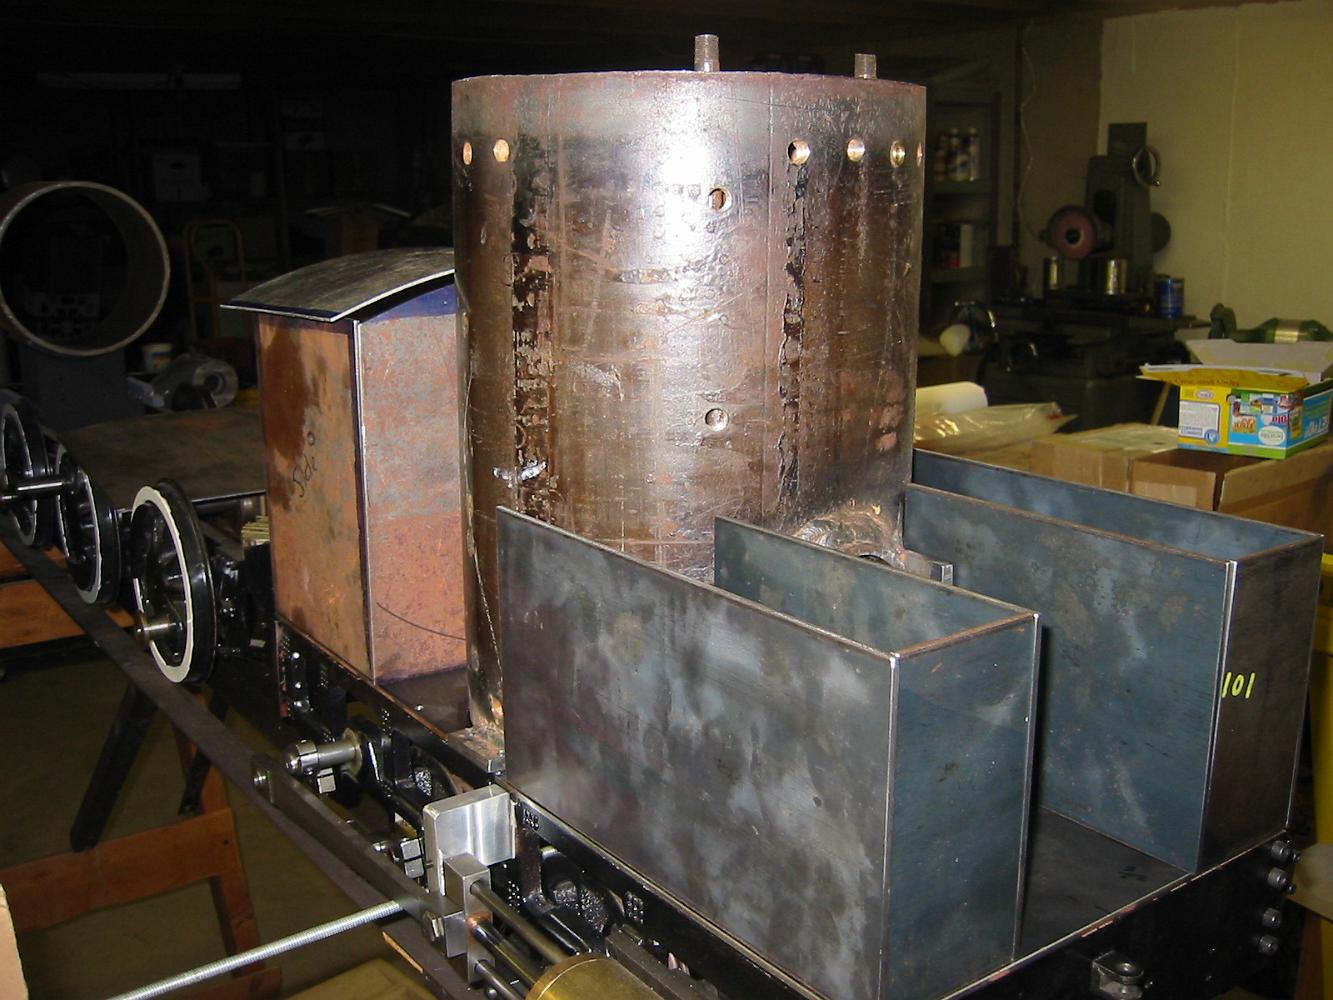
30-Mar-08 The coal bunkers after my attempt to TIG weld them. The welds are not pretty, but the sides stay together. I had to modify the design to put the sides…
30-Mar-08 I had to shorten the inside side by 1/8" before welding the coal bunker together to keep the top height the same for all three pieces. I had to modify…
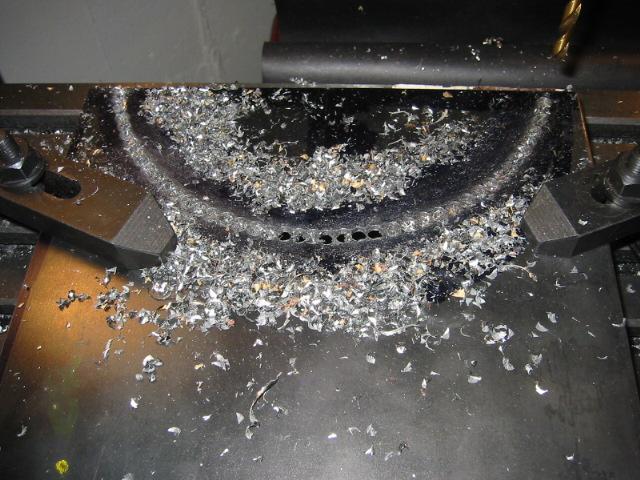
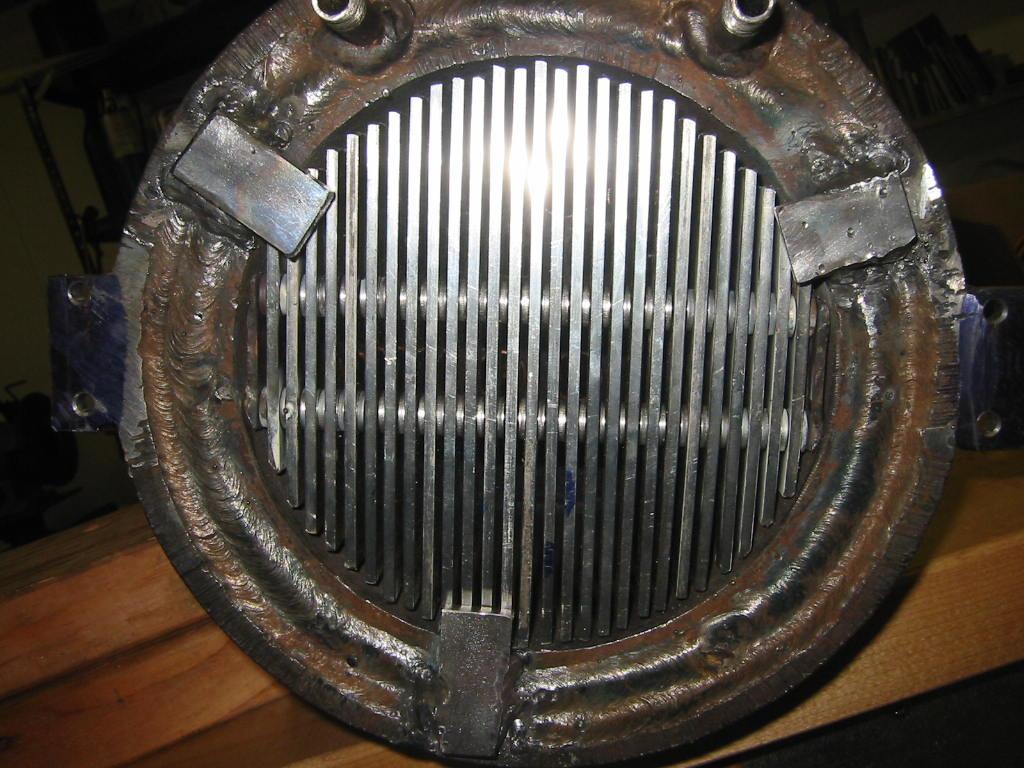
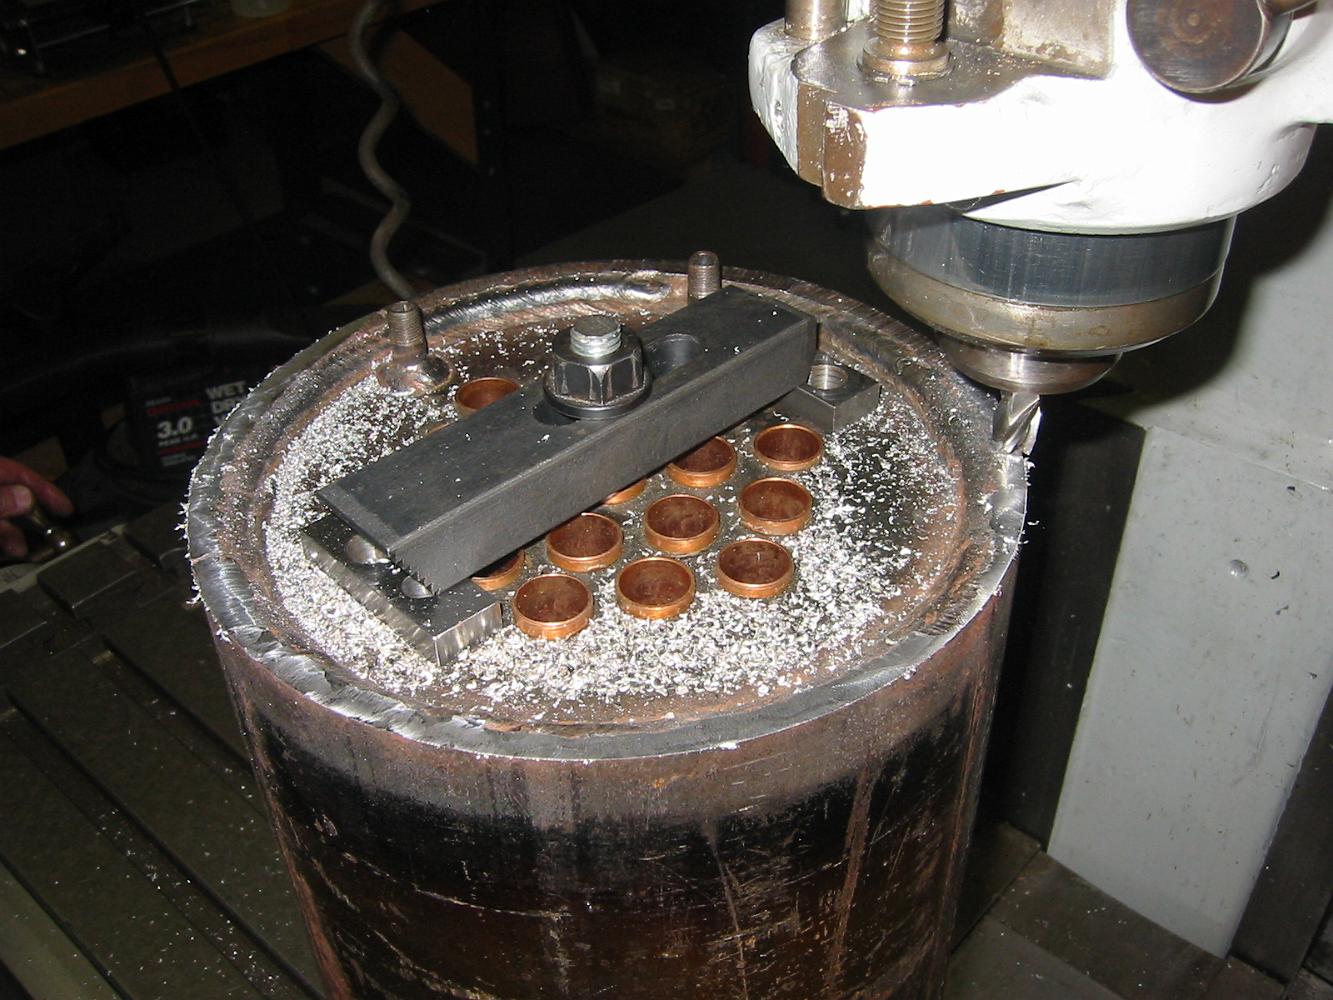
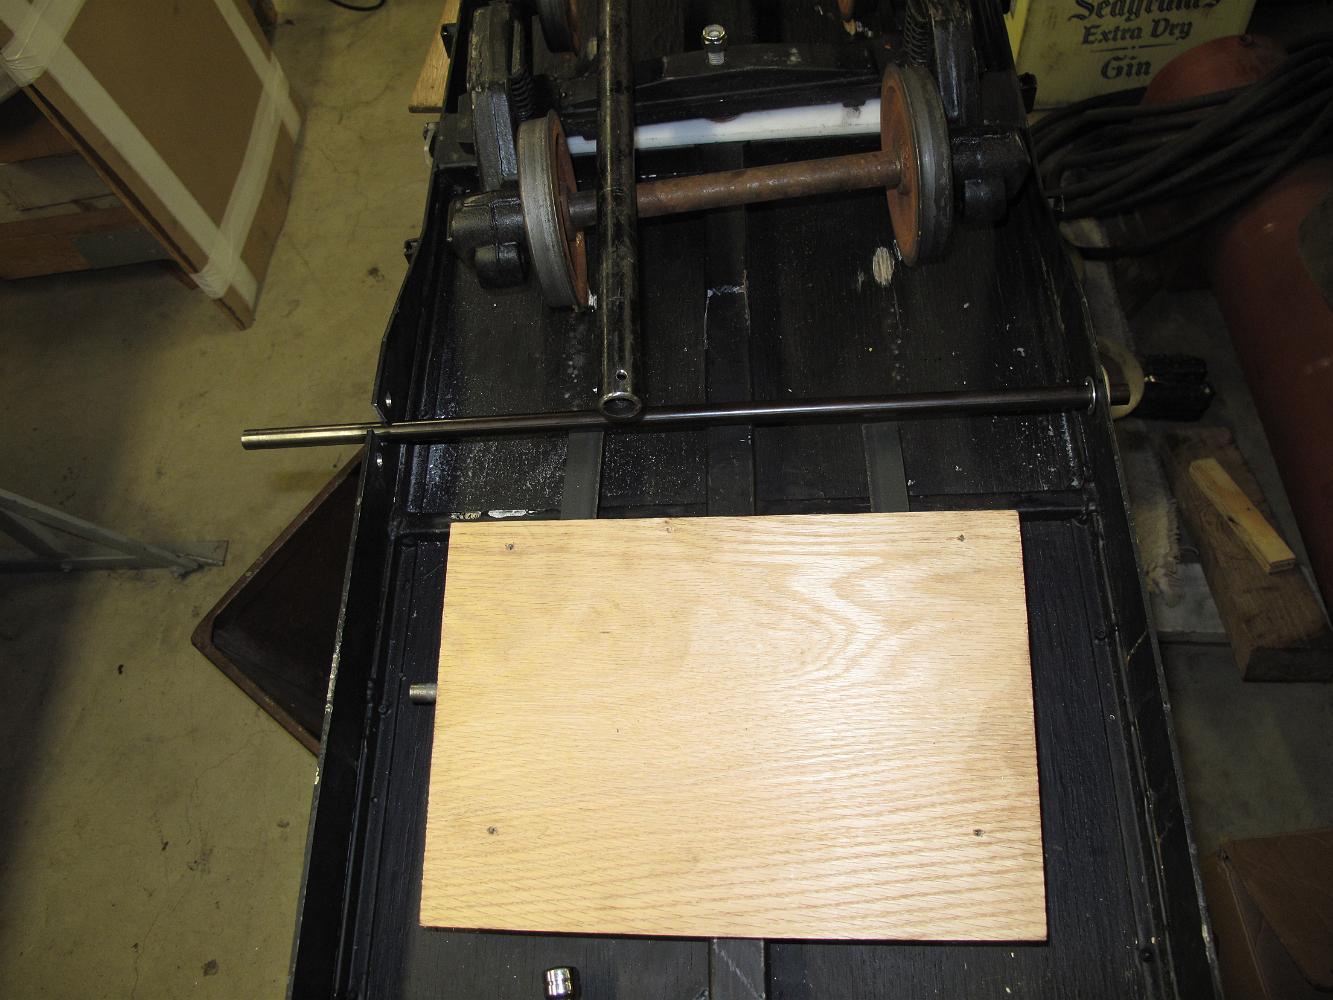
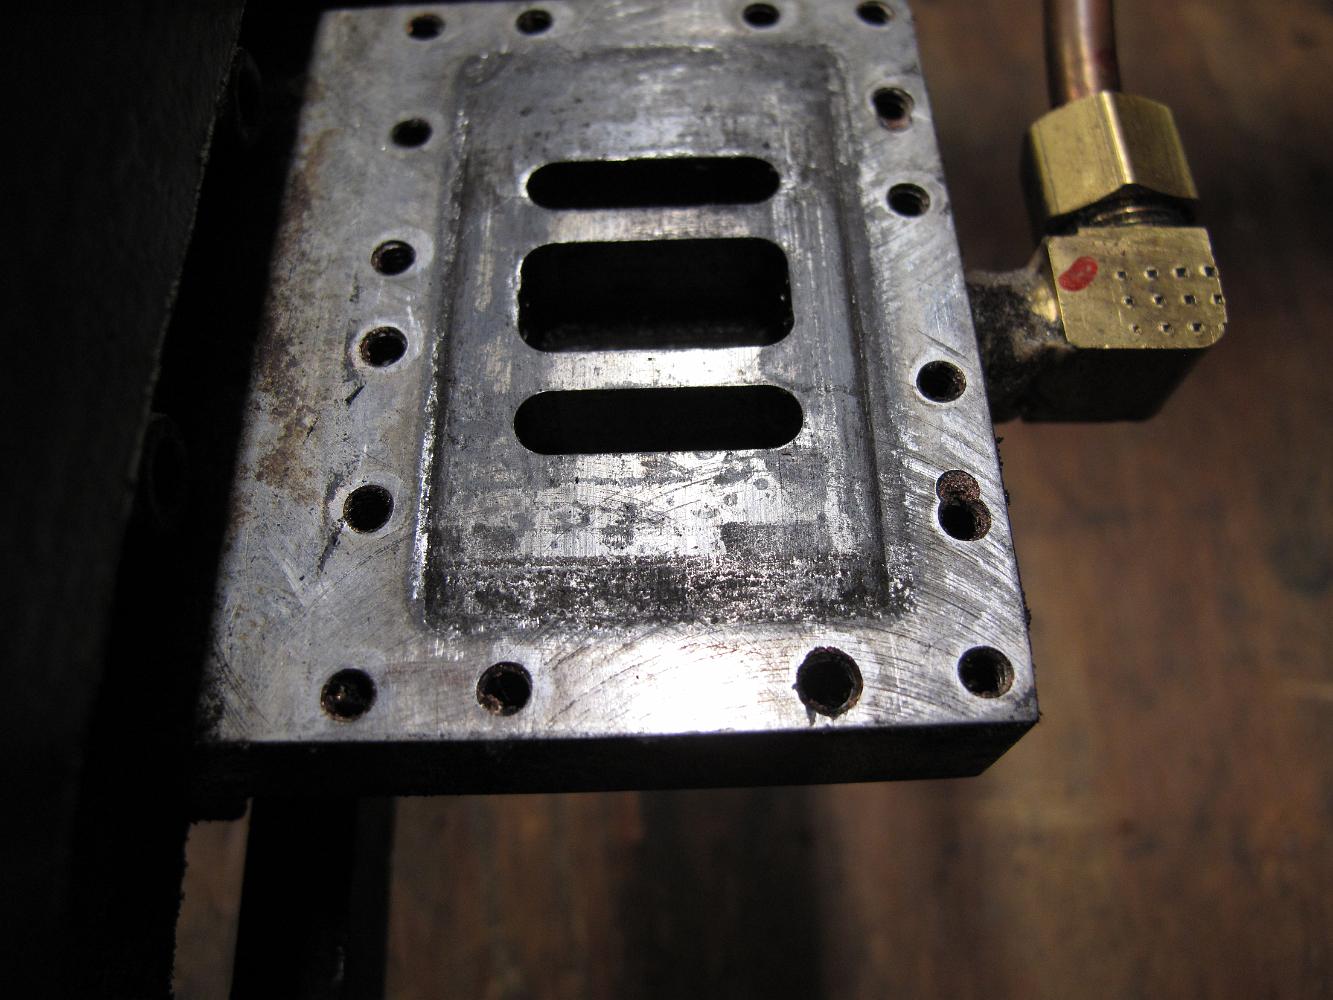
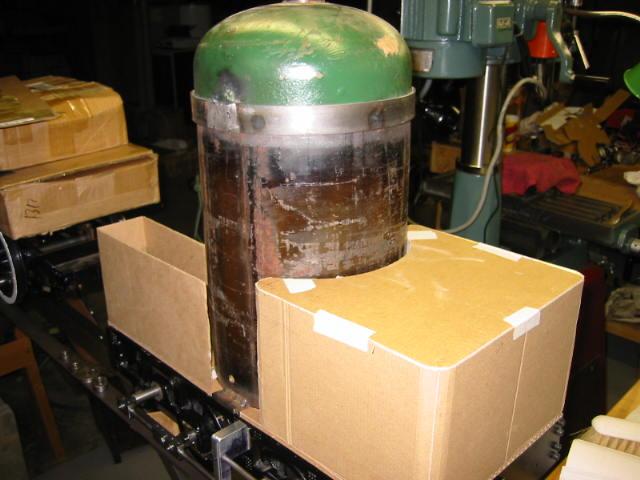
1-Mar-08 Putting a smooth surface on the top of the welded boiler to provide a better air-tight seal.
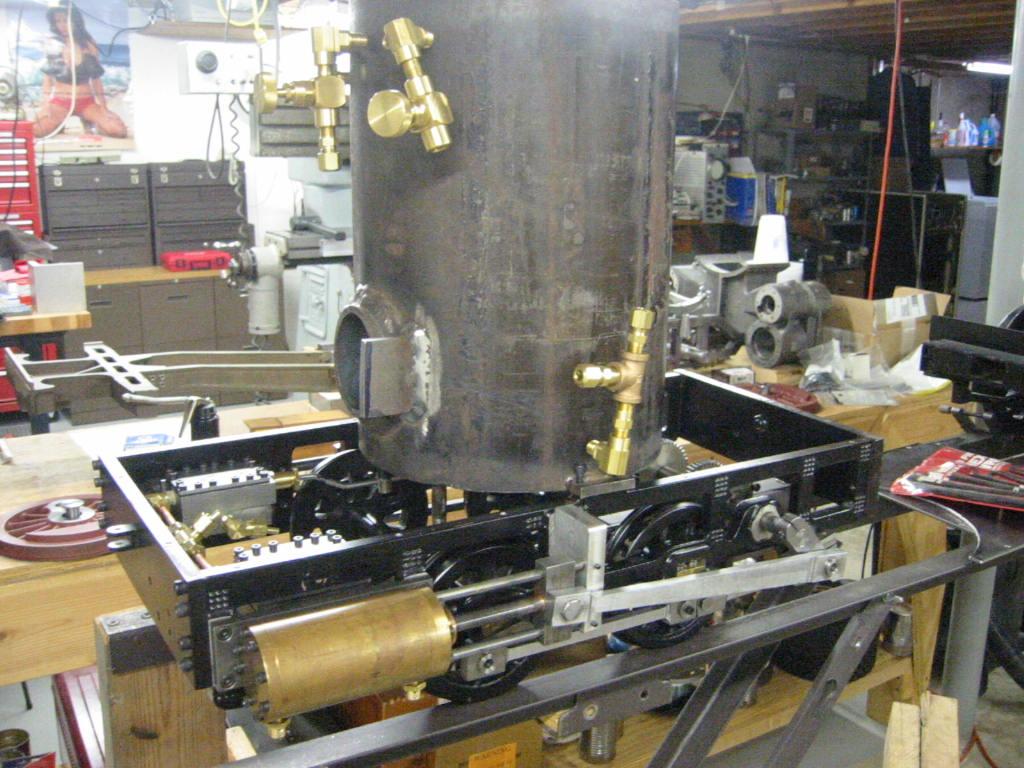
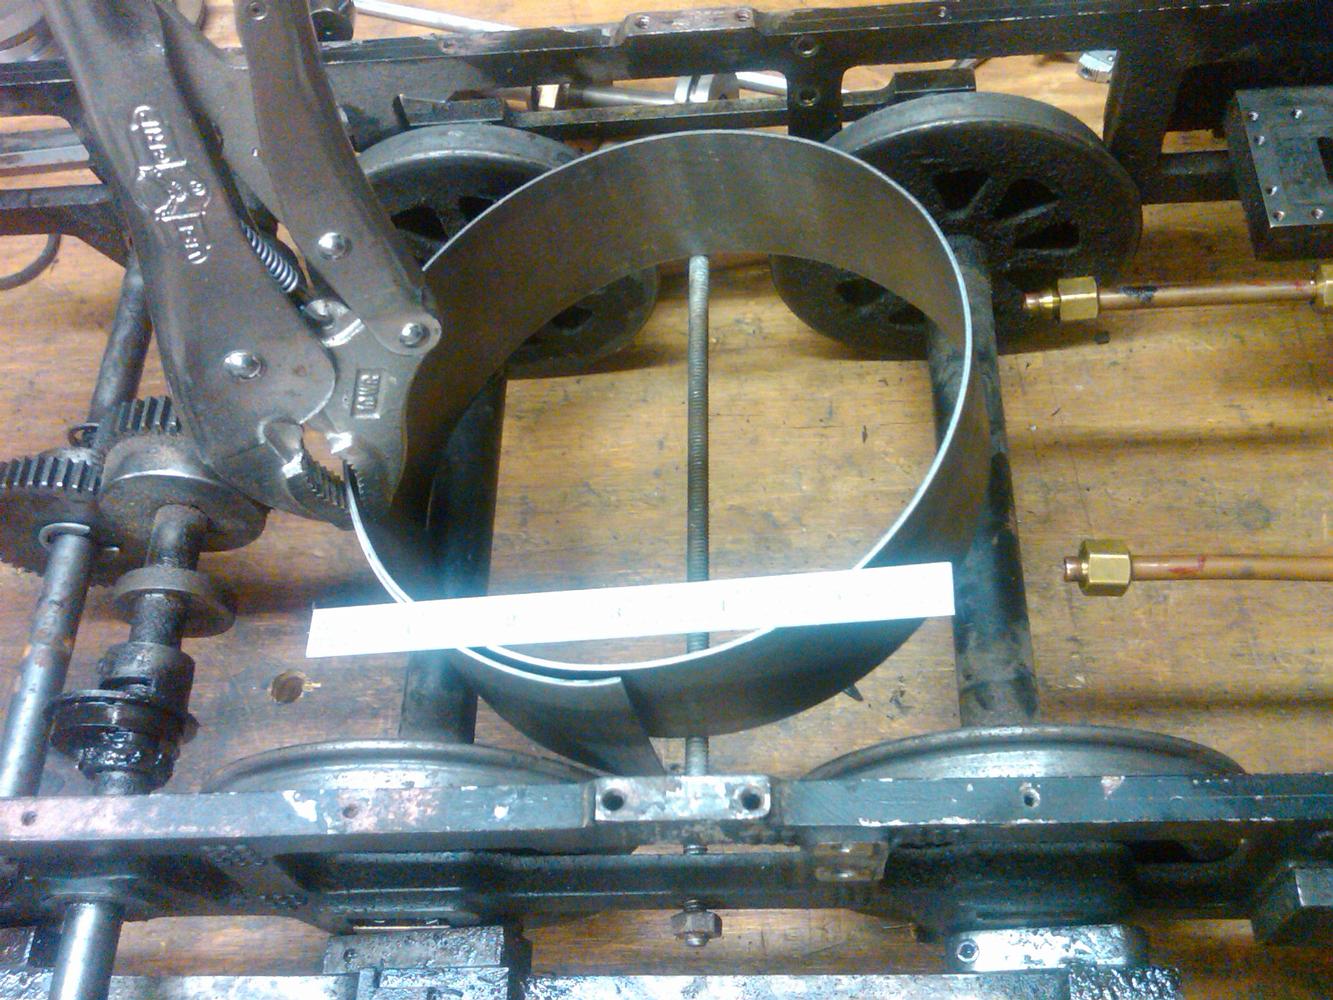
Using a large piece of all-thread rod, and bridging the soft copper flues, the boiler is lightly held down to skim the top surface smooth.
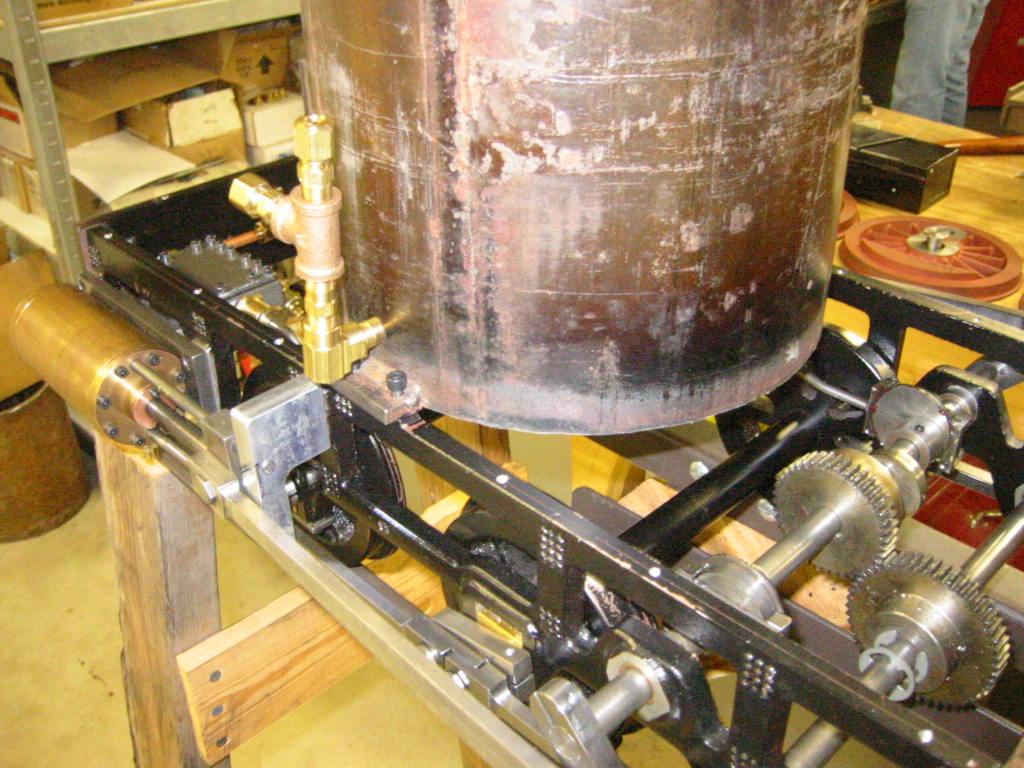
The clamping setup for the boiler was interesting - there are pipes protruding below the bottom of the boiler so we could not bolt the boiler to the table…
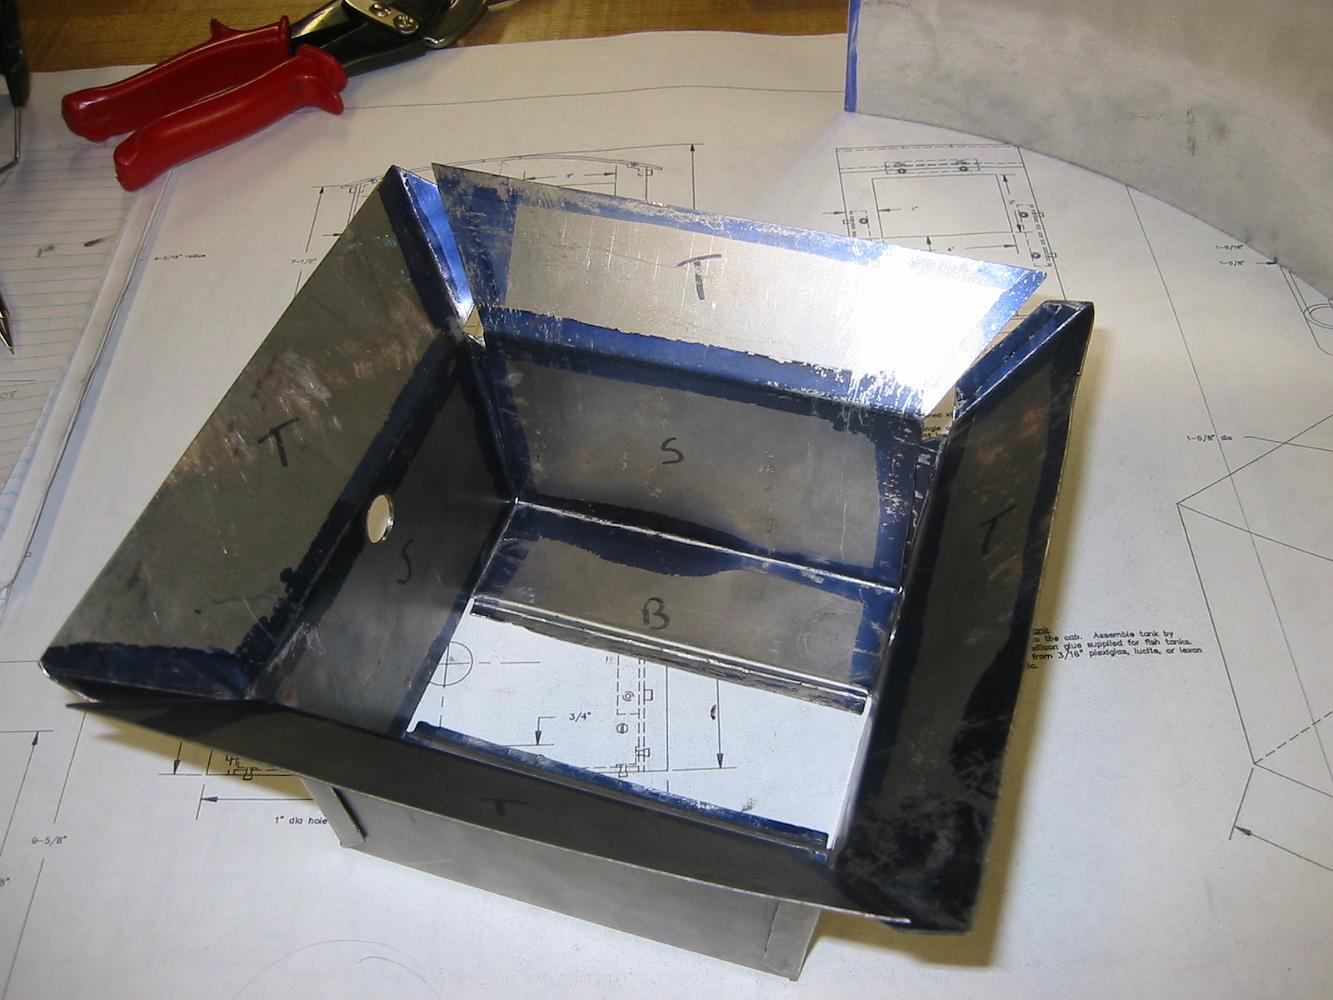
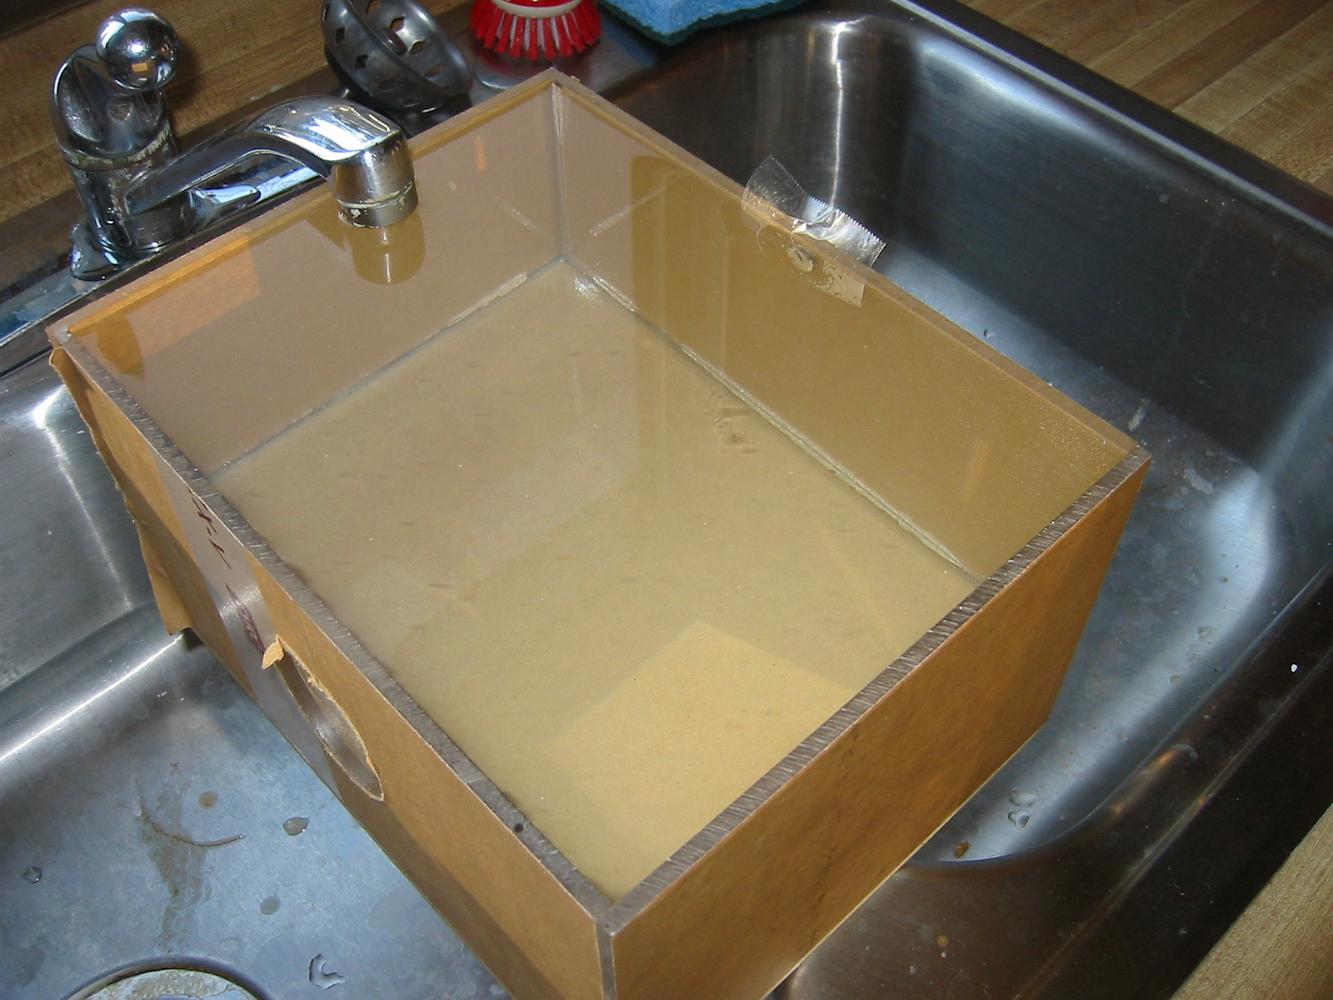
2-Apr-08 Doing a water test on the tank before gluing the last side on. It did not leak, no need to put silicone cauking on the seams like the plans call for.
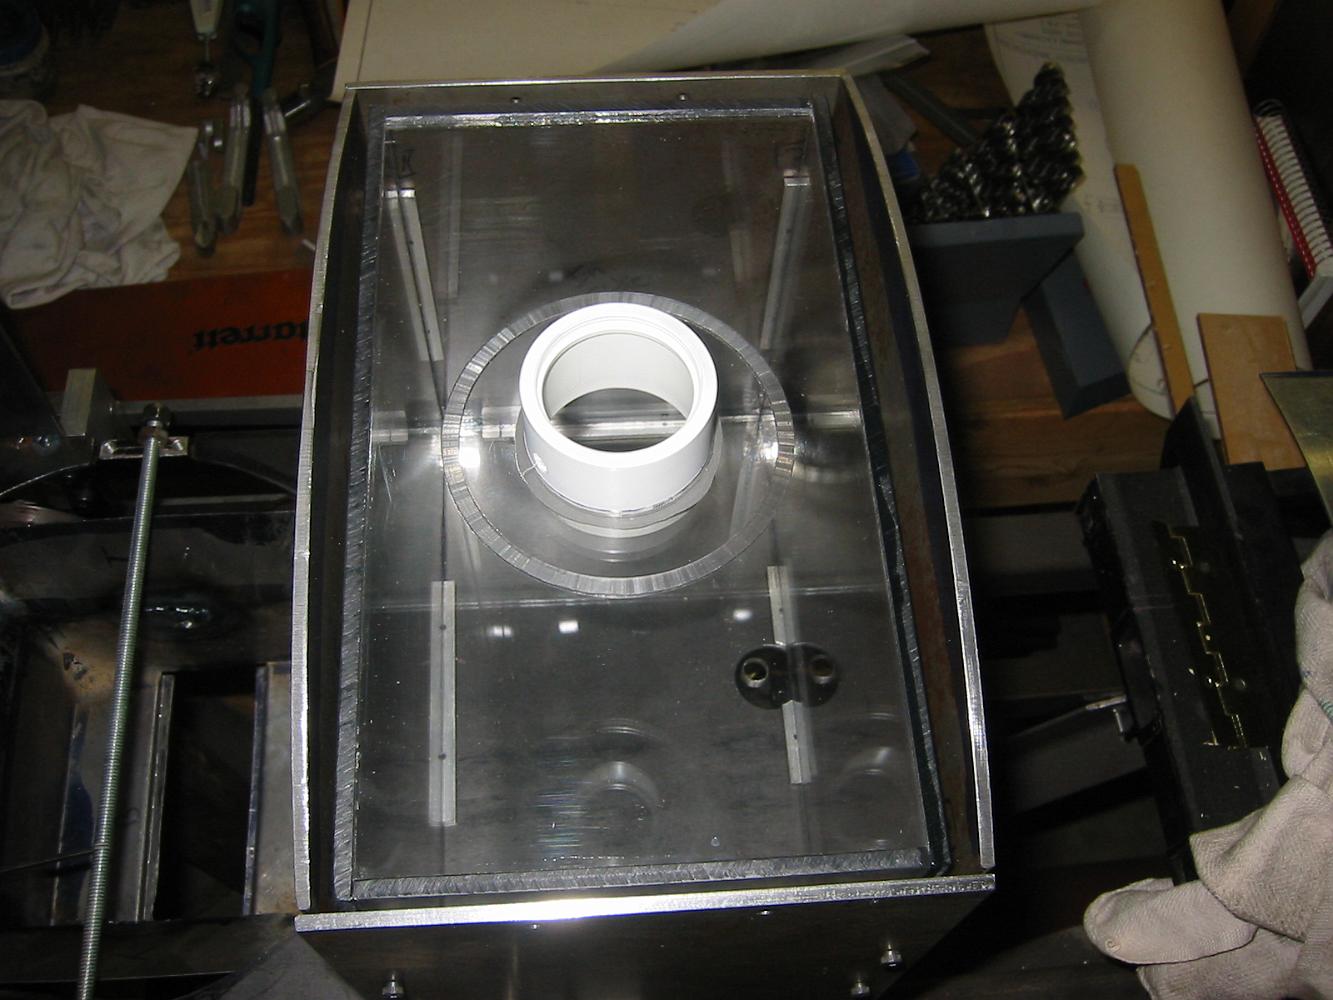
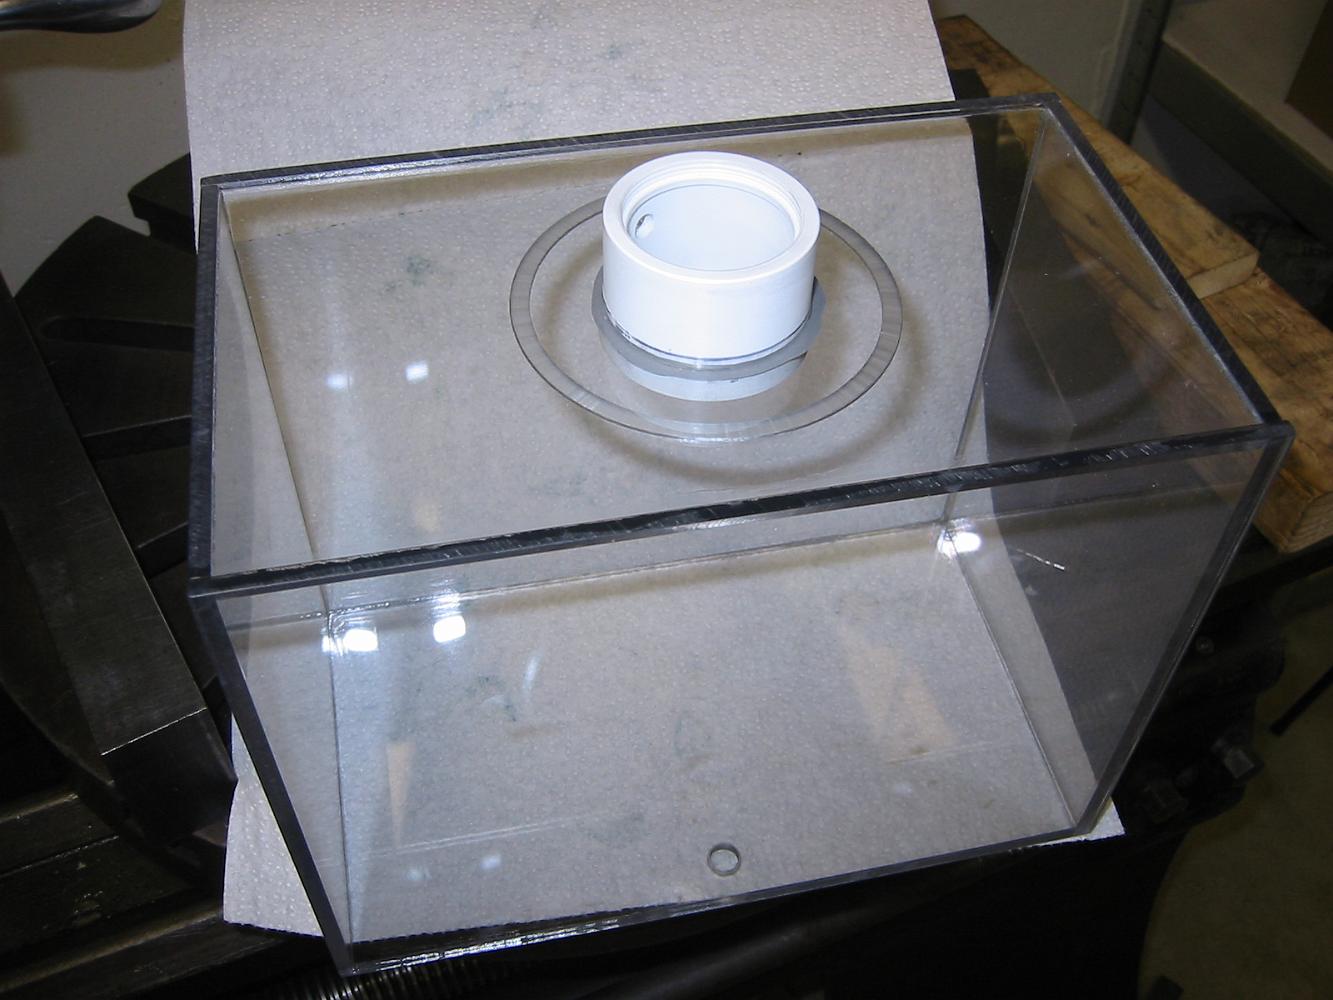
3-Apr-08 The finished water tank. I chose to shorten the fill pipe so it does not stick up through the cab roof. I also drilled a hole in the side of the fill…
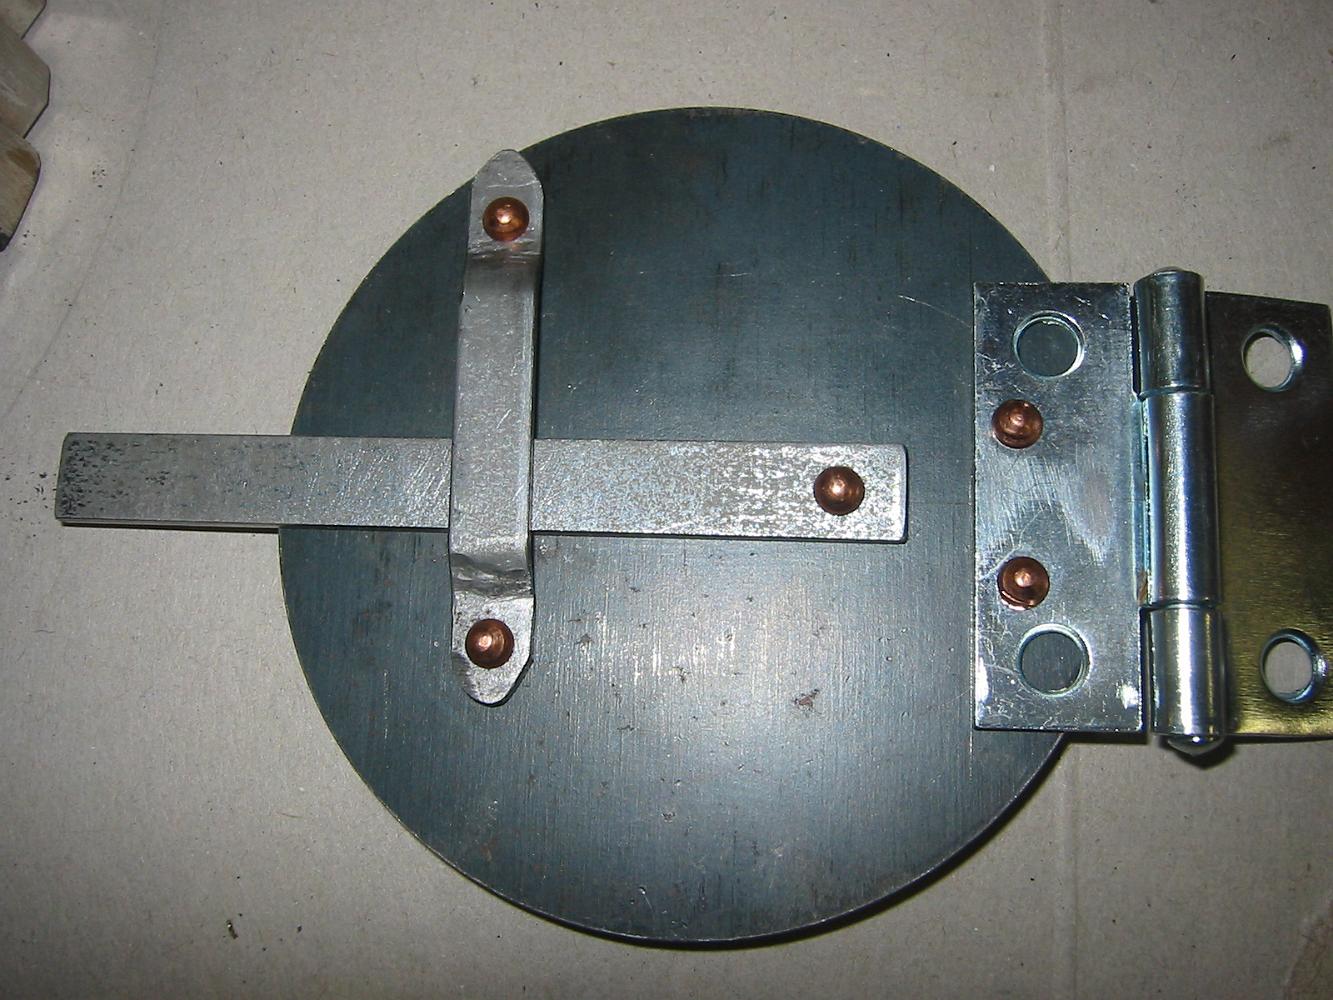
26-July-08 How cool is this? A fire door for the loco held together by just rivets. Based on a design by "Unka" Jesse Livingston, I fabricated the parts, Tim…
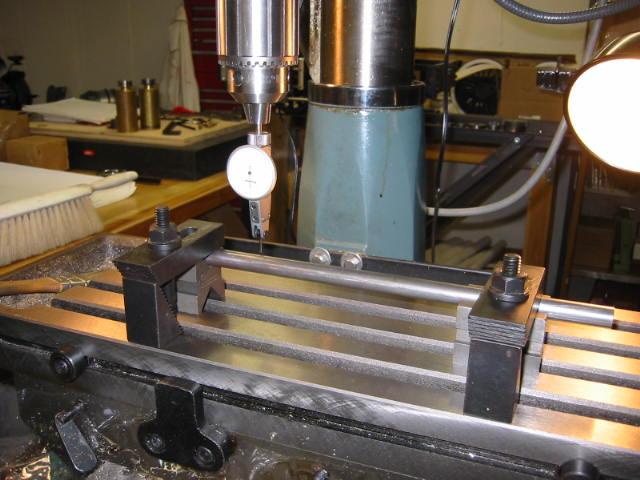
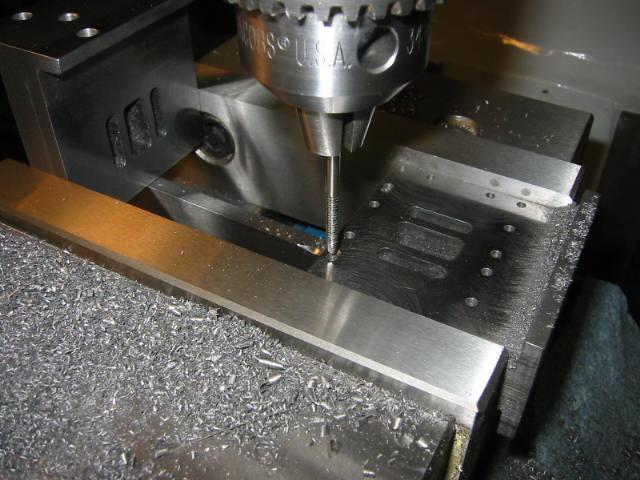
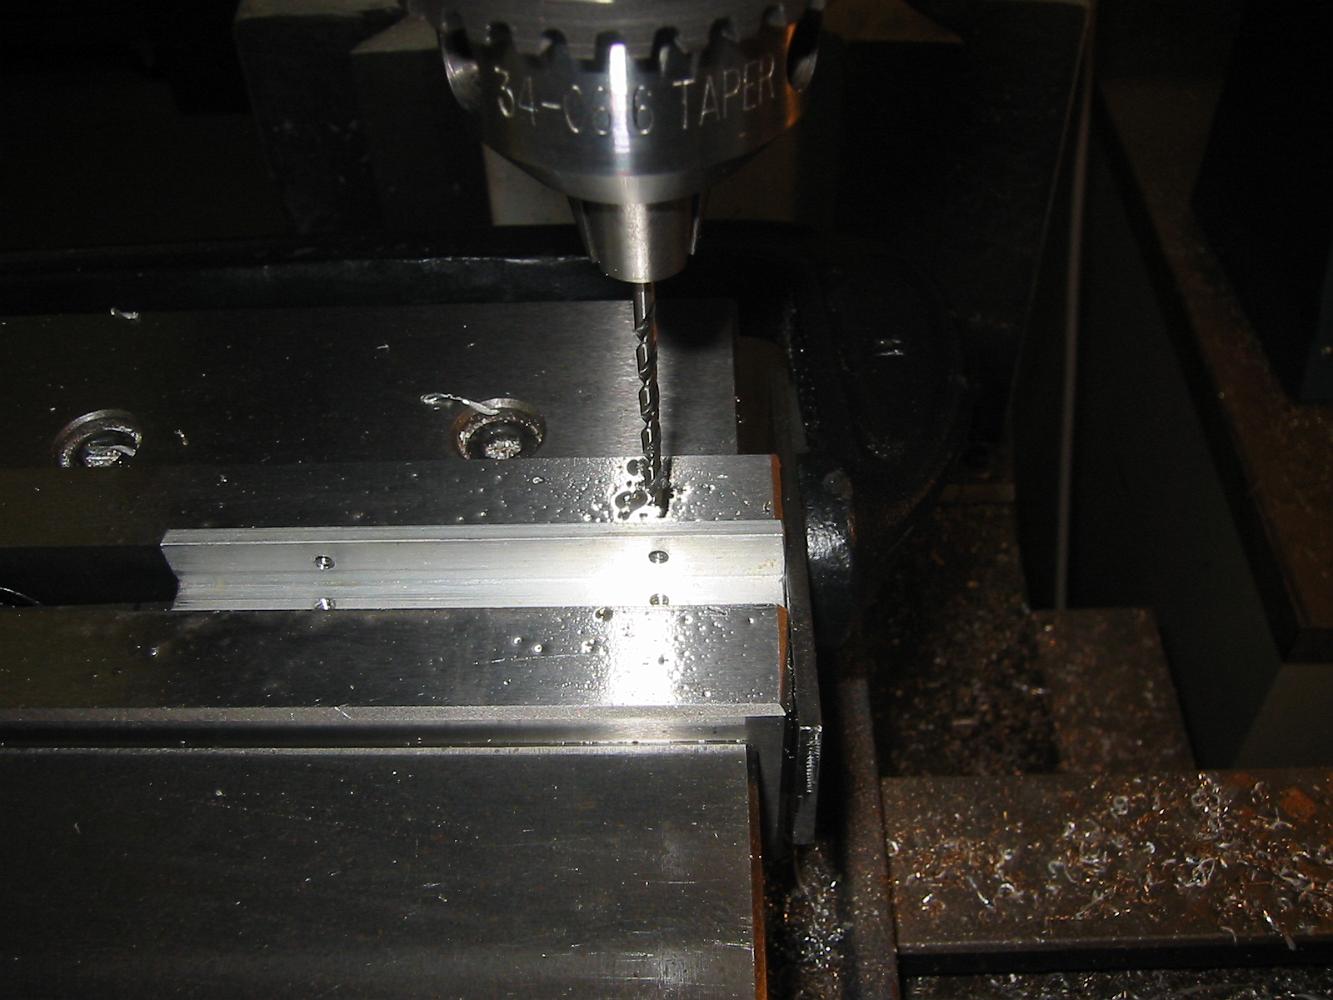
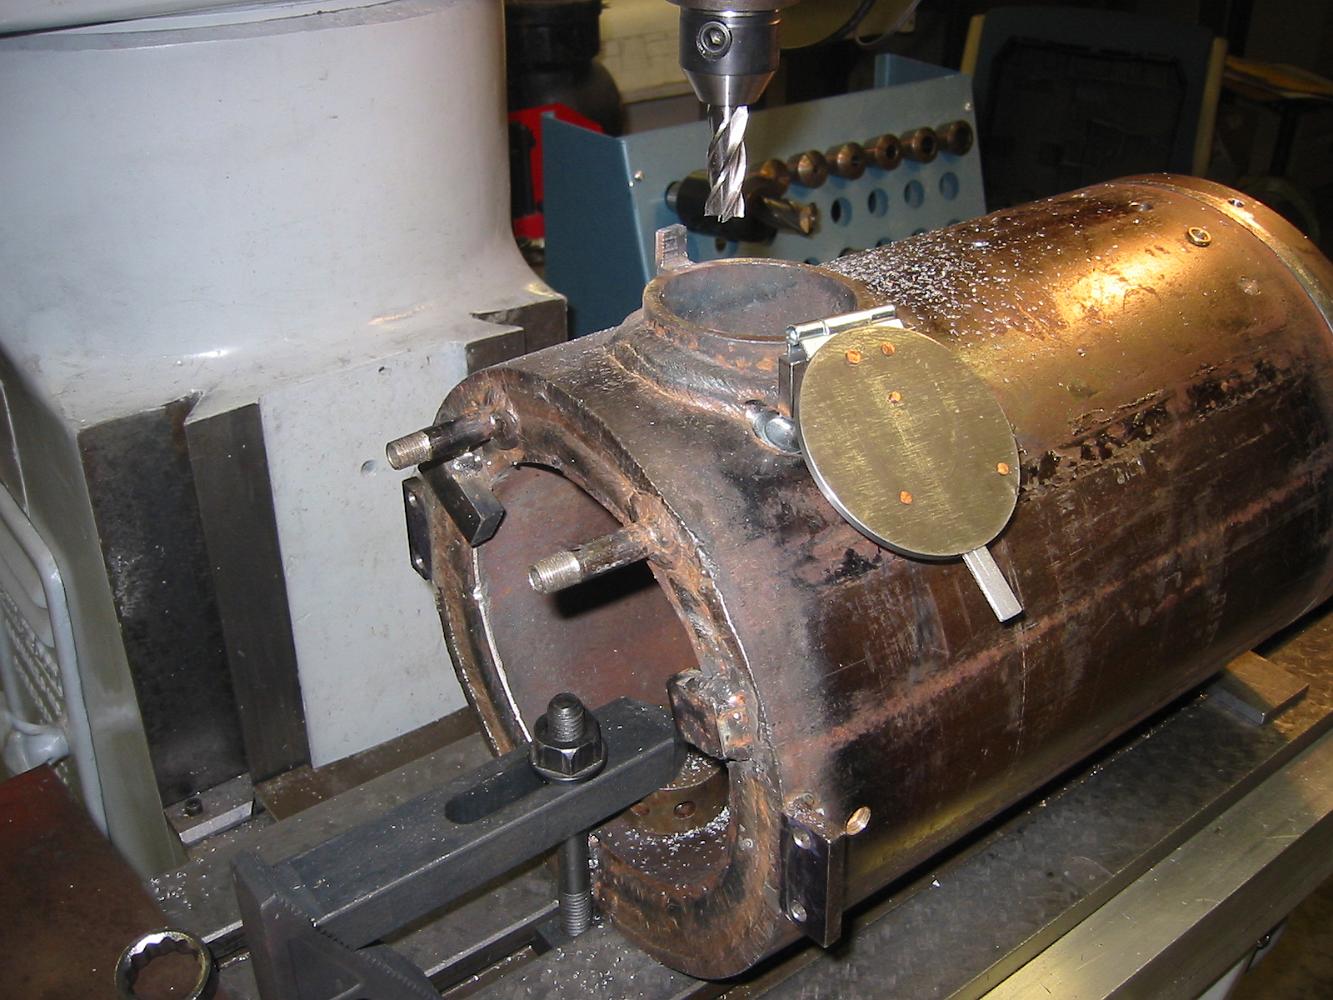
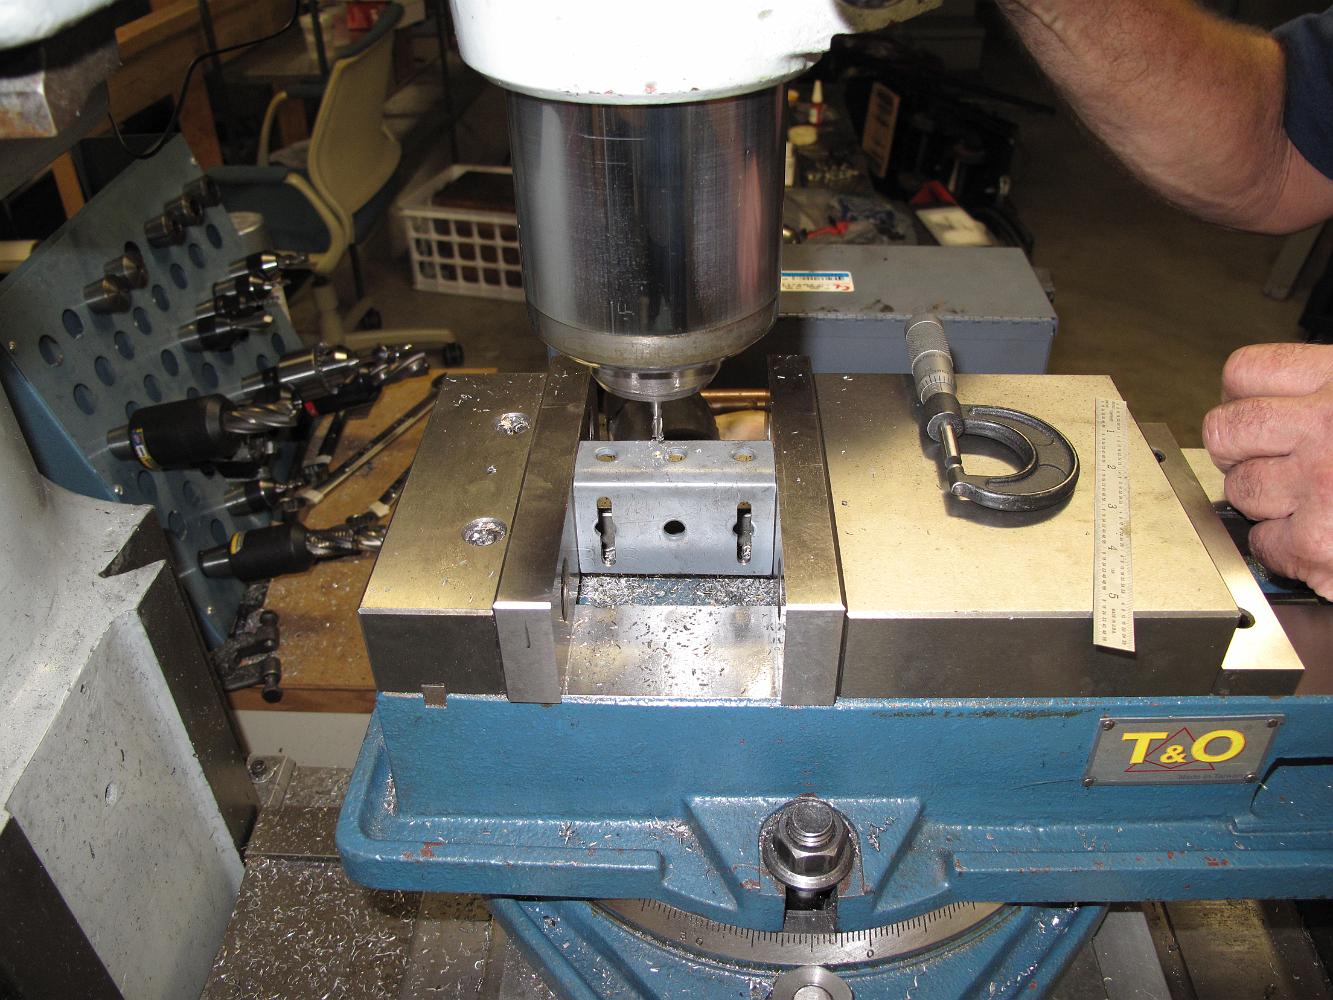
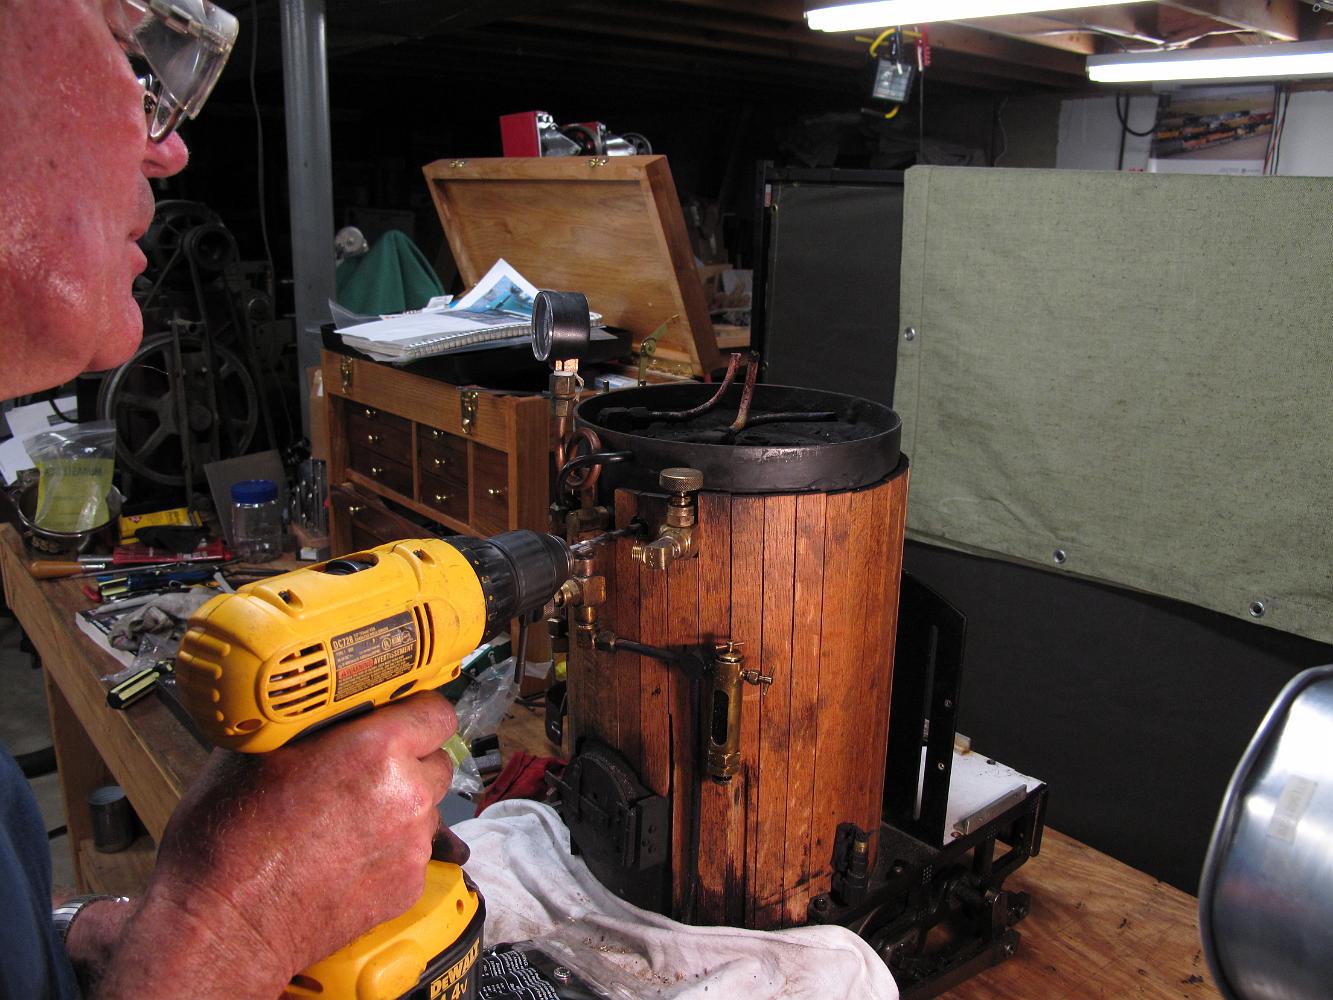
10-Aug-08 A shakey setup to mill the door latch tab on the boiler. This really was not a good setup. I wanted to clamp over the boiler, but my table is not big…
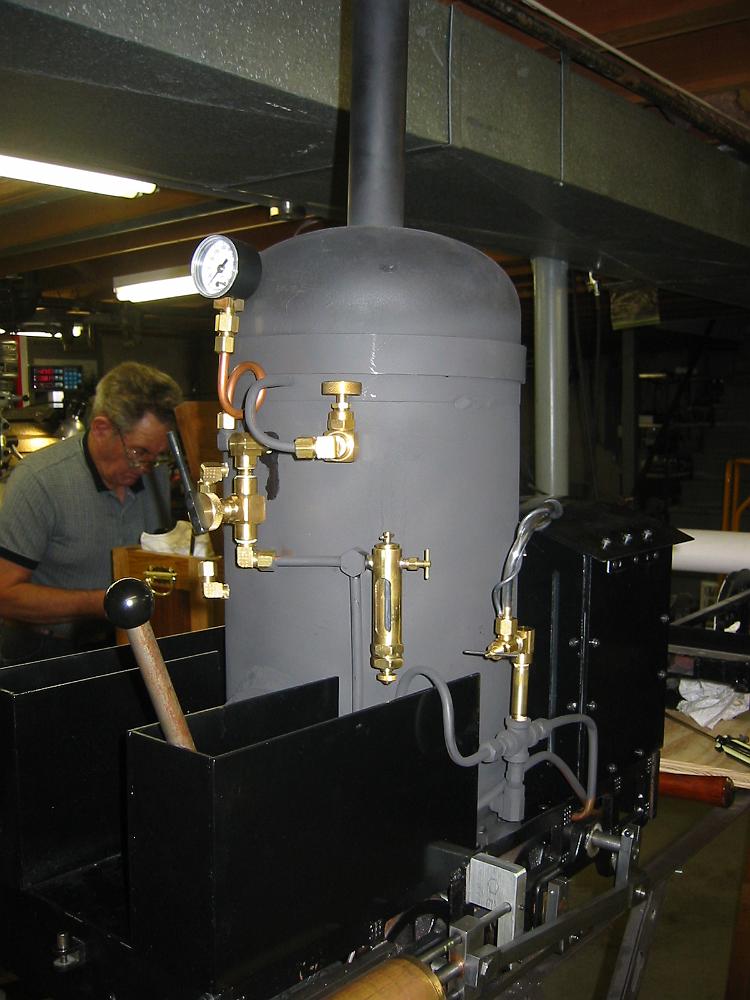
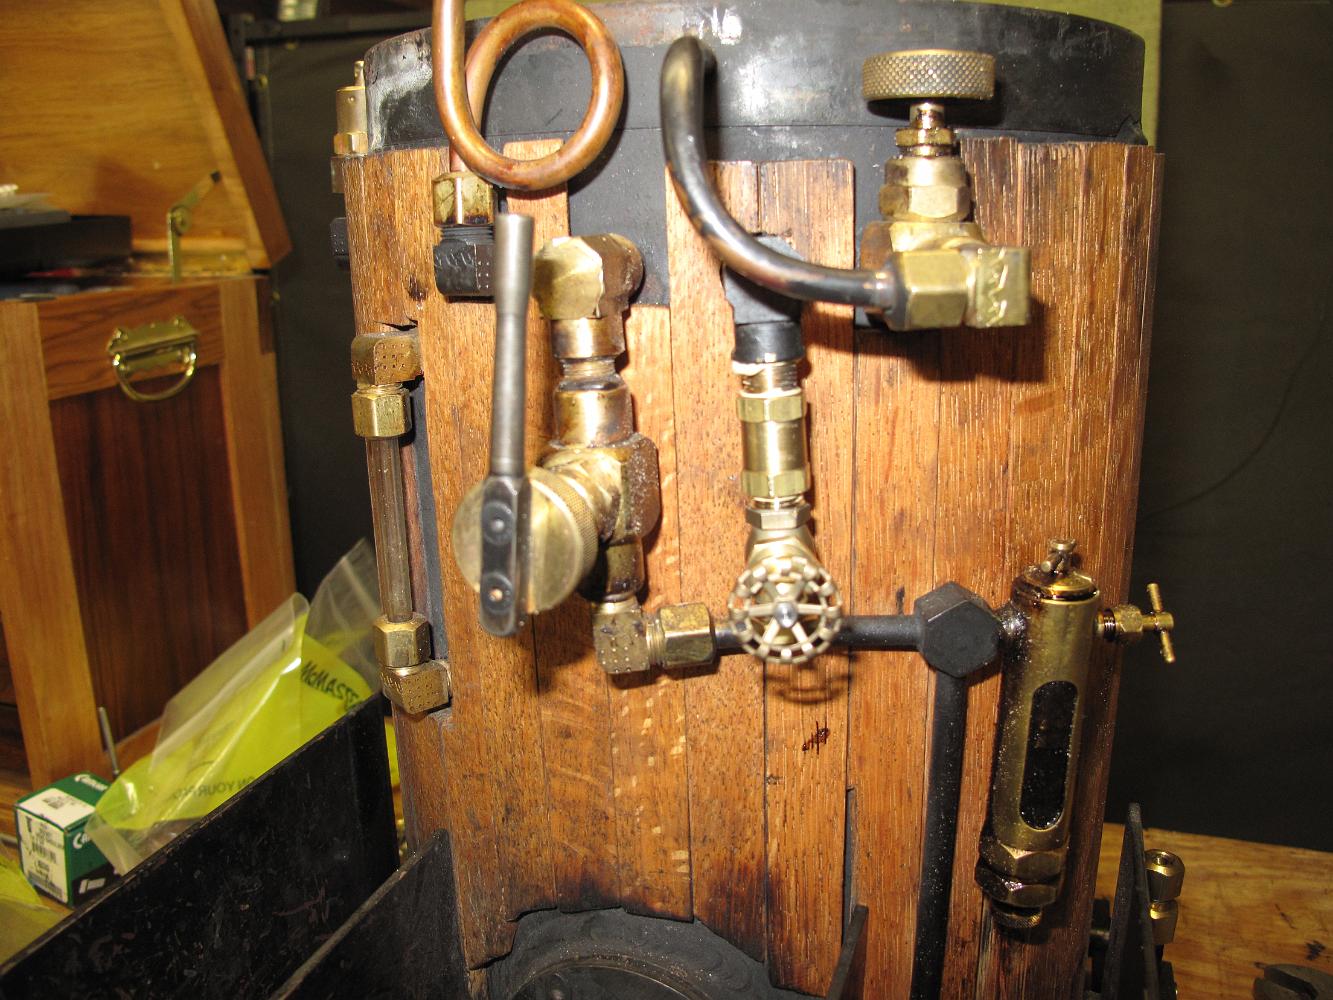
3-Oct-08 I learn how to bend copper tube, sort of. The main plumbing is completed except for the water glass and the hand pump.
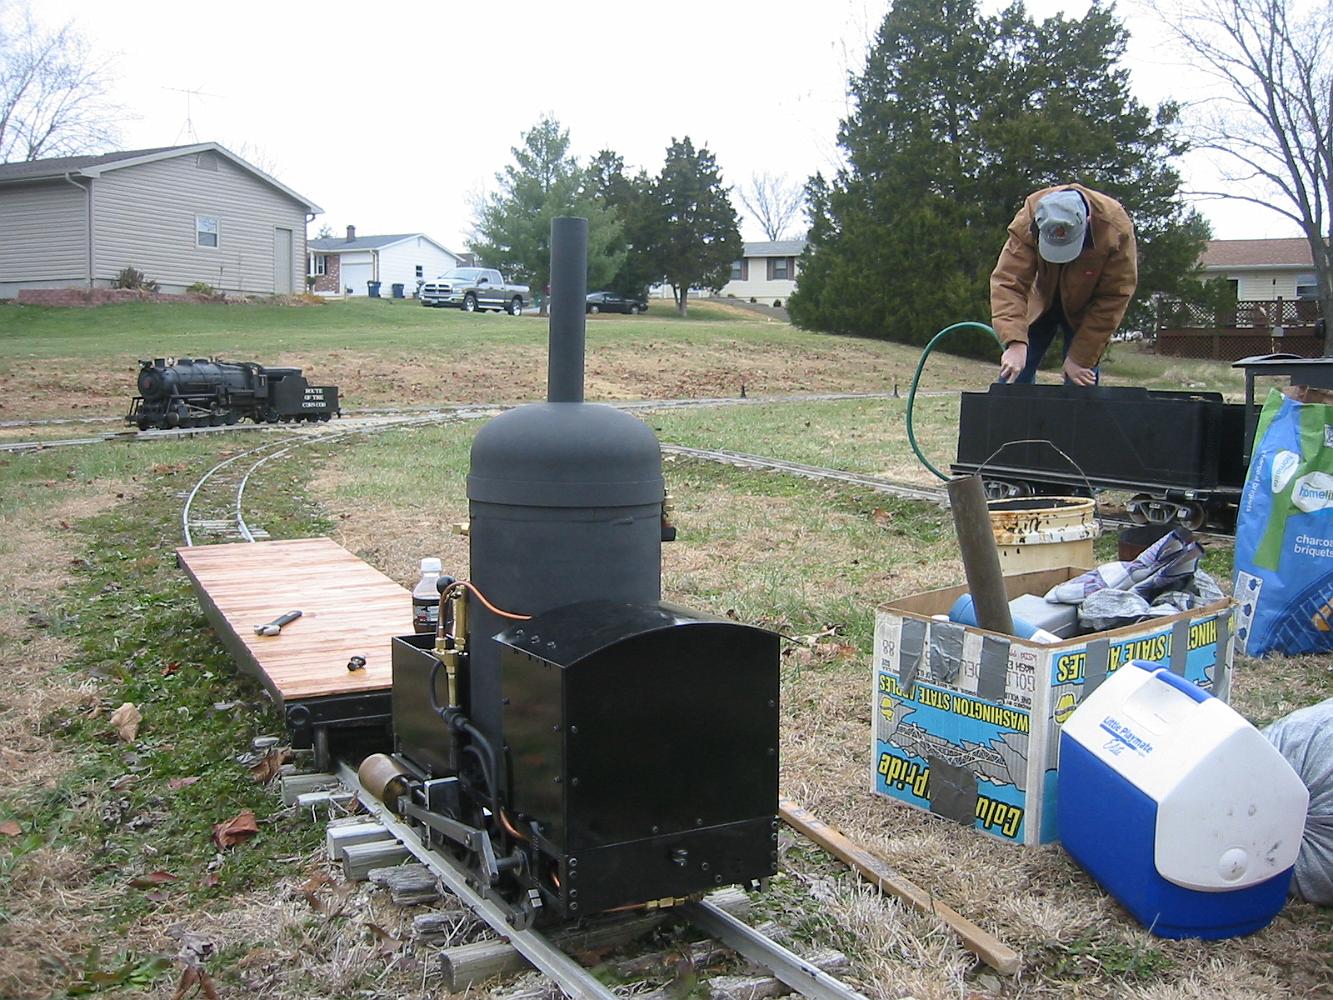
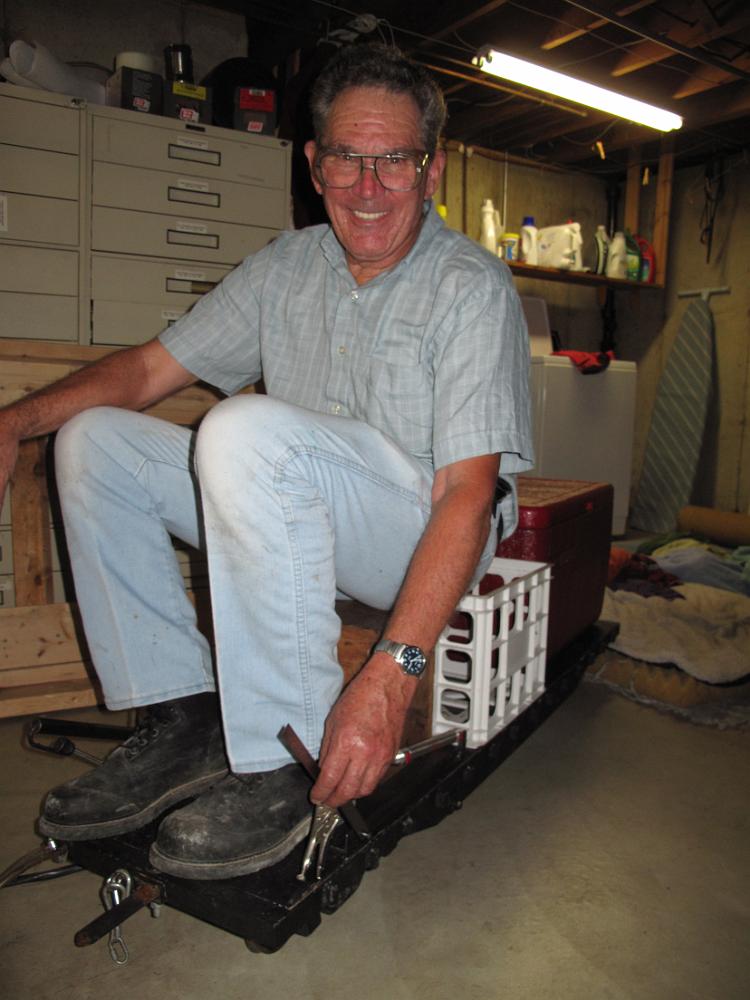
Saturday, 29-Nov-08, a steamup at Tim M.'s private track at his house. The crab is unloaded and a borrowed flatcar is the engineers seat. To the right John T.…
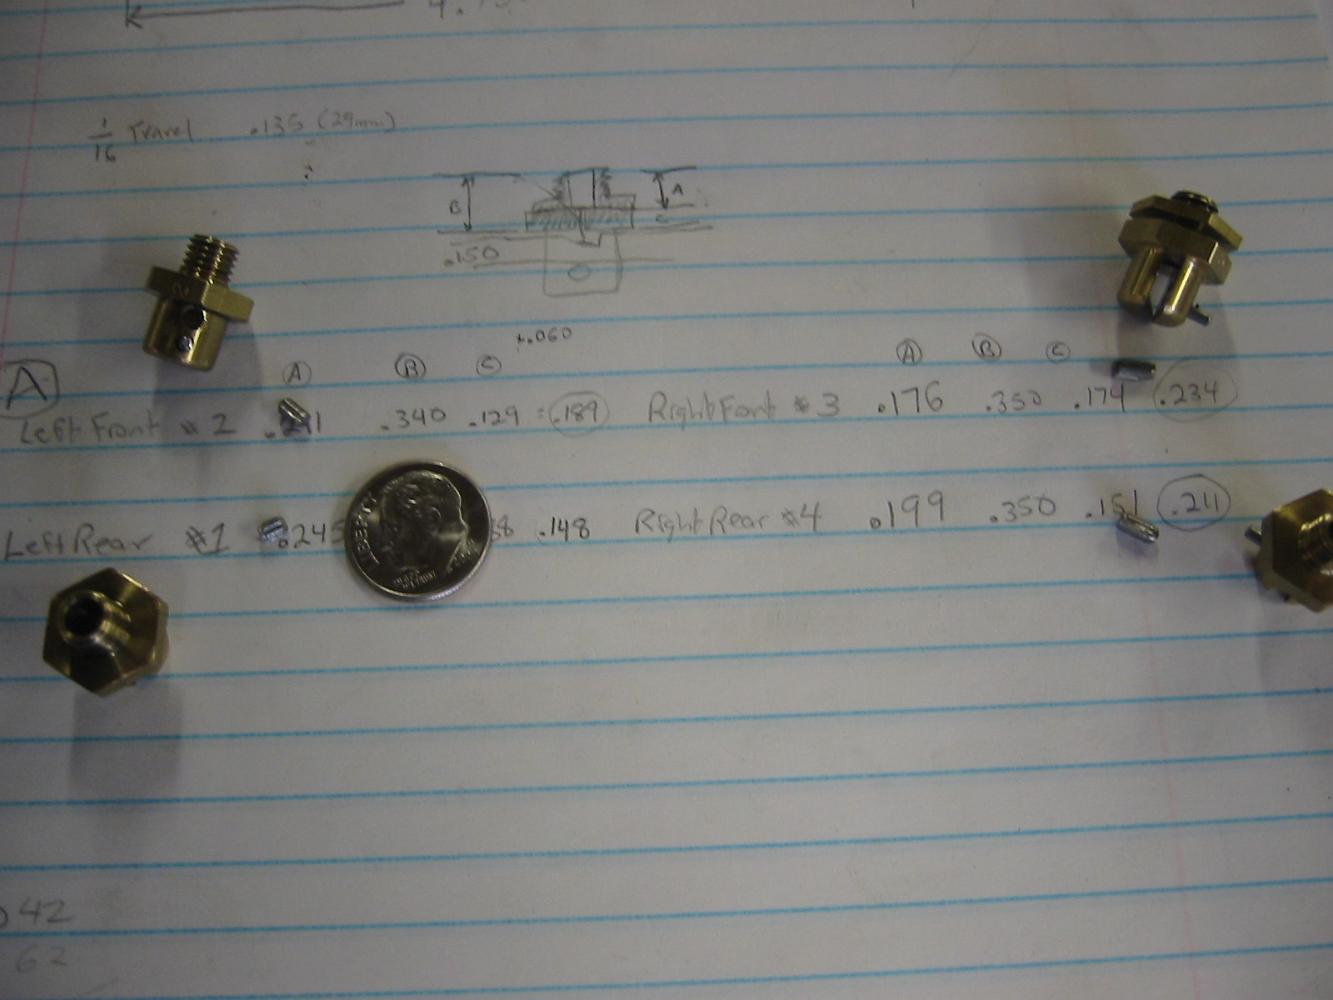
28-Nov-08 The final very tiny parts for the Van Brocklin design cylinder cocks. Cutting the grooves in the .200 long pins, and cutting them to length was a…
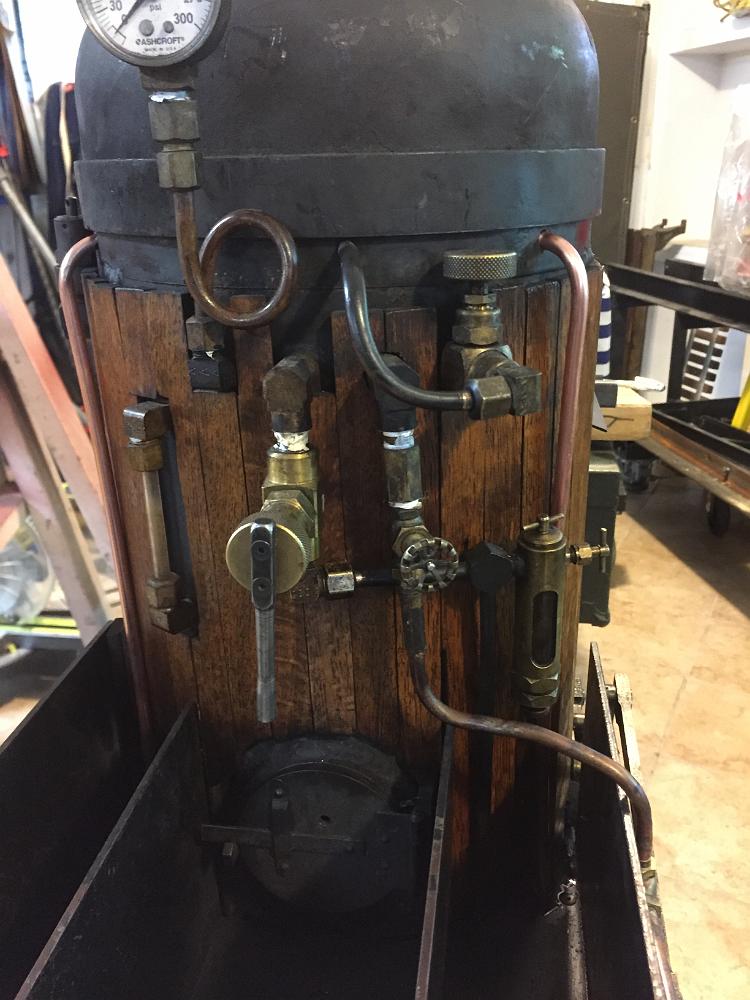
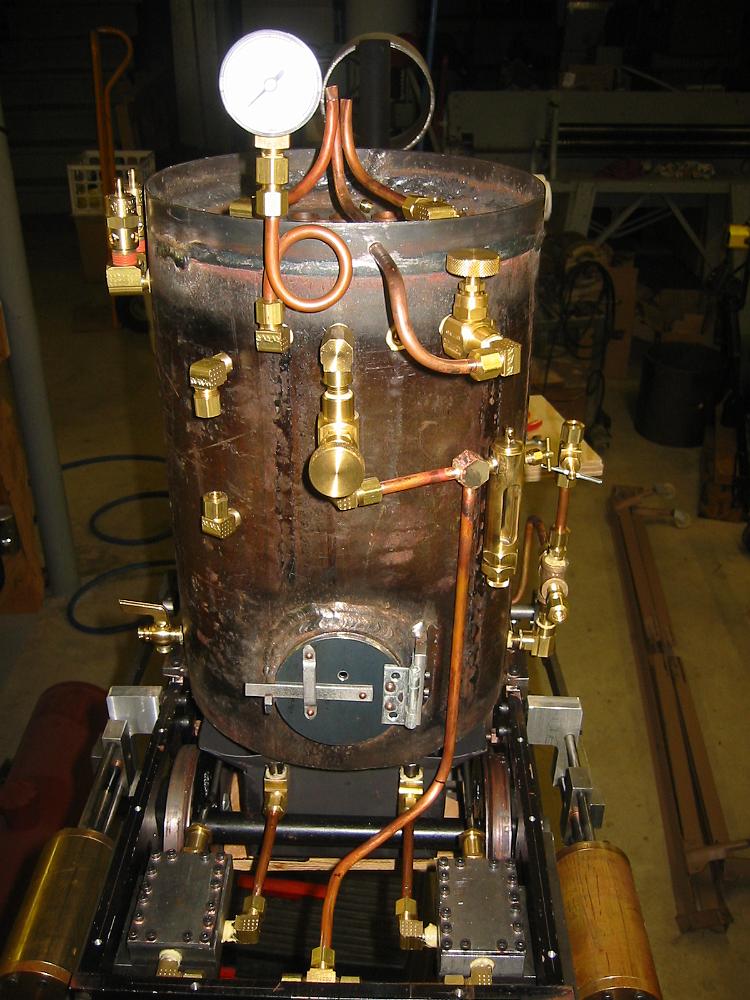
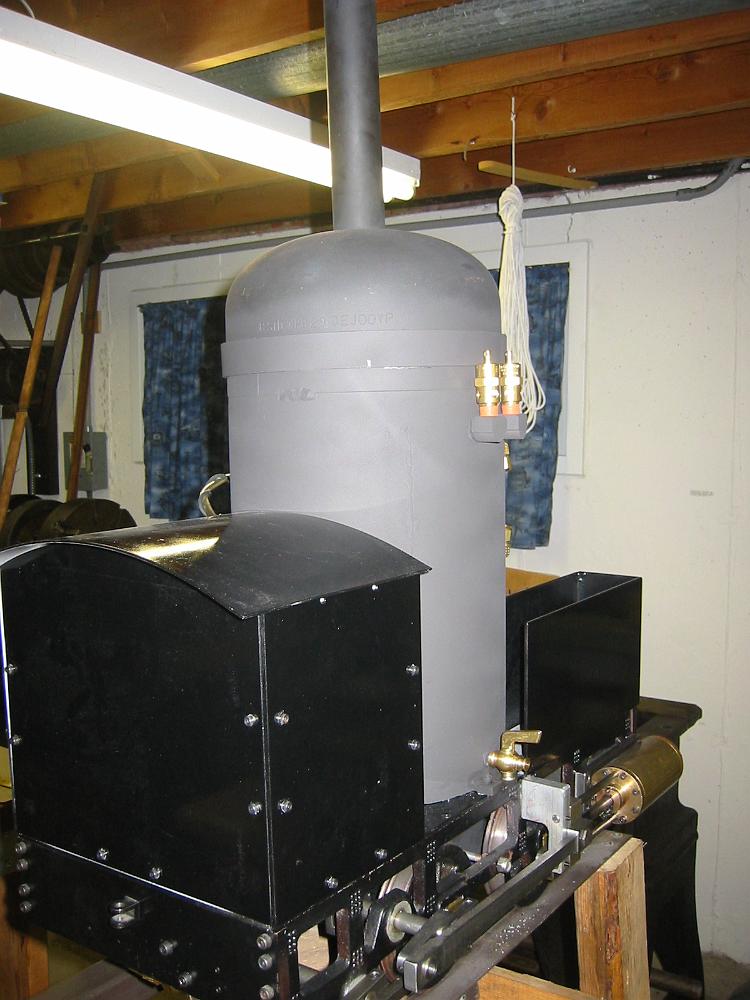
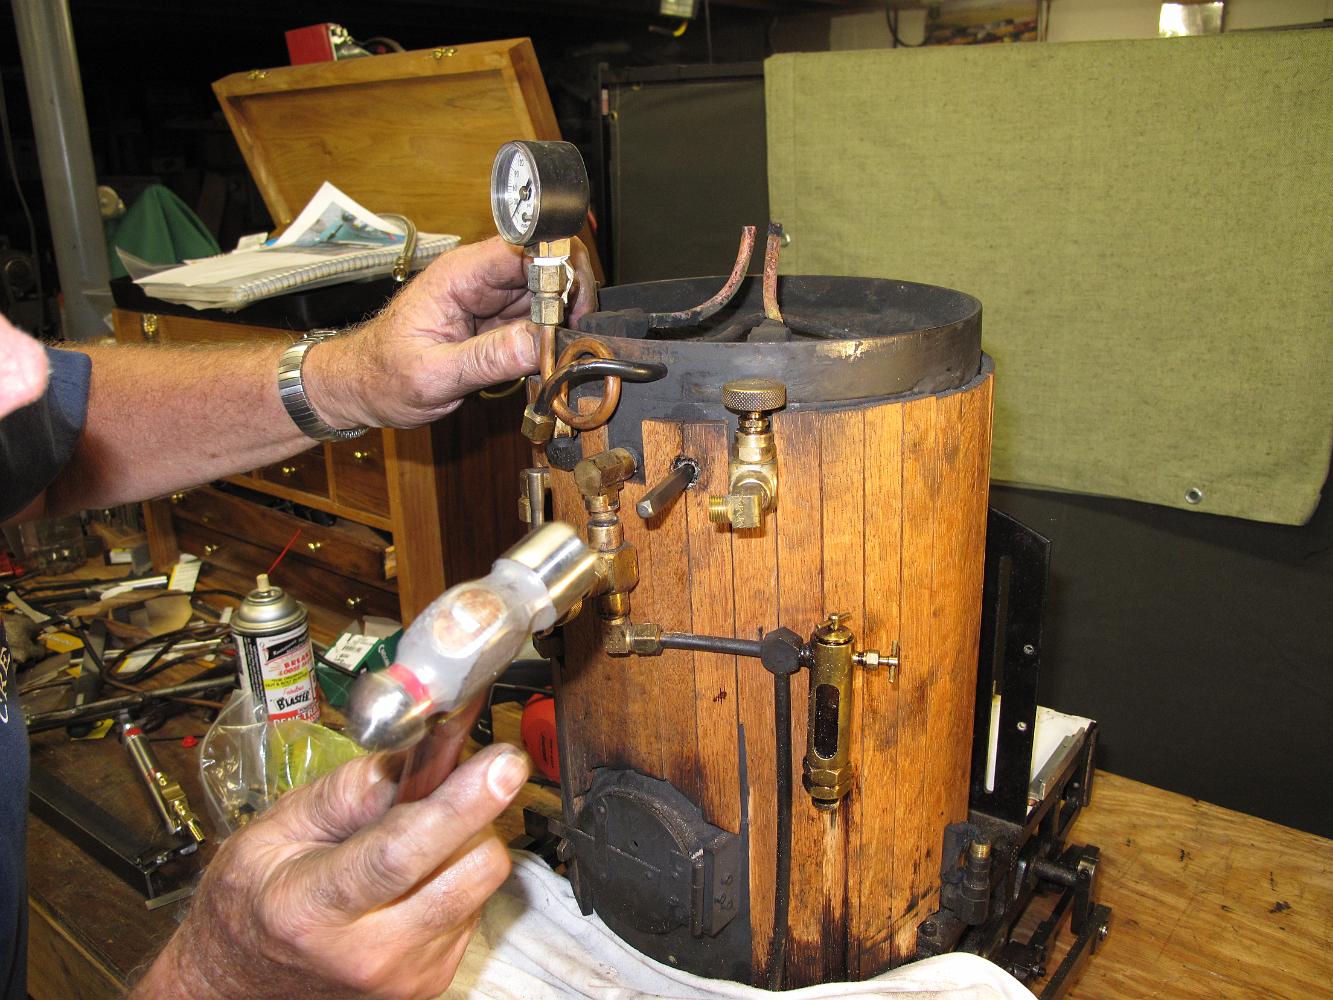
19-Nov-08 It's coming together! I just need to install a sight glass and the plumbing will be complete.
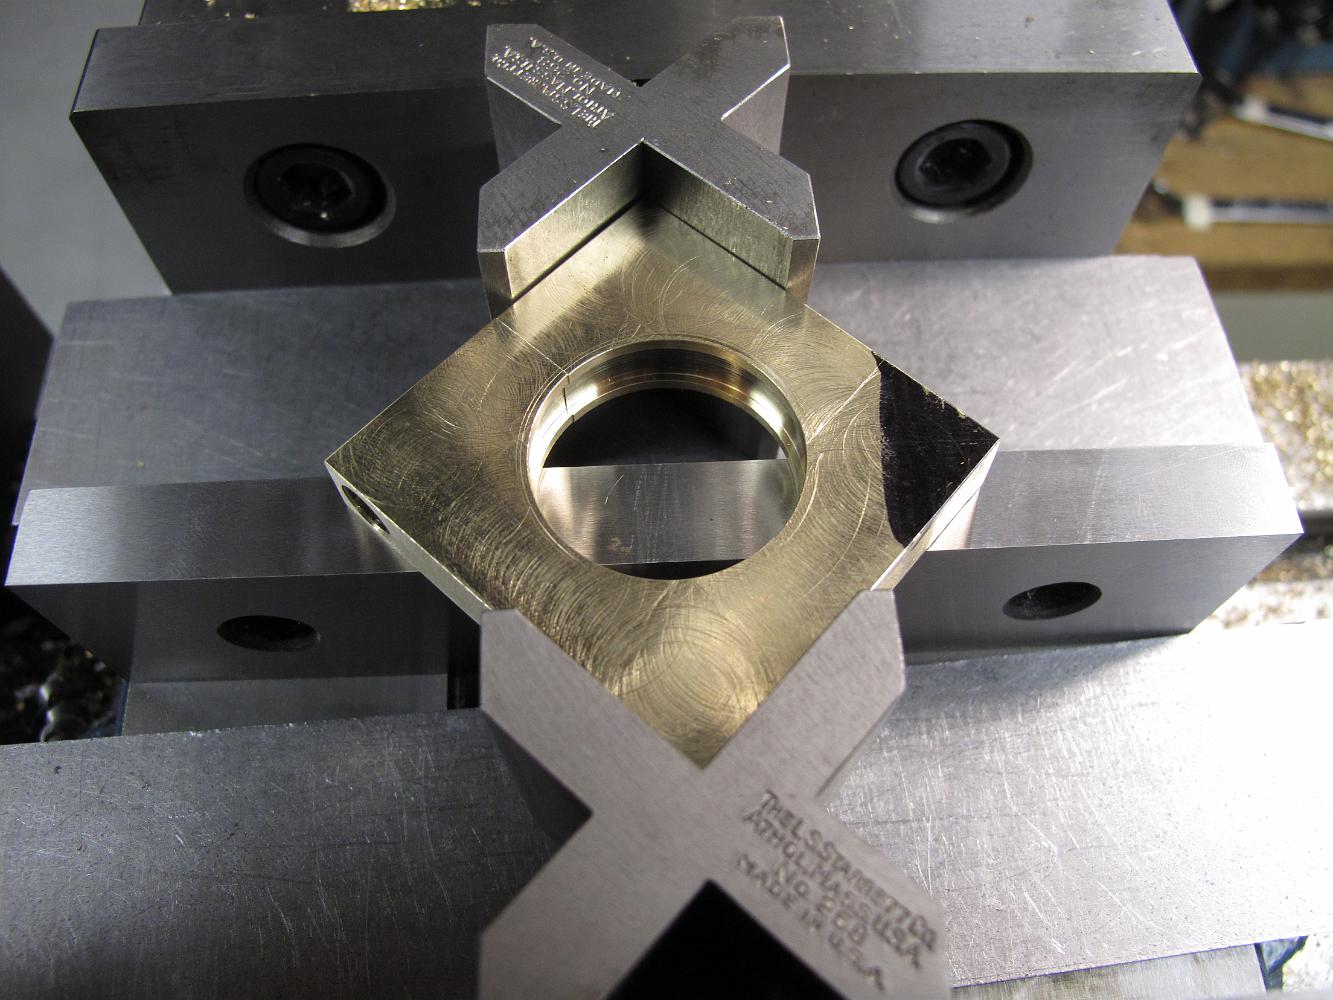
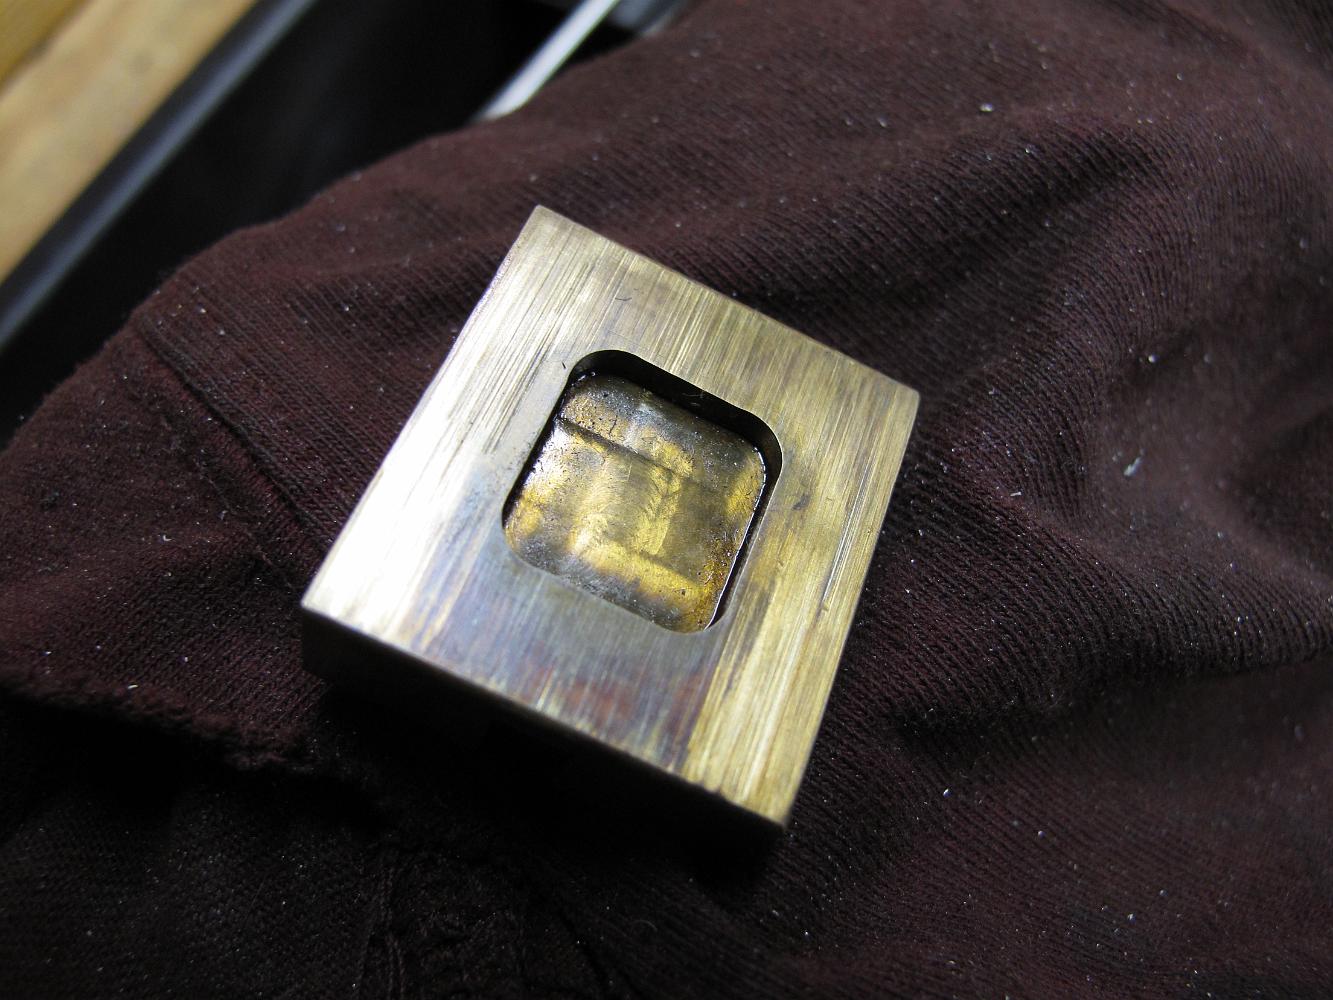
Layout concept for the waterpump eccentric strap. Material used was Alloy 954 bronze, 2"x2"x3/8". The cam-follower wheel is removed and a connection to the…
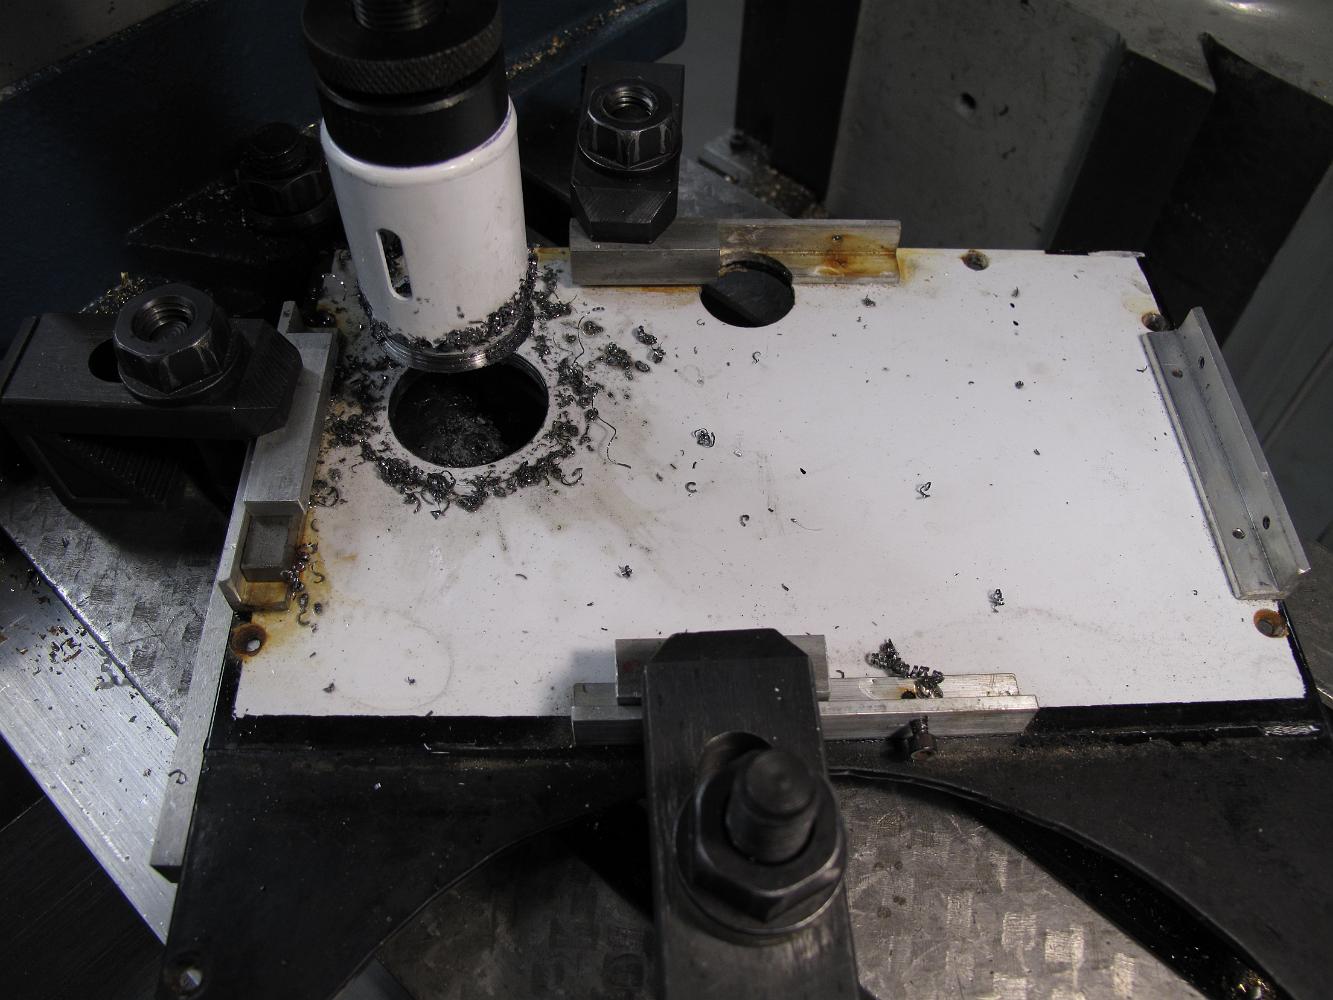
Modifications to the Crab: cutting a hole in the cab floor for the water tank 1/4 NPT drain valve with a hole saw.
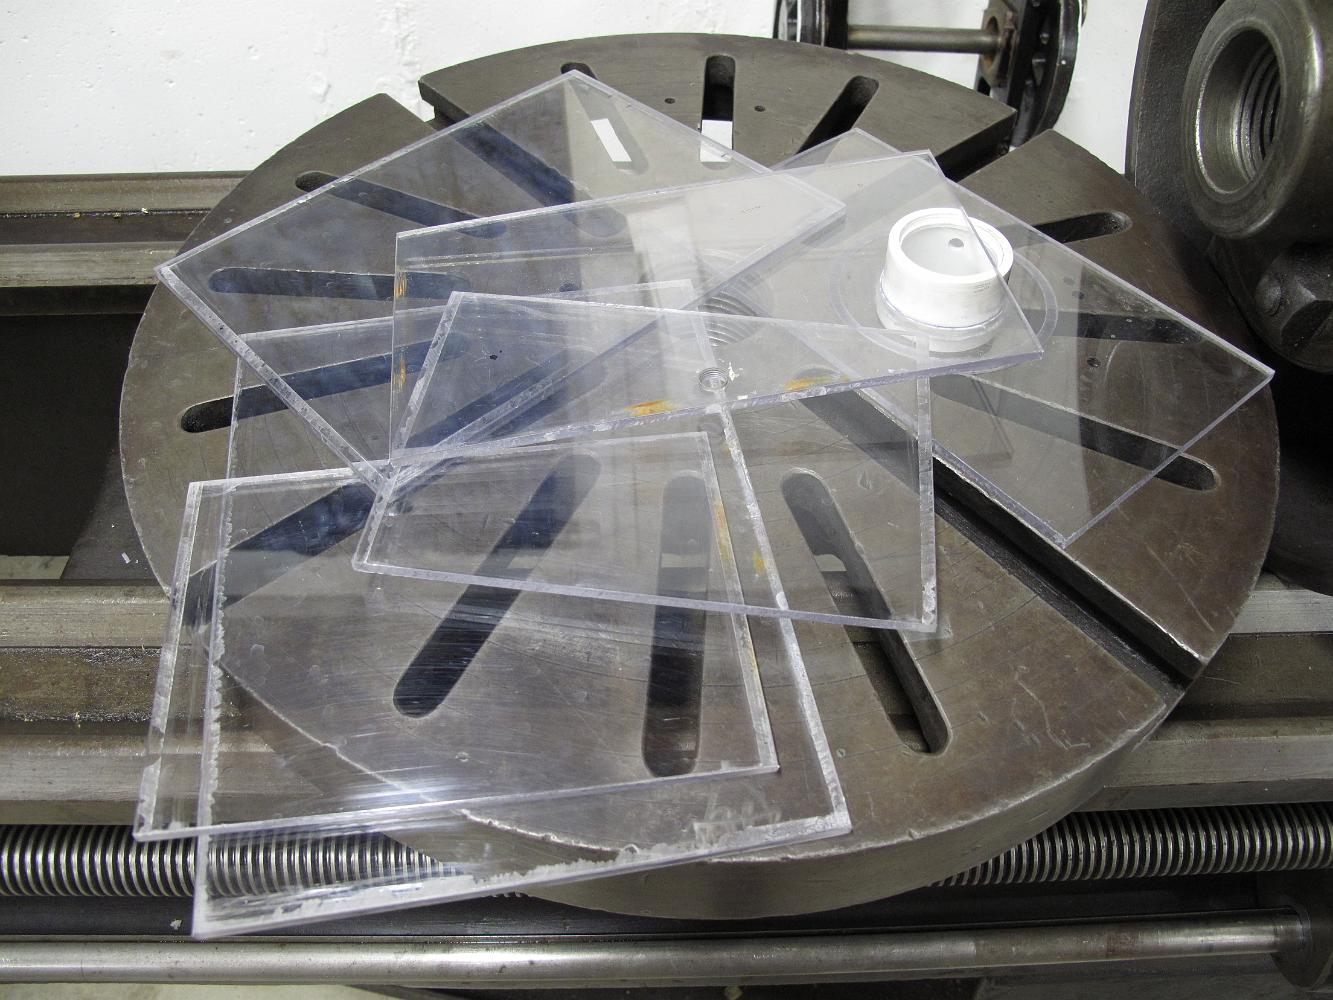
9-Sept-09 While Bill was working on the new water pump eccentric strap, I took another shot at the leaky water tank. Thinking I might make it out of PVC sheet…
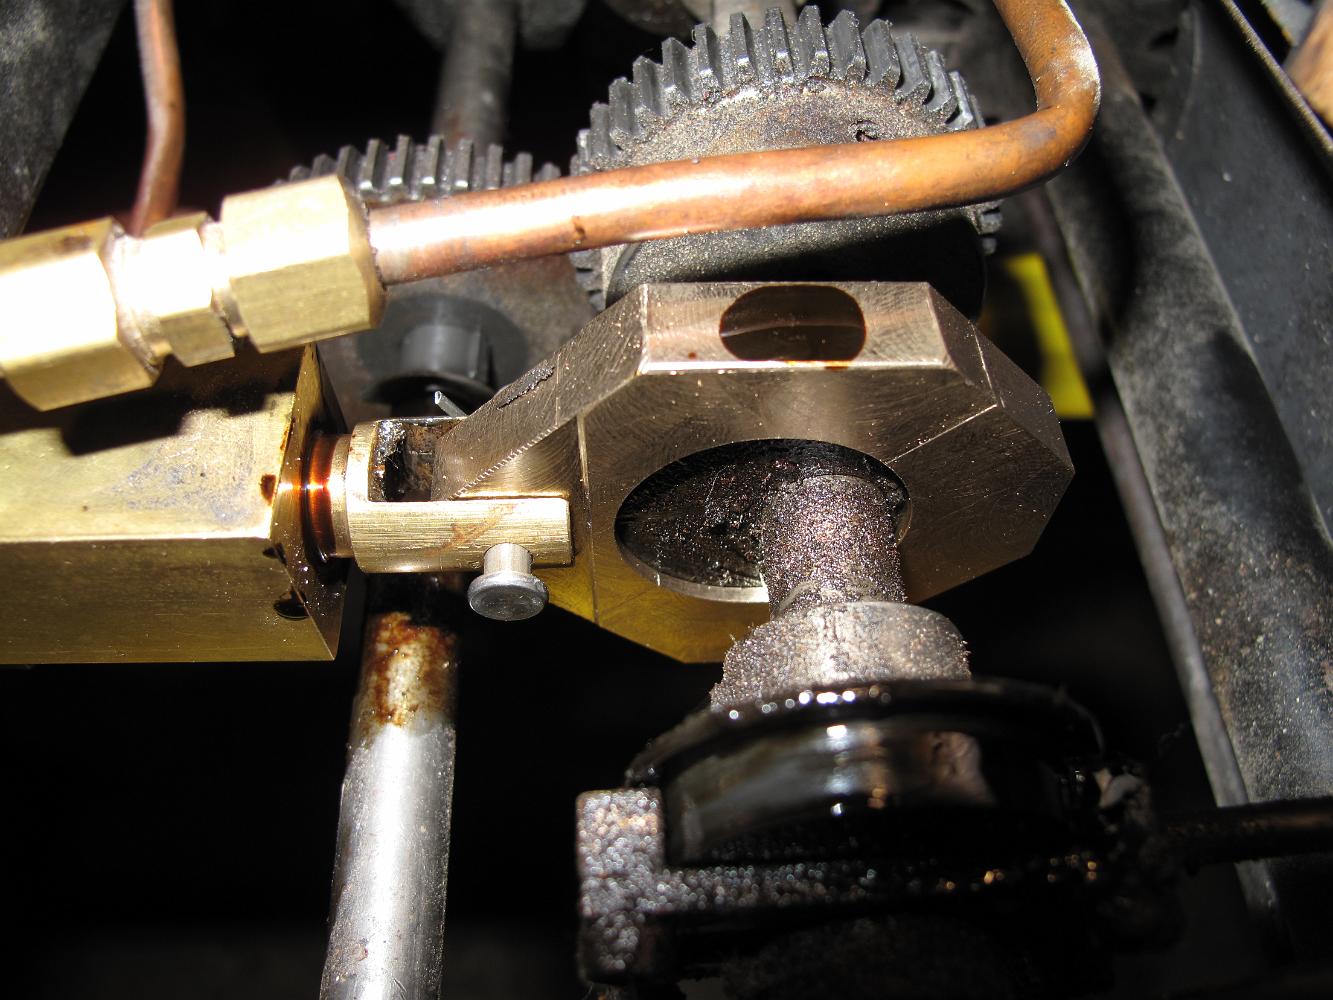
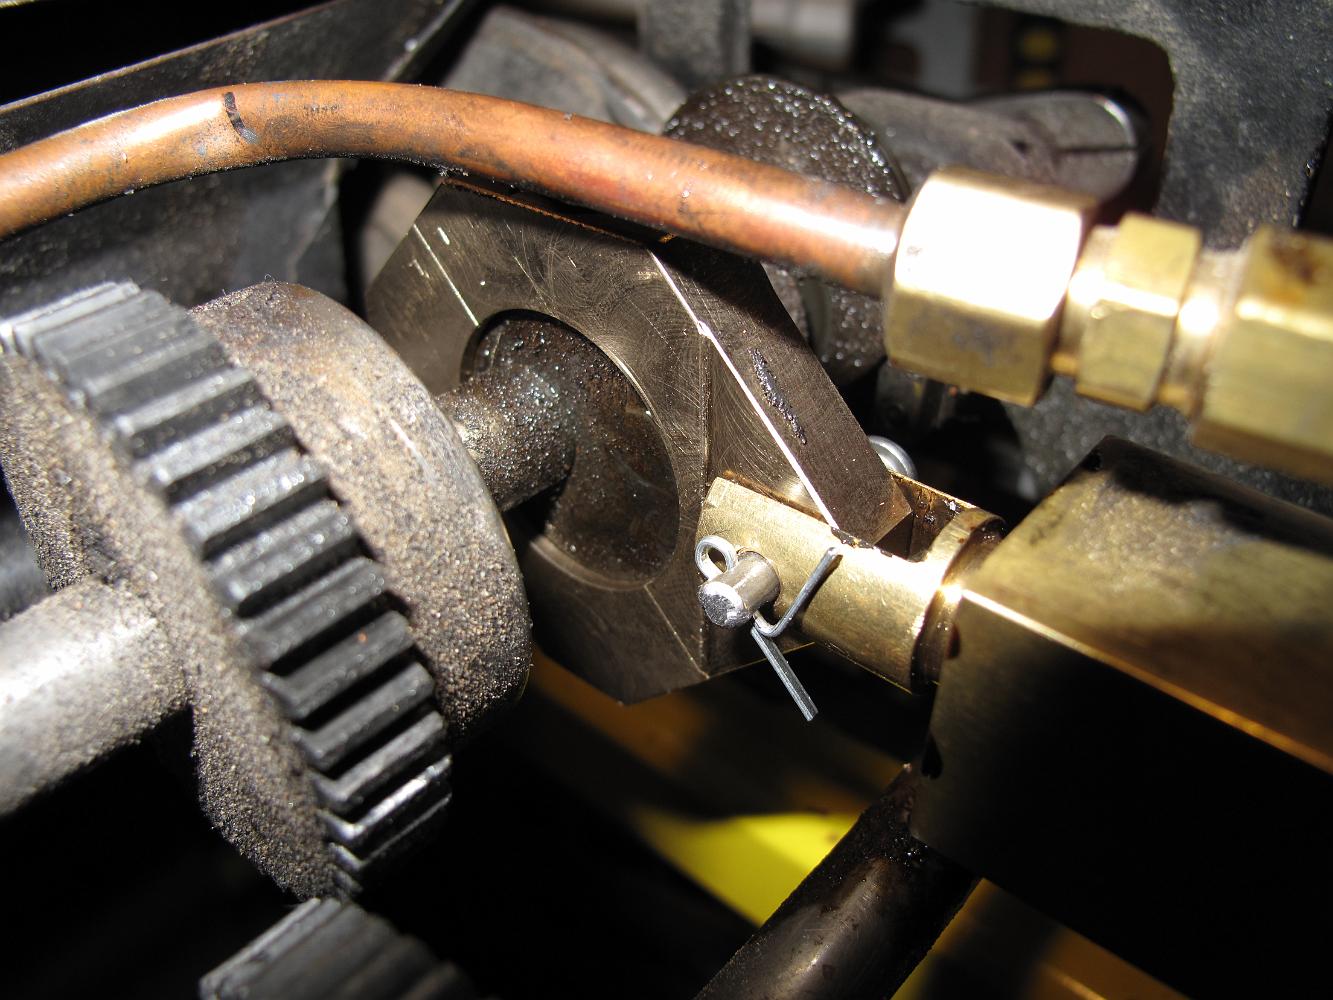
The new assembled water pump eccentric strap. The dark smudge on the top of the strap is steam oil covering the oil hole. With just a little time on the track…
Backside view of the finished strap. We cut the rest of the corners on the strap to give some more clearance.
Clamping set up #2 - successful! After finding the center of the strap, we move over, drill the ram mounting hole and machine the strap end down to the proper…
Clamping setup #1 to machine the ram mount--a failure. This setup shifted the two halves of the strap, removing our ability to indicate the hole to find the…
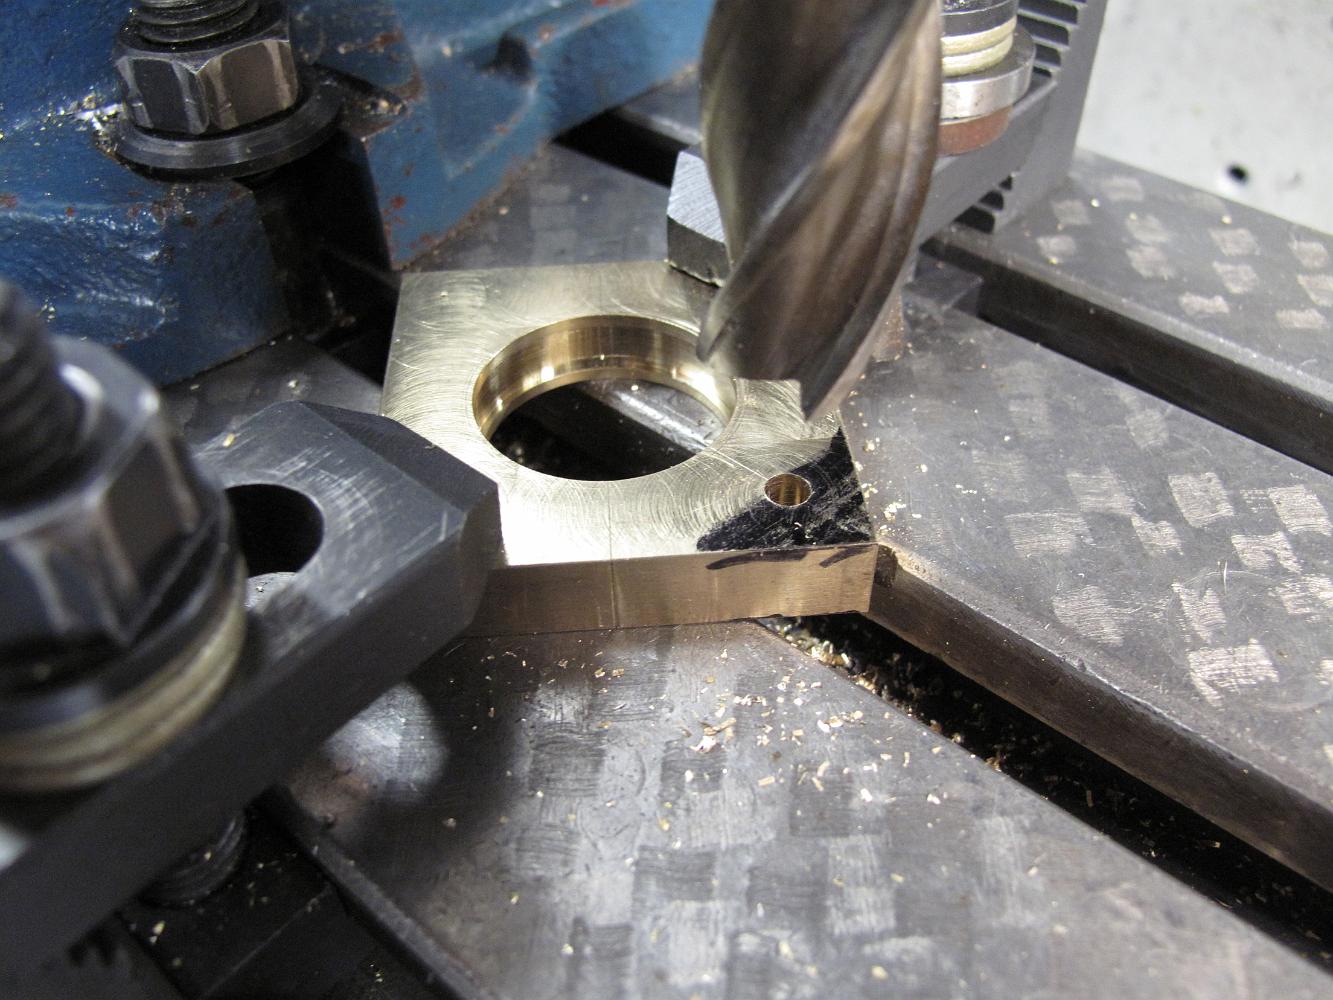
The bored eccentric strap showing the finished groove. This is necessary to keep the strap captive on the eccentric.
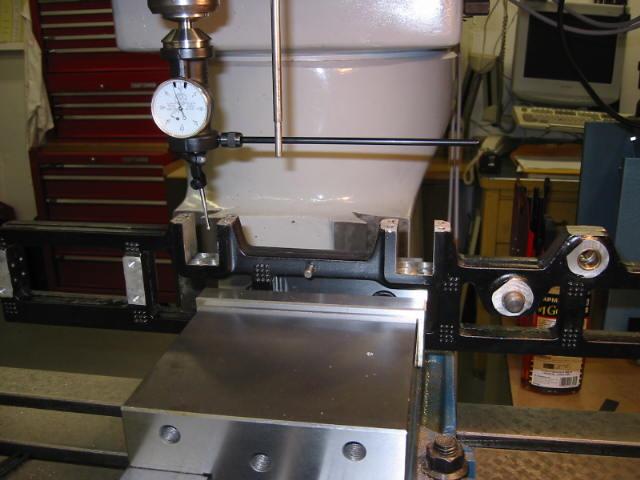
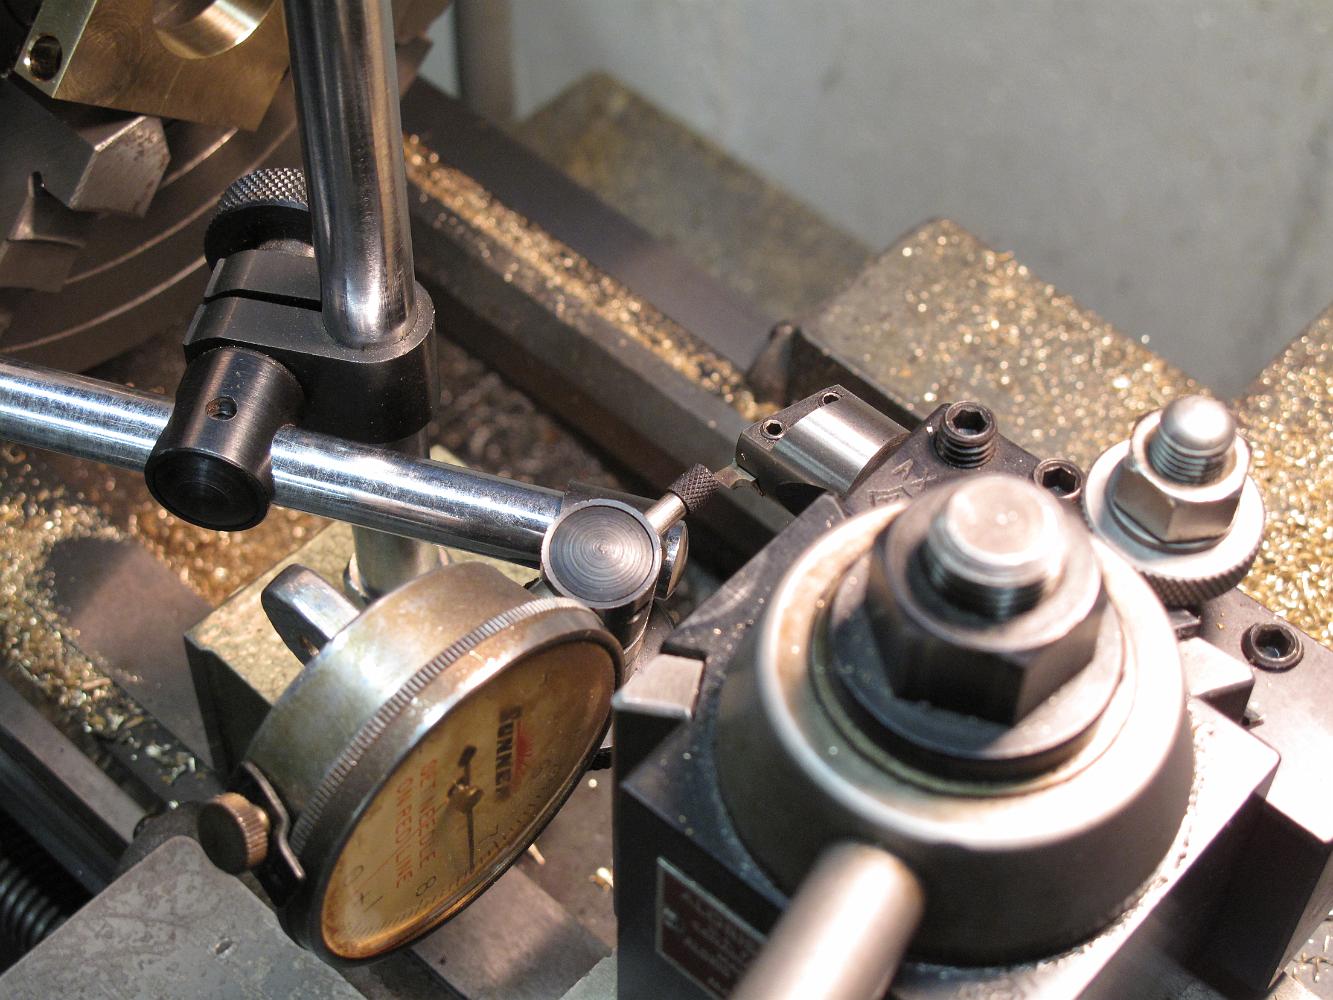
Using a dial-test indicator to insure the side of the cutter is parallel to the ways, insuring the groove is cut to the proper depth.
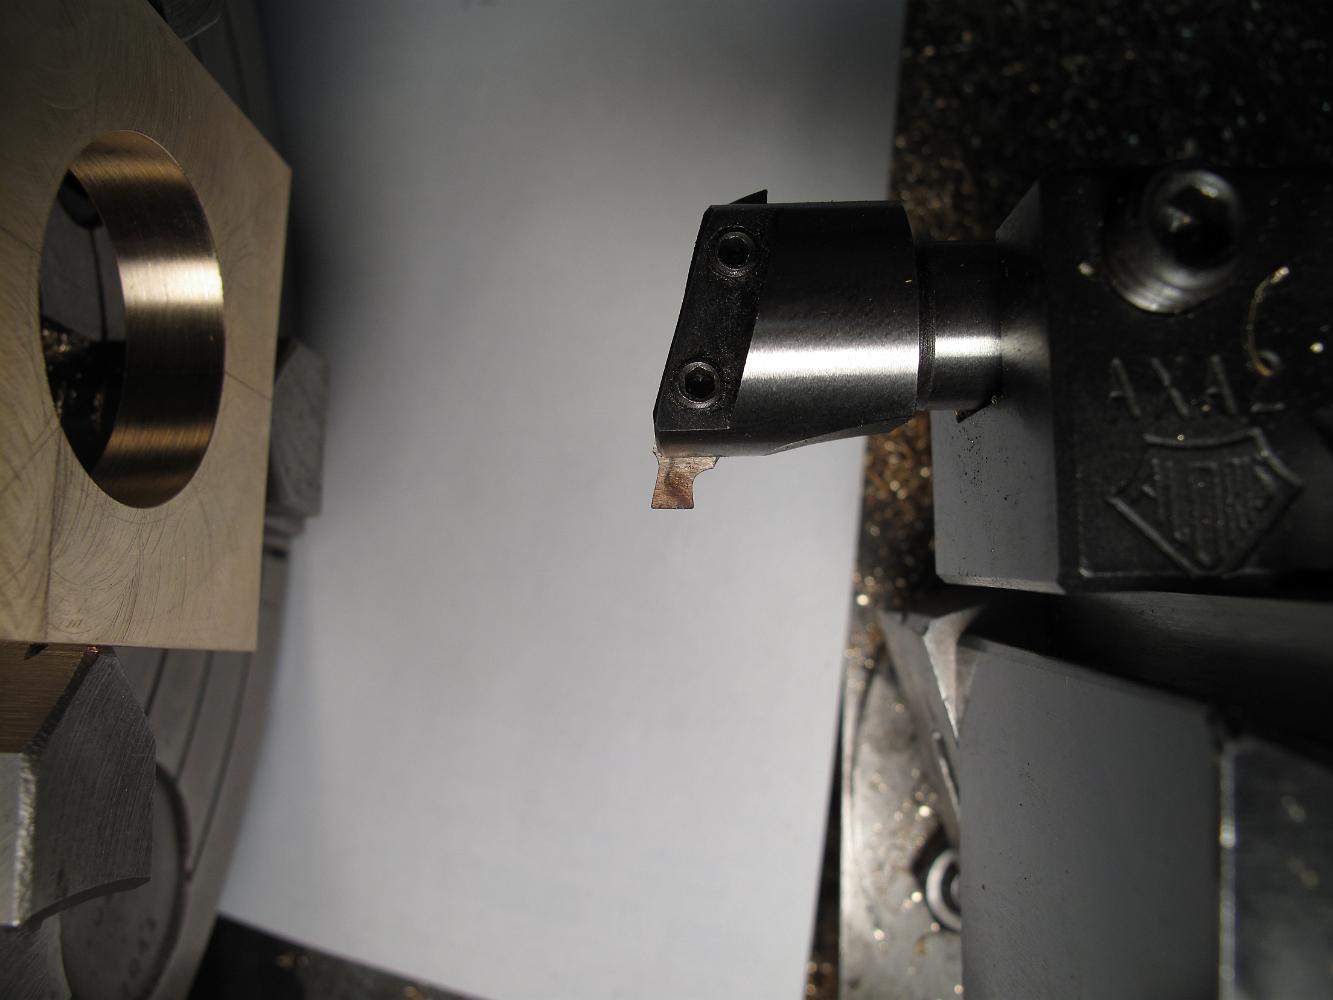
Boring the strap with a special profile tool which will allow us to turn an inside groove. The small HSS toolbit is held in a small boring bar, which is held in…
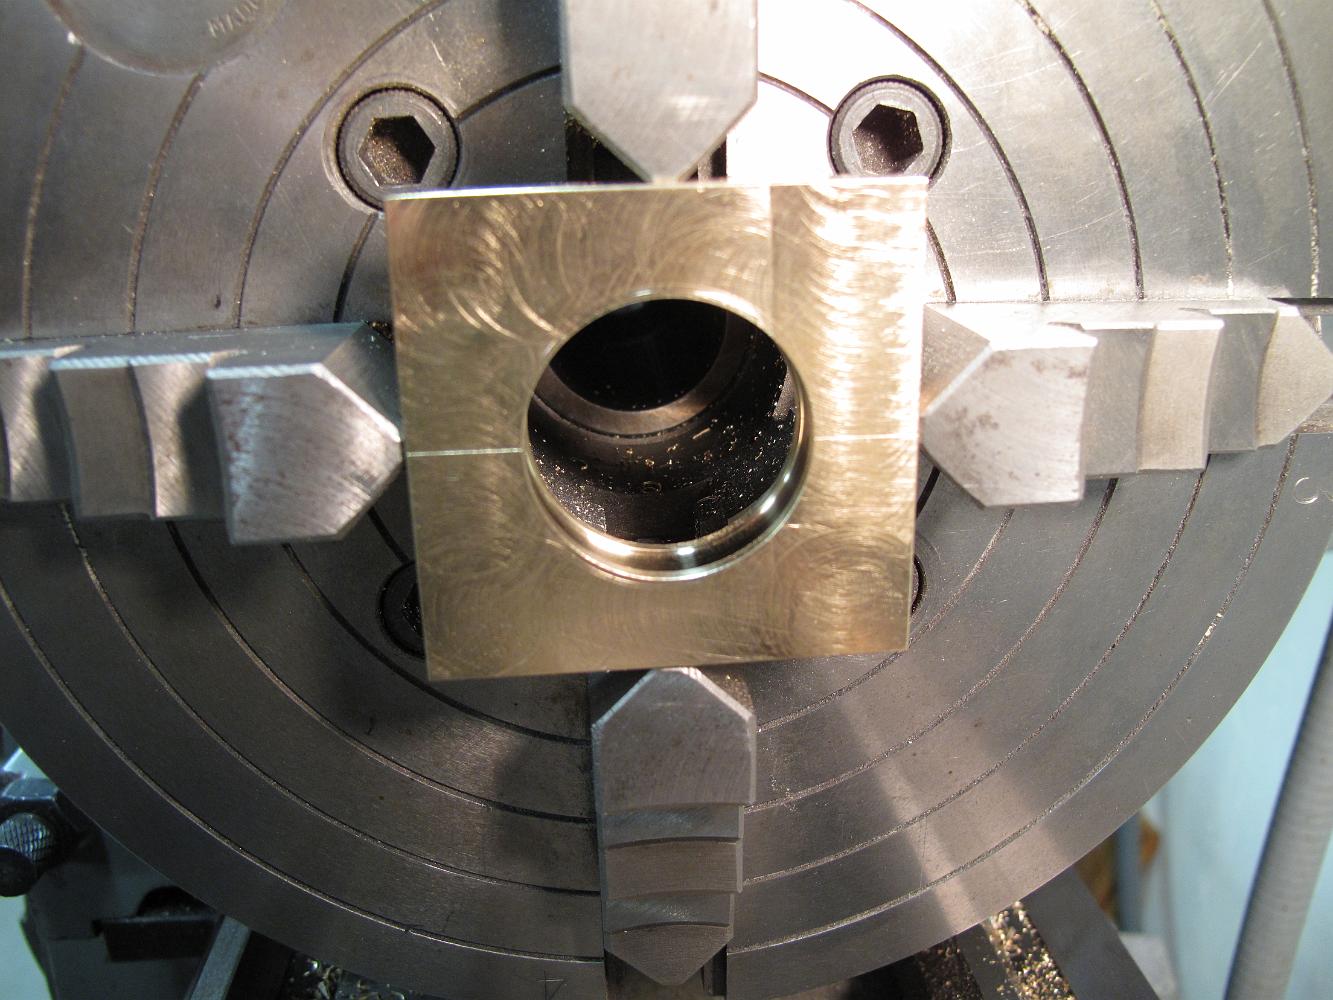
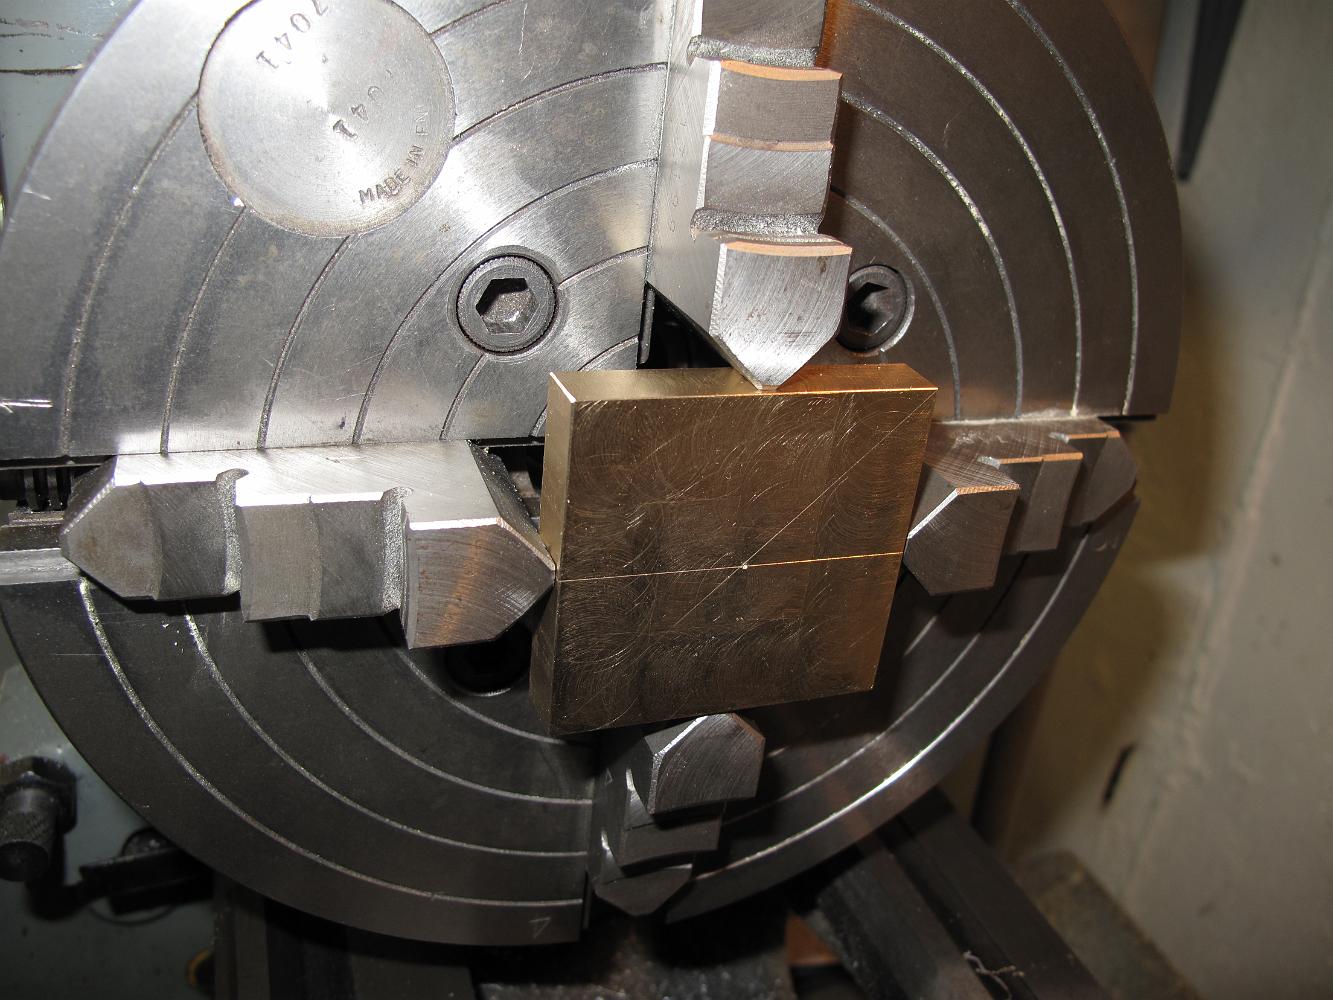
The two halves of the strap, bolted together, are chucked in the 4-jaw and centered for the boring operation.
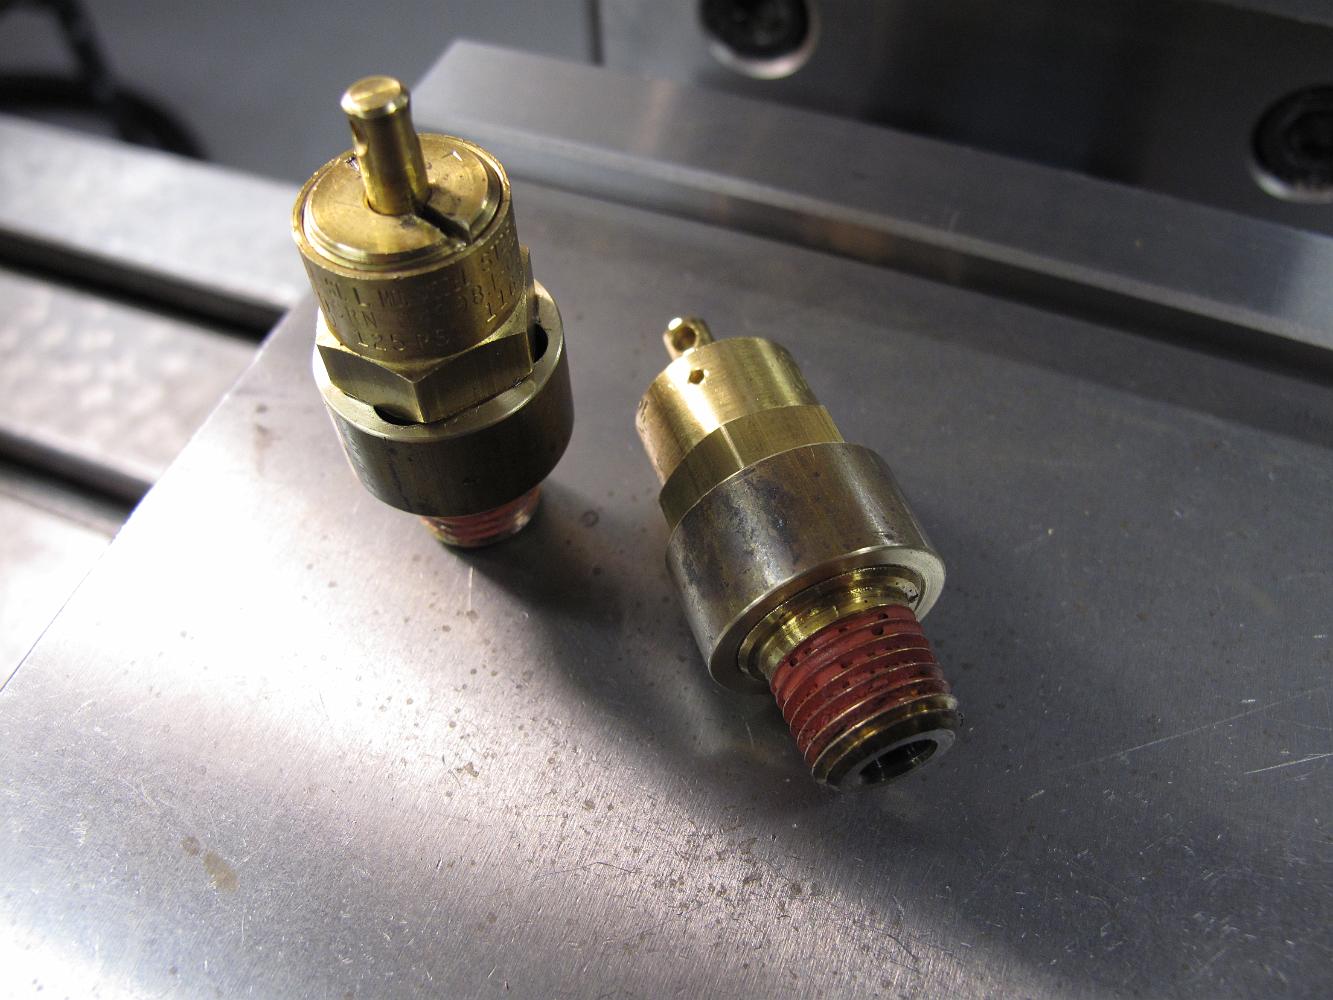
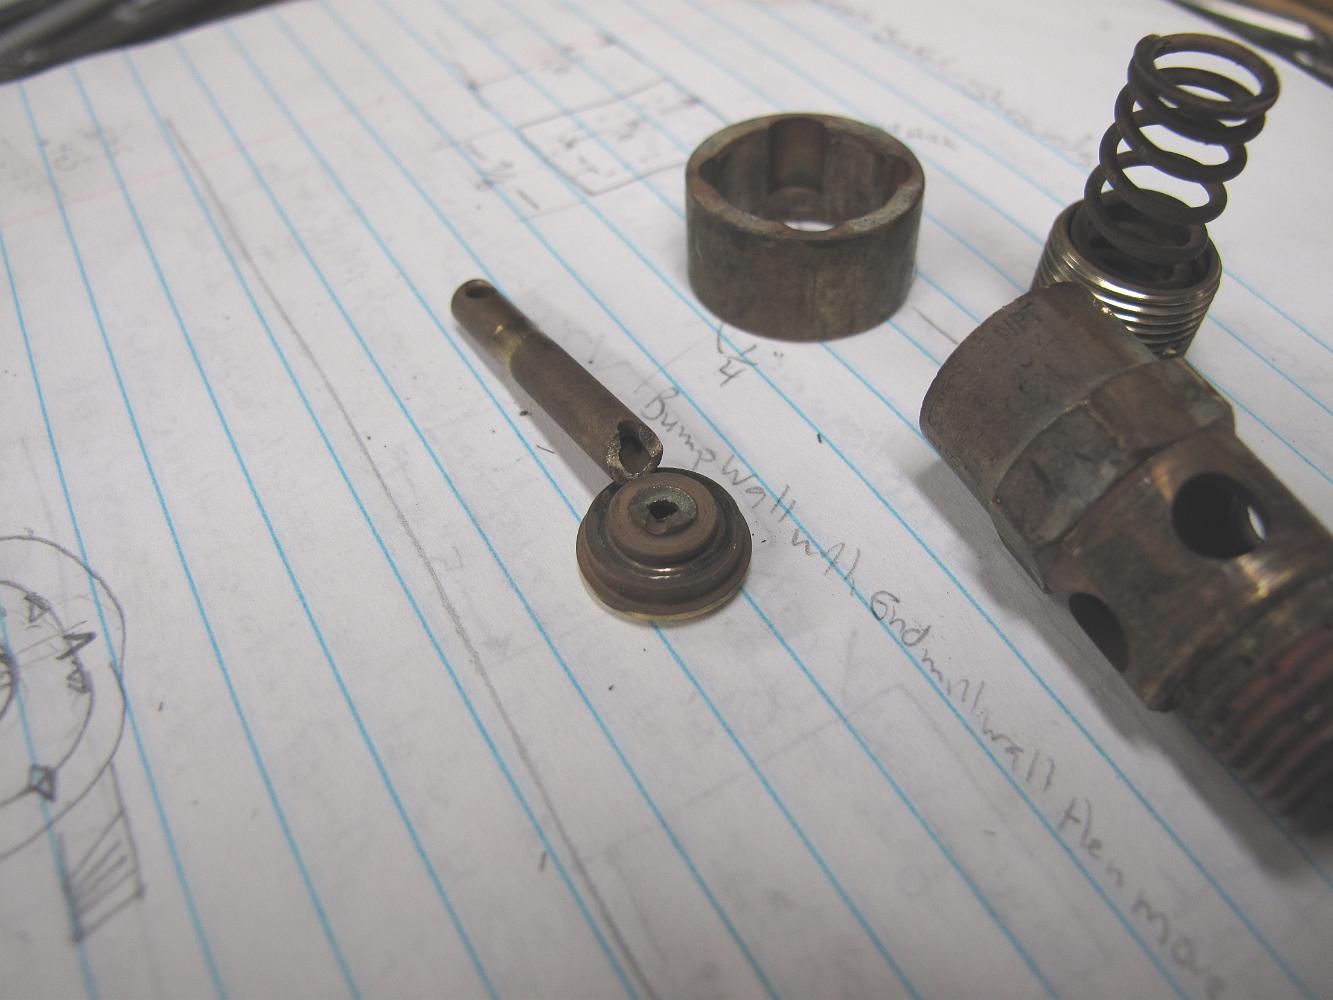
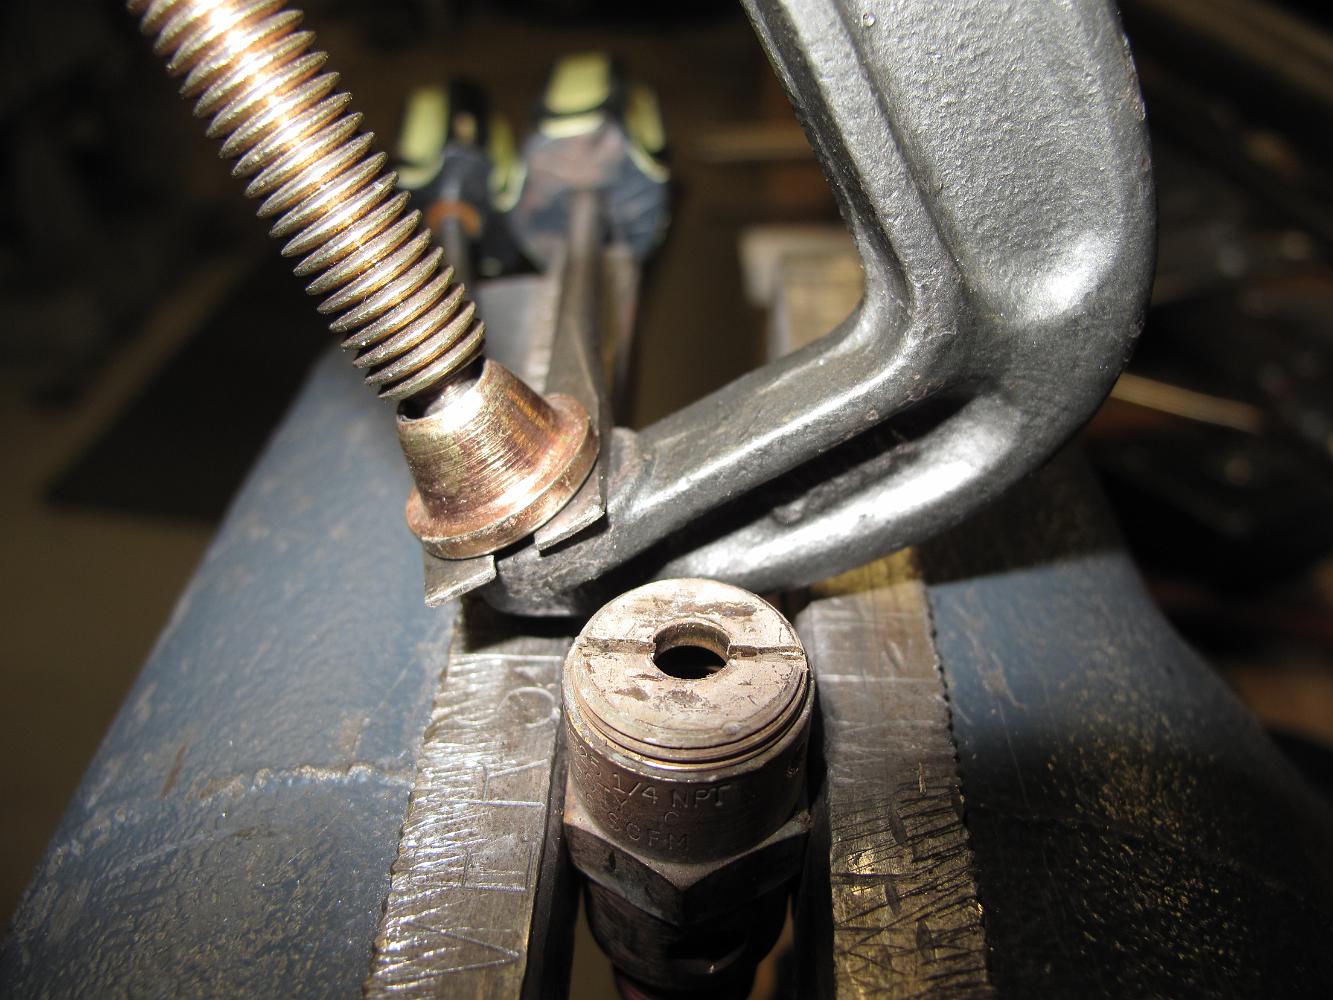
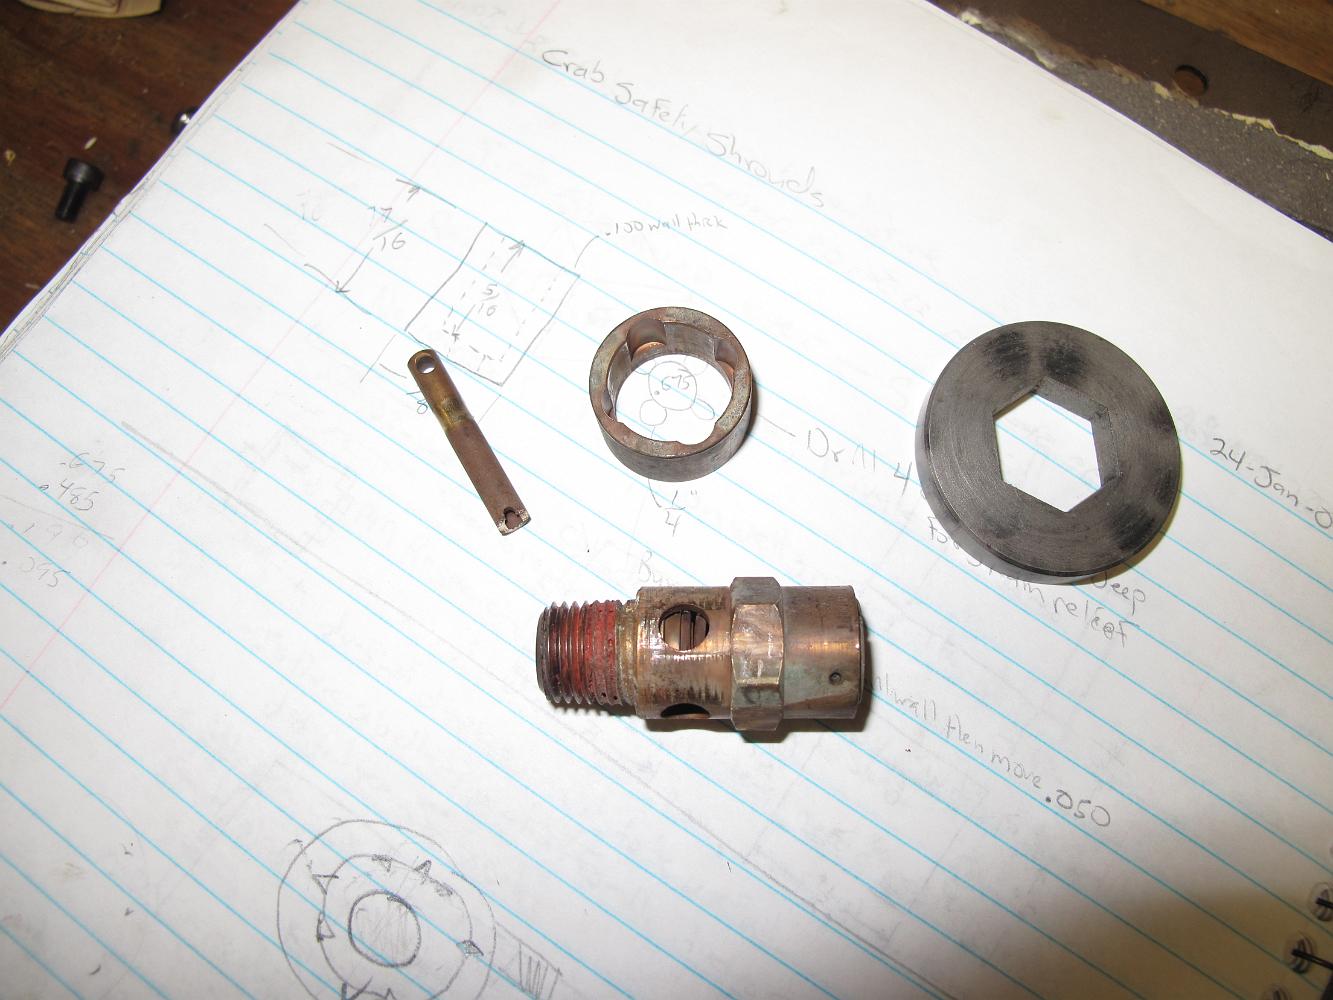
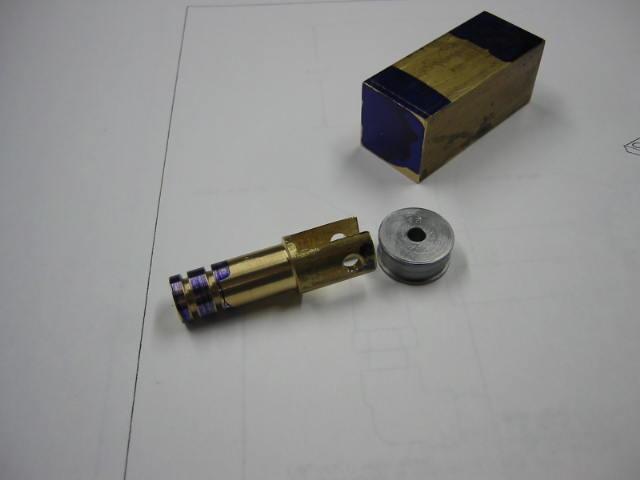
Here's the valve with the shroud pushed off. I just happened to have a steel washer with the same size 11/16" hex flat on it to help me remove the shroud.
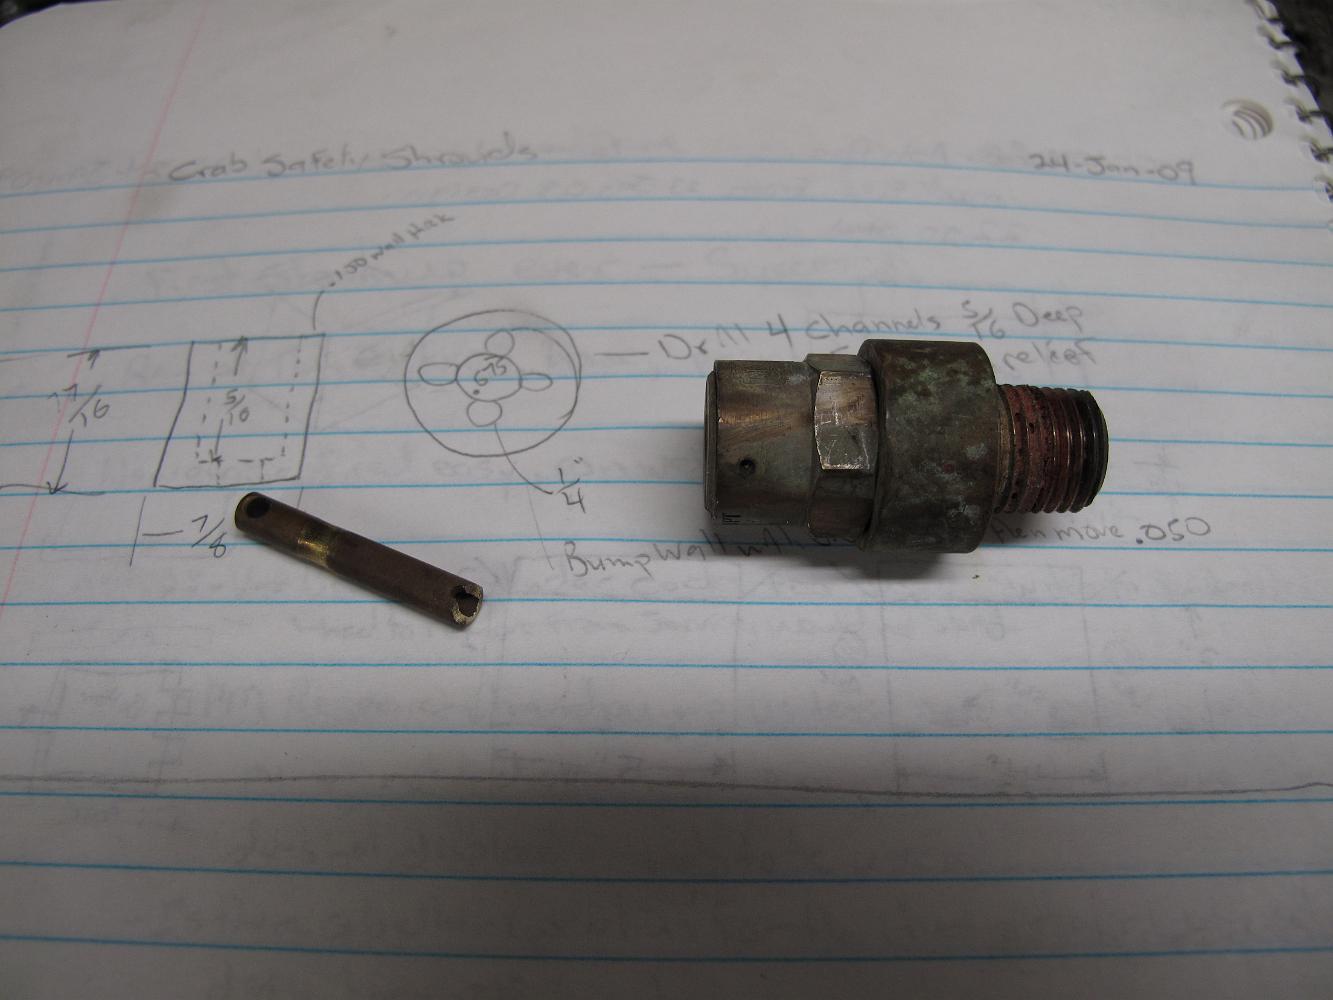
8-May-10 While at J. Schmidt's house Saturday for an invitational steamup, the valve seat guide rod broke off. Much to the entertainment of Bill and Tim, the…
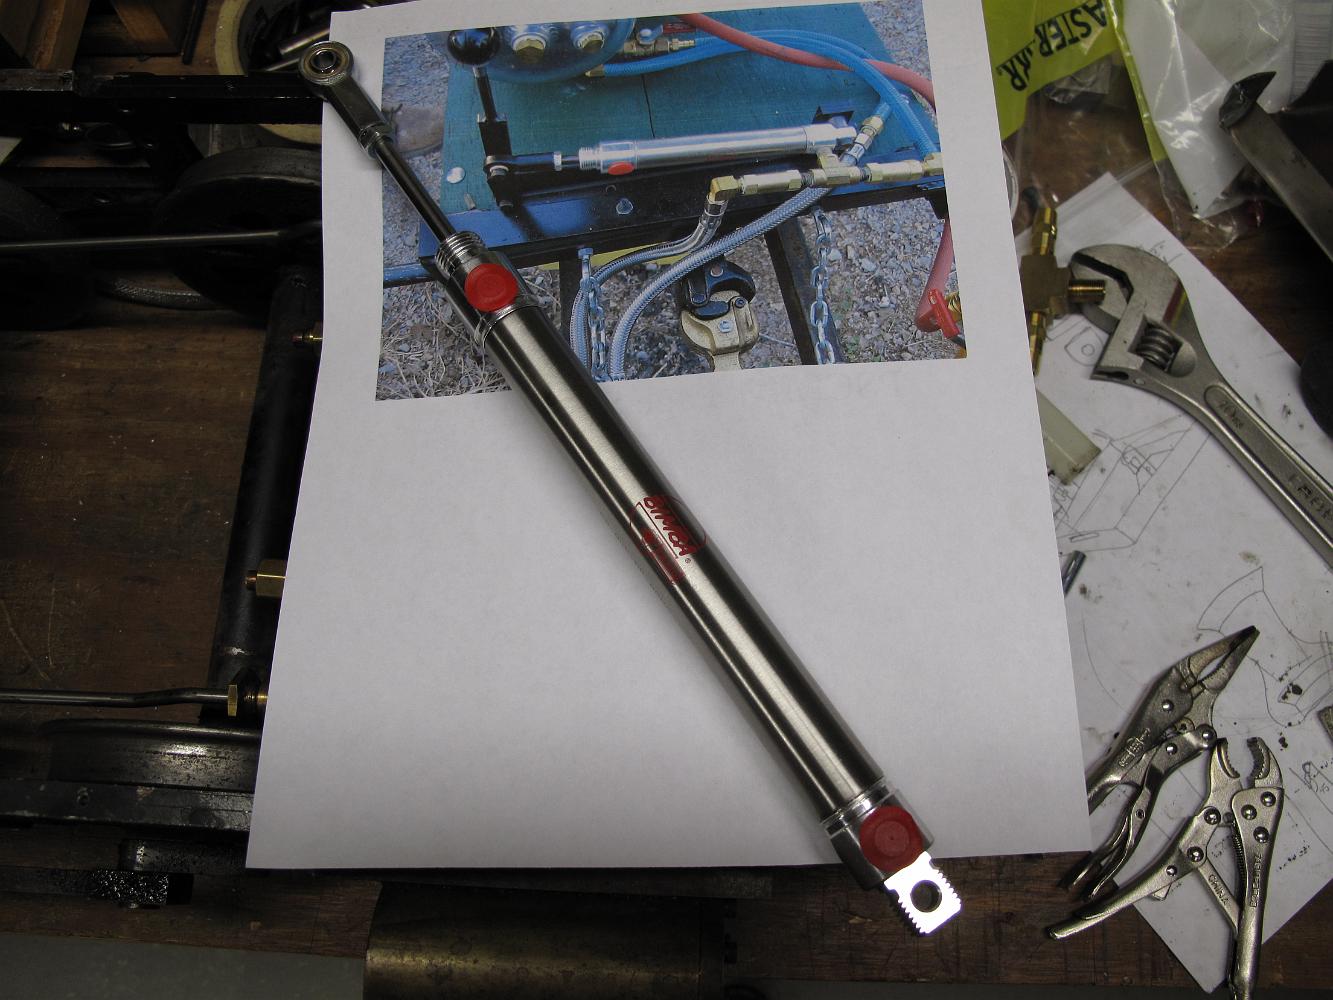
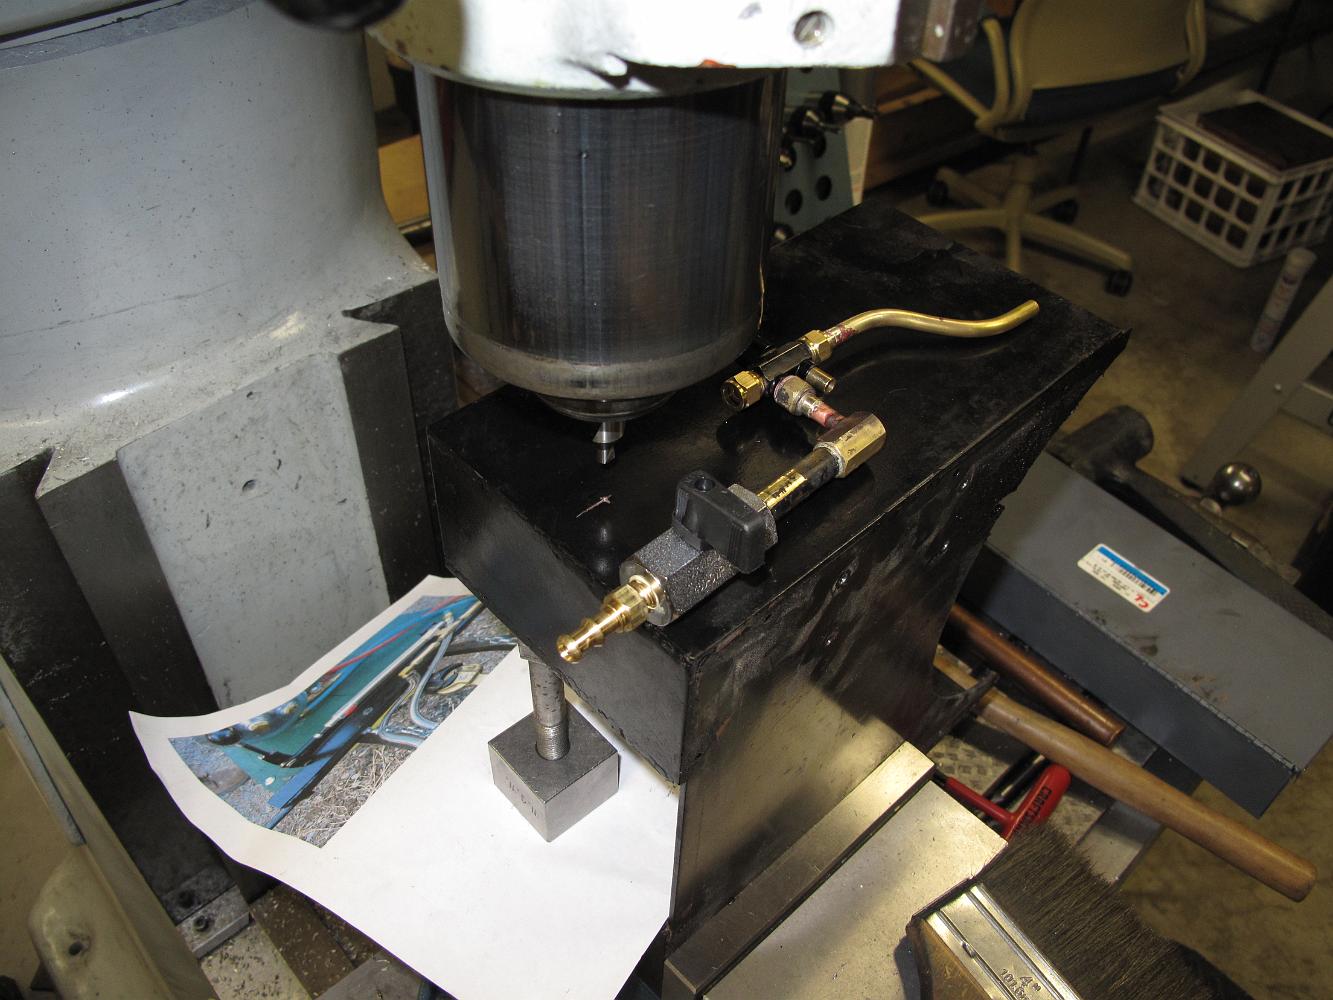
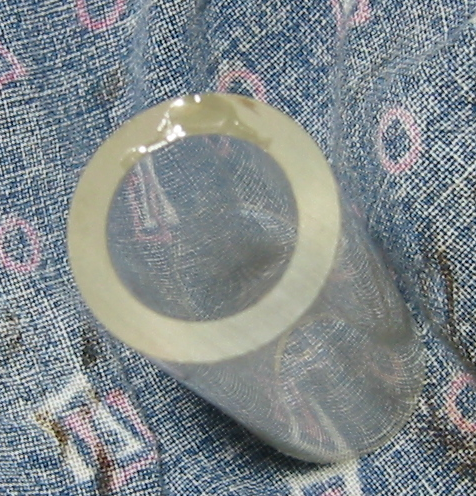
2010-08-25 - Taking a page from Greg Glos at Mid-South Live Steamers, I pick up a stainless steel air cylinder to use as a hand pump.
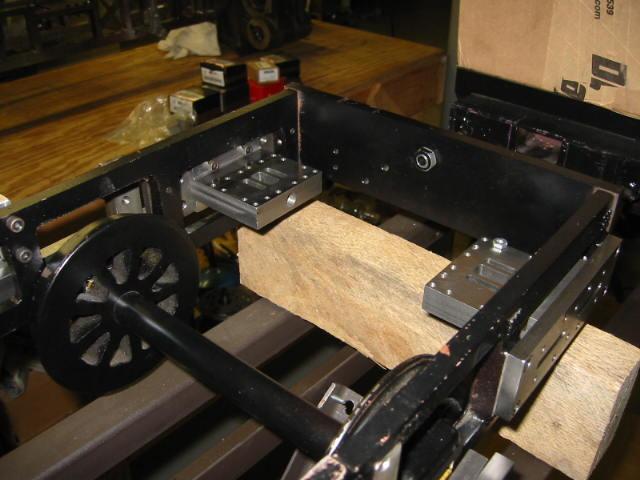
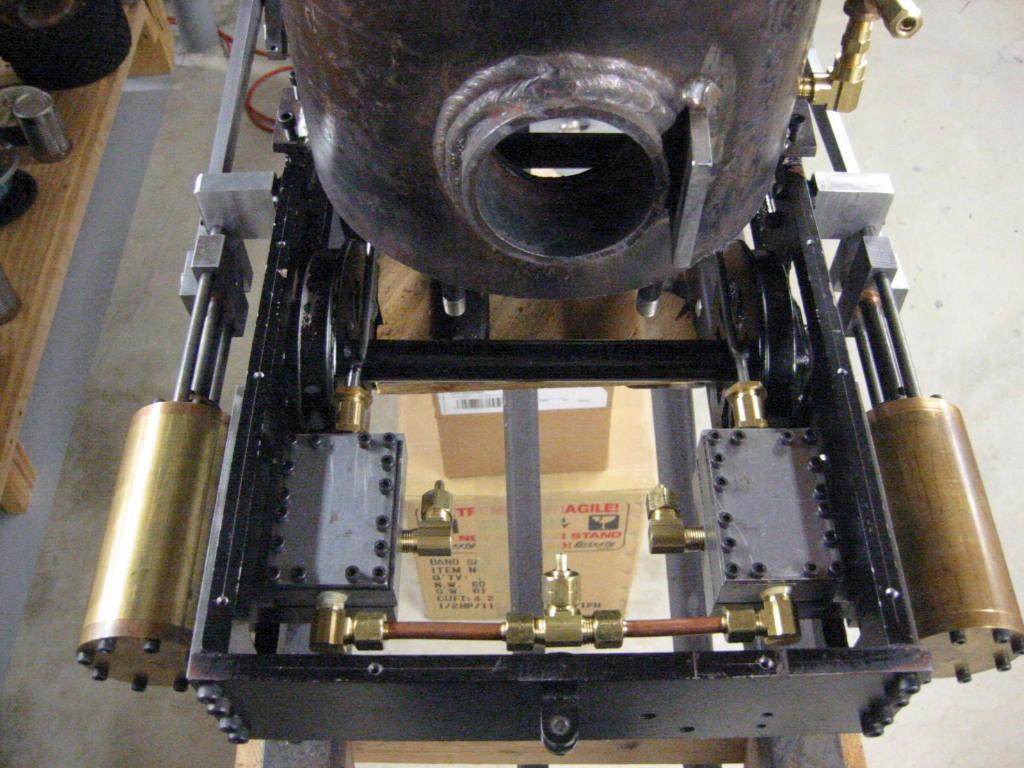
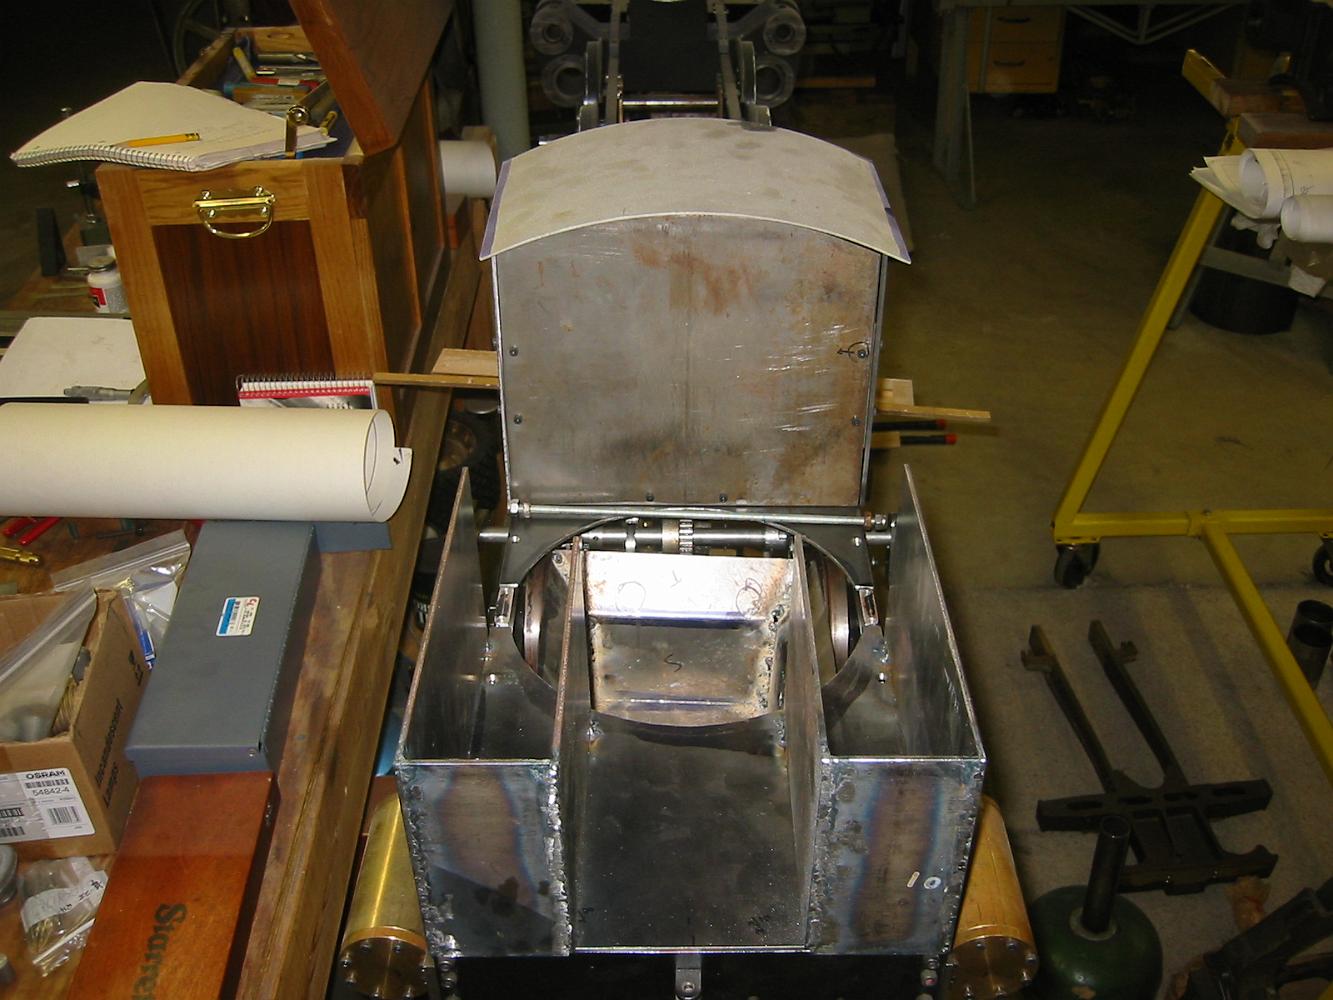
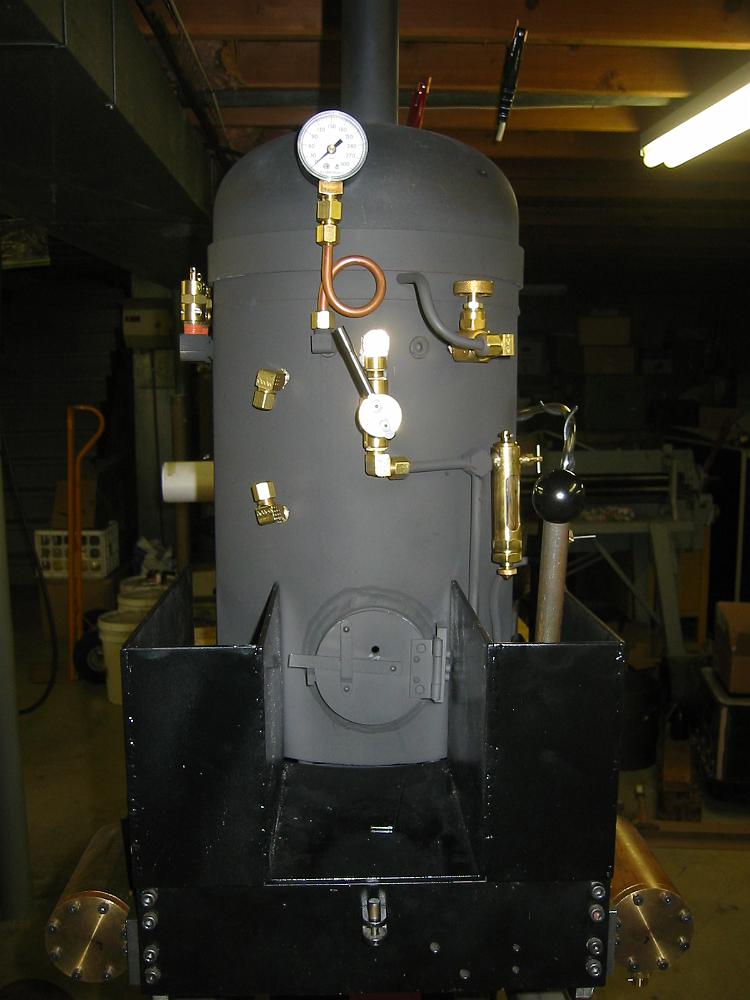
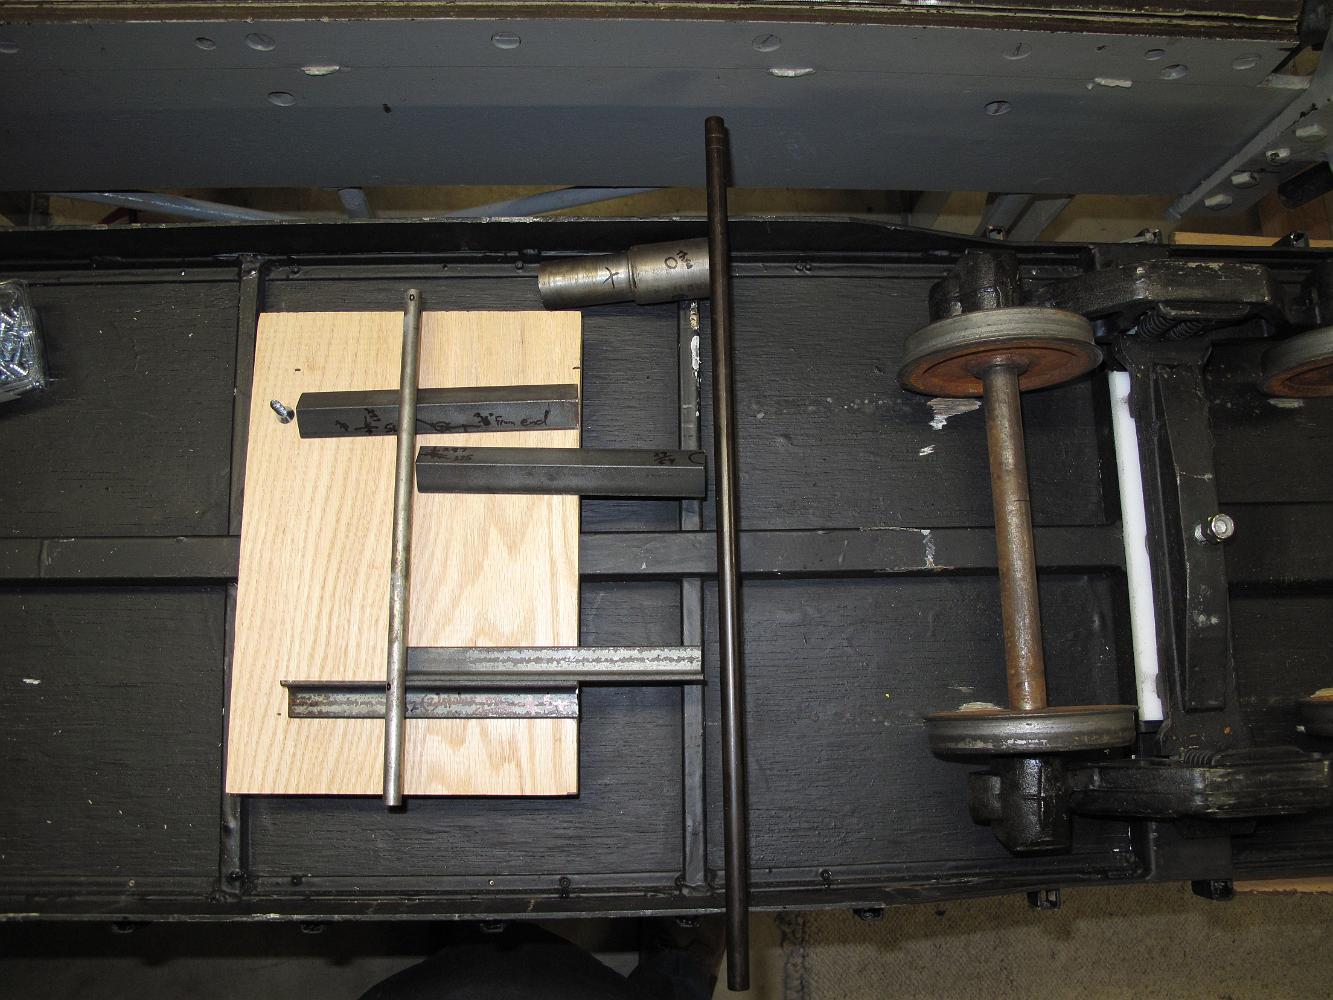
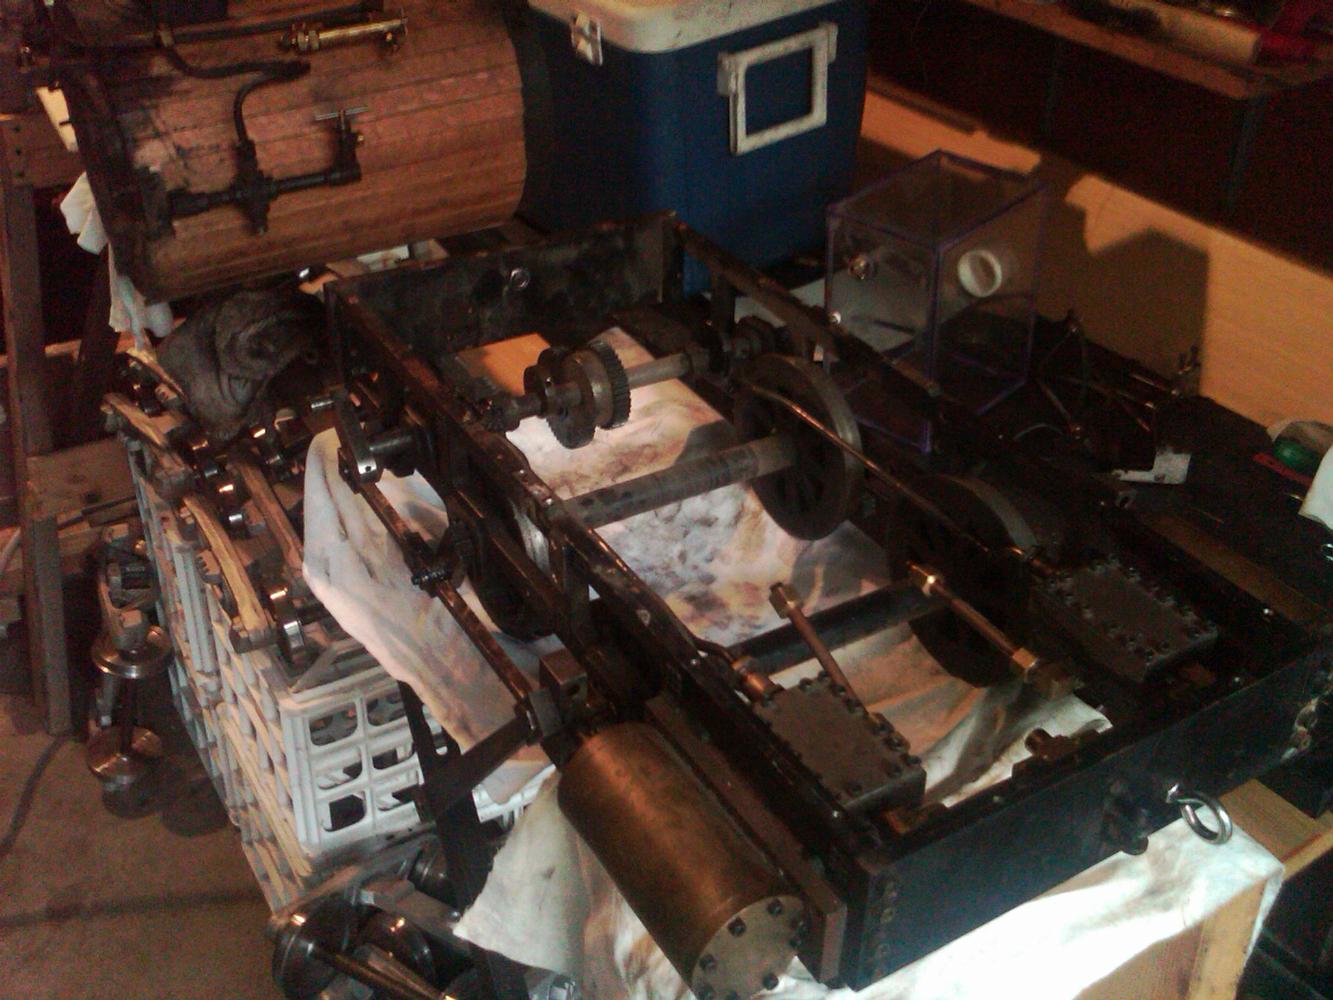
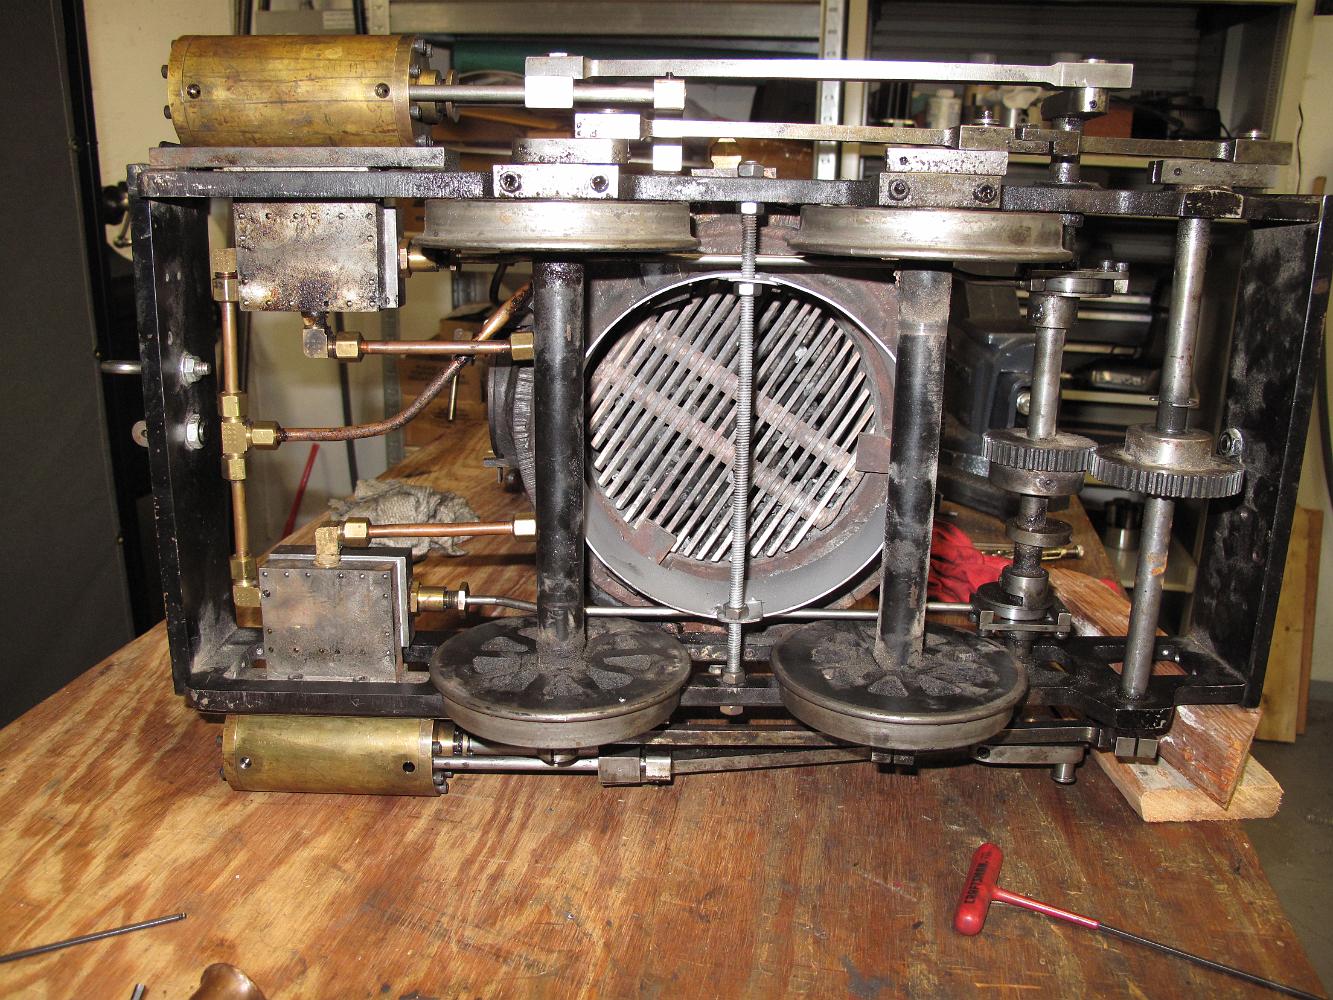
2010-09-15 - Worm's eye view of the locomotive before teardown and modifications to the ashpan and water delivery systems.
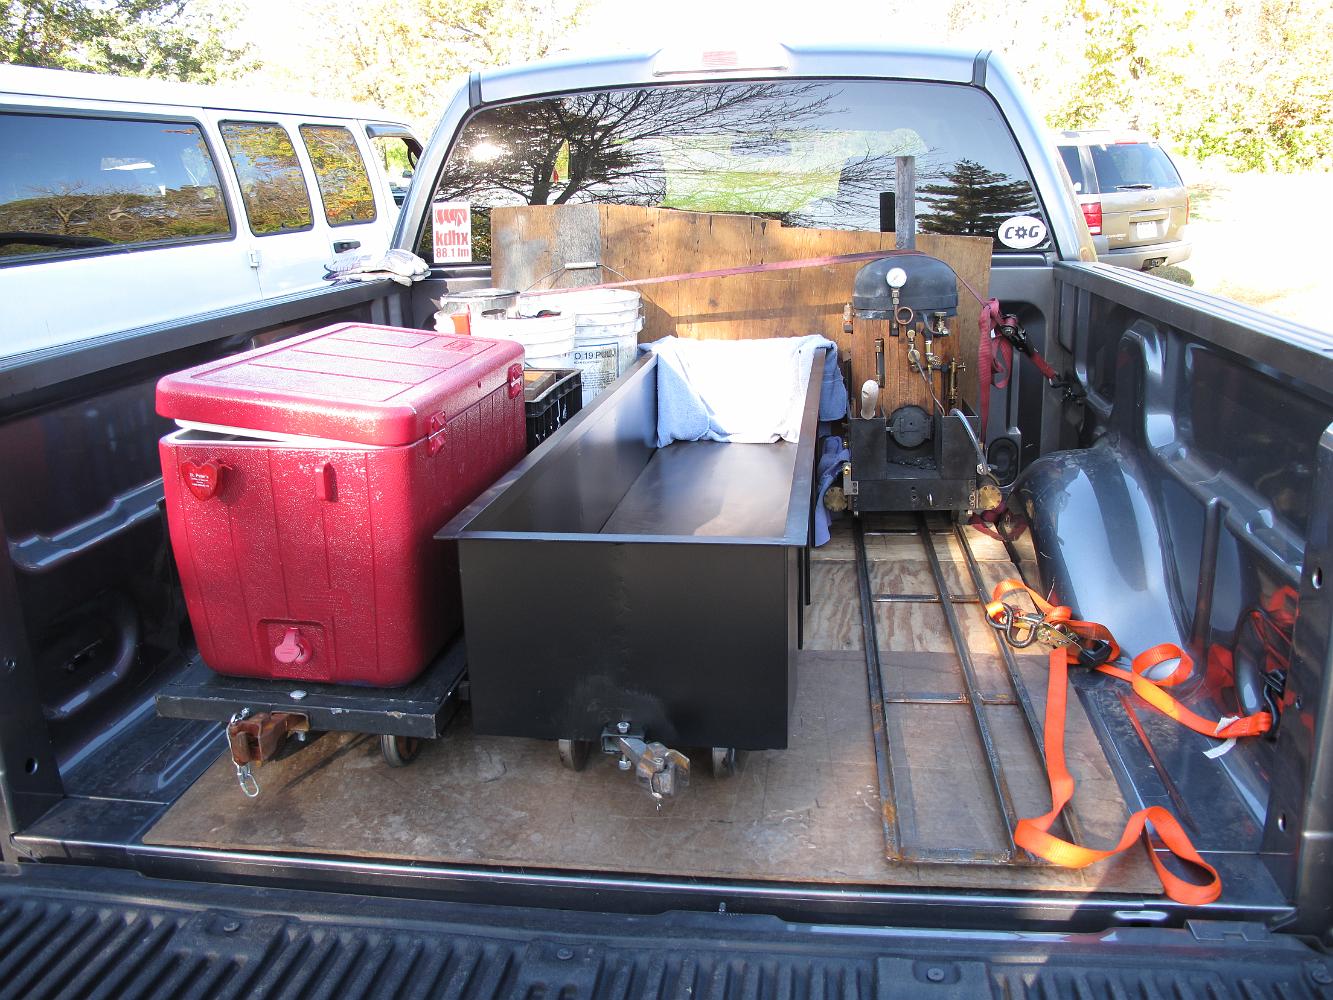
16-Oct-2011 Trainset in a truck! Newly painted red water tank, new gondola and newly plumbed Crab ready for some fun at the SLLS fall meet.
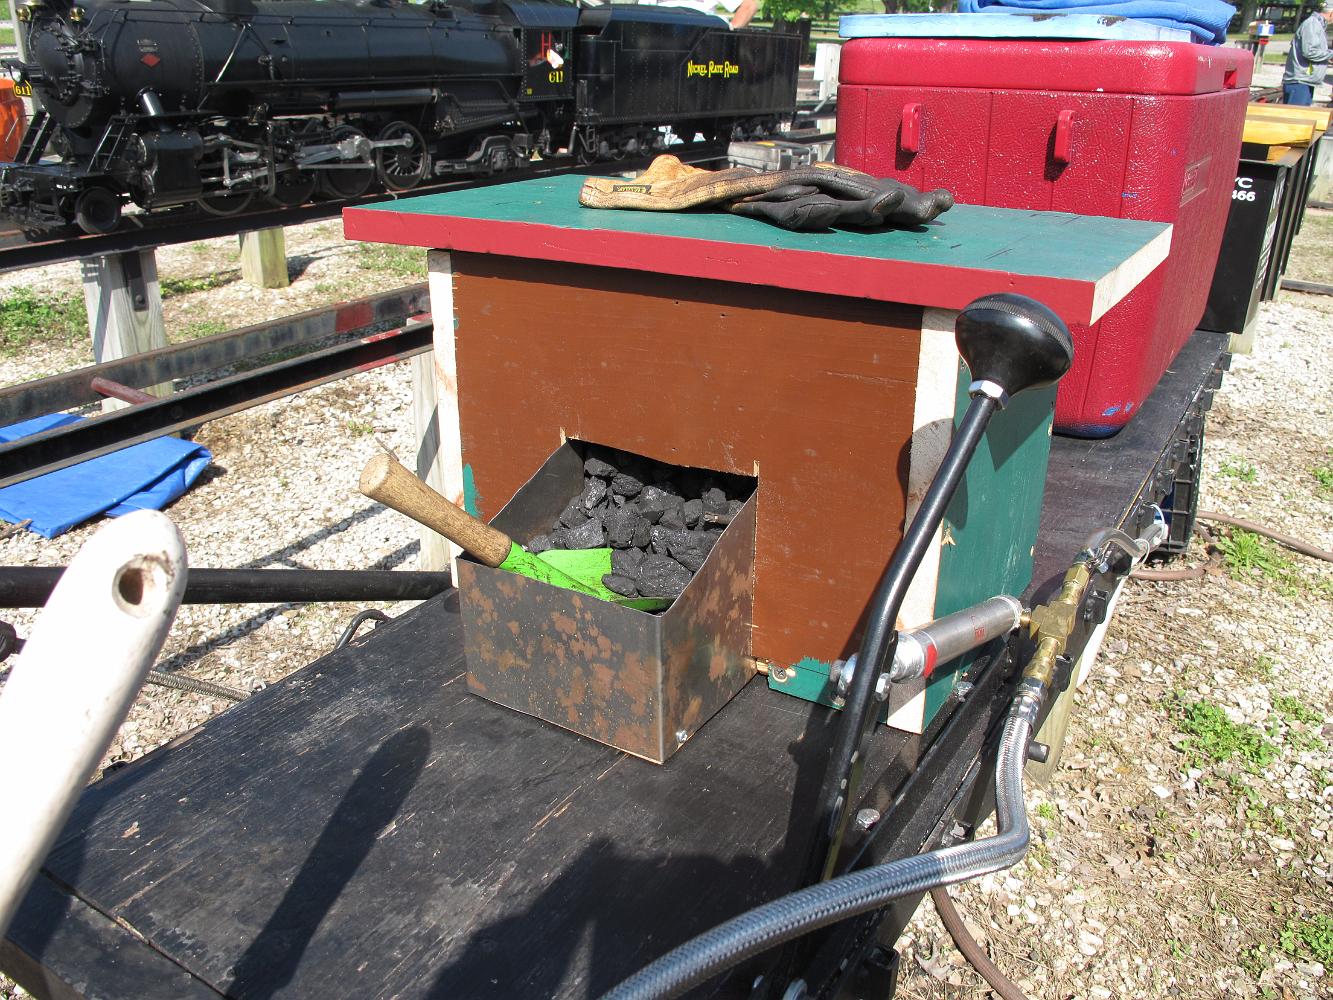
2015 The new seat / coal bunker. Lift the seat to fill, scoop from the front. I designed it, Dad constructed it, I finished the metal bunker. Could use a coat…
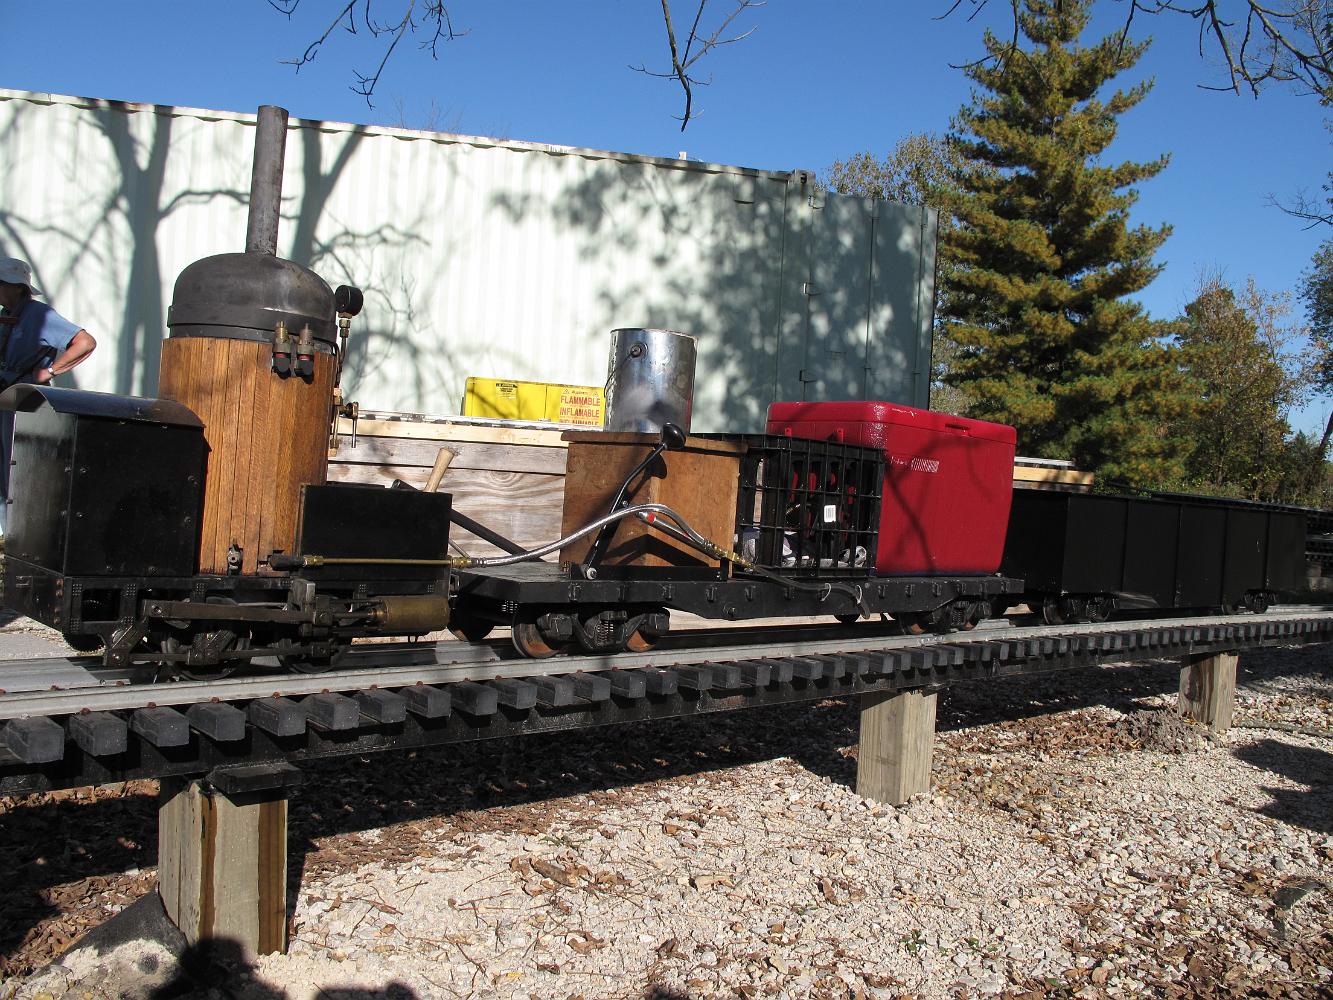
6-May-2011 Mid-South Live Steamers, TN. The full trainset: The Crab, Engineers car with new coal-bunker seat, and two-passenger NYC gondola.
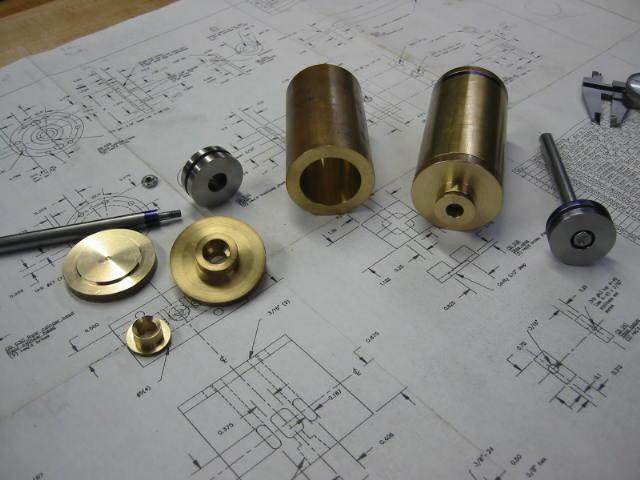
I started working on the water pump assembly. Shown is the pump ram made from brass, and follower roller in steel. Waiting with layout blue ends is the pump…
September and October 2002 were all about lathe work, brass and stainless steel. Here are the cylinder assemblies, two each. The stainless steel work was on the…
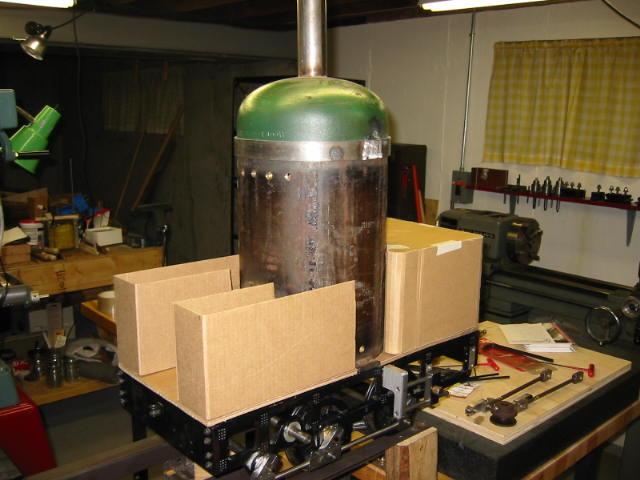
27-Oct-2002. Alternative layout for the water tank. The plans call for a square, windowed box to simulate a modern cab, which doesn't look right to me at all.…
27-Oct-2002. I started prototyping the coal bunkers and water tank for the locomotive. I'm not happy with what the plans call for, so I will probably do…
Machining the Yokes out of aluminum. Aluminum is fun to cut compared to steel! It is easy to machine and more forgiving if you are using a not quite sharp…
Friday night, 28-Nov-08. Final test on air before taking it out tomorrow and putting it under steam. (.avi movie)